
To find how many flags you need, divide your patio's total area by the effective area of one slab (which includes the joint width on two sides). For a straightforward example: a 20 m² patio laid with standard 600×600 mm concrete flags on a 5 mm joint needs roughly 55 slabs before waste. Add 10% for cuts and breakage and you're ordering 61. That's the core calculation, and the rest of this guide walks you through every step to get there confidently, whether your patio is a neat rectangle or an irregular shape, and whether you're working in metres or feet.
How Many Flags Do I Need for My Patio: Measure, Calculate & Order

Felix Brennan
25 Jul 2026
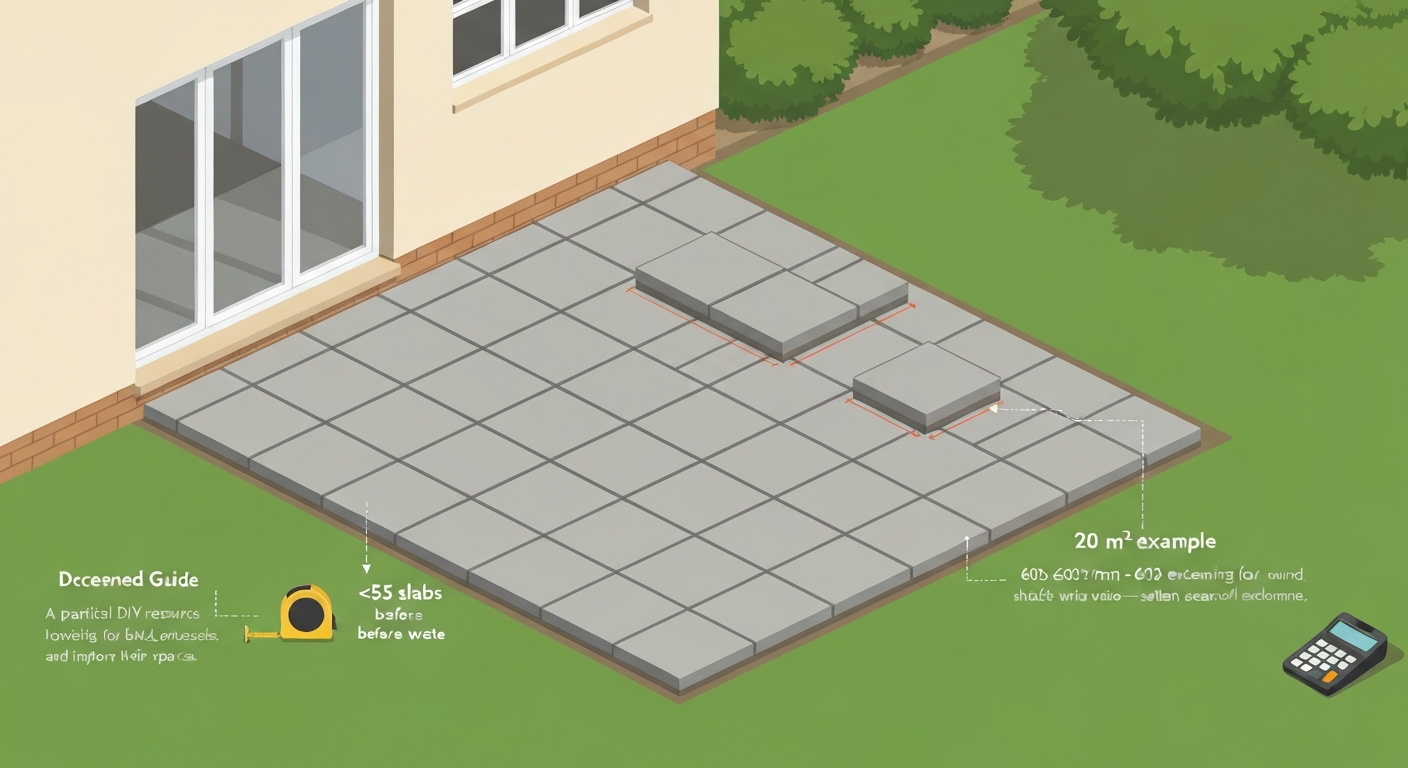
What this guide covers and who it's for
If you're planning a new paved patio or replacing an old one, this article is built around one practical goal: getting the right number of flags onto your order form before you spend a penny. We'll cover what paving flags actually are, how to measure up simple and awkward-shaped spaces, how to factor in joint width and laying pattern, how much to add for waste and cuts, and how to decode pack sizes at the merchant or online. We also touch on the basics of installation, jointing (pointing), and a few ideas for finishing the space once it's laid. Whether you've never laid a slab before or you've done a path or two and want a proper method this time, this guide is written for you.
What are flags? Sizes, materials and terminology
In the UK paving trade, a 'flag' or 'flagstone' is simply a single large paving unit, what most people would call a paving slab. The terms flag, slab, and paving slab are used interchangeably by manufacturers and merchants. They're distinct from small block pavers (which are thicker, narrower units designed for driveways) and from decking or tiles. If a product listing says '600×600 mm concrete flag, 38 mm thick,' it means one paving slab with those dimensions.
Flags come in three main material families, each with typical thickness ranges. Concrete flags are the most widely available and budget-friendly, usually 32–50 mm thick depending on whether they're rated for pedestrian or vehicle use. Natural stone slabs (sandstone, limestone, granite, slate) are typically 18–25 mm for calibrated (machine-cut) versions and are prized for their natural appearance. Porcelain paving slabs are 20 mm thick as standard for outdoor use and have become very popular for their low maintenance and sharp looks. Each material has slightly different installation needs, which affects joint width and bedding depth, so it's worth knowing which you're buying before you measure up.
| Material | Typical Thickness | Common Sizes (mm) | Notes |
|---|---|---|---|
| Concrete flag | 32–50 mm | 600×600, 450×450, 600×900 | Budget-friendly, very durable, wide joint recommended |
| Natural stone (sandstone, limestone) | 18–25 mm | 600×600, 600×900, random mixed | Natural variation; calibrated versions lay more easily |
| Porcelain | 20 mm | 600×600, 600×1200, 800×800 | Minimum 4 mm joint required; very low maintenance |
| Granite | 25–30 mm | 600×600, 900×600 | Extremely hard-wearing, often used for high-traffic areas |
Quick planning checklist: decisions to make before you measure
Before you pick up a tape measure, a few decisions will directly change how many flags you need and what you order. Getting clarity on these upfront saves you from measuring twice or ordering the wrong amount.
- What material are you using? Concrete, natural stone, or porcelain — each has a different standard joint width and installation method.
- What slab size are you going with? Larger slabs cover more area per unit but require more careful cutting at edges.
- What laying pattern are you using? A simple grid (stack bond or running bond) wastes less than a diagonal or mixed-size random pattern.
- Are there curved edges, angles, or obstacles (drain covers, posts, steps)? More cuts mean more waste.
- What joint width will you use? Even 3–4 mm makes a measurable difference on large areas.
- Do you want a full mortar bed or a sand-and-cement semi-dry mix? This affects joint type and overall thickness.
- Are you buying from a single batch? If so, order everything at once to avoid colour or shade variation between batches.
- Have you accounted for edge restraints (haunching, kerbs, lawn edges) that might reduce the flagged area slightly?
How to measure your patio area
Simple rectangular or square patios
For a rectangle or square, the calculation is straightforward. Measure the full length and the full width in metres (or feet), then multiply them together. Length × Width = Area. Always measure at the widest points, not at a midpoint that might be slightly shorter due to an uneven wall. If you're working in imperial, measure in feet and decimal fractions of a foot (for example, 12 feet 6 inches = 12.5 ft). You can then convert to metric by multiplying square feet by 0.0929 to get square metres, or convert from square metres to square feet by multiplying by 10.764.
Example: a patio that is 5 m long and 4 m wide = 20 m². In imperial that same space is roughly 16.4 ft × 13.1 ft = 214.8 sq ft (or 20 × 10.764 = 215.3 sq ft, the small difference is rounding).
L-shaped and irregular patios
For L-shapes or patios with a notch cut out, split the space into two or more rectangles, calculate each one separately, and add them together. Mark the split lines on a rough sketch, it doesn't need to be to scale, just clear enough that you can label the measurements. For gentle curves, measure the area as if it were a rectangle and subtract an estimated corner allowance. If there's a pronounced curved edge, break the curved section into small rectangular strips, measure each strip, and total them up. It's more work but gives you a number you can trust.
- Draw a rough plan of the patio on paper, marking all corners and features.
- Divide the shape into rectangles or squares.
- Measure and record the length and width of each section.
- Calculate the area of each section (Length × Width).
- Add all the section areas together for the total project area.
- Subtract any fixed obstacles (manholes, drains, built-in planters) from the total.
Choosing slab sizes and laying patterns
The size of slab you choose and the pattern you lay them in both affect the final flag count and how much waste you'll generate. Larger slabs mean fewer units to handle and a more contemporary look, but any off-cut at the edge means a larger piece of slab to cut through. Smaller slabs produce more joints (which some people like for a traditional feel) but are physically easier to handle and generate smaller waste pieces.
Common laying patterns and their waste impact
- Stack bond (grid): slabs laid in a regular grid, joints aligned both ways. Lowest waste. Good for beginners.
- Running bond (brick pattern): each row offset by half a slab. Very slightly more cutting at edges but still low waste. Classic look.
- Herringbone: slabs placed at 45-degree angles to each other. Mainly used with rectangular pavers. Higher waste, especially at edges.
- Diagonal / 45-degree layout: entire patio rotated 45 degrees to the walls. Requires significant edge cuts on all four sides. Add 15% waste minimum.
- Random or mixed-size (Ashlar pattern): multiple slab sizes arranged to avoid continuous joint lines. Excellent natural look but requires careful planning; add 10–15% waste.
- Soldier course border: a single row of slabs laid perpendicular to the main field as a border. Often a different size; plan and order this separately.
For a first-time DIY patio, a running bond pattern in a single slab size gives you the best combination of easy laying and minimal waste. If you want the visual interest of a mixed-size pattern, it's worth drawing it out on graph paper first, many suppliers offer 'contractor packs' with pre-mixed quantities of sizes designed to work together, which takes the planning headache away.
Common flag sizes and flags per square metre (quick reference)
The table below gives the number of flags needed per square metre for popular slab sizes, calculated with a 5 mm joint on each side. These are the base figures before any waste allowance is added. To use them: multiply flags per m² by your total area, then add your waste percentage on top.
| Slab Size (mm) | Slab Size (approx. inches) | Effective module with 5mm joint (m²) | Flags per m² | Flags per 10 m² | Flags per 20 m² |
|---|---|---|---|---|---|
| 450 × 450 | ~18" × 18" | 0.2080 | 4.81 | 49 | 97 |
| 600 × 600 | ~24" × 24" | 0.3660 | 2.73 | 28 | 55 |
| 600 × 900 | ~24" × 36" | 0.5490 | 1.82 | 19 | 37 |
| 600 × 1200 | ~24" × 47" | 0.7320 | 1.37 | 14 | 28 |
| 800 × 800 | ~31" × 31" | 0.6502 | 1.54 | 16 | 31 |
| 900 × 900 | ~35" × 35" | 0.8190 | 1.22 | 13 | 25 |
Note that a 600×600 mm slab covers 0.36 m² by its face area alone (as shown on product listings where a pack of 25 covers 9.0 m²). Once you include the 5 mm joint, the effective module rises to 0.366 m² and the slabs-per-m² figure drops slightly from 2.78 to 2.73. It's a small difference per slab but adds up over a large area, which is why it matters to include joint width in your calculation.
Joint width and spacing
Joint width is the gap you leave between adjacent slabs. It's not just cosmetic: the joint accommodates minor variations in slab dimensions, allows for thermal movement, and lets you work a pointing (jointing) material in to lock everything together. Getting the joint width right for your material is important both for the finished look and for the structural integrity of the patio.
For concrete flags, blank" rel="noopener noreferrer">installation guidance aligned with BS 7533 typically recommends joints in the 6–10 mm range. A 6 mm joint is fine for regular concrete slabs in a domestic setting; go to 10 mm if you're using natural stone with some thickness variation. For porcelain slabs, many manufacturers specify a minimum 4 mm joint, do not butt them tight, as porcelain has very low porosity and no joint at all can cause problems with drainage and movement. Calibrated natural stone can be laid at 5–8 mm comfortably.
| Material | Recommended Joint Width | Joint Material Options |
|---|---|---|
| Concrete flag | 6–10 mm | Mortar, kiln-dried sand, polymeric jointing compound |
| Natural stone (calibrated) | 5–8 mm | Mortar, polymeric jointing compound |
| Porcelain | 4–6 mm (min. 4 mm) | Porcelain-specific polymeric jointing compound, fine grout |
| Granite | 6–10 mm | Mortar, polymeric jointing compound |
How does joint width affect your flag count? Wider joints mean each slab's effective module (its face area plus half a joint on each exposed side) is larger, so you need marginally fewer slabs per m². The difference between a 5 mm joint and a 10 mm joint on a 600×600 slab works out to roughly 0.05 fewer slabs per m², small per unit, but worth accounting for on a large job. Use the formula: effective module area = (slab length + joint width) × (slab width + joint width), then divide your project area by that number.
Cutting, waste and how much extra to order
No matter how carefully you measure, you will cut slabs. Every edge of the patio that doesn't fall exactly on a full slab module will need a cut piece, and there's always a risk of a slab cracking during cutting or handling. Ordering the right amount of extra material upfront is important: flags are sold in packs, batches can vary in shade between production runs, and you may not be able to match them later. Order everything at once.
Waste allowance by job type
- Simple rectangular patio, single slab size, stack or running bond: add 10% for cuts and breakage.
- L-shaped or slightly irregular area, single slab size: add 10–12%.
- Mixed-size or random Ashlar pattern: add 10–15%.
- Diagonal (45-degree) layout: add at least 15%, ideally 20%.
- Very small patio (under 5 m²) or lots of fixed obstacles: add 15–20% because each cut wastes a higher proportion of the slab.
- Natural stone with significant thickness variation: add 10–15% to allow for any slabs rejected during laying.
To apply this in practice: calculate your base flag count (area ÷ effective module area), then multiply by 1.10 for a standard 10% allowance, or 1.15 for a complex job. Round up to the nearest whole pack, not the nearest slab. Most suppliers sell in packs of 16–25 for standard sizes; always check the pack quantity and coverage on the product listing.
Worked example: 20 m² patio with 600×600 mm concrete flags
- Project area: 5 m × 4 m = 20 m².
- Joint width: 6 mm.
- Effective module: (600 + 6) mm × (600 + 6) mm = 606 mm × 606 mm = 0.367236 m².
- Base flag count: 20 ÷ 0.367236 = 54.46, round up to 55 slabs.
- Add 10% waste: 55 × 1.10 = 60.5, round up to 61 slabs.
- Pack size: 25 slabs per pack. Packs needed: 61 ÷ 25 = 2.44, so order 3 packs (75 slabs, covering 9 m² per pack = 27 m² coverage — gives you a comfortable buffer).
Worked example: 200 sq ft patio with 24"×24" slabs (imperial)
- Project area: 200 sq ft.
- Slab size: 24 in × 24 in. Joint width: 0.25 in (approximately 6 mm).
- Effective module: 24.25 in × 24.25 in = 588.0625 sq in = 4.083 sq ft.
- Base flag count: 200 ÷ 4.083 = 48.98, round up to 49 slabs.
- Add 10% waste: 49 × 1.10 = 53.9, round up to 54 slabs.
- Order the nearest pack quantity above 54.
How to decode pack sizes and order correctly
Most suppliers list both the pack quantity (number of slabs) and the pack coverage (total m² per pack). The pack coverage is usually calculated including the recommended joint width, so it's the more reliable figure to use for planning. Supplier listings show example pack coverage values, for instance, Rippon Paving Slabs, Pack coverage & pack contents (Paving Direct / Pavestone) lists a contractor pack covering ~19.5 m² for 64 pieces and a mini pack ~4.7 m² for 16 pieces Rippon Paving Slabs — Pack coverage & pack contents (Paving Direct / Pavestone). If you have the pack coverage figure, divide your total project area (after waste allowance) by the coverage per pack to get the number of packs. For example, if your waste-adjusted area is 22 m² and the pack covers 9 m², you need 22 ÷ 9 = 2.44 packs, so order 3 packs.
If the pack coverage isn't listed, calculate it yourself: multiply the individual slab face area (in m²) by the number of slabs per pack. A 600×600 mm slab has a face area of 0.36 m²; 25 slabs × 0.36 m² = 9.0 m² per pack. Always cross-check this against any coverage figure on the product page, since some suppliers subtract joint allowance and some don't. For contractor packs with mixed slab sizes, the pack coverage figure is the most reliable guide because the individual piece counts are harder to verify without a full breakdown.
A quick tool and materials checklist
Before you start laying, make sure you have everything on hand. Running out of building sand or pointing compound mid-job is a frustrating delay that can leave freshly laid slabs exposed to foot traffic before they've set.
- Paving flags (ordered quantity including waste allowance)
- Sharp sand and cement for the bedding mortar (semi-dry mix: typically 4–6 parts sharp sand to 1 part cement by volume)
- Pointing/jointing compound or kiln-dried jointing sand
- Edge restraints or haunching mortar to hold perimeter slabs
- String lines and line pins (for setting out levels and alignments)
- Spirit level (at least 600 mm, ideally 900–1200 mm)
- Rubber mallet
- Tape measure
- Bolster chisel and club hammer (for breaking slabs if not using a power saw)
- Angle grinder with diamond blade or a hired slab saw (recommended for clean cuts)
- Plate compactor or hand tamper (for sub-base compaction)
- Screeding rails and screed board (for levelling the bed)
- Safety glasses, dust mask, and gloves for cutting
- Bucket and mixing paddle or a small cement mixer
Laying basics: bedding and edge restraints
A solid patio starts with a compacted sub-base, typically 100 mm of compacted MOT Type 1 (crushed limestone) for a domestic pedestrian patio. On top of that goes the bedding layer: a semi-dry mortar mix (sharp sand and cement at roughly 5:1, just damp enough to hold its shape when squeezed) screeded to a consistent depth, usually 30–50 mm depending on your slab thickness. The finished slab surface should sit slightly proud of any grass or gravel edges to allow surface water to drain away from the house, always lay with a fall of around 1:60 to 1:80 away from any structure.
Edge restraints stop the perimeter slabs creeping outward over time. The simplest approach is haunching: a collar of stiff mortar packed around the outer edges of the perimeter slabs once they're laid and levelled. For a cleaner finish you can use a pre-formed edging kerb or brick soldier course. Either way, get your perimeter established and level before you start laying the field slabs. For full step-by-step installation detail, the guide on how to flag a patio covers the complete process from sub-base preparation through to final laying.
Pointing your patio: the basics
Pointing (also called jointing) is the process of filling the gaps between slabs once they're laid and the bed mortar has set, typically after 24–48 hours. Done properly it locks the slabs together, stops weeds getting a foothold, and gives the finished patio a clean, professional look. Done badly it cracks and falls out within a season, leaving open joints for water and weeds.
The most reliable modern method for domestic patios is a polymer or resin-modified jointing compound (sometimes called pointing mortar or flowable jointing). You brush it dry into the joints, then lightly spray with water to activate the binder. It sets hard within a few hours and resists weed growth and frost much better than traditional dry sand or a basic sand-cement mix. For concrete flags with 6–10 mm joints, a flowable jointing compound is the easiest and most durable option for a DIY install. For full guidance on technique, joint preparation, and repointing existing flags, the guide on how to point patio flags walks through the whole process in detail.
- Allow the bedding mortar to cure for at least 24 hours (48 hours in cool or damp weather) before pointing.
- Clear any loose debris and sand from the joints using a stiff brush.
- Ensure the slab surface is dry before applying a dry-brush pointing compound.
- Pour or brush the jointing compound generously across the patio, working it into all joints.
- Remove excess from the slab surface before it sets (follow the product's working time instructions).
- Lightly mist with water to activate if using a polymer compound, or leave to self-cure if using a flow jointing material.
- Keep foot traffic off for the curing period stated by the manufacturer — usually 12–24 hours for polymer compounds.
Finishing touches: flowers, pots and patio styling
Once the patio is pointed and cured, the fun part starts. A freshly laid flagstone patio is a blank canvas and a few well-chosen plants can completely change how it feels. Flower pots and containers are the easiest way to add colour and greenery without committing to any permanent planting, you can move them around as you settle into the space. Grouping pots of varying heights in a corner or along a wall tends to look more intentional than dotting single pots randomly across the surface. If you're working with a small patio, keeping pots to the perimeter maximises usable floor space. For detailed ideas on arranging plants and containers on a patio, the guides on how to decorate a patio with flower pots and how to display flower pots on a patio offer plenty of practical inspiration and layout ideas. For step-by-step ideas and layouts, see the guide on how to display flower pots on a patio (reference f24cba34-ea50-42a0-9519-f55a081c32b0). For step-by-step planting suggestions and styling ideas, see our guide on how to decorate my patio with flowers. For ideas tailored to compact spaces, see our guide on how to decorate a small patio with flowers. For step-by-step plant selection and layout tips, see how to decorate a deck or patio with flowers.
Climbing plants trained up a wall or trellis, hanging baskets on brackets, and a mix of seasonal and perennial plants in a border at the patio edge all help soften the hardness of a newly paved surface. Think about what the space will look like at different times of year: a patio that's welcoming in July should still look lived-in in October. Evergreen structural plants in large pots give year-round presence and don't need replacing each season.
Seasonal maintenance and keeping flags in good shape
Flagstone patios are low-maintenance but not zero-maintenance. The joints are the most vulnerable part: check them every spring for cracking or weed growth and re-point any areas where the jointing compound has crumbled. Weeds that are left to root can lift and loosen slabs over time, so it's far easier to deal with them early. A stiff brush and a jet washer (on a wide-fan setting, not a pencil jet which can erode pointing) are enough for most annual cleans.
Natural stone flags, particularly sandstone and limestone, benefit from an impregnating sealer applied after laying and repeated every two to three years. This doesn't stop staining entirely but makes it much easier to clean and slows the growth of algae and moss in shaded areas. Porcelain flags don't need sealing and are the most frost-resistant option, which is worth bearing in mind if you're in a colder climate or the patio is north-facing and stays damp. Concrete flags can develop a surface bloom (efflorescence) in the first few months, a natural process where salts migrate to the surface, which disappears with weathering and cleaning and isn't a structural problem. For another relevant comparison, see how to decorate a patio with flower pots.
FAQ
What does 'flag' mean when planning a patio?
A 'flag' is a single paving slab or paving unit (also called a slab or paving slab). Flags come in standard nominal sizes (for example 600×600 mm, 600×1200 mm, 800×800 mm) and thicknesses vary by material (porcelain often ~20 mm, natural stone ~20–25 mm, concrete flags commonly 32–50 mm). Retail listings usually show slabs-per-pack and pack coverage (m² per pack).
What’s the basic formula to calculate how many flags I need?
Include the joint width in the unit module, then divide the total patio area by the effective slab area: slab_count ≈ Area_project ÷ ((L + joint) × (W + joint)). Use the same units for L, W and joint (metres or feet). After calculating, add a waste allowance (see below).
How do I measure my patio area correctly (step‑by‑step)?
1) Sketch the patio and split irregular shapes into rectangles/triangles. 2) Measure length and width of each rectangle (to nearest 10 mm / ¼ in). 3) For triangles measure base and height. 4) Compute area for each shape and sum them (Area_rect = L × W; Area_tri = 0.5 × base × height). 5) Convert units if mixing metric/imperial. 6) Round up slightly to avoid under-ordering before adding waste allowance.
How do I include joint width in my count?
Decide the joint width for your material and installation method (porcelain often 3–5 mm minimum; concrete or natural stone commonly 6–10 mm for mortar/flowpoint). Add one joint width to each slab dimension when computing effective slab area: Effective_L = L + joint, Effective_W = W + joint. Then use the formula in the earlier FAQ.
What waste/cutting allowance should I add?
Common guidance: 10% extra for simple single-size, straight-laid patios; 10–15% for mixed-size or minor diagonal patterns; 15–20% for diagonal patterns, irregular shapes, lots of cuts or natural stone with matching-batch concerns. For very small or highly irregular areas use 15–20%.
How do I convert slab counts between metric and imperial?
Either work entirely in one system or convert areas: 1 m² = 10.7639 ft². If you compute slabs-per-m², you can convert project area (ft²) to m² using that factor or compute effective slab area in ft (add joint in inches) and use the same formula. Always keep units consistent when calculating.
Next Articles
How to Decorate a Patio with Flower Pots: Step-by-Step DIY Guide
DIY patio flower-pot guide: planning, pot & plant picks, small-space layouts, vertical displays, drainage, seasonal care
How to Decorate a Small Patio with Flowers: A Practical Plan
Practical step-by-step guide to decorate a small patio with flowers: measurements, plant lists, containers, watering.
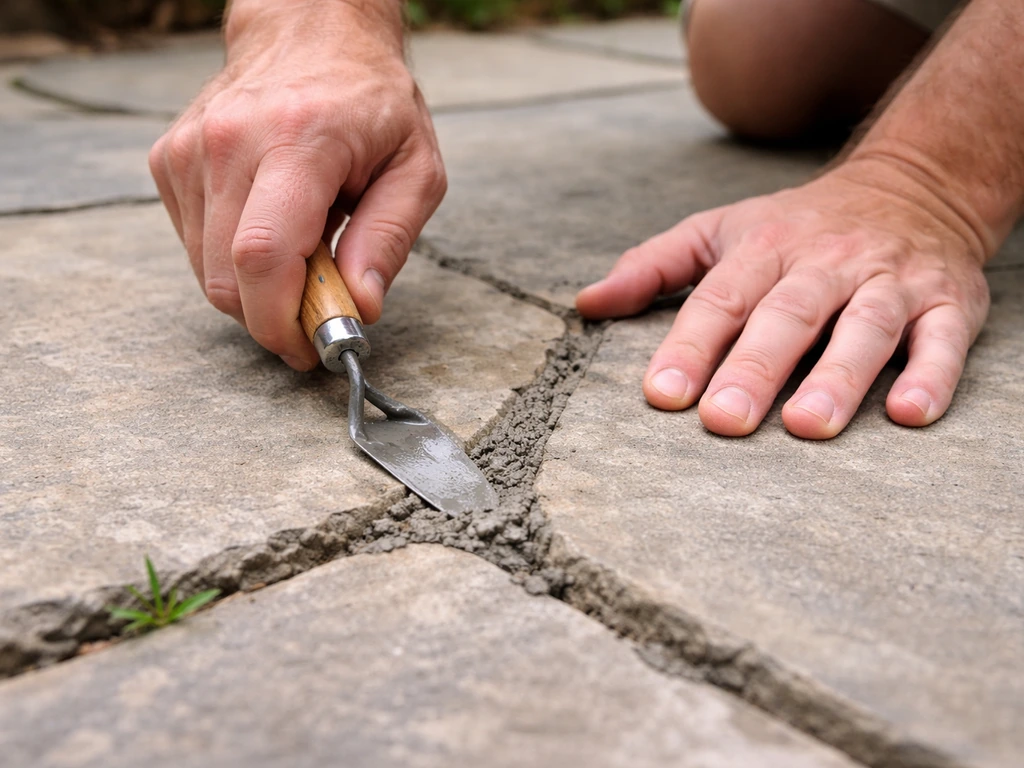
How to Point Patio Flags: DIY Repointing Guide
Step-by-step DIY guide to repoint patio flag joints, fix gaps and weeds, choose exterior mortar, and cure for lasting re