
You can make screen panels for a patio using wood, aluminum kit frames, or PVC pipe, and a complete panel from scratch takes most beginners about 2 to 4 hours per panel once materials are on hand. For a full step-by-step walkthrough on how to close in a patio with screen, see our dedicated guide. The basic process is the same for all three frame types: build a rectangle, stretch your mesh across it, and lock the mesh down with spline pressed into a channel groove. The differences come down to cost, durability, how well the frame holds up to weather, and what tools you already own.
How to Make Screen Panels for Patio: DIY Guide & Plans

Felix Brennan
17 Jul 2026
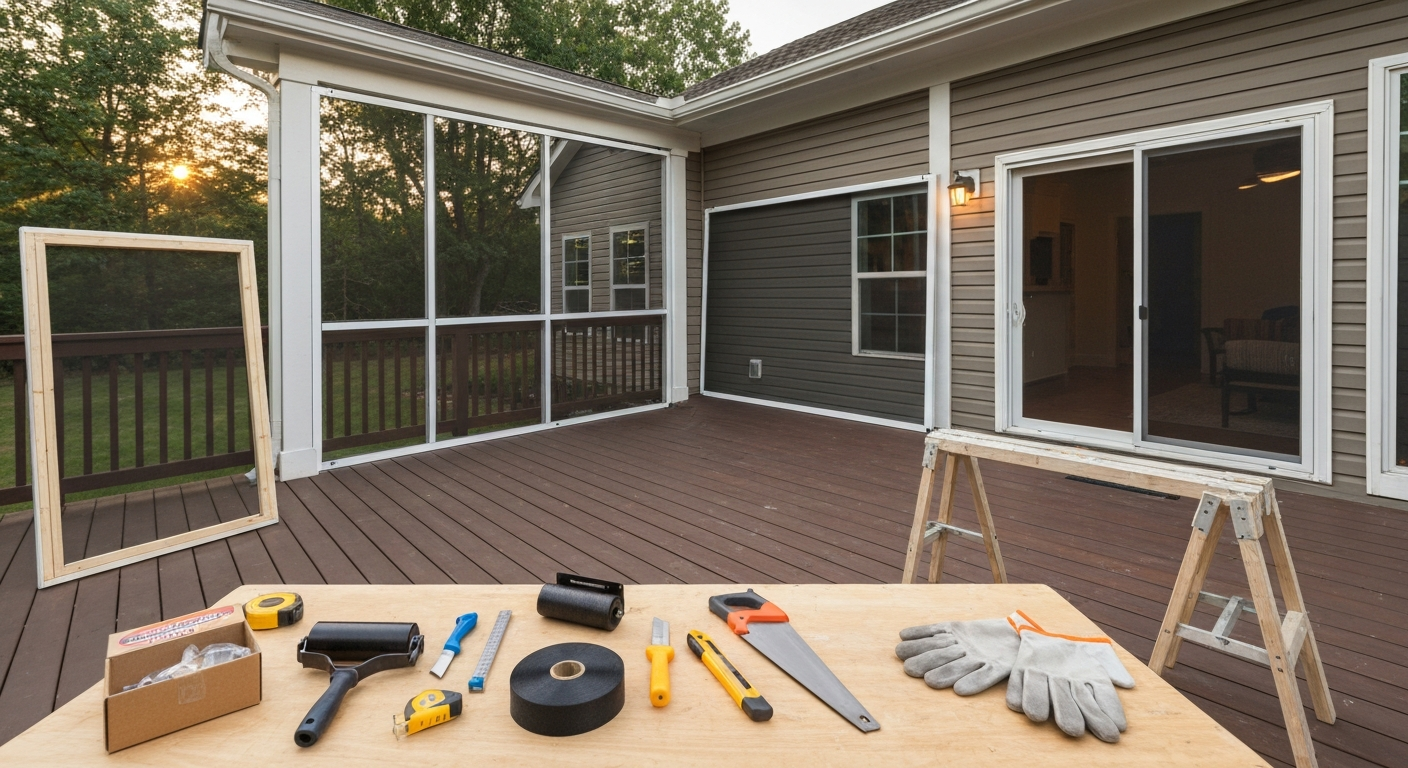
Who this guide is for and what we cover
This guide is written for homeowners who want to build, replace, or repair screen panels for a patio, whether you are enclosing an open patio for the first time, rescreening damaged panels, or adding removable seasonal panels you can take down in winter. You do not need carpentry experience to follow along. We cover everything from choosing the right mesh and frame material to cutting, assembling, installing, and maintaining panels over time. We also walk through common repairs like patching holes and replacing spline, plus honest cost and time estimates so you can plan your project before you buy a single piece of lumber.
Choose your panel type and mesh before you buy anything
The single biggest decision is whether you want to build frames yourself or buy a pre-assembled aluminum kit and rescreen it. Both are valid, and neither is universally better. Build-it-yourself wood or PVC frames cost less in materials and are easier to customize to odd dimensions, but they take longer and require more tools. Aluminum screen kits (like those from RiteScreen) arrive with pre-cut rails, corner keys, and spline included, a 36x84 inch kit typically runs $185 to $275 at home improvement stores, and they assemble in under an hour if your opening is a standard size. For anything larger than about 36 inches wide or taller than 84 inches, or for a non-standard shape, building your own frame is almost always the easier path.
Picking your mesh: insect, pet, solar, or privacy
Mesh choice matters more than most people realize. Standard fiberglass insect screening, Phifer's Phiferglass in an 18x14 or 20x20 weave, is the most affordable option at roughly $0.22 per square foot for a 36-inch wide roll, and it handles the vast majority of patio applications just fine. If you have dogs or cats that lean on or scratch the screen, Phifer PetScreen (vinyl-coated polyester) is a much better choice: it is marketed as tear- and puncture-resistant and is available in widths from 30 to 96 inches in black. For sun and heat control, Phifer SunTex is a heavy-duty solar mesh that blocks a significant percentage of solar heat, the exact percentage depends on the openness factor of the fabric you choose, with tighter weaves blocking more heat but also reducing airflow. Privacy mesh sits at the heavy end of the scale and limits sightlines from the street, which is useful for ground-level patios near neighbors or sidewalks.
| Mesh Type | Best For | Typical Width Options | Relative Cost | Trade-off |
|---|---|---|---|---|
| Fiberglass 18x14 or 20x20 (Phifer Phiferglass) | General insect control | 36", 48", 60", 72", 96" | Lowest (~$0.22/sq ft) | Tears more easily than specialty mesh |
| PetScreen (vinyl-coated polyester) | Homes with dogs or cats | 30"–60", special 72" and 96" in black | Moderate | Heavier; reduces airflow slightly |
| SunTex (solar/shade mesh) | Sun and heat reduction | Standard rolls up to 100 linear ft | Moderate–high | Lower visibility through screen |
| Privacy mesh | Blocking sightlines | Varies by brand | High | Minimal airflow; heavier frame load |
| TuffScreen (Phifer heavy-duty) | High-traffic or high-abuse areas | Standard roll widths | Moderate | Stiffer; harder to work with spline tool |
Build vs. buy: a quick decision guide
- Standard opening (36"x80" or 36"x84"): buy an aluminum kit and rescreen it — faster, cleaner finish, easier to replace later
- Non-standard or oversized opening: build your own wood or aluminum frame to exact dimensions
- Removable seasonal panels: wood frames with hook-and-eye hardware are lighter and easier to store than aluminum kits
- Permanent enclosure panels: aluminum or pressure-treated wood frames hold up better against moisture and UV over multiple seasons
- Tight budget, simple tools: wood 1x2 or 1x3 lumber frames are the most accessible starting point
- Minimal tools, clean look: aluminum kit frames require only a miter saw or hacksaw and a spline roller
Safety notes before you start cutting
Screen panel work is low-risk compared to most construction projects, but a few precautions are worth taking seriously. Freshly cut aluminum extrusions and screen mesh edges are sharp, wear work gloves whenever you are handling cut aluminum rails or rolling spline into metal frames. Safety glasses are a must when cutting aluminum with a miter saw or hacksaw because aluminum shavings travel farther than wood chips. When working with PVC pipe and PVC cement, work in a ventilated area and keep the cement away from skin and eyes. If you are working on a ladder to install upper panels, have a second person hold the base and do not overreach, more patio screen injuries come from ladder instability than from the tools themselves. Finally, if your patio has overhead electrical fixtures or wiring near the framing area, turn off the circuit at the breaker before you start drilling or fastening into the ceiling or header.
Tools and materials you will need
| Item | Recommended Spec / Size | Quantity (per panel) | Common Alternative |
|---|---|---|---|
| Lumber (for wood frames) | 1x3 or 1x4 pressure-treated pine or cedar | 2x panel perimeter (linear ft) | 1x2 for lightweight removable panels |
| Aluminum screen frame kit | RiteScreen or Everbilt 36"x84" rail kit | 1 kit per panel | Cut-to-length aluminum U-channel |
| PVC pipe (PVC frames) | Schedule 40, 1" nominal (OD 1.315", wall 0.133") | 2x panel perimeter (linear ft) | 3/4" nominal for very small panels |
| Screen mesh roll | Phifer Phiferglass 18x14, 36" or 48" wide | Panel area + 6" overage on each side | PetScreen, SunTex, or TuffScreen |
| Spline (retainer cord) | 0.140" diameter vinyl spline, 25 ft roll | 1x panel perimeter + 20% | Match to frame groove: 0.125" or 0.175" also common |
| Spline roller tool | Standard double-wheel roller | 1 | Flathead screwdriver (not recommended but possible) |
| Corner brackets / keys | Aluminum right-angle or T-bracket | 4 per panel | Wood pocket screws for wood frames |
| Wood screws or deck screws | 1-5/8" coarse-thread for 1x3 lumber | 16–20 per panel | Pocket hole screws for cleaner joints |
| Utility knife | Heavy-duty with snap blades | 1 | Box cutter |
| Tape measure | 25 ft locking tape | 1 | Any accurate measuring tape |
| Miter saw or hand miter box | Compound or simple 45-degree miter | 1 | Hacksaw with miter box for aluminum/PVC |
| Drill/driver | 18V cordless with bits | 1 | Hand screwdriver for final fastening |
| Staple gun (wood frames only) | Heavy-duty, 3/8" staples | 1 | Optional — spline holds mesh without staples |
| Flat work surface | Workbench, plywood sheet on sawhorses | 1 | Garage floor with carpet scraps to protect mesh |
| Safety glasses and work gloves | ANSI Z87.1 rated glasses | 1 set | N/A — do not skip |
Measuring and cutting: get these numbers right the first time
Accurate measurement is where most DIY screen panel projects succeed or fail. A panel that is even 1/4 inch too wide will not fit in its track; one that is 1/2 inch too narrow will sag and let bugs in at the edges. Measure each opening individually, even on the same patio, two openings that look identical are rarely exactly the same size.
The panel sizing formula
For panels that slide into a track or groove: measure the opening width and height at three points (top, middle, bottom for width; left, center, right for height). Use the smallest number in each direction. Subtract 1/4 inch from both width and height for clearance. That is your finished frame size. For panels that mount flat against a surface with clips or hooks: make the frame 1 to 1.5 inches larger than the opening on all sides so it overlaps the frame edge and seals against bugs. Write your measurements on masking tape and stick it to the opening, it saves a lot of re-measuring trips.
Cutting allowances and thermal expansion
For wood frames, cut lumber at exactly the finished frame dimension, wood does not expand enough over typical patio temperature swings to matter for short panel lengths. For aluminum frames, aluminum has a linear thermal expansion coefficient of approximately 12.8x10(-6) per degree Fahrenheit. On a 96-inch aluminum rail going from 30 degrees F in winter to 100 degrees F in summer (a 70-degree swing), that is about 0.086 inches of expansion, small but worth a 1/8-inch gap at the rail ends if you are setting panels into a tight track in a climate with extreme temperature swings. PVC expands even more than aluminum at the same temperature range, so for PVC frames longer than 48 inches in hot climates, build in a 1/8 to 3/16 inch gap at any fixed-end connections.
Mesh cutting rules
Cut your mesh so it extends at least 1 inch beyond the spline channel on all four sides before you start rolling the spline in. This gives you enough material to maintain tension and correct small alignment errors as you work around the frame. After the spline is fully seated, trim the excess mesh flush with the outside edge of the frame using a utility knife. Do not pre-trim the mesh before installing spline, you will lose tension and end up with a wavy screen.
Templates, diagrams, and cutting patterns
Before cutting any material, sketch your panel on paper or a piece of cardboard at a 1:10 scale (1 inch on paper equals 10 inches on the panel). Mark the four corners, the spline channel location, and where any center rail or cross-brace will go if your panel is taller than 48 inches. For a basic rectangular panel, your cutting template is simple: four pieces cut to length (two at finished width, two at finished height minus the width of the frame stock twice, so the corners close flush). Label each piece with a marker before cutting.
Wood frame cutting pattern
For a butt-joint wood frame using 1x3 lumber (actual dimensions 0.75" x 2.5"): cut two pieces at the full finished width (let's call it W), and two pieces at the finished height minus 1.5 inches (H - 1.5"). The 1.5 inches accounts for the top and bottom boards sitting across the full width, with the two side pieces fitting between them. Assemble with the top and bottom pieces running the full width and the side pieces filling the gap between them. This keeps the end grain hidden on the sides and the long grain faces outward for a cleaner look. For a 45-degree mitered corner (better for larger or permanent panels), all four pieces are cut at 45 degrees to finished outside dimensions, this requires a miter saw and careful measurement but produces a stronger, more attractive corner.
Aluminum frame cutting pattern
Aluminum kit rails come pre-cut at standard lengths or as raw extrusion you cut to size. For a frame with corner keys (plastic or aluminum corner connectors that plug into the hollow end of the rail), all four rails are cut at 90 degrees to exact finished dimension, no mitering needed, since the corner keys create the right angle internally. Use a hacksaw with a fine-tooth blade (32 TPI) or a miter saw with a non-ferrous metal blade, and deburr the cut ends with a file before inserting corner keys. Forcing corner keys into uncleared burrs cracks the key and ruins the joint.
PVC frame cutting pattern
For Schedule 40 1-inch nominal PVC pipe frames (OD 1. Schedule‑40 1" nominal PVC has an outside diameter of 1.315" and a wall thickness of 0.133" (PVC Pipe Dimensions Chart (schedule 40 dimension table)). 315 inches), cut four pieces using the same butt-joint logic as the wood frame above, two pieces at the full width, two pieces at the full height minus 2x the pipe OD (2 x 1.315" = 2.63", so subtract 2-5/8" from the height for the two side rails). Connect corners with 90-degree PVC elbows and PVC cement. Add a flat-sided PVC spline channel (sold as vinyl screen frame U-channel) along the inside face of each rail to hold the mesh and spline, since standard round PVC pipe does not have a built-in groove.
Step-by-step: building wood-frame screen panels
Wood frames are the most beginner-friendly option and the easiest to customize. Use pressure-treated pine for panels that will stay outdoors year-round, or cedar if you want a better natural look without painting. Avoid standard construction SPF lumber for permanent outdoor panels, it warps and rots quickly without heavy finishing.
- Measure your opening and calculate frame dimensions using the panel sizing formula above. Write measurements on tape at the opening.
- Cut your lumber to length. For a butt-joint frame, cut two pieces at finished width (W) and two pieces at H - 1.5 inches. For mitered corners, cut all four pieces at 45 degrees to finished outside dimensions.
- Lay the four pieces on a flat surface and dry-fit the corners before any fasteners. Check squareness by measuring diagonals — both diagonals should match within 1/8 inch.
- Fasten corners using 1-5/8 inch deck screws, two screws per corner. Pre-drill to avoid splitting. For mitered corners, use a right-angle clamp while you drive screws from the back face, or use pocket screws with a pocket hole jig for a cleaner joint.
- For panels taller than 48 inches, add a center horizontal rail (same stock lumber, cut to the inside width) at roughly mid-height to prevent mesh sag. Fasten it the same way as the corner joints.
- Cut a shallow spline channel into the inner face of each rail using a router with a 3/16 inch straight bit, OR attach a vinyl U-channel spline track to the inner face of the frame with staples or brad nails every 6 inches. The channel needs to be deep and wide enough to accept your spline diameter (0.140 inch is the most common retail size — measure your channel before buying spline).
- Lay your mesh roll flat on the work surface. Position the assembled frame on top of the mesh. The mesh should extend at least 1 inch beyond the spline channel on all four sides.
- Starting at the top rail, press the mesh lightly into the spline channel at the center of the top rail. Use your spline roller to press the spline cord into the channel over the mesh, working from center outward toward each corner. Keep light tension on the mesh with your free hand as you roll.
- Move to the opposite (bottom) rail. Pull the mesh taut — firm but not stretched so hard the weave distorts — and roll the spline in from center outward, the same way.
- Repeat for the two side rails, pulling the mesh taut as you go. At each corner, fold the mesh neatly (like folding a hospital corner on a bed sheet) before pressing the corner spline in. Avoid cutting a notch at the corner — the folded overlap keeps the corner sealed.
- Trim excess mesh flush with the outside edge of the spline channel using a sharp utility knife. Pull the blade along in one smooth stroke rather than sawing — this prevents fraying.
- Inspect the finished panel. Press on the mesh surface — it should feel taut like a drum, with no visible wrinkles or sags. If a section sags, remove the spline at that section, re-tension the mesh, and re-roll the spline.
- Sand any rough wood edges, apply an exterior wood primer, and finish with exterior paint or a UV-resistant wood stain. Two thin coats are better than one thick coat. Let the finish cure fully before installing the panel outdoors.
Wood frame joints: what works and what to avoid
Butt joints with screws are fast and strong enough for most removable panels. Pocket hole joints (using a Kreg jig or similar) are stronger and hide the fasteners, which matters if the panel face will be visible. Mitered corners look the most finished but require accurate cuts, a 1-degree error on a miter saw produces a visible gap at the corner. For any joint that will be permanently outdoors, add a small dab of exterior wood glue along with the screws. Avoid wood glue alone without mechanical fasteners on screen panels, the constant tension from the mesh will eventually pull glue-only joints apart.
Step-by-step: assembling aluminum kit panels
Aluminum screen frame kits from brands like RiteScreen and Everbilt are sold at home improvement stores in standard sizes (typically 36x36 or 36x84 inches) and include pre-cut aluminum rails, plastic corner keys, spline, and sometimes a spline roller. They are the fastest route to a finished screen panel, and the aluminum frame will not rot, warp, or need painting. The trade-off is that cutting rails to non-standard lengths requires a hacksaw or miter saw, and the frame depth is usually shallower than a wood frame, which means less rigidity on very large panels.
What a typical aluminum kit includes
- Four aluminum extrusion rails (two horizontal, two vertical) with a built-in spline groove on the inner face
- Four plastic corner keys (right-angle connectors that press into the hollow ends of the rails)
- One roll of vinyl spline (typically 0.140 inch diameter, enough for one panel perimeter)
- Screen mesh cut to approximately the kit size (some kits) or sold separately
- Occasionally a spline roller tool — check the kit contents before buying one separately
- Measure your opening and calculate your finished frame size (opening dimension minus 1/4 inch in each direction for track-mounted panels).
- If the kit rails are longer than your finished size, mark the cut line with a marker. Cut with a fine-tooth hacksaw (32 TPI blade) or a miter saw with a non-ferrous metal blade. Aluminum cuts cleanly and quickly — let the saw do the work without forcing it.
- Deburr all cut ends using a flat file or fine sandpaper. Run your gloved finger across the end — it should feel smooth with no sharp edges. Skipping this step will crack your corner keys.
- Lay two opposite rails (one top and one bottom, or one left and one right) on your work surface. Press a corner key firmly into each open end. The key should seat fully with hand pressure — if it does not, lightly tap it with a rubber mallet, not a steel hammer.
- Connect the remaining two rails to the corner keys already installed, forming the complete rectangular frame. Press all connections fully seated and check squareness by measuring both diagonals.
- Lay the mesh over the assembled frame, extending 1 inch beyond the spline groove on all sides.
- Roll the spline into the groove starting at the top rail center, working outward toward each corner. Move to the bottom rail, pull the mesh taut, and roll. Repeat for both side rails. Fold corners neatly rather than cutting notches.
- Trim excess mesh flush with the outer edge of the spline groove using a utility knife.
- If your frame will be exposed to full sun year-round, apply a light coat of clear automotive wax or aluminum-compatible UV protectant to the rails to reduce oxidation. Anodized aluminum kits need no additional finish, but bare aluminum will oxidize to a chalky white over a few seasons without protection.
- To cut panels to custom non-standard sizes: cut all four rails to your calculated length, deburr, and assemble with corner keys exactly as above. The corner keys work at any length — you are not limited to the original kit dimensions.
Finishing and weatherproofing aluminum panels
Aluminum does not rust, but it does oxidize and pit over time in humid or coastal environments. Mill-finish (bare silver) aluminum benefits most from a protective coating. A clear lacquer spray or a wax application after assembly gives the frame a longer service life and keeps the tracks from binding when you remove or reinstall seasonal panels. For painted aluminum, use a spray paint rated for metal and apply after the frame is assembled but before the mesh is installed, overspray on the mesh is nearly impossible to remove cleanly.
Installing your finished panels: tracks, clips, and hangers
A well-built panel is only as good as its mounting system. For permanent enclosure panels that are part of a screened room, panels are typically set into a track system, an aluminum or vinyl U-channel fastened to the structural frame of the patio at the top and bottom, with the panel sliding or dropping into place. For seasonal or removable panels, hook-and-eye hardware, screen clips, or magnetic closure strips are cleaner solutions that let you pull panels down in late fall without tools. Clips sold as screen panel fasteners (available at window screen suppliers and online) space every 12 to 18 inches around the panel perimeter and hold the panel flush against the framing. Magnetic closure strips work well for frequently opened panels, like a screen door in a panel wall.
Cost and time: what to actually budget
A basic wood-frame screen panel using standard fiberglass mesh costs roughly $15 to $35 in materials per panel depending on size, lumber species, and mesh choice. An aluminum kit panel for a standard 36x84 inch opening runs $185 to $275 for the kit plus the cost of mesh if not included. Premium meshes like PetScreen or SunTex add cost, budget around $30 to $60 per panel in mesh for a mid-size panel using specialty material. High-end metal security mesh (bronze or stainless) is in an entirely different category: Phifer notes premium bronze or stainless rolls can range from roughly $700 to $1,000 per roll, which is only worth it for very specific security or architectural applications. Time-wise, plan on 2 to 4 hours for your first panel including measuring, cutting, assembly, and screening. By the third or fourth panel you will be moving faster, most experienced DIYers finish a panel in about 45 minutes once they have a rhythm.
Troubleshooting, patching, and common repairs
The most common issue after installation is a wavy or saggy screen. This almost always means the mesh was not kept taut while rolling the spline, or the spline diameter is slightly too small for the frame groove and is not gripping the mesh firmly. To fix it: pull the spline out of the sagging section, re-tension the mesh by hand, and re-roll with fresh spline. If the groove is the right size and the problem keeps recurring, move up one spline diameter (for example, from 0.125 inch to 0.140 inch).
Small holes and tears from pet claws or furniture contact can be patched without rescreening the whole panel. Phifer and other manufacturers sell small patch kits, and for fiberglass mesh you can also use a dab of clear waterproof adhesive over a small cut. For anything larger than about 1 inch across, rescreening the full panel is the cleaner fix, partial patches on large holes tend to peel and look worse over time. For step-by-step instructions on repairing small holes and choosing the best patch method, see how to patch patio screen. If you need to rescreen a panel, the process is identical to the original screening steps: pull the old spline, remove the mesh, clean the groove, and start fresh. For a step-by-step walkthrough on removing old spline and installing new mesh, see our how to rescreen a patio guide. Related guides on how to repair patio screen and how to patch patio screen cover these repairs in more detail if you are working on an existing damaged panel rather than building new. For step-by-step instructions on replacing an entire panel, see our guide on how to replace patio screen.
Seasonal removal, storage, and maintenance
Removable panels should come down before the first hard freeze in cold climates, frozen spline becomes brittle and cracks, and ice loading on mesh tears it. Before storing panels for winter, brush off debris, rinse with a garden hose, and let them dry fully in a standing position (do not lay mesh-side-down on concrete or you will crack the spline). Store panels upright in a garage or shed, not flat in a pile where warping and crushing can distort the frames. For aluminum frames, stack them with a sheet of cardboard between each panel to prevent the mesh from pressing against the rails of the panel below.
Twice a year, once when you put panels up in spring and once when you take them down in fall, inspect each panel for spline that has started to shrink or pull out of the groove, mesh that has developed small holes, and wood frames that show signs of water damage or rot at the joints. Catching these issues early means a 20-minute repair rather than a full rebuild. For permanent aluminum or PVC frame installations that stay up year-round, an annual wipe-down of the frame rails with a damp cloth and mild soap keeps tracks clean and prevents the frames from sticking in their channels.
When to hire a pro instead of DIY
Most patio screen panel work is genuinely within reach of a first-time DIYer. The time to call a professional is when your project involves structural changes to the patio, adding a permanent header above the screen wall, cutting through a ledger board, or tying into the house's existing framing. If your patio does not have an existing structural frame to attach screen panels to and you need to build one from scratch, that work overlaps with the scope of a full screened enclosure project, which is covered in more detail in our guide on how to build a patio screen enclosure. Also consider hiring out if your patio is on a second floor or raised deck, working at height with large panels is a two-person job at minimum, and on a tall structure it is worth having someone experienced with fall protection managing the process.
FAQ
What primary manufacturer and product datasheets should be researched and cited to accurately describe screen mesh types, sizes, strengths, and solar/privacy performance?
Cite Phifer product and technical datasheets for fiberglass (Phiferglass 18×14 and 20×20), PetScreen, SunTex (solar/shade mesh), and TuffScreen; include Phifer hardware/product-brochure pages that list standard roll widths and lengths. Use Centor/Phifer specification guides (mesh test tables) for tensile/tear/grab numbers and flame classification. These documents supply weave counts, openness/solar block percentages, roll widths/lengths, and manufacturer test figures needed for strength and climate recommendations.
Which retail SKUs and kit pages are required for realistic cost, parts lists, and DIY kit examples?
Use representative retail product pages and SKUs from Home Depot, Lowe’s and major suppliers: Phifer/ADFORS fiberglass and BetterVue screen kits (36×25, 36×100 rolls), PetScreen roll SKUs, RITESCREEN and other aluminum/vinyl frame kit listings, and sample aluminum door/frame kit product pages. Pull current retail prices (per-roll and kit prices) to build cost-per-square-foot estimates and example BOMs.
What specifications and dimension tables must be included for frame materials (wood, aluminum, PVC) and for spline/retainer sizes?
Include PVC Schedule‑40 nominal vs actual OD/wall-thickness table (e.g., 1" nominal = 1.315" OD) to pick pipe sizes and calculate internal clearances. Include aluminum extrusion channel depths and common frame rail profiles (from kit product pages or manufacturer spec sheets). List common spline diameters (0.125", 0.140", 0.175") and note matching to frame groove; cite retail spline SKUs (e.g., 0.140" × 25 ft). Provide thermal expansion coefficients for aluminum (~22–24×10⁻⁶/°C) and typical polymers from Engineering Toolbox for spacing/expansion allowances on long rails.
What tool, hardware, and materials lists should be verified and included with exact specs?
Verify and list the following with sample SKUs or spec ranges: screen mesh by type & roll width/length; spline by diameter and material; spline roller; screen frame rails or PVC pipe nominal sizes; corner keys/corners for aluminum kits; miter saw or hand saw specs and blade types for wood/metal; utility knife and serrated screen roller blade; clamps, drill/driver and bits, pop rivets or stainless screws, weatherproof sealant (silicone/OSM); adhesives/epoxy for patching; patch kits and self-adhesive screens; paint/stain and exterior-grade fasteners for wood frames; optional brackets/tracks/hangers for removable panels. Use kit product pages as examples for included parts.
Which measurement, cutting, and installation rules must be specified and sourced?
Cite kit and manufacturer installation notes: allow ~1" mesh overhang beyond spline channel before trimming; measure inside frame channel dimensions and match spline diameter to groove; give specific cutting rules for wood/metal/PVC frames (miter rules, corner assembly tolerances). For long rails, include thermal-expansion allowance calculations using aluminum and PVC coefficients. Reference Phifer/ADFORS kit docs and retail how‑to pages for these rules of thumb.
What visual assets are required to make the DIY article actionable (photos, diagrams, templates)?
High-resolution photos and vector diagrams for: finished panel types (wood, aluminum kit, PVC) front/edge views; exploded-parts photos of kits (rails, corner keys, rollers, spline); step-by-step sequence shots of measuring, laying mesh, spline-rolling, trimming, and installing into frames; close-ups of spline channel dimensions with labeled spline diameter; templates and printable dimensioned patterns for standard panel sizes (36×80, 36×36, custom); track/attachment examples (top-hung, slide-in, removable hook/latch, Z-channel); repair/patch steps (before/after). Provide downloadable PDF templates with 1:1 spline channel and corner-key outlines for shop use.
Next Articles
How to Close in a Patio With Screen: DIY Steps
DIY step-by-step guide to close in a patio with screen panels, doors, framing, sealing, and troubleshooting gaps and lea
How to Patch Patio Screen: Step-by-Step Repair Guide
Learn how to patch patio screen: fix holes, sagging, or loose seams by swapping fabric and reinstalling spline tightly.
How to Build a Patio Screen Enclosure Step by Step
Step-by-step DIY guide to build a patio screen enclosure, from planning and materials to framing, installing screens, an