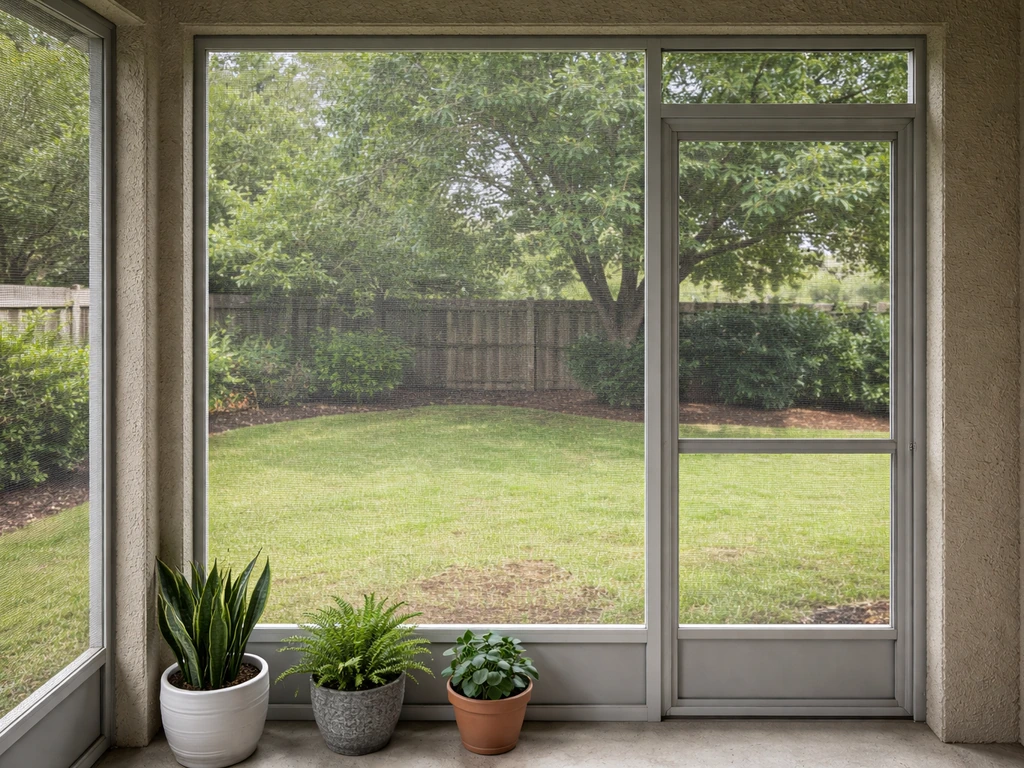
Rescreening a patio enclosure is a fully doable weekend project for most homeowners. You pull out the old spline, remove the damaged screen, inspect the frame, cut and lay new mesh, press in fresh spline with a rolling tool, and trim the edges clean. The whole job on a single panel takes about 30 to 45 minutes once you have the right materials in hand. A full enclosure with multiple panels might take a full day, but there's nothing technically difficult about it, it's mostly about working methodically and keeping even tension on the screen as you go. Once you complete the panel rescreening, you can also upgrade to a diy bug screen for patio coverage to help keep insects out all season. If you want the full walkthrough, follow this guide on how to build patio screen enclosure step by step.
How to Rescreen a Patio: DIY Steps and Tips

Quick diagnostic: does your patio really need rescreening?
Before you buy anything, take 10 minutes to walk the perimeter of your enclosure and look closely at every panel. Some damage calls for a patch, some calls for replacing a single screen panel, and some situations mean the whole enclosure needs fresh screen from top to bottom. Knowing which situation you're in saves you time and money.
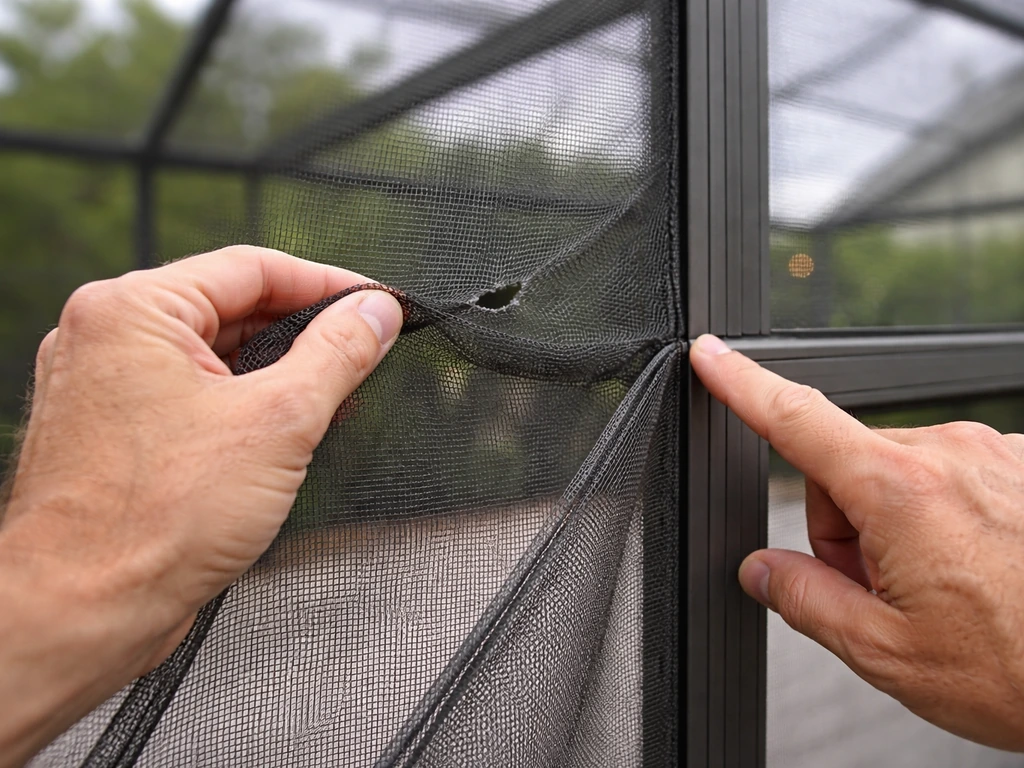
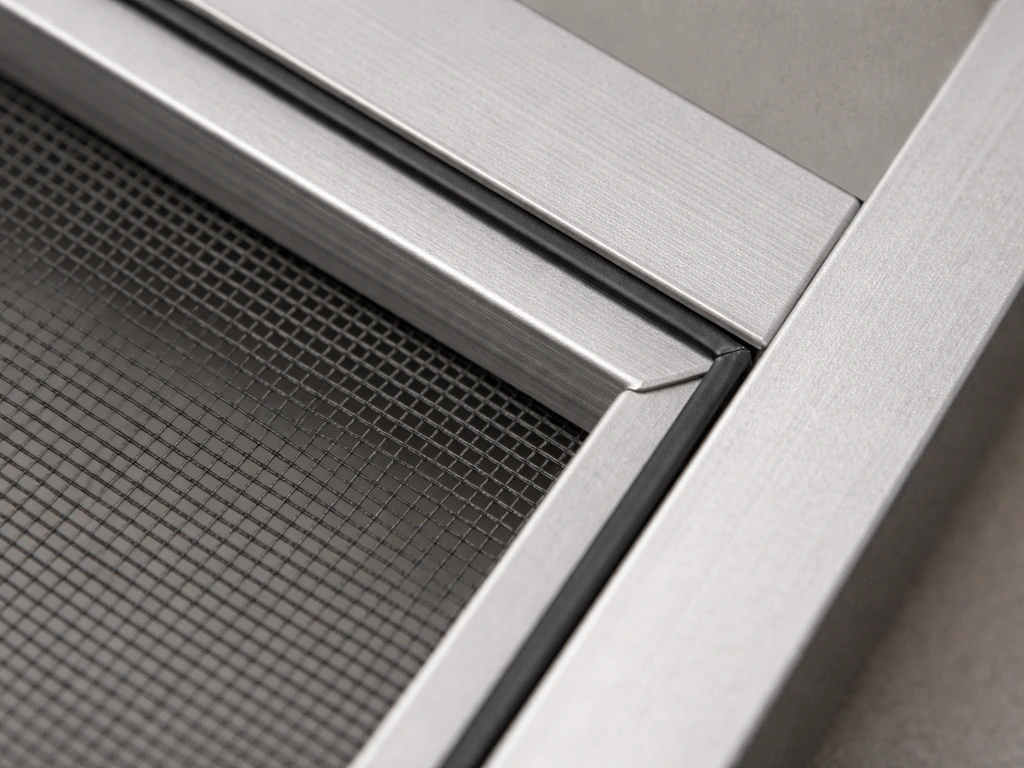
The clearest sign you need to rescreen (not just patch) is when multiple panels show damage, or when the spline itself has failed. Spline is the rubber cord that locks the screen into the frame channel. When it gets brittle and starts pulling away from corners, the screen loses tension and starts sagging or creeping back from the frame edge, leaving a gap. UV exposure breaks down both standard fiberglass mesh and spline over time, so if your enclosure is more than 7 to 10 years old and you're seeing any of these signs, full rescreening makes more sense than repeated patching.
- Tears, holes, or punctures in the mesh (even small ones let insects in)
- Sagging or rippling panels where the screen has gone slack
- Screen pulling away from the frame at corners or edges
- Spline that's cracked, crumbling, or missing in sections
- Visible gaps at panel seams where insects or rodents could enter
- Mesh that tears easily when you press on it (UV degradation)
While you're inspecting, check the aluminum frame itself. Look for bent or warped sections, corrosion at fastener points, and any sections where the frame has shifted away from the base. Slight warping can compromise how well the new screen sits, and loose or corroded fasteners should be replaced before you start. If you find significant frame damage, you're looking at a bigger repair scope than rescreening alone, that's worth knowing upfront. For straightforward frame damage, tighten or replace fasteners and straighten any minor bends before moving on.
Tools, materials, and screen types to gather before you start
Getting the right materials before you start is the part most people underestimate. Showing up with the wrong spline size or the wrong screen type turns a one-day project into multiple hardware store trips. Here's what you need.
Tools
- Spline roller (also called a screen rolling tool) — get one with both a concave and convex wheel
- Utility knife with fresh blades
- Flathead screwdriver or spline removal tool (to pry out old spline)
- Tape measure
- Scissors or aviation snips
- Ladder or step stool for upper panels
- Stiff brush or vacuum for cleaning frame channels
- Clamps or binder clips (optional but helpful for holding screen while you work)
Choosing the right screen type
Standard fiberglass mesh is the most common choice for patio enclosures and works well in most climates. It's flexible, easy to install, and reasonably priced. If you have pets, look at pet-resistant options like Phifer's PetScreen or products marketed as TuffScreen, these are significantly heavier than standard mesh and resist tearing and puncturing. They're rated specifically for patio and pool enclosure use. If solar heat gain is a concern, Phifer's SunTex and similar solar screen products block a substantial portion of sunlight while still providing airflow and insect protection.
| Screen Type | Best For | Durability | Notes |
|---|---|---|---|
| Standard fiberglass | General use, mild climates | Moderate (7–10 years) | Easiest to install, most affordable |
| Pet-resistant (PetScreen, TuffScreen) | Homes with dogs or cats | High | Heavier fabric — use one spline size smaller |
| Solar/sun screen (SunTex) | Hot climates, sun-facing panels | High | Reduces heat and glare; heavier fabric |
| Aluminum mesh | High-wear or high-wind areas | Very high | Harder to work with; not ideal for beginners |
Getting the spline size right
Spline sizing is the detail that trips people up most often. The spline has to fill the channel groove in your frame snugly, too thin and it won't hold the screen; too thick and you can't press it in. For most standard patio and pool enclosure frames, a .140-inch (9/64") spline is a common starting point. Measure your old spline with calipers or take a sample to the hardware store. If you're installing a thicker mesh like PetScreen or SunTex, Phifer's own guidance recommends going one spline size smaller than what your frame normally takes, because the fabric itself takes up space in the channel. Buy about 10 to 15 percent more spline than you think you need, it's cheap and running short mid-panel is frustrating.
Step-by-step: removing the old screening and inspecting the frame
Work on one panel at a time rather than stripping the whole enclosure at once. It keeps the project manageable and gives you a clear visual reference if something goes sideways.
- Start at a corner of the panel and use a flathead screwdriver or spline removal tool to pry up the end of the spline cord. Work slowly — yanking hard can crack or chip the frame channel, which makes seating new spline much harder.
- Once you have an end started, pull the spline out of the channel by hand, working around the full perimeter. The old screen will come loose as you go. Set the old spline aside (don't reuse it — old spline is usually too stiff or degraded to seat properly).
- Remove the old screen completely and discard it. If the screen tears during removal, that's a sign of how degraded the material was — don't worry about it.
- Use a stiff brush, vacuum, or compressed air to clean out the frame channel. Any debris, old spline bits, or grit left in the channel will prevent the new spline from seating flush.
- Inspect the channel for cracks, deep gouges, or sections that are bent inward. Minor imperfections are usually okay; a badly damaged channel won't grip the spline and may need frame repair or replacement before you proceed.
- Check the frame corners and fasteners. Tighten any loose screws. If fasteners are corroded, replace them with stainless steel or aluminum equivalents to prevent future rust. Look for any warping in the frame sections — a twist or bow of more than about a quarter-inch over a panel's length will cause the new screen to sit unevenly.
If you find that the frame needs significant work, bent sections, major corrosion, or a shifted base, address those issues before installing new screen. New screen over a bad frame won't last, and you'll be doing this job again in a year.
Installing new screen and spline
This is the core of the job. Take your time with tensioning, a screen installed with uneven tension will sag or wrinkle within a season, and there's no fixing it without pulling the spline and starting over.
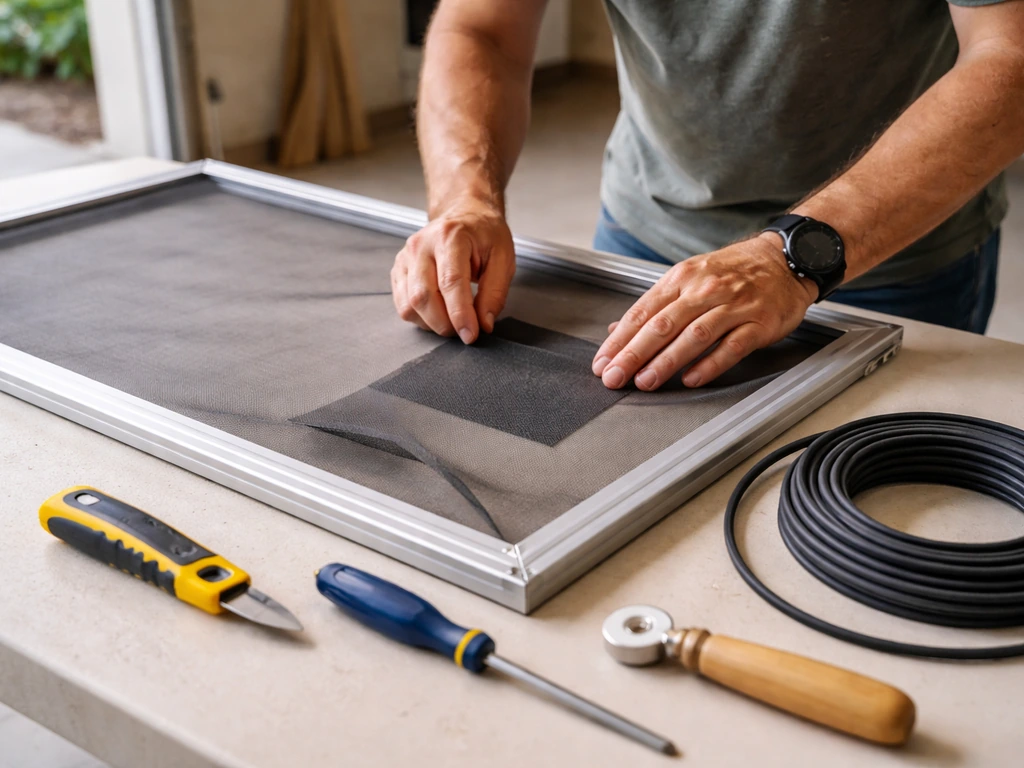
- Cut your new screen material so it overlaps the frame on all four sides by at least 1 to 2 inches. You'll trim the excess after the spline is set. It's better to start with too much than too little.
- Lay the screen over the frame and align it so the mesh runs straight and square with the frame edges. If the mesh is running at an angle, your finished panel will look wavy. Take a moment to get this right before you start rolling.
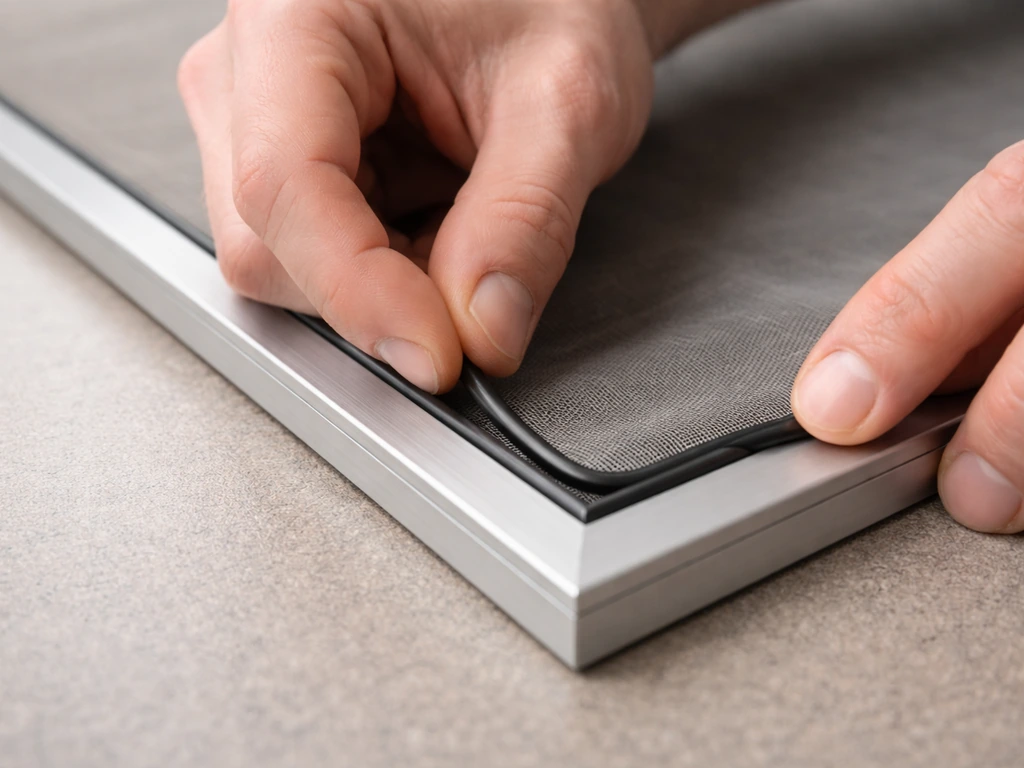
- Start at one of the longer sides of the panel (not a corner). Use the convex wheel of your spline roller to crease the screen into the channel groove along that side — don't add spline yet, just crease the screen to hold it in position.
- Move to the opposite long side and gently pull the screen taut across the panel — not stretched drum-tight, just snug with no slack — then crease it into that channel as well.
- Repeat for the two short sides. The screen should be evenly taut across the whole panel with no visible sag or ripple.
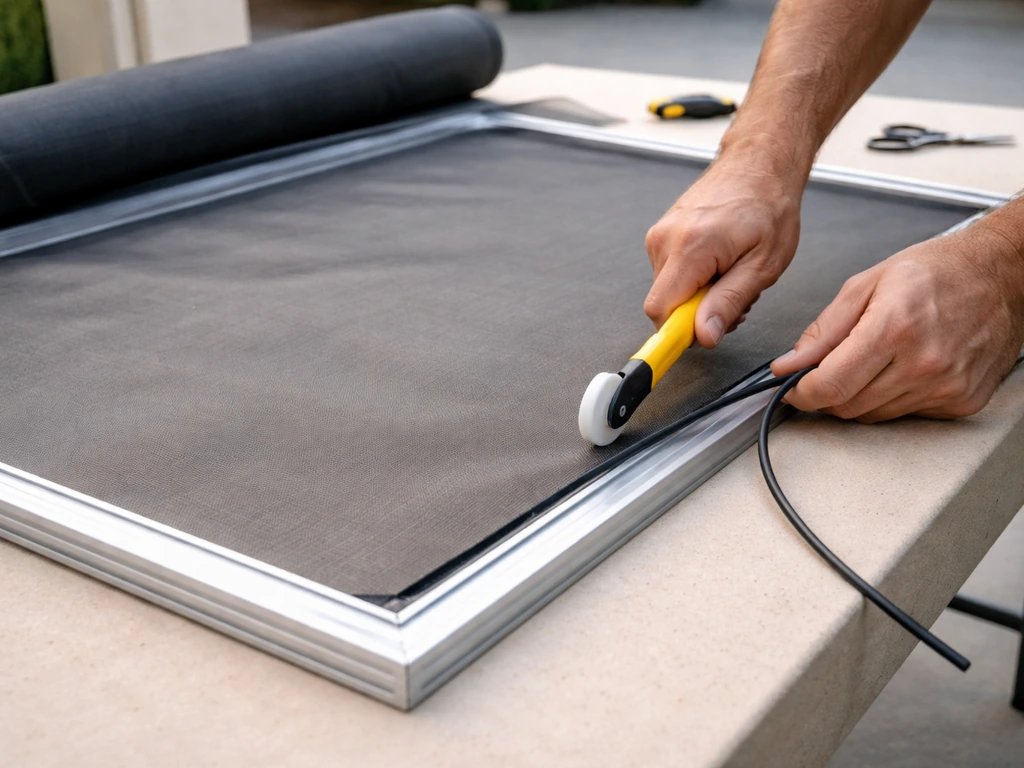
- Now go back to your starting edge and begin pressing spline into the channel over the screen using the concave wheel of the roller. Apply firm, steady downward pressure and angle the roller slightly forward as you move — this seats the spline fully without tearing the mesh. Work in one continuous motion rather than pressing and releasing repeatedly.
- At corners, use your screwdriver to tuck the screen and spline into the corner channel snugly. Don't rush corners — this is where buckling and gaps most often happen. Ease the screen into the corner rather than forcing it.
- Continue spline installation around the full perimeter. If the spline starts bunching or the screen starts pulling, back up and re-tension before continuing.
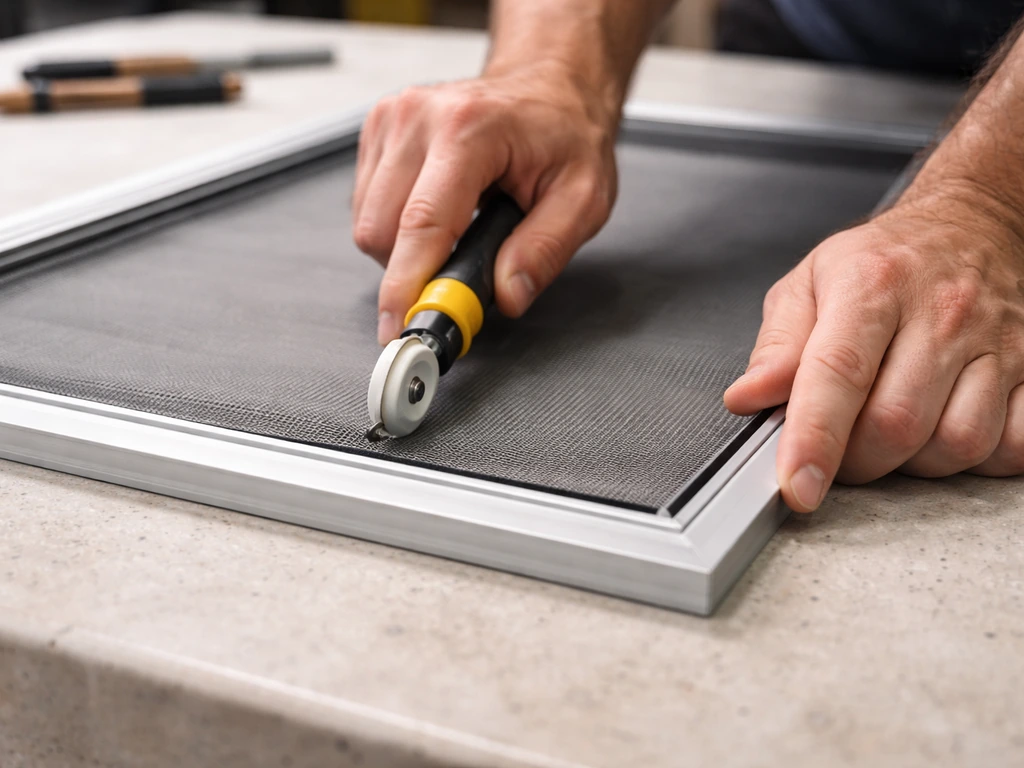
- Once all four sides are splined, use a utility knife to trim the excess screen. Slice along the inside edge of the frame, just above the spline — a fresh blade makes this clean and easy. Keep the blade angle low and away from the spline to avoid cutting into it.
One mistake worth calling out: don't stretch the screen too tight before splineing. It feels counterintuitive, but over-tensioning pulls the spline out of the channel over time and can distort the frame. Snug and flat is the goal, you want the screen to feel firm when you press it, but you shouldn't be fighting the material to get it into the channel.
Finishing details: corners, doors, and vents
Standard flat panels are the bulk of the work, but corners, door frames, and any vented sections need a bit of extra attention. Getting these right is what separates a professional-looking job from one that looks DIY from 10 feet away.
Corners and transitions
Where two screen panels meet at a structural corner, make sure the spline is fully seated right up to the junction. Gaps at corners are the most common entry point for insects and the most common place where screen fails first. If your enclosure uses corner molding or trim pieces, reinstall those over the finished edges to cover the spline and give the corner a clean finish. Press them firmly into place, don't rely on them to hold a poorly splined corner.
Screen doors
Rescreening a door in your enclosure follows the same spline-and-roller process, but the door frame is usually removable, which actually makes it easier. Take the door off its hinges, lay it flat on a workbench or sawhorses, and work it exactly like a standard panel. The flat surface gives you much better control over tension. When you rehang the door, check that it closes flush with no gaps at the sweep or sides, those gaps let insects in just as surely as a torn panel.
Vents and specialty openings
If your enclosure has roof vents or any screened openings beyond standard wall panels, screen those the same way but pay attention to the direction of water drainage. On roof or angled panels, make sure the spline is absolutely fully seated, water getting behind loose spline on a roof panel will accelerate degradation significantly. In corrosion and humidity-prone locations, sagging screens and loose spline connections are commonly cited as warning signs that enclosure components are degrading. Some vent frames use clips or zip ties rather than spline; check what your enclosure uses and replace any clips or fasteners that look worn.
Final tension check
Once all panels are installed, walk the perimeter and press gently on each panel with an open hand. It should feel firm and spring back slightly, like a drum head, not a trampoline and not a loose sheet. If a panel feels loose or you can see sagging in raking light, pull the spline on that side and re-tension before calling the job done. It's a 10-minute fix now versus a season of mosquitoes getting in.
Post-install checks and keeping your new screen in good shape
Before you pack up your tools, do a thorough gap check. Close all doors and walk inside the enclosure at dusk, if your yard has any insects active, you'll see them accumulating at any gaps. Once everything is installed, focus on how to close in a patio with screen by ensuring doors shut flush and gaps are sealed so insects stay out. Alternatively, shine a flashlight along all seams from outside at night and look for light leaking through from inside. Pay special attention to door sweeps, corner junctions, and the base of the enclosure where the screen meets the floor or foundation.
Minor gaps at seams or corners that don't involve damaged spline can often be sealed with a bead of clear silicone caulk. For gaps caused by screen that didn't seat fully, pull the spline in that section and redo it, caulk over a structural gap won't last.
Maintenance to extend the life of your new screen
New screen, properly installed, should last 7 to 10 years for standard fiberglass or longer for pet-resistant or solar screen products. A little maintenance goes a long way toward hitting that upper end of the range.
- Rinse panels with a garden hose once or twice a year to clear pollen, dirt, and debris that holds moisture against the mesh and spline
- Inspect the spline every spring — look for sections that have shrunk back from corners or feel hard and brittle
- After any major storm, check for small tears, debris impact damage, and any panels that have gone slack
- Keep vegetation trimmed back from the enclosure — branches and leaves rubbing against screen cause abrasion wear over time
- Don't pressure-wash screen panels; the force can damage the mesh and push water behind the spline
- If you catch a small tear early, a patch repair can extend the panel's life — but once spline starts failing in multiple spots, plan for a full rescreen rather than chasing patches
One thing worth doing right after install: take a few photos of each panel from up close so you have a reference for what new, properly tensioned screen looks like. When something starts to go wrong a few years from now, you'll have a clear baseline to compare against and catch problems early before they turn into a full rescreen project again.
FAQ
Do I need to remove all the old spline before installing new screen, even if only one area is damaged?
If the spline in the damaged area is brittle or has begun pulling away, remove spline locally in that panel section and replace it, then make sure the new screen seams meet solidly at the junctions. If the surrounding spline is still tight and not separating, you can often reuse it, but don’t reuse spline that has cracks, flat spots, or gaps where the channel no longer grips.
How do I measure the correct screen size before cutting?
Measure the opening dimensions for each panel after you check the frame for being square, then add a little working allowance before final trimming. Cut the first panel carefully and verify fit with the mesh seated before you commit to trimming, because oversizing can make corner junctions bow and undersizing can leave the spline short of the edges.
What’s the best way to deal with corners if my enclosure uses corner molding or trim pieces?
Install the screen so the spline seats fully right at the corner junction, then reinstall the trim over the finished edges. Avoid relying on the trim alone to cover a gap, if light or insect entry shows at the corner, it usually means spline seating is incomplete and trimming will not fix it.
Can I reuse the old mesh if only the spline is bad?
Usually no. When spline fails, the screen often has lost tension, stretched unevenly, or developed stress wrinkles. A tight, even re-spline only works if the mesh is still flat and undamaged, if you see tears, permanent sagging, or distortion, replace the mesh for a long-lasting fix.
Is there a simple test to confirm I used the right spline size?
After seating, the screen should feel firm with slight give, and the spline should sit fully in the channel without being so tight you can’t press it flush. If the spline looks partially out of the groove, it may be undersized, if it won’t roll in neatly or requires extreme force, it may be oversized or the mesh type may need a different spline choice.
What’s the safest way to tension the screen without over-stretching?
Aim for snug and flat before splineing, use steady tension as you work, and stop once the mesh stops wrinkling without forcing it. Over-tension can pull spline out over time and also warp the frame, if you have to fight the mesh into the channel, your cut size or tension approach is off.
Should I rescreen in hot or rainy weather?
Avoid direct sun heat spikes and damp conditions. Screen and spline handle better when the materials are at room temperature and not wet, and working in rain or heavy moisture can trap water at the seams and promote early degradation. If you must work outside, pause and cover materials if the panel area gets wet.
How do I check screen tension beyond just walking around the perimeter?
Use a raking light check from the inside at an angle, wrinkles or sagging will show immediately. Then press gently in a grid pattern with an open hand, each section should respond like a drum head and return, if one spot feels looser, redo spline in that exact area before closing everything up.
What sealant should I use for small gaps, and where should I not rely on caulk?
Use clear silicone caulk only for minor cosmetic gaps at seams or corners where spline is still fully seated. Do not caulk structural gaps caused by unseated screen, if the spline is loose, pull and redo it first because caulk alone won’t restore the mechanical grip of the channel.
How do I handle vented openings or roof panels with water drainage?
Follow the same spline process, but treat roof or angled sections as high-risk for failure. Ensure the spline is fully seated along the entire edge so water cannot get behind the mesh, and replace any non-spline fasteners or clips that show wear or looseness.
When should I stop and switch from rescreening to a bigger frame repair?
If you find significant frame shifting, heavy corrosion at multiple fastener points, repeated gaps that reopen after re-tensioning, or warped sections that prevent spline seating, stop and repair the frame first. New screen will not compensate for a frame that no longer holds the channel alignment.
How do I prevent future spline failure after the job is done?
Keep the spline contact area clean and avoid dragging items across the screen, pets and kids’ play can nick mesh edges and start separation. For best longevity, inspect seasonally for early corner lift, UV exposure is a slow process, catching it early often means a small spline replacement instead of full rescreening.
How can I tell whether I did enough to seal the enclosure after installation?
Do an inside-at-dusk insect test plus a flashlight leak check from outside. If you see or feel airflow at a seam, that spot likely needs re-seating rather than just cleaning up trim, because light leaking often correlates with future insect entry.
How long should a properly rescreened patio last, and what’s a realistic maintenance routine?
For standard fiberglass and correct installation, expect roughly 7 to 10 years under typical sun and weather exposure. Plan for an annual perimeter check for corner lift and spline separation, and gently clean the mesh so debris does not abrade the fibers or hide early gaps.
Step-by-step DIY guide to repair a screened patio, from torn screen patches to replacing panels and re-tensioning for a
Step-by-step DIY guide to replace patio screen panels or door screens, with measuring, tools, install, and troubleshooti

Practical DIY layout and decor tips to widen a long narrow patio using zoning, furniture spacing, lighting, greenery, an