
A 'patio knife' means two different things depending on who you ask. In garden centers and hardware stores, it refers to a long-handled weeding tool designed to clear moss and weeds from the joints between pavers. But in screened patio and enclosure DIY work, the term is used loosely to describe any hand-cutting or scraping tool you reach for on the job: utility knives, snap-off knives, hook blades, razor scrapers, and carpet knives. This article covers the second definition, because if you are replacing screen mesh, trimming awning fabric, removing old caulk, or fitting weatherstripping on your patio enclosure, these are the tools that actually get the work done safely and cleanly.
How to Use a Patio Knife: Guide for Screening, Sealing & Trimming

Felix Brennan
8 Aug 2026
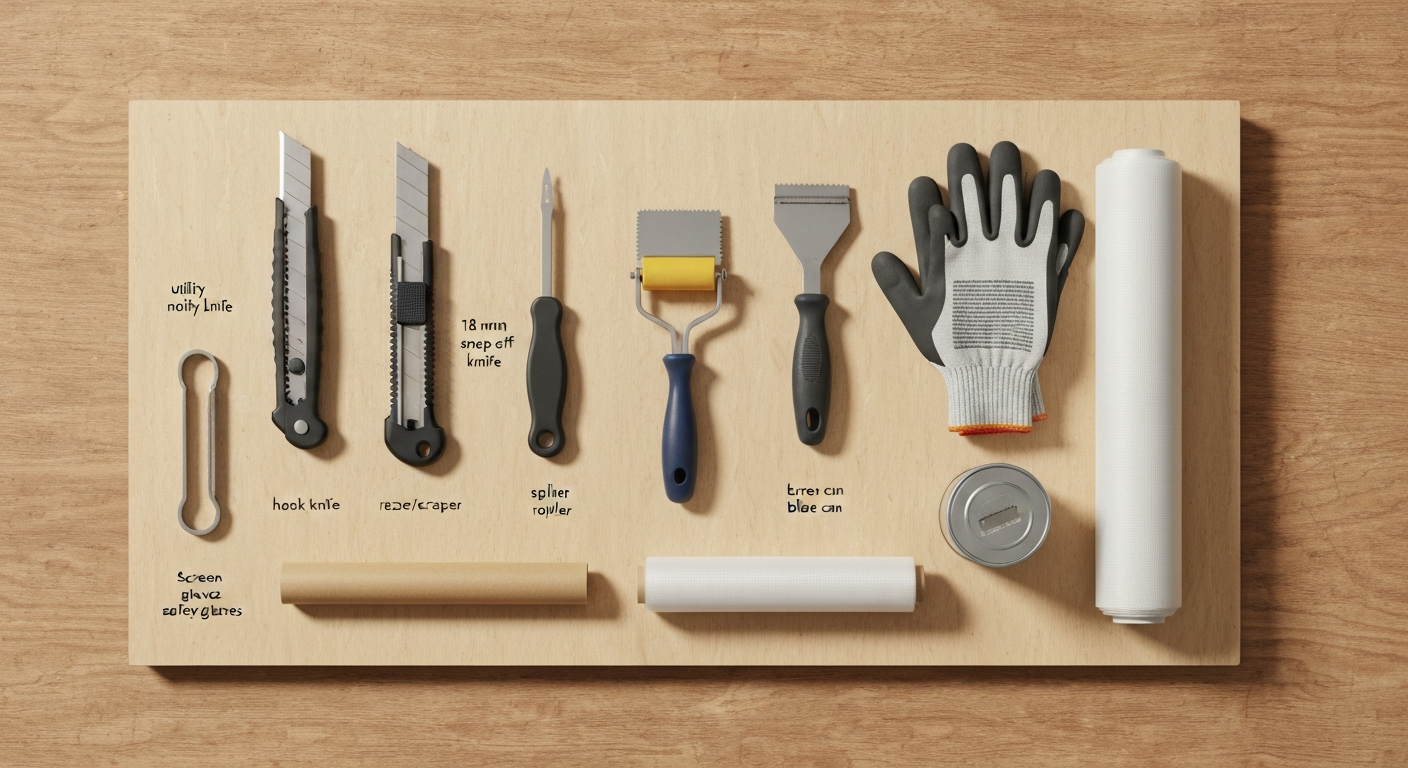
What exactly is a patio knife?
The garden-style patio knife, sold by brands like DeWit and Spear & Jackson, is a narrow, flat-bladed hand tool with a long handle used to slice roots and scrape debris from between patio pavers or flagstone joints. It is a legitimate and useful tool for that specific outdoor maintenance task. However, when homeowners and DIY communities talk about using a 'patio knife' for screened enclosure work, they are really describing a family of cutting and scraping hand tools. Utility knives, snap-off blade knives (like those from OLFA), hook knives, razor scrapers with replaceable blades, and carpet knives all get lumped under the umbrella. For this article, we will treat 'patio knife' as that full family, because matching the right blade to the specific patio task is what separates a clean, safe job from a frustrating one.
Who should use one, and when
Any homeowner handling screened patio maintenance or enclosure upgrades will reach for one of these tools at some point. If you are re-screening a porch panel, trimming a shade sail, pulling old caulk from door frames, fitting a backer rod before resealing expansion joints, or scraping adhesive residue off a concrete threshold, you need a cutting or scraping blade in your hand. These are not contractor-only tasks. They are exactly the kind of seasonal DIY work that comes up every spring and fall when you are prepping your patio for heavy use or battening it down for winter.
The most common moments to reach for one of these tools include: replacing damaged or sagging screen mesh in a porch frame, trimming outdoor carpet or patio mat to fit an irregular space, removing cracked or peeling caulk from window frames and enclosure joints before resealing, cutting weatherstripping to length, and scraping old adhesive off concrete or aluminum frames after removing stick-on products. Patio gardeners who grow plants near their enclosure may also use the traditional paver-style patio knife for joint weeding between pavers, which is a completely separate but valid use. If you're growing container or patio tomatoes nearby, see a short guide on how to stake patio tomatoes to keep plants from brushing against enclosure frames. If you're interested in container gardening near your enclosure, see how to grow strawberries on patio for tips on planting and care. If you're into container gardening by your enclosure, see how to grow lettuce on patio for simple tips on edible plants that do well in pots near screened patios. If you grow fruit in containers near your enclosure, see our guide on how to care for patio fruit trees for pruning, watering, and winter protection tips.
Knife and blade types matched to common patio jobs
The biggest mistake most people make is grabbing whatever utility knife is closest and using it for every task. A standard utility knife blade works fine for cutting screen mesh, but it is the wrong tool for trimming thick outdoor carpet without nicking the underlayer, and it is a poor substitute for a dedicated scraper when you need to lift old caulk without gouging aluminum. Here is how the main types break down.
| Knife/Blade Type | Best Patio Uses | Key Advantage |
|---|---|---|
| Standard utility knife (retractable) | Cutting screen mesh, trimming weatherstripping, cutting backer rod | Versatile, widely available, familiar to handle |
| Snap-off blade knife (9 mm, 18 mm, 25 mm) | Screen mesh, vinyl, thin fabric, general cutting | Fresh sharp edge on demand without full blade swap; wider blades handle tougher materials |
| Hook/carpet knife blade | Trimming patio carpet, outdoor fabric, awning material, roll goods | Curved hook cuts on the pull stroke, avoids cutting through underlayers |
| Razor scraper (replaceable rectangular blade) | Removing old caulk, adhesive, paint residue from glass, tile, aluminum | Flat geometry removes thin films without rocking; replaceable blades stay sharp |
| Retractable box/scraper knife | Heavy adhesive removal, scoring paving adhesive | Rigid blade support for controlled downward pressure |
| Garden patio knife (paver tool) | Weeding between paving joints, clearing moss from pavers | Long handle keeps hands away from ground level; designed for compacted soil |
OLFA's snap-off line is worth a mention here because their blade material guide is genuinely useful for patio work. Their black carbon steel blades (LB series, 18 mm and 25 mm) are specifically recommended for heavy cutting in rubber, carpet, and vinyl, which covers most of the tough fabric trimming you will do on a patio enclosure project. Stainless blades are better for precision cuts in thinner materials. If you have never used an 18 mm snap-off blade on fiberglass screen mesh, try it: the wider blade tracks straighter and gives you more control against a straightedge than a standard thin utility blade.
Buying checklist: what to prioritize
You do not need to spend a lot. A quality utility knife runs between $10 and $25, and a good snap-off blade knife is in a similar range. A razor scraper handle with a pack of replacement blades usually costs under $15. Here is what actually matters when you are choosing tools for patio work.
- Blade locking mechanism: choose a knife with a positive blade lock, not just friction. On a patio job where you are pressing against spline or scraping caulk, the blade must not be able to retract unexpectedly.
- Retractability: a fully retractable blade is a safety essential when you are moving around a porch frame or working near screen panels. Non-retractable blades belong in a pouch only.
- Handle grip: rubber or overmolded handles are worth the small premium when your hands are dusty, sweaty, or wearing gloves. A slippery metal handle is a cut waiting to happen.
- Blade replaceability: make sure replacement blades are easy to source at hardware stores. Proprietary blade systems that only work with one brand's blades are a nuisance.
- Blade type compatibility: some utility knife handles accept both standard trapezoidal blades and hook blades, which means one handle covers two of your most common patio tasks.
- Price: for occasional DIY patio use, mid-range tools from Stanley, OLFA, or Milwaukee are sufficient. Reserve premium knives for heavy or daily use.
PPE and safe cutting technique
This section is not optional reading. Utility knife injuries are among the most common DIY hand injuries, and almost all of them follow the same pattern: the blade slips off the material or the hand gets in the path of the cut. Before you pick up any cutting tool for patio work, get your PPE sorted.
- Cut-resistant gloves (ANSI A4 or higher): standard work gloves will not stop a utility blade. Cut-resistant gloves rated A4 or above give meaningful protection without sacrificing dexterity.
- Safety glasses: trimming screen mesh and scraping adhesive both create small debris that can reach eye level, especially when you are working overhead on a porch frame.
- Knee pads: you will spend time kneeling on concrete when working on lower porch panels or outdoor carpet.
- Closed-toe shoes: dropped blades and scrapers are a real hazard on hard patio surfaces.
For cutting technique, the single most important rule is to always cut away from your body and away from your free hand. Guide the blade with a metal straightedge, never a plastic ruler or your fingers. Keep your free hand behind the blade's path, not beside or ahead of it. Use light, controlled strokes rather than one heavy pass; screen mesh and fabric cut cleanly in two or three light passes with a sharp blade far more safely than in one forced stroke. Change blades frequently: a dull blade requires more pressure, and more pressure means more danger when the blade finally bites.
Setting up your workspace before you cut
Good lighting is non-negotiable. Porch frames often sit in partial shade, and if you cannot clearly see the spline groove or the caulk line you are scoring, you will cut the wrong thing. A portable LED work light positioned to the side eliminates shadows far better than overhead porch lighting. For cutting long runs of screen mesh or outdoor fabric, a flat, clean surface is essential: a folding work table or a sheet of plywood on sawhorses works well. Do not try to cut fabric that is bunched up or hanging loose.
- Clamp your material: for fabric and screen rolls, use spring clamps or binder clips to hold the material flat before cutting.
- Use a metal straightedge: a 48-inch aluminum ruler or level works perfectly for long cuts. Hold it firmly with your non-cutting hand positioned behind the blade path.
- Clear the workspace: remove tools, spline rollers, and loose screen material before you make a cut to avoid tripping or shifting the material mid-stroke.
- Work in dry conditions: wet screen mesh and wet fabric are harder to cut cleanly and increase blade slippage risk.
- Position the frame securely: when re-screening, use C-clamps or wedges to keep the frame from sliding while you roll spline and trim excess mesh.
Step-by-step: replacing screen mesh in a patio frame
Replacing patio screen is one of the most satisfying DIY enclosure jobs because the result is immediately visible, the materials are inexpensive, and a sharp utility knife is the only blade you need. Phifer's installation guidance and This Old House both recommend the same basic process, and it works reliably on aluminum and wood porch frames. If you’re considering converting a screened patio into a growing space, see our concise guide on how to make a patio greenhouse for practical steps and materials. This Old House's article 'blank" rel="noopener noreferrer">How To Replace a Window Screen | This Old House' gives a step‑by‑step procedure for removing old spline and mesh, laying new mesh with 1–3" overhang, seating spline with a convex spline‑roller while alternating sides to tension, and trimming the excess with a utility knife.
- Gather your tools: utility knife with fresh blade, spline roller (convex wheel side for seating), awl or flat screwdriver, replacement spline matching your frame channel diameter, replacement screen mesh (18x14 or 18x16 fiberglass is standard residential; use 20x20 no-see-um mesh if tiny biting insects are a problem in your area), scissors or shears, and metal straightedge.
- Remove old spline: use an awl or the corner of a flat screwdriver to pry one end of the spline out of the groove, then pull the entire spline run out by hand. If it is stiff, a utility knife tip can help lift the edge. Pull the old mesh out and discard.
- Size your new spline: Phifer's spline chart matches spline diameter to channel groove width. Measure your channel with a ruler or calipers, then use the matching diameter. For thicker specialty fabrics like no-see-um mesh, go one size smaller than the standard match so the spline still seats fully.
- Cut the new mesh: roll the mesh over the frame leaving 1 to 3 inches of overhang on all four sides. Do not trim to exact size at this stage. Cut rough edges with shears or a utility knife.
- Seat the spline: starting at one corner, press the spline into the groove over the mesh using the convex side of the spline roller. Work one side fully, then move to the opposite side, then the remaining two sides. This alternating pattern creates even tension and prevents the frame from bowing. Keep the mesh taut as you go but do not stretch fiberglass mesh aggressively or it will distort.
- Trim the excess mesh: once all four sides of spline are fully seated, use a utility knife with a sharp blade to trim the overhang. Hold the blade against the outer edge of the spline and cut in a single smooth stroke away from you. Keep fingers behind the blade path. The spline holds the mesh edge, so trimming after seating prevents fraying and tension loss.
- Inspect the finished panel: press gently on the center of the mesh. It should feel firm and spring back without visible slack. If you see ripples or sagging at any corner, pry that section of spline out, re-tension the mesh, and re-seat.
Step-by-step: trimming outdoor fabric, awnings, and patio carpet
Outdoor fabric, awning canvas, and patio carpet all benefit from a hook blade or a fresh snap-off blade rather than a standard utility blade. The hook blade in particular is the right choice for thick roll goods because its curved geometry cuts on the pull stroke and reduces the risk of the blade skipping into an underlayer or surface you want to protect. For guidance on shaping and maintaining small ornamental trees near patios, see a short how-to on how to trim a lavender patio tree.
- Measure and mark your cut line: use a chalk line or a marker and straightedge. For awning canvas, add a 1-inch allowance beyond the finished dimension if the edge will be hemmed or folded under a retaining strip.
- Lay the material flat: on a table or clean concrete. Smooth out any wrinkles. For carpet, a sheet of scrap plywood under the cut line protects your surface and gives the blade a consistent backing.
- Choose your blade: hook blade for carpet and thick outdoor fabric; 18 mm snap-off black carbon blade for vinyl-backed fabric or awning material; standard utility blade for lighter shade cloth and nylon mesh.
- Make the cut: hold the metal straightedge firmly. For a hook blade, pull toward you in a single smooth stroke. For a snap-off blade, push away from you against the straightedge. Apply consistent, moderate pressure rather than forcing the cut.
- Seal the cut edge: for outdoor fabric and awnings, apply a thin bead of fabric sealant or a heat-sealing pen along the cut edge to prevent unraveling. For patio carpet, press a strip of heat-activated carpet edge tape under the cut edge.
- Finishing tip: for long cuts on awning material, make a shallow scoring pass first to establish a groove, then a full-depth second pass. This produces a cleaner edge than trying to cut through in one heavy stroke.
Step-by-step: removing old caulk and adhesive from frames and joints
Old caulk on patio enclosure window frames, door frames, and expansion joints needs to come off completely before you reapply sealant, or the new bead will not bond properly and will fail within a season. A razor scraper or retractable scraper knife is the right tool here, not a utility knife: the flat, wide geometry of a scraper blade removes thin films of caulk and adhesive without rocking into the substrate. When using chemical strippers for caulk or adhesive, follow NIOSH/OSHA guidance because methylene chloride is a serious inhalation hazard with documented worker fatalities; see NIOSH Pocket Guide to Chemical Hazards - Methylene chloride (CDC/NIOSH).
- Score the caulk bead first: run a fresh utility blade along both edges of the caulk bead where it meets each surface, breaking the adhesive bond on both sides. Do this with light controlled strokes, not deep cuts into the substrate.
- Pull the bulk of the caulk: grip the scored bead with pliers or your fingers and pull it away in as long a strip as possible. Silicone caulk often peels cleanly if both edges are scored; polyurethane caulk tends to break into chunks.
- Scrape the residue: hold the razor scraper at a shallow angle, roughly 20 to 30 degrees to the surface. Use firm, controlled strokes pushing away from you. Change the blade when it stops cutting cleanly; a dull scraper blade smears residue rather than lifting it.
- Clean the joint: wipe the surface with a clean cloth dampened with isopropyl alcohol or a manufacturer-recommended solvent to remove the last traces of adhesive. Do not use consumer methylene chloride products: the EPA banned consumer-use methylene chloride paint and coating removers in 2019 due to serious inhalation hazards. Follow the SDS instructions for any chemical solvent you use.
- Inspect and allow to dry: the joint must be clean, dry, and free of residue before new sealant is applied. Allow at least 30 to 60 minutes after solvent cleaning before applying new caulk.
Step-by-step: reapplying caulk and sealant with backer rod
For expansion joints and larger gaps in patio enclosures, backer rod is the right move before you apply sealant. It controls joint depth, saves sealant material, and improves the sealant's performance by allowing the correct two-point adhesion that lets the bead flex with joint movement. Sika's installation guidance recommends sizing the backer rod diameter about 1/8 inch (3 mm) larger than the joint width so it compresses into the joint and holds position.
- Measure the joint width: use calipers or a ruler. For joints up to about 1/2 inch (13 mm) deep, you may be able to apply sealant directly if the joint is shallow enough. For anything deeper than 1/2 inch, backer rod is required to avoid wasting sealant and creating an incorrectly profiled bead.
- Choose your backer rod type: closed-cell polyethylene foam is the standard choice for most patio enclosure joints because it is firm, weather-resistant, and does not absorb moisture. Open-cell foam is specified in some applications where the manufacturer requires the sealant to breathe during cure; check your sealant's technical data sheet.
- Cut backer rod to length: use a utility knife to cut the rod cleanly. It cuts easily with one stroke.
- Install backer rod: press the rod into the joint using a blunt tool like the back of a spline roller or a smooth dowel. The rod should sit below the surface by about half the joint width to allow space for the sealant bead. Do not push so deep that the rod bottoms out; it should compress slightly against the joint walls.
- Apply the sealant: gun a consistent bead of 100% silicone, polyurethane, or hybrid MS polymer sealant over the backer rod. Choose your sealant chemistry based on substrate and movement: 100% silicone performs well on aluminum frames and glass and offers high UV resistance, but it cannot be painted. Polyurethane and MS polymer hybrids are paintable and bond well to concrete and wood.
- Tool the bead: use a wet finger, a caulk tool, or a plastic spoon dipped in soapy water to smooth and concave the bead within the sealant's skin-over window. Consult the product's technical data sheet for the specific skin-over time and rain-ready window; these vary by product and temperature.
- Allow full cure before traffic or exposure: again, consult the TDS. Most silicone sealants skin over in 30 minutes to 1 hour but require 24 to 48 hours for full cure.
Installing and trimming weatherstripping and backer rod
Weatherstripping on patio doors and enclosure panels is a common seasonal maintenance task that a utility knife handles cleanly. The only real trick is getting the cuts square at the ends so the strips butt together tightly without gaps.
- Measure the door or frame opening precisely and add 1/4 inch to each piece to account for compression trim.
- Mark your cut line squarely across the weatherstrip using a speed square or combination square and a pencil.
- Use a utility knife with a fresh blade and cut in a single clean stroke across a cutting mat or scrap wood backing. For foam weatherstrip, one firm push cuts cleanly. For rubber or vinyl V-strip, score and then press through.
- Test fit before peeling the adhesive backing. The strip should compress evenly along its full length without bunching at the corners.
- For compression foam backer rod used as a gap filler (rather than a sealant backer), the same utility knife cut works well. Press the cut end flush into the joint opening so it holds its own position by compression.
Scraping paint, adhesive and residue from frames and thresholds
Aluminum patio frames, concrete thresholds, and tile surfaces around enclosures occasionally need paint or adhesive scraped before refinishing or re-tiling. A retractable razor scraper with fresh replacement blades is the right tool. The technique that prevents gouging is a shallow blade angle, around 20 to 30 degrees, combined with short strokes and frequent blade changes. Popular Mechanics and general trade guidance both emphasize that a dull blade gouges surfaces because it requires so much more downward pressure before it cuts.
- Always use a fresh blade for each scraping session: dull blades drag and dig.
- Keep the blade angle shallow, especially on soft aluminum: a steep angle turns the scraper into a chisel.
- Scrape with the grain on wood surfaces and along the length of aluminum extrusions, not across them.
- On concrete, a floor scraper with a long handle gives better leverage and keeps your back straighter than a short-handled tool.
- Wet the surface slightly when scraping water-based adhesive residue: moisture softens the bond and reduces scratching.
Blade care, maintenance, and when to replace
Patio work is tough on blades. Fiberglass screen mesh dulls a steel blade noticeably faster than cardboard, and outdoor adhesives gum up cutting edges quickly. The practical rule is simple: if the blade requires noticeably more pressure to cut than it did at the start of a task, snap off the segment (for snap-off blades) or swap the blade entirely. For scraper blades, a blade that smears residue rather than lifts it is done.
- After each use, retract the blade fully into the housing before setting the knife down.
- Wipe the blade with a dry cloth to remove adhesive residue before it hardens. For stubborn adhesive, a drop of isopropyl alcohol on the cloth loosens most residue without damaging the blade.
- Store knives horizontally in a tool roll or tray, not loose in a bucket where blades contact other metal tools and dull prematurely.
- For snap-off blades, do not attempt to sharpen spent segments. The design of the tool is that each segment is a fresh edge. Use a snap-off tool or pliers to break the segment cleanly, holding it away from your face and fingers.
- Corrosion prevention: after use in humid outdoor environments, a thin wipe of light machine oil on carbon steel blades prevents rust. Stainless blades are less susceptible but still benefit from wiping clean.
Safe blade disposal and storage
Used blades wrapped in paper or dropped loosely in a trash bag are a serious hazard to sanitation workers and anyone handling the waste. Handle this properly.
- Use a dedicated sharps or blade disposal container: most hardware stores sell small plastic blade disposal cans for a dollar or two. Keep one on your work table.
- Never place loose blades in a household trash bag, recycling bin, or toolbox pocket where they can shift and cut through materials.
- When the disposal container is full, seal it and check with your local waste authority for accepted disposal methods. Some municipalities treat blade disposal containers the same as puncture-proof sharps containers.
- For snapped segments from snap-off blades: most snap-off knives have a built-in segment storage compartment in the handle. Use it, then empty the compartment into a blade disposal can when it is full.
- At a job site or during a patio project, keep a small magnetic tool tray on your work surface to catch dropped blades before they hit the ground.
Cost and feature guidance: how much to spend
For occasional DIY patio enclosure maintenance, you do not need a professional-grade cutting tool setup. Here is a realistic spending guide based on what actually matters for the tasks covered in this article.
| Tool | Budget Range | Worth the Upgrade? |
|---|---|---|
| Standard retractable utility knife | $8–$15 | Mid-range ($12–$15) for a better blade lock; premium models add little value for occasional use |
| Snap-off blade knife (18 mm) | $10–$22 | Yes, for anyone cutting mesh or vinyl regularly; the wider blade is significantly more controllable |
| Hook/carpet knife | $10–$20 | Yes if you trim carpet or thick fabric; the blade geometry genuinely improves results |
| Razor scraper (retractable) | $8–$14 | Mid-range is fine; buy extra replacement blade packs |
| Garden patio knife (paver tool) | $18–$45 | Spend more for a forged steel blade; cheap versions bend in compacted joint material |
| Blade disposal can | $1–$3 | Always buy one; it is a safety essential, not optional |
A practical starter kit for patio enclosure DIY would include one retractable utility knife, one 18 mm snap-off knife, a razor scraper, a pack of mixed replacement blades, a blade disposal can, and a pair of cut-resistant gloves. Total cost is typically under $60 and covers every cutting and scraping task you will encounter on a standard patio screening or sealing project.
When to call a pro instead
Most patio cutting and scraping tasks are well within DIY range, but there are situations where you should put the knife down and get professional help. If you find black or green mold behind screen frames or inside enclosure wall channels, do not scrape or cut into it without proper containment; disturbing mold spreads spores and some mold species pose real health risks that require professional remediation. If removing old caulk or sealant reveals structural damage, rot, or cracked framing in the enclosure, that is a carpentry or structural repair before it is a sealing job. Any work that requires a building permit in your area (adding a permanent enclosure wall, modifying roof attachments) should involve a licensed contractor. Difficult-access areas like high overhead frames on two-story screened porches, where a fall from a ladder would be serious, are also worth hiring out rather than risking on a DIY basis.
Quick reference: task, blade, and safety reminder
| Task | Recommended Knife/Blade | Top Safety Reminder |
|---|---|---|
| Cutting and trimming screen mesh | Utility knife or 18 mm snap-off blade | Trim after spline is seated; cut away from body with a metal straightedge |
| Trimming patio carpet or thick outdoor fabric | Hook blade or 18/25 mm carbon snap-off blade | Use a plywood backer; pull hook blade toward you in a single stroke |
| Trimming awning or shade fabric | 18 mm snap-off or standard utility blade | Mark and clamp material flat before cutting; seal cut edge immediately |
| Removing old caulk (scoring) | Fresh utility blade | Score both edges of bead before pulling; shallow angle, light pressure |
| Scraping adhesive or paint residue | Retractable razor scraper | Keep blade angle at 20–30 degrees; change blade when dragging begins |
| Installing backer rod | Utility knife for length cuts | Size rod 1/8" larger than joint width; do not bottom out in joint |
| Applying and tooling sealant bead | Caulk gun + gloved finger or caulk tool | Tool within skin-over window per product TDS; never use methylene chloride removers |
| Cutting weatherstripping to length | Utility knife on a cutting mat | Cut square using a speed square guide; test fit before adhering |
| Scraping paint from aluminum frames | Razor scraper, fresh blade | Low angle, short strokes along the extrusion; do not dig into soft aluminum |
| Weeding paver joints | Garden patio knife (DeWit/Spear & Jackson style) | Keep handle grip dry; do not use as a pry bar on loose pavers |
FAQ
What do you mean by “patio knife” for screened‑patio and patio‑enclosure DIY work?
In this context “patio knife” is a practical, user‑friendly label—not an industry standard—for the small cutting and scraping tools homeowners use on screening, sealing and trim tasks. Typical tools used for those jobs are: retractable utility knives (single‑edge or double‑edged/snap‑off blades), hook/carpet knives for trimming roll goods, razor/box scrapers for adhesive and caulk removal, and rigid scrapers for paint or heavy adhesive. (Note: some hardware stores sell a garden/paver tool called a “patio knife,” but screening/enclosure work relies on the utility/scraper family above.)
Which knife and blade styles match common screened‑patio tasks?
Match blade geometry and material to the task: - Cutting screen mesh: sharp utility knife or heavy scissors/shears; 9–18 mm single‑edge or snap‑off blades work well. - Seating/trimming spline: utility knife (single‑edge) for final trim. - Trimming shade/awning fabric or outdoor carpet: hook/carpet knife or snap‑off blades (black/carbon blades for heavy material). - Removing old caulk/adhesive: razor/box scraper with replaceable rectangular blades or carbide‑tipped scraper for stubborn residue. - Scraping paint or adhesive from frames: rigid scraper with appropriate blade steel (stainless for non‑corrosive, carbon/carbide for heavy duty). Choose blade width (9/18/25 mm) and steel type per leverage and material toughness; carbon/tool‑steel for heavy materials, stainless for rust‑resistance and fine work.
What PPE and safe cutting techniques should I follow?
Wear cut‑resistant gloves (level 3–5 for knife work), safety glasses, and dust mask if scraping paint/old caulk. Always cut away from your body and hands; secure the workpiece to prevent slipping. Use a firm, controlled stroke and avoid excessive force—change blades often so you don’t force a dull blade. Retract blades or use blade guards when not cutting. For overhead or ladder work, use both hands for stability, keep the knife tethered if working at height, and don’t overreach.
Step‑by‑step: replacing a screen (frame screening) with safety notes
1) Remove frame and lay on a flat surface. 2) Pry out old spline with an awl, flat screwdriver or spline‑removal tool; wear eye protection (old spline can snap). 3) Remove old mesh and clean frame channel. 4) Lay new mesh over frame with 1–3" overhang. 5) Starting at a corner, press spline into the channel with a convex spline roller; seat alternating sides/opposite corners to tension evenly—don’t overstretch. 6) After spline is fully seated, trim excess mesh with a fresh utility blade held at a shallow angle; cut toward the spline, not into the channel. 7) Inspect corners and reassemble. Safety: keep fingers away from roller path and use gloves when possible; change blades if tearing/fraying occurs.
Step‑by‑step: removing and reapplying patio caulk and backer rod
1) Remove old sealant: cut surface bead with a utility knife or razor scraper, then scrape residue with a rigid/replaceable‑blade scraper. Use solvent only if compatible and follow SDS; avoid methylene‑chloride strippers. 2) Clean joint of debris and allow to dry. 3) Select backer rod diameter ~1/8" larger than joint width and push it into the joint to proper depth (compress 20–30%); closed‑cell is common for non‑wettable applications—follow manufacturer guidance. 4) Mask edges if needed. 5) Apply compatible sealant (100% silicone, polyurethane or hybrid) sized to joint width/depth per TDS: maintain correct bond‑breaker/backer rod depth so sealant bonds to two surfaces only. 6) Tool the bead for adhesion and finish. Safety: use gloves, eye protection, and appropriate ventilation for solvent primers or sealant fumes; consult product TDS for cure/temperature limits.
Step‑by‑step: trimming outdoor fabric and carpet
answer 1) Lay material flat and mark cut line. 2) Use a hooked or heavy‑duty utility knife with a sharp/carbon blade; pull fabric taut and cut in long, continuous strokes—multiple light passes beat forcing one thick cut. 3) For carpet backing, cut from the exposed top surface so the hook blade grabs the roll; avoid nicking underlying frame or surfaces. 4) Finish raw edges per manufacturer (hem, seam tape, or adhesive) to prevent fraying. Safety: use knee pads if cutting on floor, cut away from your body, and change blades frequently to keep cuts clean.
Next Articles
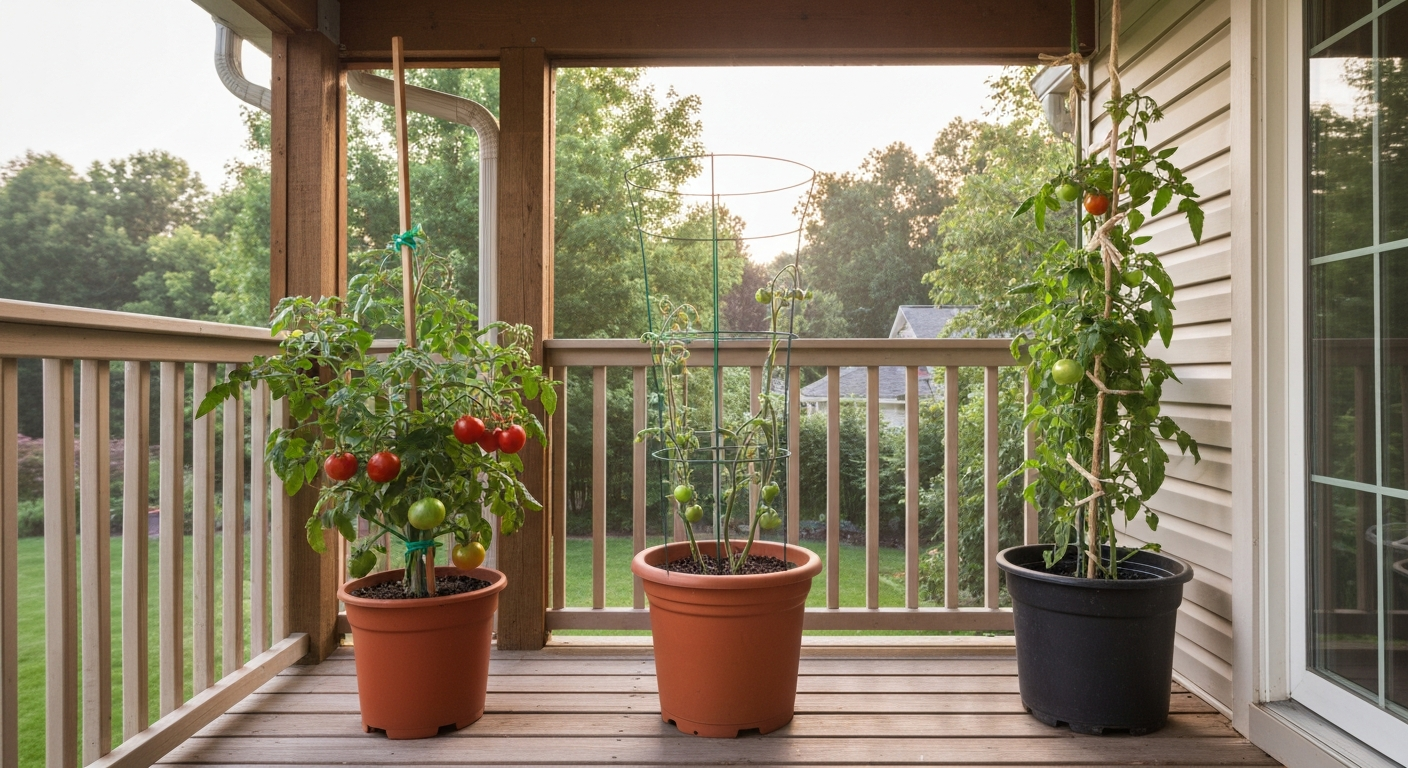
How to Stake Patio Tomatoes: Best DIY Methods for Containers
Step-by-step patio tomato staking: cages, trellises, strings, anchors, pruning, watering, windproofing.
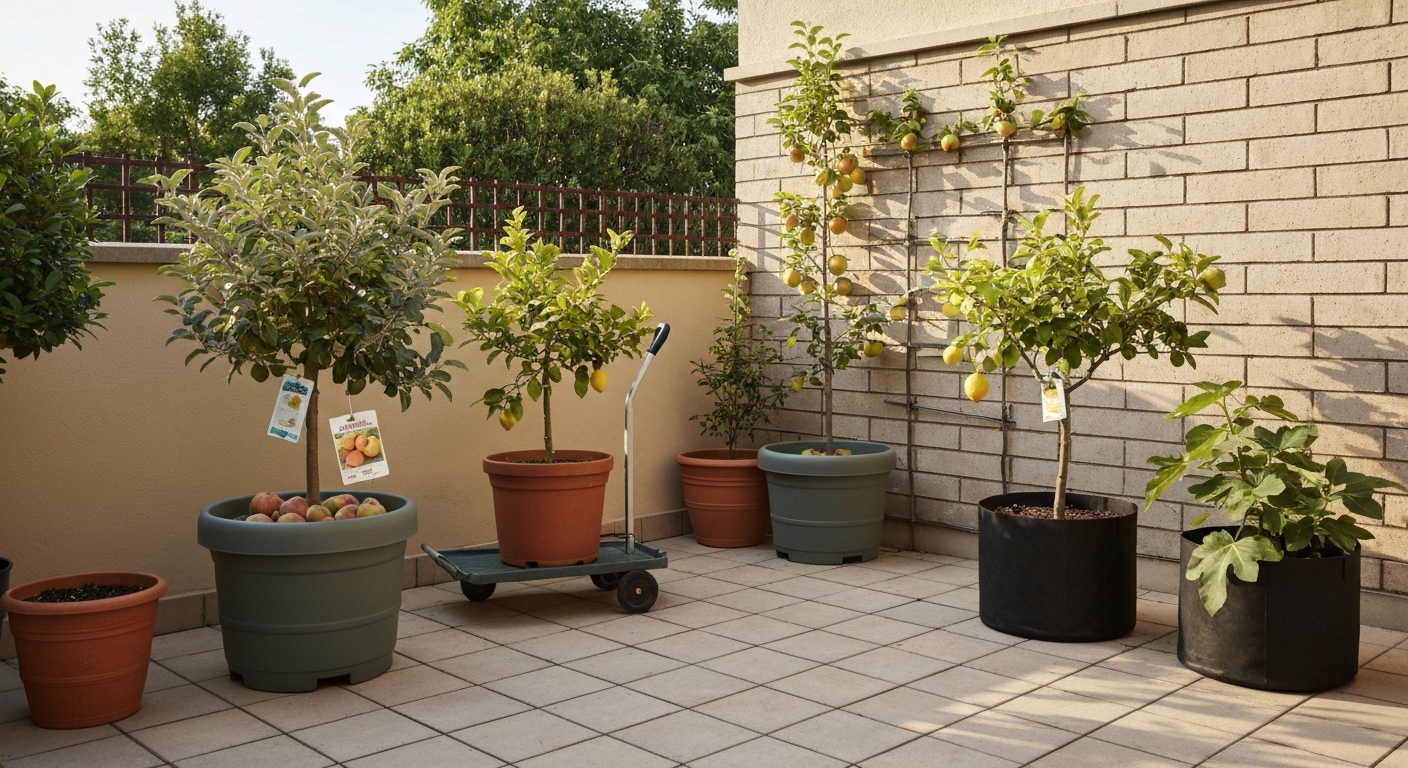
How to Care for Patio Fruit Trees: Complete Guide to Growing
Patio fruit tree care: choose dwarf varieties, right pots & soil; water, prune, protect, pollinate & harvest.

How to Grow Lettuce on a Patio: Step-by-Step Guide
Step-by-step patio lettuce in containers: varieties, sun and soil setup, watering, feeding, pest fixes, and harvest timi