
The best patio cover depends on three things: how much rain and sun you're dealing with, whether you own the space, and how permanent you want the result to be. Solid attached roofs and aluminum patio covers give you the most protection for year-round use. Pergolas and louvered roofs give you filtered shade with an open feel. Awnings, shade sails, and canopies handle lighter shade needs at lower cost and less commitment. For sides and privacy, you can use screens, roll-up shades, curtains, or lattice depending on your budget and how enclosed you want the space to feel. This guide walks through every realistic option so you can land on the right one for your yard, your wallet, and your skill level. For a quick list of options and pros and cons, see our guide on what can i cover my patio with.
What to Cover Patio With: Best DIY Covers, Costs & Maintenance

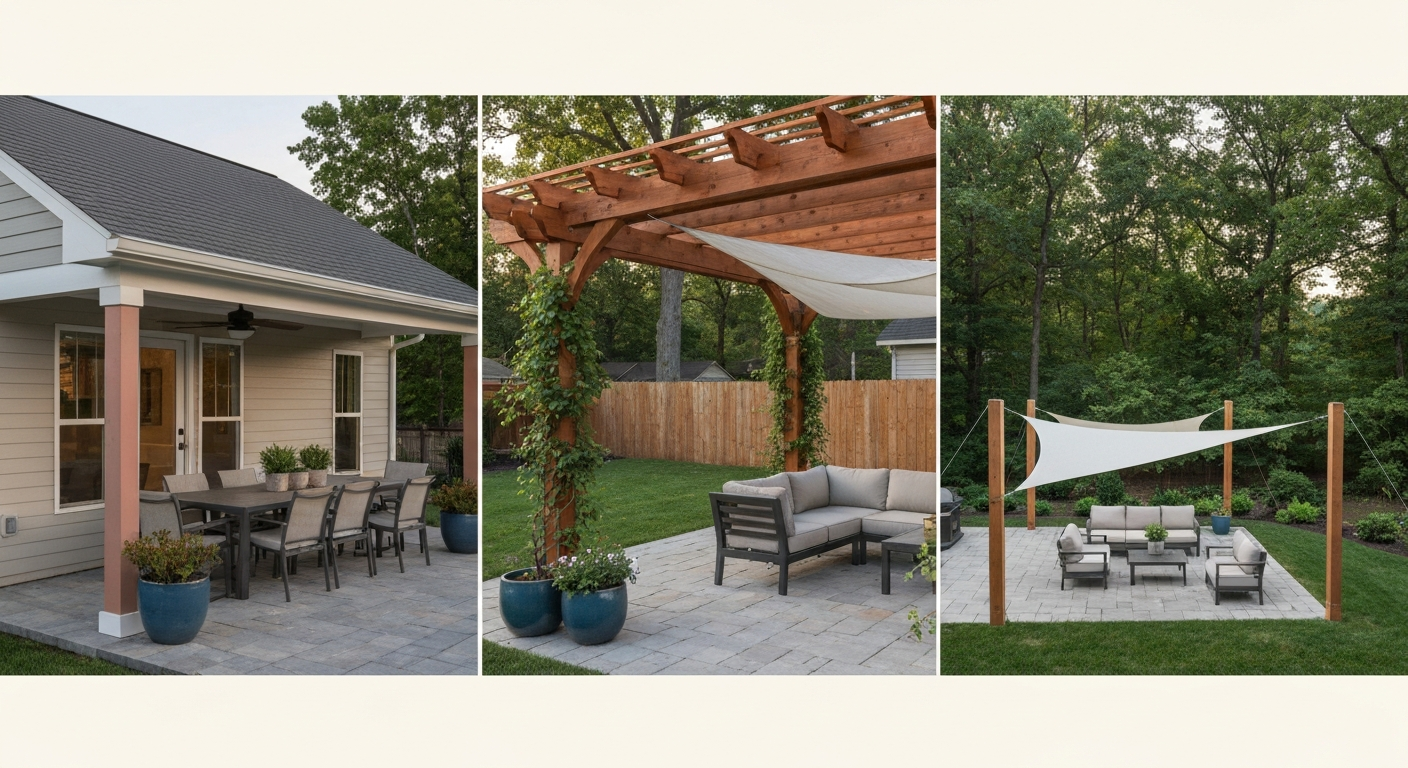
Who This Guide Is For (And What It Doesn't Cover)
This article is written for homeowners and renters who want to physically cover, shade, or enclose an outdoor patio. Whether you're planning a full attached roof over a back patio, looking for a quick temporary shade fix for an apartment balcony, or trying to figure out the difference between a pergola and a patio cover, you're in the right place. We cover overhead options, side privacy solutions, renter-friendly installs, and small-patio strategies. If you're trying to build a covered patio in Sims 4, that's a different kind of project entirely and not something this guide addresses. The game has its own tools and tutorials that have nothing to do with real-world construction.
Make This Decision Before You Buy Anything
A lot of people skip straight to browsing pergola kits or awning prices before they've answered the basic questions that actually determine which cover makes sense. Run through this checklist first and you'll save yourself a lot of time and potentially a lot of money.
- Site type: Is your patio attached to the house (back patio with a wall to tie into) or freestanding in the yard? Attached covers can borrow structural support from the house; freestanding ones need posts and independent footings.
- Budget range: Are you working with a few hundred dollars (temporary/fabric solutions) or several thousand (structural covers)? Most installed solid patio covers run $20–$50 per square foot, putting a 12x16 project in the $3,800–$9,600 range before options.
- Permanence: Do you want something you build once and forget about, or something you can take down or adjust seasonally? Permanent means permits and footings; temporary means flexibility but less durability.
- DIY skill: Are you comfortable with basic framing, post-setting, and a drill? Or are you looking for a no-tools solution? Be honest here. Underestimating a structural project is how people get hurt.
- Permit triggers: In most U.S. jurisdictions, any attached, roofed structure that alters the exterior envelope of the house requires a building permit. Check with your local building department before you break ground. Freestanding structures and open pergolas often (but not always) slip under permit thresholds, but this varies by city and county.
- Climate: If you're in a high-wind or heavy-snow zone, lightweight fabric covers like shade sails are not a long-term solution. If you're in a hot, dry climate with minimal rain, a shade sail or open pergola may be all you need.
- Rental or ownership: Renters need reversible, no-damage solutions. Drilling into a wall or setting concrete footings is off the table without landlord approval.
All the Main Options at a Glance
| Cover Type | Rain Protection | Shade | Permanence | Approx. Cost Range | Permit Likely? | DIY Friendly? |
|---|---|---|---|---|---|---|
| Solid attached roof (wood/aluminum) | Full | Full | Permanent | $4,000–$20,000+ installed | Yes, usually | Moderate–advanced |
| Polycarbonate panel roof | Full | Partial (translucent) | Permanent | $3,000–$12,000 installed | Yes, usually | Moderate |
| Open pergola (wood or aluminum) | None | Partial/filtered | Permanent | $2,500–$10,000+ installed | Sometimes | Moderate |
| Louvered/adjustable roof pergola | Partial–full (when closed) | Adjustable | Permanent | $8,000–$30,000+ installed | Yes, usually | Advanced or pro |
| Retractable awning | Light rain only | Good when extended | Semi-permanent | $1,000–$6,000+ installed | Rarely | Moderate |
| Fixed/stationary awning | Moderate | Good | Semi-permanent | $800–$4,000 installed | Rarely | Moderate |
| Shade sail | None (unless laminated) | Good | Seasonal/removable | $100–$600 DIY | Rarely | Easy |
| Pop-up canopy | Light only | Good | Temporary | $100–$400 | No | Very easy |
| Freestanding canopy frame | Moderate | Good | Semi-permanent | $300–$1,500 | Rarely | Easy–moderate |
Solid Overhead Roofs and Attached Patio Covers
If you want year-round use, weather protection for an outdoor kitchen, or a cover that genuinely feels like a room, a solid overhead roof is the right category. These range from a simple lean-to shed roof tied to the house wall all the way to a full gable roof with its own ridge beam. The three most common residential configurations are the flat/single-slope lean-to (simplest, lowest cost), the attached gable (pitched roof that matches the house), and the freestanding solid cover on four posts.
Material Options for the Roof Itself
For the framing, pressure-treated lumber is the standard workhorse for above-ground applications and can last multiple decades when properly installed with the right UC (Use Category) rating for your exposure. Cedar and redwood have natural decay resistance and look beautiful but cost more and have a shorter service life than dense tropical hardwoods. Aluminum patio cover kits are a popular mid-range option: they're lightweight, rust-proof, and come in pre-engineered systems that simplify the build. For the roof surface, you have a few solid choices. Asphalt shingles or metal roofing match the house and give full rain protection. Polycarbonate multiwall or corrugated panels are a smart alternative when you want natural light to come through: quality UV-coated polycarbonate is commonly warranted for 10–20 years and handles impact well. They're not as solid-feeling as wood and shingles, but they're dramatically easier for a solo DIYer to handle and cut.
Ledger Attachment: The Part That Matters Most
For any attached cover, how you connect it to the house wall is the structural detail that most DIYers underestimate. The ledger board carries the load from the roof back to the house structure and it has to be done right. Use through-bolts or structural ledger screws (never toenails), install proper flashing above the ledger to stop water from running behind it, and match your fastener pattern to the span and load. The IRC R507 deck/ledger provisions are the code baseline most U.S. jurisdictions follow. If your local building department reviews the project, they'll check the ledger connection first. Hardware like structural ledger screws (Simpson or equivalent) makes this easier and more predictable than lag bolts drilled by hand. If you're uncertain about the connection to your specific wall type (especially if it's a stucco or brick exterior), talk to a structural engineer or your building department before you frame anything.
Footings and Posts for Freestanding Covers
Freestanding solid covers need posts and footings. IRC R403 provides prescriptive footing sizing guidance, but your local jurisdiction may have additional requirements based on frost depth. In freeze-thaw climates, footings typically need to go below the frost line (which can be 3–4 feet in northern states). Use post bases rather than setting wood directly in concrete to keep the post end dry and extend its life. A general rule for 4x4 or 6x6 post spacing: keep spans under 8–10 feet unless you've sized your beams for longer spans. When in doubt, add a post.
Pergolas and Louvered Roof Systems
A pergola gives you structure and filtered shade without enclosing the sky. Open-top pergolas with rafters or lattice overhead are one of the most popular patio projects precisely because they're achievable for an intermediate DIYer and dramatically change how a patio feels without requiring a full roofing job. The trade-off: they don't keep rain out. If your main frustration is direct sun rather than rain, a pergola is a practical and attractive solution. Add a shade canopy, shade cloth, or climbing plants between the rafters and you get more shade without losing the open feel.
Louvered Pergola Roofs
Motorized louvered pergola systems (brands like StruXure, Renson, or Equinox) let you tilt aluminum louvers to adjust sun angle and close them completely when it rains. They're the most versatile single overhead solution available, and also the most expensive, commonly running $8,000 to $30,000 or more installed depending on size, brand, and add-ons like integrated lighting and ceiling fans. Most louvered systems are designed for professional installation. If you're comparing a louvered roof to a solid cover, the louvered system wins on flexibility and aesthetics; the solid cover wins on cost and simplicity.
Maintaining a Wood Pergola
Cedar and redwood pergolas need cleaning and a UV-protective sealer or stain every 2–3 years to maintain their appearance and slow surface checking. Pressure-treated pine pergolas benefit from a water-repellent sealer applied after the initial drying period (usually 6–12 months after install). Check post bases annually for standing water or debris accumulation. Aluminum pergola kits need very little maintenance beyond the occasional rinse and inspection of fasteners.
Awnings: Retractable vs. Fixed
Awnings are the most practical semi-permanent overhead shade option for patios where you don't want to build a structure. They mount to the wall above a door or window, extend out over the patio, and keep direct sun (and light rain) off the space below. The main choice is between retractable and fixed.
Retractable Awnings
Retractable awnings roll up when not in use, which protects the fabric and extends its life. Manual crank models are the budget option and are completely DIY-installable for most homeowners. Motorized models add convenience and wind sensors that auto-retract in gusts, but they cost more and add a component that can need servicing. Expect to pay roughly $1,000 to $6,000 or more installed for a quality motorized system depending on width and projection. Fabric lifespan varies a lot: quality solution-dyed acrylic fabrics (Sunbrella and similar) are the industry benchmark for UV and fade resistance, mildew resistance, and cleanability. With a good fabric and proper retraction when not in use, a retractable awning can realistically last 5–15 years. The biggest mistake we see is leaving a retractable awning extended during storms. These systems are not built to handle high winds extended, and a single windstorm can destroy a frame and fabric that would otherwise last a decade.
Fixed Awnings
Fixed awnings are simpler, lower cost, and provide consistent shade without any operation. They're a good fit for south or west-facing patios where you always want shade in the afternoon. The downside is that they're always out, which exposes the fabric year-round and can shorten its life compared to a retractable. They also can't be adjusted for different sun angles or seasons. If you're in a climate with heavy winter precipitation or snow, a retractable (or a solid cover) is the smarter long-term choice over a fixed fabric awning.
Canopies, Pop-Up Frames, and Shade Sails
If you're not ready to commit to a permanent or semi-permanent structure, these three options give you meaningful shade at low cost and low effort.
Shade Sails
Shade sails are triangular or rectangular fabric panels tensioned between anchor points (posts, trees, or house walls). They look clean and modern, cost $100–$600 for a quality sail, and are one of the easiest DIY shade projects available. The anchors are the part that requires thought: each attachment point carries concentrated load from the tensioned fabric, especially in wind, so anchor into solid structure (lag into a wall stud or use a properly set post in concrete, not a fence board). Most shade sails are not waterproof. Standard knitted HDPE shade cloth sheds some rain but will let heavier rain through. Laminated or PVC shade sails offer more water resistance but aren't a substitute for a roof. Manufacturers consistently advise removing or de-tensioning shade sails in high winds. If you're in a storm-prone area, expect to take the sail down seasonally.
Pop-Up Canopies and Freestanding Canopy Frames
Pop-up canopies (the folding tent-style frames you see at events) are genuinely temporary. They're great for a single-day party or a weekend project but they are not engineered for sustained wind and manufacturers are clear that you should not leave occupants under them in gusty conditions. Anchor them with manufacturer-approved weights or stakes when in use and take them down when you're done. Freestanding canopy frames with a more rigid structure and a proper fabric top are a step up: they're semi-permanent, can often accept replacement canopy tops, and work well for apartment patios or rental situations where you can't attach to the building. They're still not a substitute for a structural cover in a high-wind or heavy-snow zone.
Side and Privacy Options
Covering the top of a patio is only part of the equation. For many people, side privacy and insect control matter as much as shade. Here's what actually works. For step-by-step options on how to cover patio sides, see our detailed guide.
Screens and Screen Systems
Framed screen panels are the classic solution for enclosing a patio's sides. Fiberglass screen in a standard 18x16 mesh is the most common for insect control and gives you good visibility and airflow. If you want more insect exclusion for very small bugs (no-see-ums, gnats), 20x20 mesh is tighter and blocks more. Solar screen mesh (like Phifer SunTex) is a PVC-coated polyester that blocks 65–90% of solar radiation and gives significant privacy from outside, but it reduces your outward view. BetterVue or similar fine fiberglass meshes maximize view-through and insect protection but do less for solar blocking. For a screened patio build, you'll typically build a simple 2x4 or aluminum frame, stretch and spline the screen into the frame, and panel the perimeter. It's one of the most achievable DIY projects on a patio.
Roll-Up Solar Shades and Outdoor Curtains
Roll-up solar shades hang from a header (often the beam of a pergola or the edge of a covered roof) and roll down to block sun, wind, and view. They're a flexible solution because you can deploy them only when needed and they're relatively easy to install. Outdoor curtains made from solution-dyed acrylic or other UV-resistant fabrics work similarly and add a softer, more decorative look. Both options do best with a header to hang from, which means they pair naturally with a pergola or covered roof rather than being a standalone solution.
Lattice, Privacy Panels, and Glass Panels
Wood or vinyl lattice panels attached to a patio frame give partial privacy and wind screening while still allowing air movement. They're a good budget option and easy to cut and install. For a more finished look, composite privacy panels or cedar board-and-batten panels work well on a pergola's sides. Tempered glass or clear acrylic panels give maximum wind protection while preserving views, and are a popular upgrade for coastal or cold climates where you want to enclose a patio without making it feel like an indoor room. Glass panel systems cost more and need proper framing to manage the weight.
If You Rent: No-Damage Solutions That Actually Work
Renting doesn't mean you're stuck with an exposed patio. The key constraint is that you can't permanently alter the structure, which rules out lag screws into walls, concrete footings, and anything that leaves holes or marks. Here's what you can do without triggering a security deposit dispute.
- Freestanding canopy frames: Set them on the patio surface, weight the bases with sandbags or purpose-made weights, and remove when your lease ends. No drilling required.
- Tension-pole room dividers and outdoor privacy screens: Freestanding frames that use tension legs to press against a floor and ceiling. These work on covered balconies with an overhead surface to press against.
- No-drill shade sails: You can tension shade sails between freestanding weighted posts rather than drilling into walls. The geometry needs to be workable (enough open space), but it's a clean solution for apartment patios and balconies.
- Outdoor curtain tension rods: Tension rods fit inside a door frame or between two surfaces without any hardware penetrations. Pair with outdoor curtain panels for shade and privacy.
- Weighted umbrella bases: A large offset patio umbrella on a heavy weighted base covers a surprising amount of surface area and moves when you need it to.
Covering an apartment or condo patio has a specific set of constraints worth digging into carefully, especially when your balcony overhead is another unit's floor rather than open sky. For step-by-step renter-friendly methods, see how to cover an apartment patio. The side solutions above combine well with whatever shade you can manage overhead.
Small Patios: Getting Cover Right Without Crowding the Space
Small patios (think 8x10 feet or under) have their own challenges: a shade structure that's too big overwhelms the space visually, and anything that requires multiple posts eats into usable floor area. A few approaches work particularly well here.
- Offset patio umbrella: A single cantilevered umbrella with a weighted base covers a small patio without any center post. Look for a base weight of at least 50 lbs for wind stability.
- Wall-mounted retractable awning: Attaches directly to the house wall above the patio door and extends out over the space. No posts on the patio floor at all, which keeps the footprint completely open.
- Single-post shade sail: One corner anchors to the house wall (or a single post at the edge of the space), and the other two corners attach to posts at the patio's far corners. You only need two posts maximum.
- Compact pergola kit: Several manufacturers make pergola kits sized for small patios (8x8, 8x10) with four posts and minimal overhead bulk. These pair well with a shade canopy insert or shade cloth draped across the rafters.
- Multi-use fixtures: A ceiling fan with a light kit mounted to a pergola overhead does double duty. On a small covered patio, this keeps you from adding a floor lamp and a separate fan, which would crowd the space.
The layout principle for small patios is to build overhead and keep the floor clear. Every structural post that lands on the patio surface costs you usable square footage, so minimize them wherever the structure allows. A small patio-specific approach is worth thinking through carefully before you commit to a design. For step-by-step advice on how to cover a small patio without crowding the space, see our guide on how to cover a small patio.
Back Patios and Attached Covers: Structural and Drainage Details
A back patio attached to the house is the most common project scenario, and it comes with a few structural and drainage details you need to get right before construction starts.
Tying Into the House Structure
The ledger board is where the cover connects to the house. We covered the fastening requirements in the solid roof section above, but one additional point bears repeating: your flashing detail at the ledger is where most moisture problems start on attached covers. Water runs down the wall, hits the ledger, and if there's no flashing directing it away, it migrates behind the siding or stucco and starts rotting the wall framing. Use metal step flashing tucked under the siding course above the ledger, or a continuous piece of sheet metal flashing with a backward kick against the wall. Caulk alone is not a long-term solution here.
Drainage from the Roof
If your patio cover has a solid roof, water has to go somewhere. Slope the roof a minimum of 1/4 inch per foot away from the house. Add a gutter at the low (outer) edge with downspouts that direct water away from the foundation. Don't let a patio cover roof sheet water directly onto the patio surface or adjacent landscaping without a proper drainage path. On lean-to covers where the low edge is at the outer posts, a simple fascia-mounted gutter and two downspouts handle a typical residential patio without issue.
Integration with the House Appearance
A well-integrated attached cover uses roof pitch and materials that match or complement the house. A cover that looks like an afterthought can affect curb appeal and even property value. The most natural-looking result pitches the cover's roof to match the house's existing pitch and uses the same roofing material. This is worth considering from the start rather than trying to match an aluminum kit panel roof to a tile house after the fact. Matching trim profiles, fascia color, and column style to the house exterior brings the whole project together. The how-to-cover-back-patio design process is worth working through deliberately if you're tackling an attached project.
Permits: Don't Skip This Step
We've mentioned permits throughout this guide and it's worth one direct statement: most U.S. jurisdictions require a building permit for any attached patio cover with a roof, and many require permits for freestanding covered structures above a certain square footage. Permit fees vary by municipality (some cities list patio covers as a specific line item in their fee schedules), but the cost of a permit is a fraction of the cost of having to tear out unpermitted work. Check with your local building department before you break ground. Bring your rough dimensions, your site plan, and a sketch of the structure you're planning. Most building department staff will tell you quickly what's required. Code-compliant work also protects your homeowner's insurance coverage in the event of a claim.
Choosing the Right Cover: A Quick Recommendation by Situation
| Your Situation | Best Cover Option | Why |
|---|---|---|
| Year-round use, outdoor kitchen, full weather protection | Solid attached roof (framed wood or aluminum kit) | Handles rain, wind, and heat; permanent and structurally robust |
| Want shade and open feel, dry climate | Open pergola with shade cloth or canopy insert | Lower cost than solid roof, achievable DIY build, good aesthetics |
| Want adjustable sun/rain control, higher budget | Louvered motorized pergola roof | Maximum flexibility; closes for rain, opens for breeze |
| Temporary or seasonal shade, low budget | Shade sail or offset umbrella | Fast, inexpensive, easy to remove or reposition |
| Renter or no-drill situation | Freestanding weighted canopy frame or offset umbrella | No permanent attachment to structure required |
| Small patio, want to keep floor space open | Wall-mounted retractable awning or offset umbrella | No posts on the patio floor; maximizes usable area |
| Insect control and enclosure | Framed screen panels with spline mesh | Keeps bugs out, maintains airflow, DIY-achievable |
Before You Start Building: Your Project Prep Checklist
- Measure your patio accurately: length, width, and height from the patio surface to any overhead obstructions or the eave line of the house. Write these down.
- Check your local building department's website for permit requirements for patio covers, accessory structures, and attached roofs in your jurisdiction.
- Identify your attachment points: if attaching to the house, locate wall studs or rim joist with a stud finder before you plan the ledger location.
- Assess your roof slope needs: will rain drain away from the house naturally with your planned design? Minimum slope is 1/4 inch per foot.
- Decide on materials based on your climate: heavy snow load zones need engineered spans; high-wind zones need robust post anchoring and secure fabric attachment.
- Price out at least two material options (for example, wood frame vs. aluminum kit) before committing. Get local lumber and hardware pricing rather than relying on national averages.
- Identify your tools: at minimum you'll need a drill/driver, circular saw, level, tape measure, and post hole digger for any structural project. Rent what you don't own.
- Sketch your design to scale on paper or a free tool like SketchUp Free before buying materials. Catching a measurement error on paper is free; catching it after cutting lumber is not.
Covering a patio is one of the highest-return DIY projects you can take on because the result is usable space you'll enjoy every day. Start with the checklist, land on the right cover type for your situation, and build it correctly from the foundation up. Aggregated 2026 industry surveys show most full installed patio covers commonly fall in the $4,000–$20,000+ range, with basic aluminum patio cover kits often starting at several thousand dollars blank" rel="noopener noreferrer">How Much Will It Cost to Cover a Patio? (pricing guide / aggregated 2026 data). The rest of this site goes deep on screened enclosures, specific patio design layouts, and the kind of finishing details that turn a basic covered patio into an outdoor room you actually want to spend time in. For a step-by-step walkthrough on planning layout, materials, and construction details, see our how to design a covered patio guide.
FAQ
Which patio cover type should I choose for my site, budget, and DIY skill level?
Match cover performance to needs: Solid patio covers (attached or freestanding) give full rain and sun protection — best for year‑round use, outdoor kitchens, and higher resale value; expect higher cost and likely permit/structural work. Pergolas provide filtered/partial shade and an open look; good for moderate budgets and DIYers but won’t keep rain out. Retractable or fixed awnings offer flexible shade and can be renter‑friendly for some installs; motorized units cost more but add convenience. Shade sails and tensile fabrics are low‑cost, modern options for sunny climates but are not waterproof and need secure anchors and wind management. Pop‑up or freestanding canopies are temporary — good for renters or short‑term needs but not a long‑term roof. Choose by site: small patios often benefit from awnings, retractable roofs, or compact pergolas; attached back patios typically suit solid covers or pergolas; apartment balconies usually need renter‑friendly, non‑penetrating solutions (tension‑pole canopies, no‑drill shades).
What are the pros and cons of the main overhead cover types?
Solid patio cover: Pros — full weather protection, durable (with proper materials), supports lighting/heating; Cons — higher cost, permitting/structural work often required. Pergola: Pros — aesthetic, lighter permitting, lower cost, DIY‑friendly; Cons — no full rain protection. Retractable awning: Pros — flexible shade, saves space, can be motorized; Cons — limited lifespan (5–15 years typical), maintenance and higher upfront for motorized units. Shade sail/canopy: Pros — low cost, modern look, quick install; Cons — not waterproof, wind load on anchors, remove or de‑tension in high winds. Pop‑up/freestanding canopy: Pros — temporary, renter‑friendly; Cons — not engineered for heavy wind/rain and not a permanent roof.
How much do patio covers cost (ballpark figures)?
Typical installed ranges used for planning: basic aluminum or kit covers often quote $20–$50 per sq ft (varies by material and region). Small installed projects commonly start in the low thousands; many full installed covers fall between $4,000–$20,000+. Retractable awnings vary widely: manual units can be a few hundred dollars installed; motorized or large systems commonly run $1,000–$6,000+ installed. Shade sails and simple canopies are low‑cost (hundreds to low thousands) depending on fabric and anchors.
What materials are best for durability and maintenance?
Long‑life choices: polycarbonate panels (multiwall/corrugated) — good light transmission, impact resistance, UV coatings; expected 10–20+ years for quality products. Solution‑dyed acrylic fabrics (e.g., Sunbrella) are top for awnings/curtains — UV/fade and mildew resistant but not fully waterproof unless coated. Wood: cedar/redwood resist decay naturally; pressure‑treated (PT) lumber lifespan depends on UC rating and exposure but can last decades when installed properly. Aluminum covers resist rot and low maintenance. Choose finishes and fasteners for outdoor exposure and maintain per manufacturer guidance.
What are common side and privacy options and when should I use them?
Framed insect screens or spline screens — use when insect exclusion and airflow are primary goals. Solar/mesh roll‑up screens — provide sun control and privacy but reduce outward view. Outdoor curtains (acrylic fabrics) — flexible privacy and wind buffering, good for patios and renter installs (with noninvasive hardware). Lattice or slatted screens — attractive partial privacy and climbing‑plant support. Glass or acrylic panels — best when wind/rain protection and clarity are needed but usually costlier and may need permits. Pick based on desired sightlines, ventilation, and permanence.
Do I need a permit to build a patio cover or enclosure?
Often yes for attached patio covers, roofs, and enclosed structures; many U.S. jurisdictions use IRC provisions for ledger, footings, and connections as the prescriptive basis. Local rules vary — check your city/county building department. Even for small projects, confirm permit triggers and required details (plans, connection details, footing sizes). Failure to get required permits can lead to costly remediation and safety risks.
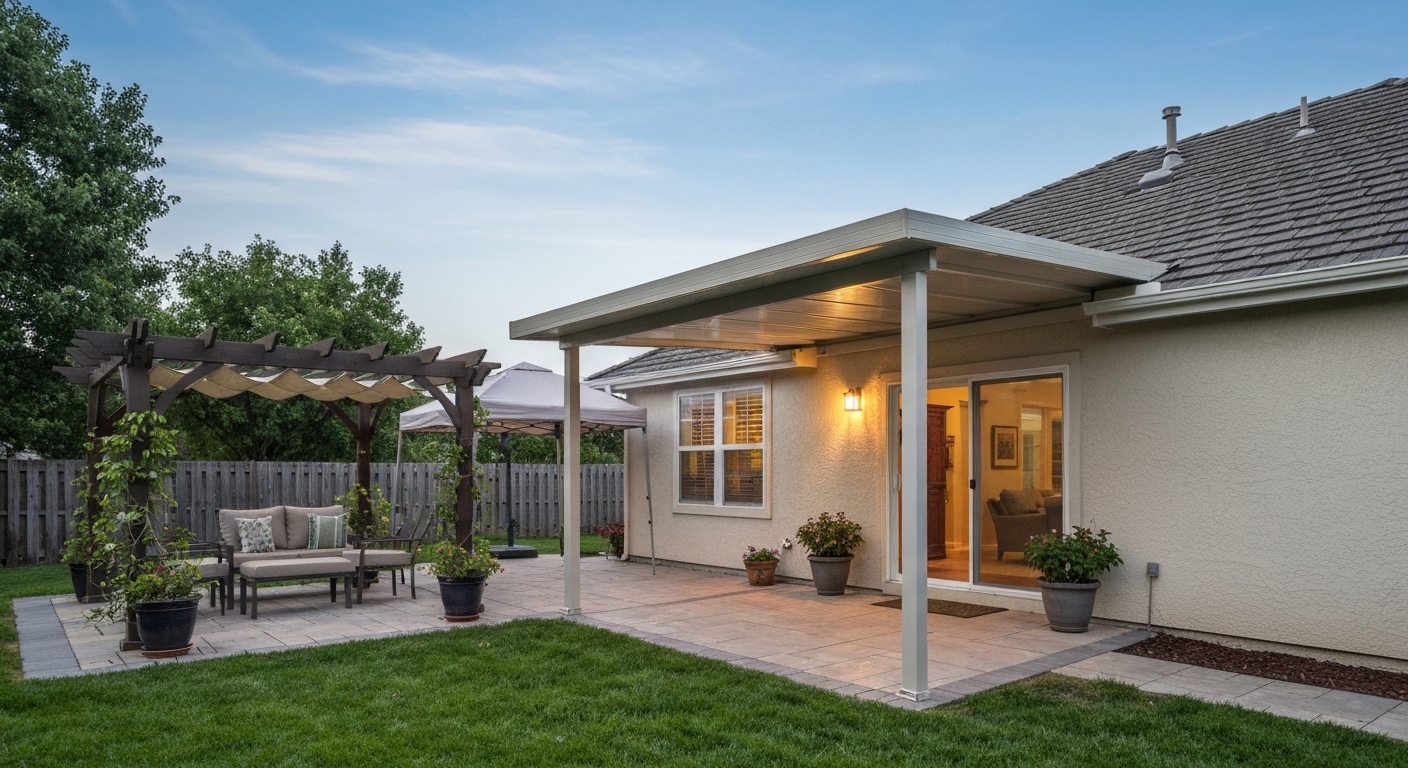
Step-by-step DIY guide to cover your back patio: options, costs, materials, permits, and installation checklists.
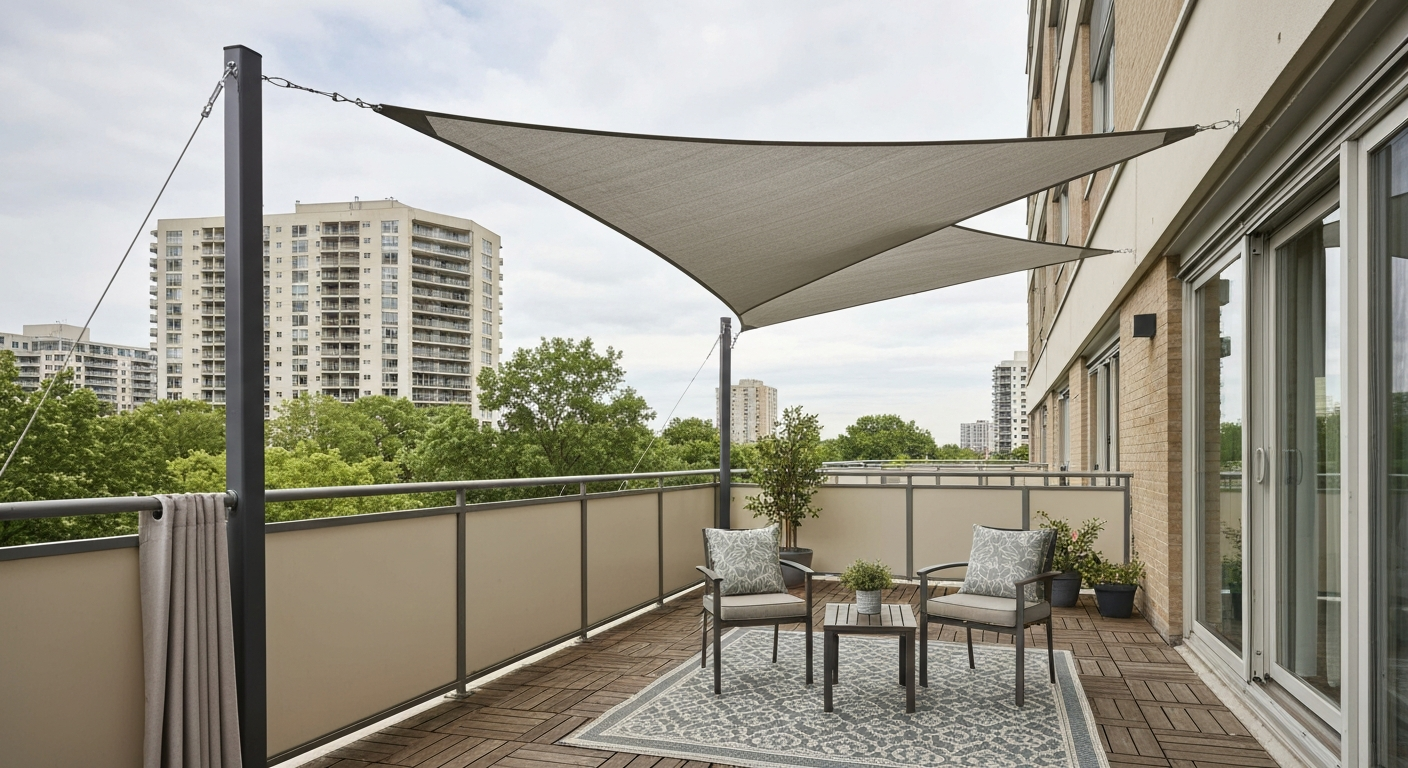
How to cover an apartment patio: apartment-safe DIY plans, materials, costs, permissions, and step-by-step installs
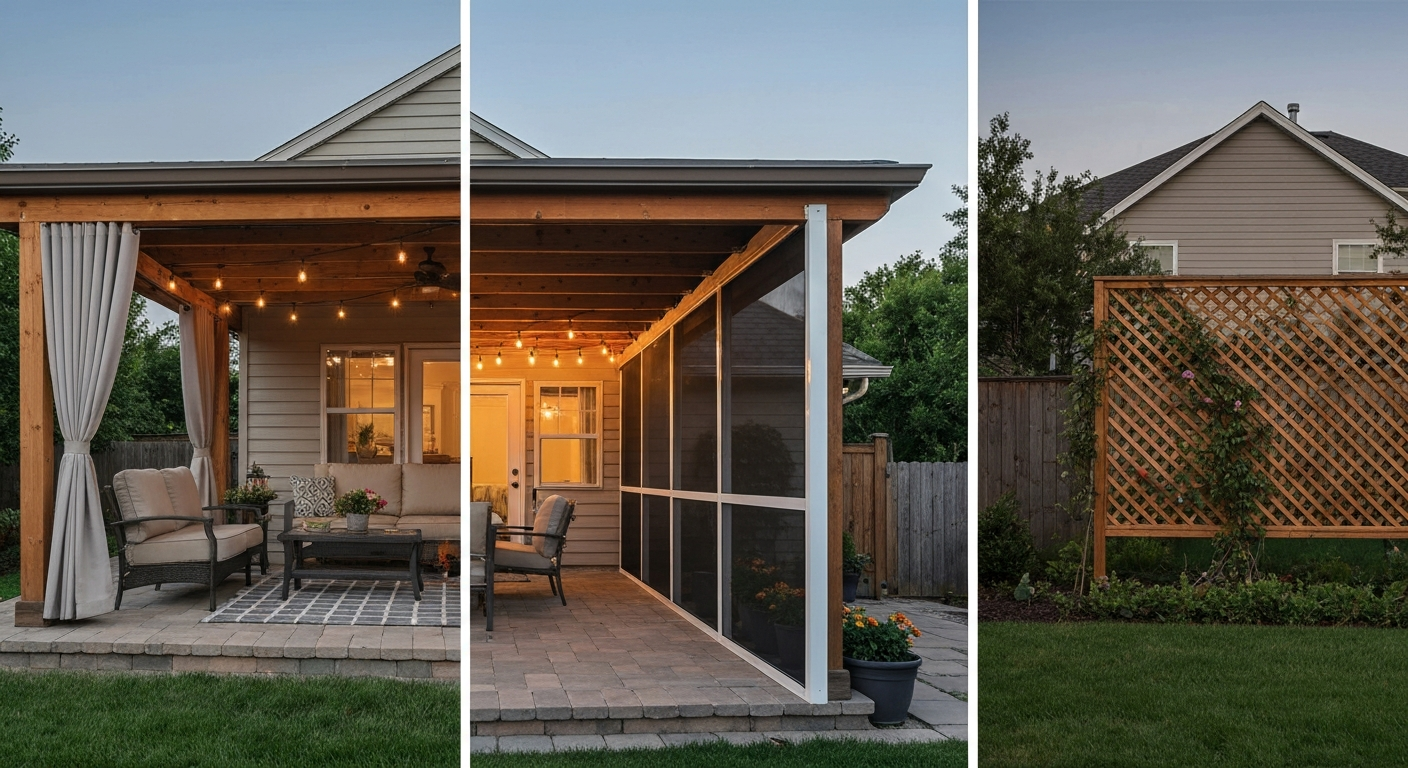
Practical DIY ways to cover patio sides for shade, privacy and weather, step‑by‑step plans, costs, tools, rental options.