
Covering a back patio comes down to three questions: how permanent do you want it, how much protection do you actually need, and what your budget and local rules allow. A shade sail can go up in an afternoon for under $100. A proper attached roofed patio with polycarbonate panels or metal roofing is a weekend-plus project that can cost $3,000 to $15,000 depending on size and materials. Between those extremes sit pergolas, awnings, screened enclosures, and canopies, each with a different trade-off between cost, effort, weather protection, and reversibility. This guide walks through every option in plain terms so you can pick the right one and actually build or install it. See our quick guide on what can I cover my patio with for a concise checklist of cover types, materials, and pros and cons to help you choose. For players interested in a virtual walkthrough, see our companion piece on how to make a covered patio in Sims 4.
How to Cover Back Patio: Complete DIY Guide for Homeowners

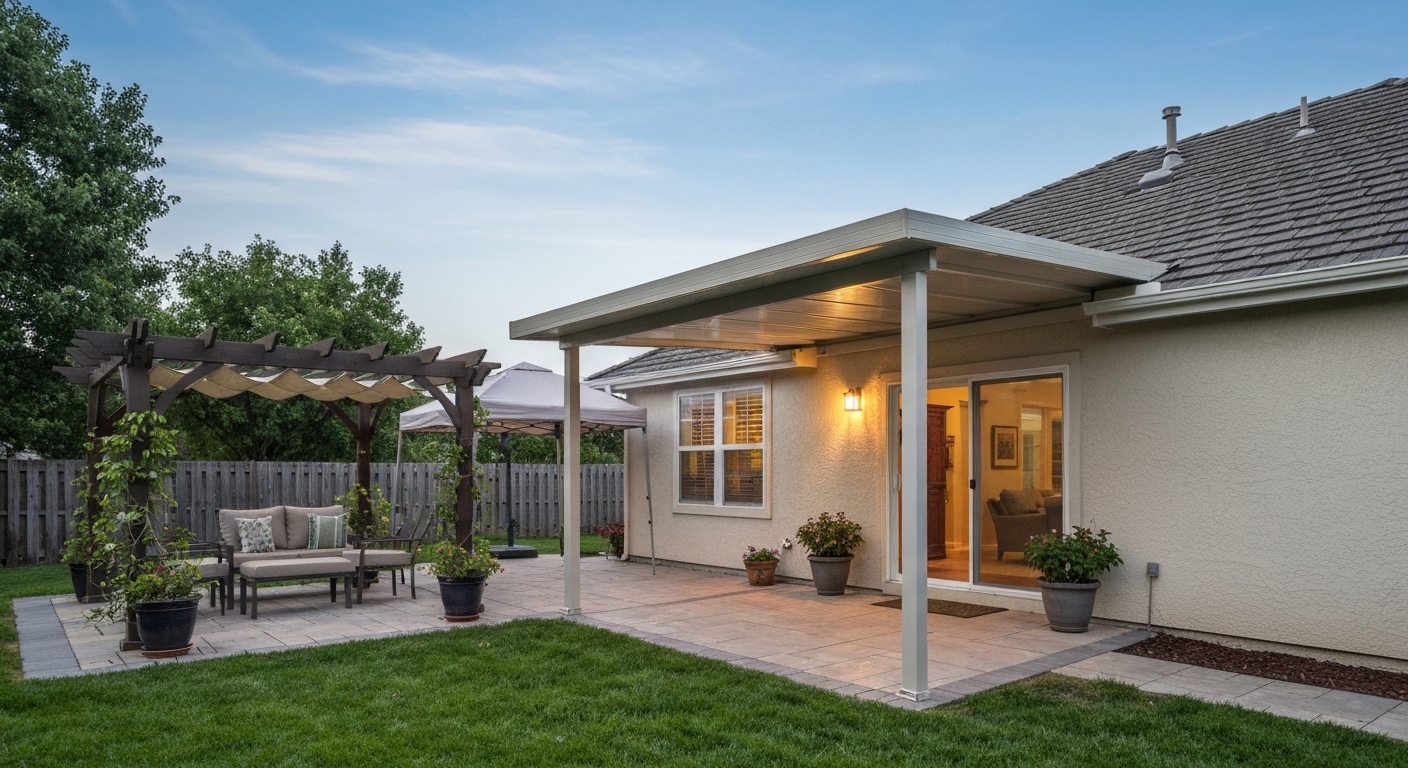
Who this guide is for and how to use it
This guide is written for homeowners and renters who want to make their back patio genuinely usable, whether that means blocking afternoon sun, keeping rain off a barbecue area, or sealing out mosquitoes on summer evenings. You do not need to be an experienced builder. Some projects here require only a ladder, a drill, and a measuring tape. Others involve footings, ledger attachments, and basic framing, and we flag those honestly so you can decide whether to DIY or hire help for specific steps.
Start with the decision section to narrow down your options, then jump to the specific cover type that fits your situation. Each section includes what you need to buy, roughly what it costs, how hard the installation is, and what to watch out for. Renters and apartment dwellers will find non-permanent options called out specifically. See our short guide on how to cover an apartment patio for renter-friendly, non-permanent solutions and step-by-step options. If your patio is on the smaller side, the shade sail and canopy section is a great place to start. For practical, space-conscious solutions and step-by-step options, see our guide on how to cover a small patio.
How to choose the right back-patio cover
Before buying anything, spend ten minutes answering a few honest questions. Your answers will eliminate most options immediately and save you from expensive mistakes.
What protection do you actually need?
Sun shade alone is the easiest and cheapest problem to solve. Rain protection requires a solid or near-solid roof. Insect exclusion needs a screened enclosure. Wind blocking needs solid side panels or a sheltered structure. Most people overestimate how much they need at first and underestimate how much they actually use the patio once it is comfortable. Think about the specific reason you avoid the patio right now and design for that first.
Permanence and reversibility
Permanent structures add home value but require permits, possibly footings below the frost line (the IRC requires exterior footings no less than 12 inches below undisturbed ground, and deeper in cold climates per local frost depth), and they are not reversible if you move. Semi-permanent options like pergolas and fixed awnings are mostly removable with effort. Temporary solutions like shade sails, canopies, and freestanding umbrellas leave no trace and work well for renters.
Climate matters more than aesthetics
If you live somewhere with heavy snow loads or sustained high winds, lightweight canopy fabric and shade sail hardware are genuinely dangerous if undersized. ASCE 7 is the national standard used for calculating wind and snow loads on patio covers and enclosures, and local building departments adopt it when reviewing permits. In high-wind or high-snow areas, stick with engineered structures or get a permit review even if you think you do not need one.
Budget reality check
Be honest with yourself before you start shopping. Shade sails and pop-up canopies start under $100. DIY pergola kits run roughly $2,200 to $6,400 depending on material and size. Cost To Install a Pergola – The Home Depot (services/cost page) lists example installed pergola job pricing, showing typical installed residential pergolas commonly run in the low‑to‑mid thousands. Professionally installed awnings typically land between $1,400 and $4,400. A full attached patio cover with roofing can run $5,000 to $15,000 or more once you factor in framing, roofing material, permits, and any electrical work. These are ballpark figures; get local quotes for anything permanent because material and labor costs vary significantly by region.
HOA rules and renter restrictions
Check your HOA covenants before buying a single post. Many HOAs restrict structure height, color, material, or require pre-approval for anything attached to the house. Renters need landlord written permission for any anchored installation. Some lease agreements allow free-standing structures that do not touch the building or ground with permanent fasteners, which is worth clarifying before you shop.
Decision checklist
- What is the primary problem: sun, rain, insects, wind, or a combination?
- Do you own or rent, and does your lease or HOA allow structural installations?
- What is your total budget, including hardware, fasteners, and any permit fees?
- Will this structure need to handle snow or high winds? Check local frost depth and wind zone maps.
- Do you want this to be permanent, or do you need to be able to remove it?
- Is your patio attached to the house or freestanding (deck, concrete slab, pavers)?
- What is the patio's approximate size in feet (length x width)?
- Are you comfortable with basic framing, or do you need a kit-based or tool-free solution?
All your options at a glance
| Cover Type | Rain Protection | Sun Protection | Permanence | DIY Difficulty | Rough Cost (DIY) | Permit Likely? |
|---|---|---|---|---|---|---|
| Attached roofed cover / lean-to | Excellent | Excellent | Permanent | Hard | $4,000–$15,000+ | Yes |
| Pergola (attached or freestanding) | None to partial | Partial (add shade cloth) | Semi-permanent | Moderate | $2,200–$6,400 | Often |
| Fixed awning | Good | Excellent | Semi-permanent | Easy–Moderate | $300–$2,500 material | Sometimes |
| Retractable awning | Good (when extended) | Excellent | Semi-permanent | Moderate | $800–$4,000+ material | Rarely |
| Full screened enclosure | Good (with roof) | Partial | Permanent | Hard | $3,000–$10,000+ | Yes |
| Roll-up / retractable screens | None | Partial | Semi-permanent | Easy–Moderate | $200–$1,500 | Rarely |
| Shade sail | None | Good | Temporary | Easy | $50–$300 | No |
| Pop-up canopy / gazebo | Good | Excellent | Temporary | Very Easy | $100–$800 | No |
| Freestanding umbrella | Minimal | Good (small area) | Temporary | Very Easy | $50–$600 | No |
Attached roofed patio covers and lean-to roofs
An attached roofed patio cover, often called a lean-to or patio addition, is the most protective and most permanent option. You are essentially building a single-slope roof that ties into the house wall at one end and is supported by posts at the outer edge. The roofing material can be corrugated metal, asphalt shingles, or polycarbonate panels. Each gives you a different balance of light transmission, weight, and cost.
Footings and foundations
Post footings must go below your local frost line to prevent heaving in cold climates (IRC Section R403.1.4.1). In frost-free zones, the IBC Appendix I allows patio covers to bear on an existing slab-on-grade as long as the slab is at least 3.5 inches thick and each column carries no more than 750 pounds. If you are in a cold climate, dig post holes below the frost line, pour concrete tube footings, and set post bases. This is non-negotiable for structural safety.
Attaching the ledger to the house
The ledger board is the beam that ties the patio roof to your house framing. Attach it directly to the house's rim joist or structural framing, not just to siding or sheathing. If your house has brick veneer, use a code-listed solution like the Simpson Strong-Tie BVLZ Brick Veneer Ledger Connector, which uses a steel ledger plate, compression strut, and long tension screws through 1-1/8-inch masonry pilot holes to transfer load properly to the structural framing behind the veneer. Do not lag through brick into nothing. For wood-framed houses, follow Simpson Strong-Tie's Deck Connection and Fastening Guide for fastener type, diameter, and spacing based on your specific ledger size and load.
Polycarbonate and metal roofing panels
Polycarbonate panels (like Palram's SUNTUF or SUNSCAPE systems) are popular for patio covers because they let light through while blocking rain. Installation requires pre-drilled oversize holes or slotted mounting rails to allow for thermal expansion, which can be significant in summer heat. Use only the recommended sealants and flashings from the panel manufacturer. One important safety note from Palram's installation guides: do not walk on polycarbonate panels. Corrugated metal is cheaper, more durable, and opaque, which works well if you do not need natural light.
Slope and drainage
Aim for a minimum slope of 1/4 inch per foot (roughly 2 degrees) for metal or polycarbonate panels so water runs off cleanly. Steeper is better for heavy rain areas. Make sure the low end drains away from the house foundation, either into a gutter or off the edge of the patio.
Permits and inspections
Any attached roofed structure almost certainly requires a building permit. The permit process typically requires a site plan showing the structure's dimensions and distance from property lines, basic framing plans, and sometimes load calculations. It sounds intimidating but most residential patio cover permits are straightforward. The inspection protects you legally and can catch mistakes before they become expensive problems.
Pros, cons, and who it suits
- Best for: homeowners who want year-round all-weather use and maximum protection
- Pros: full rain and sun coverage, adds home value, very durable, can be fully screened in later
- Cons: highest cost and complexity, requires permit, involves footing work, not reversible
- Difficulty: hard for a solo DIYer; most people tackle the framing with a helper and hire out the electrical if needed
Pergolas and arbors: freestanding and attached
A pergola is an open-beam overhead structure. It does not block rain on its own, but it defines the patio space, supports climbing plants, holds shade cloth or retractable canopy fabric, and can be screened on the sides. Arbors are smaller, usually marking an entryway rather than covering a full seating area. Both are genuinely achievable DIY projects, especially with a kit.
Attached vs. freestanding
An attached pergola uses the house wall as one side, which means fewer posts and a tidier look but requires a proper ledger connection to the house (same rules as the roofed cover above). A freestanding pergola stands on its own four or more posts and can go anywhere, making it better for renters or anyone who does not want to touch the house. Freestanding models still need footing work in cold climates or areas with wind, otherwise they will shift and lean over time.
Materials comparison
| Material | Lifespan | Maintenance | Approximate Kit Cost | Notes |
|---|---|---|---|---|
| Pressure-treated pine | 15–25 years | Stain every 2–3 years | $500–$2,000 for lumber | Budget-friendly, widely available |
| Cedar / redwood | 20–30 years | Seal every 2–3 years | $1,500–$4,000 | Naturally rot-resistant, better look |
| Aluminum | 30+ years | Very low | $1,500–$5,000 (kit) | Lightweight, no rot, powder-coated finishes |
| Vinyl / PVC | 25+ years | Minimal (wipe down) | $1,500–$4,500 (kit) | No painting, but can flex in heat |
| Cedar / hardwood composite | 20–30 years | Low | $2,000–$6,000 (kit) | Good aesthetics, heavier than aluminum |
Adding shade to a pergola
A bare pergola offers maybe 30% shade from its beams. To add real coverage, staple or tie shade cloth (50% to 90% block rating) across the top, hang a retractable canopy system on the rafters, or train fast-growing vines like wisteria or Virginia creeper over the structure. Shade cloth is the cheapest and most adjustable option. Retractable pergola canopy kits are available from many manufacturers and turn a basic pergola into a genuinely usable rain-shelter for light rain.
DIY scope and permit check
Kit-based pergolas with pre-cut lumber and step-by-step instructions are a manageable two-day project for two people. Custom-built pergolas take longer but give you flexibility on sizing. Many jurisdictions require a permit for any pergola over a certain footprint (commonly 200 square feet) or height. Freestanding structures under a set square footage threshold are sometimes exempt, but check locally before you start.
Pros, cons, and who it suits
- Best for: homeowners who want a defined outdoor room with flexibility on shade coverage
- Pros: moderate cost, attractive, supports lighting and plants, semi-permanent and removable
- Cons: no rain protection without an added canopy or shade cloth, open sides let insects in
- Difficulty: moderate; kit builds are beginner-friendly with basic tools
Awnings: fixed vs. retractable
An awning mounts directly to the house wall above the patio door or window and projects out over the patio on a fixed or retractable arm. It is the most space-efficient way to add sun and light rain coverage without building a freestanding structure. Awning prices range from roughly $54 for a small fixed metal window awning up to $4,754 or more for a large motorized retractable unit at retail, so the range is wide.
Fixed awnings
Fixed awnings use a rigid frame, usually aluminum or steel, covered with fabric or aluminum panels. They are always deployed, which means they block sun and light rain all the time without any adjustment. The trade-off is that they also block some winter light when you might want it, and they take the full force of any storm since you cannot retract them. Fixed awnings work well in climates with consistent sun and mild weather. Installation involves mounting a header bracket to the house wall framing (not just siding) and attaching support arms to a fascia or wall-mounted bar. Most are installed in two to four hours with a drill and a helper.
Retractable awnings
Retractable awnings roll up on a spring or motor-driven cassette when not in use, which dramatically extends their lifespan because the fabric is not constantly exposed to UV and weather. Manual crank-operated units are the budget option. Motorized units add convenience and can be fitted with wind sensors that automatically retract the awning when wind speeds exceed a set threshold, typically 15 to 25 mph depending on the sensor calibration. Manufacturers consistently recommend not leaving retractable awnings extended in higher winds. If you live in a gusty area, a wind sensor is worth the extra cost.
Awning materials and lifespan
| Material | UV Resistance | Water Resistance | Typical Lifespan | Notes |
|---|---|---|---|---|
| Acrylic fabric (e.g., Sunbrella) | Excellent | Good (water-resistant, not waterproof) | 10–15 years | Industry standard, wide color range |
| Vinyl / PVC fabric | Good | Excellent (waterproof) | 8–12 years | Heavier, less breathable, stays damp longer |
| Aluminum panels | Excellent | Excellent | 20+ years | Fixed only, no fabric look, more rigid |
| Polyester fabric | Fair | Fair | 5–8 years | Budget option, fades faster |
Installation steps for a wall-mounted retractable awning
- Locate wall studs or structural blocking above the door opening using a stud finder; mark centers.
- Hold the mounting bracket assembly at the desired height (typically 8–10 ft above the patio surface) and mark bolt hole locations.
- Drill pilot holes and attach the mounting brackets with lag screws (minimum 2-1/2 inch lags into solid framing, not just sheathing).
- With a helper, lift the awning cassette and secure it to the brackets; most units hook on and lock with a set screw.
- Extend the awning manually or power it up, then set the pitch angle to 10–15 degrees for rain runoff.
- Test full extension and retraction, and adjust tension if the fabric sags or bunches.
- If motorized, run wiring per the manufacturer diagram; hire an electrician if you are not comfortable with low-voltage wiring.
Pros, cons, and who it suits
- Best for: homeowners who want easy sun and light rain protection without a separate structure
- Pros: no footings, relatively quick install, retractable models protect themselves when stowed
- Cons: attached to house (not renter-friendly without permission), limited projection (usually 8–14 ft), fabric needs periodic cleaning
- Difficulty: easy to moderate; most homeowners handle fixed awnings solo; retractable units benefit from a second person for mounting
Screened enclosures and roll-up screens
If insects are your main problem, a screened enclosure is the definitive solution. You are basically adding walls of screen mesh around the patio, either as a full floor-to-ceiling enclosure under an existing or new roof, or as roll-up or retractable screen panels that you deploy when needed and stow away when not in use.
Full screened enclosures
A full screen room uses a framed structure (aluminum is the most common) with screen infill panels on all sides and a screened or solid roof. These are the porch screen rooms you see on Florida and Gulf Coast homes. They require a permit in most jurisdictions, need an existing slab or patio surface to anchor into, and typically cost $3,000 to $10,000 or more depending on size and whether you use a kit or custom framing. The upside is that once it is done, you have a fully protected outdoor room that is genuinely usable morning to night in bug season.
Choosing the right screen mesh
Standard fiberglass screen mesh is rated at 18x14 (meaning 18 openings per inch horizontally, 14 vertically). This keeps out mosquitoes reliably. If you are dealing with no-see-ums, which are tiny biting midges in the Culicoides family averaging 1 to 3 mm long, you need a tighter weave. Phifer's 20x20 mesh, sold at home improvement stores as 'No-See-Um' screen, significantly reduces midge entry. Research from UF/IFAS extension entomology notes that very small pest exclusion may require openings of approximately 385 micrometers or smaller (roughly 40 mesh), which is tighter than standard retail options. For most backyards, 20x20 is a practical and widely available compromise.
Roll-up and retractable screen panels
Roll-up screens mount on a bracket above the opening and drop down when you need them, held in place with bottom-rail hooks or magnetic edge seals. They are a great middle ground for people who want insect protection on demand without a full enclosure. Motorized versions integrate with smart-home systems. Basic manual roll-up screen kits for a 10-foot opening cost $200 to $600. Motorized units run $500 to $1,500 per panel or more. Installation is similar to a retractable awning: mount the header bracket into structural framing, hang the cassette, and run the cable or wiring.
Screen mesh installation tips
- Use a screen rolling tool (spline roller) to press the screen mesh into aluminum channel frames; stretch the mesh taut before pressing the spline to avoid sagging.
- Cut mesh 2 inches larger than the frame opening on all sides before rolling, then trim the excess after the spline is seated.
- Replace damaged sections rather than patching; patches rarely hold long-term in a high-traffic patio screen.
- Clean screen mesh with a soft brush and mild detergent annually to keep airflow good and extend the mesh lifespan.
Pros, cons, and who it suits
- Best for: homeowners in high-insect areas, especially mosquito or no-see-um-heavy climates
- Pros: complete insect exclusion, usable at dawn and dusk, roll-up versions are semi-permanent
- Cons: full enclosures require permits and significant investment; screens need replacement every 5–10 years
- Difficulty: roll-up screens are easy to moderate; full screen rooms are hard and often best left to a screened enclosure contractor
Shade sails, canopies, and freestanding umbrellas
These are the fastest, cheapest, and most flexible options. They work brilliantly for renters, small patios, and anyone who wants shade now without a weekend project. None of them provide serious rain protection, but for sun shade they are genuinely effective and easy to reposition or take down seasonally.
Shade sails
A shade sail is a tensioned triangle or quadrilateral of UV-blocking fabric stretched between three or four anchor points. Anchor points can be wall-mounted hooks, posts you set in the ground, or existing trees. HDPE (high-density polyethylene) shade cloth in 185 gsm or heavier is the standard material for outdoor shade sails; it blocks 90% to 97% of UV rays while still allowing airflow underneath. Shade sails do not seal out rain because they are flat or slightly curved, so water pools and drips through or runs off the edge. Set the sail at an angle so it sheds water rather than collecting it. A 12x12 foot shade sail costs $50 to $200 depending on material weight and brand.
Installing shade sail posts
- Decide on your attachment points: wall hooks, existing structures, or new ground posts.
- For ground posts, dig holes at least 24 inches deep (36 inches in windy areas) and set 4x4 or 4-inch round steel posts in concrete; let cure 48 hours before tensioning.
- Mount stainless steel D-ring hardware or turnbuckle kits at each anchor point.
- Attach the sail's corner grommets to each point and tension evenly using the turnbuckles until the sail is drum-tight with no pooling areas.
- Take the sail down and store it indoors if you expect sustained winds over 25 mph or heavy snow.
Pop-up canopies and gazebo canopies
Pop-up canopies (the folding 10x10 or 10x20 foot frames with a fabric top) are the single easiest option. They go up in under ten minutes, cost $100 to $400 for a decent-quality model, and can be staked to grass or weighted down with sandbags on hard surfaces. They do provide rain protection for light rain. Their weakness is wind: even staked canopies should come down before any strong wind event, and cheap canopies have a bad habit of collapsing or becoming airborne. Invest in a frame rated for at least 40 mph wind resistance and always use all the stake and guy wire points.
Freestanding gazebo canopies are the more permanent version of the pop-up, with a steel or aluminum frame designed to stay in place all season. They typically cost $200 to $800. They need to be staked or anchored to prevent wind uplift, and the canopy fabric should be replaced every two to three seasons as UV degradation weakens the material.
Freestanding umbrellas
A large market umbrella (9 to 11 feet) or a cantilever umbrella (offset pole) covers one to two seating areas and costs $50 to $600. Cantilever umbrellas offer more flexibility because the pole is out of the way, but they need a heavy base (50 to 100 pounds) to stay stable. Tilt-and-rotate models let you track the sun. Close umbrellas any time wind picks up; open umbrellas in moderate wind become a projectile hazard quickly.
Pros, cons, and who they suit
- Best for: renters, small patios, apartment balconies, or anyone wanting a quick and reversible solution
- Pros: very low cost, no tools or permits needed, easy to reposition, seasonal storage extends lifespan
- Cons: limited or no rain protection, must be taken down in high winds, shorter lifespan than permanent structures
- Difficulty: very easy; most installations take under an hour
Covering the sides of your patio
A top cover solves sun and rain, but side openings let in wind, rain blow-in, and insects. Once you have the overhead covered, it is worth thinking about the sides. The main options are outdoor curtains hung on a curtain rod or wire system, roll-up bamboo or reed shades, lattice panels (which block partial wind and add privacy without fully enclosing the space), solid screen panels in an aluminum or wood frame, and clear vinyl or polycarbonate side panels for full weather protection while maintaining visibility. For a full walkthrough on side coverage, see our guide on what to cover patio with. Outdoor curtains are the most renter-friendly option since they hang on a rod with no permanent fasteners. For a full walk-through on side coverage, that topic deserves its own dedicated guide. For a full walk-through on how to cover patio sides, see our dedicated guide. For a full walk-through on side coverage, see our guide on how to design a covered patio.
Seasonal maintenance for every cover type
No patio cover is truly maintenance-free. Here is what to do each season to keep your investment in good shape.
| Cover Type | Spring Tasks | Fall Tasks | Annual Check |
|---|---|---|---|
| Attached roofed cover | Clear gutters, check flashing and sealant at ledger | Clear debris from roof, inspect polycarbonate for cracks | Check ledger bolts for corrosion, reapply sealant if needed |
| Pergola (wood) | Re-stain or re-seal if needed, check post bases for rot | Clear leaves, check hardware for rust | Inspect post bases and footing connections |
| Awning (fabric) | Clean fabric with mild soap and water, extend to inspect for mold | Retract and store if motorized; cover if fixed | Check mounting brackets for looseness |
| Screened enclosure | Inspect mesh for holes, clean frames | Check door hardware and closers | Test screen tension, replace sagging panels |
| Shade sail | Reinstall after winter storage, re-tension hardware | Remove, clean, and store before first frost | Inspect grommets and anchor hardware for rust |
| Pop-up canopy | Check fabric for UV damage and frame joints | Clean and store in a bag | Replace canopy fabric every 2–3 seasons |
Common mistakes and how to avoid them
- Skipping the permit: attaching a structure to your house without a permit can cause problems when you sell and may void homeowner's insurance claims if the structure causes damage.
- Fastening into siding or sheathing only: ledger boards and awning mounts must hit structural framing, not just the exterior cladding.
- Undersizing posts or beams: use a span table or online calculator for your lumber species and load; undersized framing sags or fails in wind and snow.
- Ignoring thermal expansion in polycarbonate: panels that cannot expand will buckle or crack the fasteners; always pre-drill oversize holes per the manufacturer's guide.
- Buying a shade sail without proper anchor points: a sail under tension puts significant force on its anchors, especially in wind; wall hooks must be into solid blocking, not just drywall or stucco.
- Leaving temporary canopies up in wind: pop-up canopies and shade sails become dangerous projectiles in winds over 20–25 mph; take them down proactively.
FAQ
What are the main types of back‑patio covers and when is each appropriate?
Main types: 1) Roofed attachments (permanent, mimics house roof) — best for long‑term weather protection and resale value; requires structural tie‑in and permits. 2) Pergolas (open or with louvered/solid tops) — good for shade and aesthetics; lighter structure, can be DIY. 3) Awnings (fixed or retractable) — low‑profile shade, retractables are good where wind/weather vary; motorized models need sensors. 4) Screened enclosures — for insect protection and partial weather barrier; heavier framing and possible permit. 5) Shade sails/canopies/umbrellas — low‑cost, temporary to semi‑permanent solutions for renters or seasonal use. 6) Polycarbonate/metal panel roofs on lightweight frames — durable, translucent or opaque options, follow manufacturer installation for expansion and fastening. Choose by permanence, budget, local climate, HOA/permit limits, and rental restrictions.
How do I decide between permanent, semi‑permanent and temporary solutions?
Consider: permanence needs (how long you’ll occupy), budget, permits/HOA rules, structural capacity of the house, local wind/snow loads, and DIY skill. Permanent: best if you own long‑term, want resale value, and can obtain permits; allows full roofs and attachments. Semi‑permanent: pergolas with solid tops, polycarbonate roofs, or anchored canopies — good compromise. Temporary: umbrellas, shade sails, tensioned canopies, or freestanding screened rooms — ideal for renters or seasonal needs since they avoid penetrating attachments. Factor maintenance and insurance implications.
What measurements and site checks are required before starting?
Measure: patio length/width and perpendicular distance to roof eaves, doors, and windows. Check setbacks from property lines/utility easements and existing grade/drainage. Confirm overhead clearances, nearby trees, and roof overhangs. Determine soil/frost depth (local code) for footing depth and locate underground utilities before digging (call 811 in the U.S.). Record wind exposure, sun orientation, and typical snow loads to size structure. Sketch a site plan with dimensions and elevation view for permit or material ordering.
When do I need a permit and how do HOA rules affect my project?
Permits are typically required for structural or attached covers, any new footings, or enclosures; local codes vary. Use IRC/IBC/ASCE guidance for structural loads—inspectors check attachments, footings and flashing. HOAs often regulate size, color, materials and whether attachments are allowed; get written approval from the HOA before work. For renters, skip permanent attachments unless landlord approves; use temporary freestanding options instead.
What are the key structural and safety considerations when attaching a patio cover to a house?
Key items: correctly attach ledger to structural framing (not just siding); use code‑listed attachments for brick/masonry when required. Design for uplift/suction and lateral loads per ASCE 7 and local adoption (wind/snow loads). Footings must meet frost depth and footing rules (IRC foundation rules) or use slab‑on‑grade when allowed (IBC Appendix I conditions). Use rated fasteners (through‑bolts, exterior structural screws, connector plates) per manufacturers' guides; flash ledger and roof integration to prevent water infiltration. If in doubt, consult an engineer for large spans or high wind/snow areas.
How do I choose materials for roofs, framing and screens?
Materials: framing — pressure‑treated lumber, cedar, or aluminum (aluminum resists rot and requires less maintenance). Roofing — composite shingles for tied‑in roofed attachments, metal panels, or multiwall polycarbonate (lightweight and translucent) per manufacturer instructions. Screens — fiberglass 18×14 keeps out mosquitoes; 20×20 or finer ('no‑see‑um') excludes tiny biting midges. Fasteners/connectors — use corrosion‑resistant hardware (hot‑dip galvanized, stainless steel, or manufacturer‑specified). Choose finish/color for heat gain and HOA requirements.
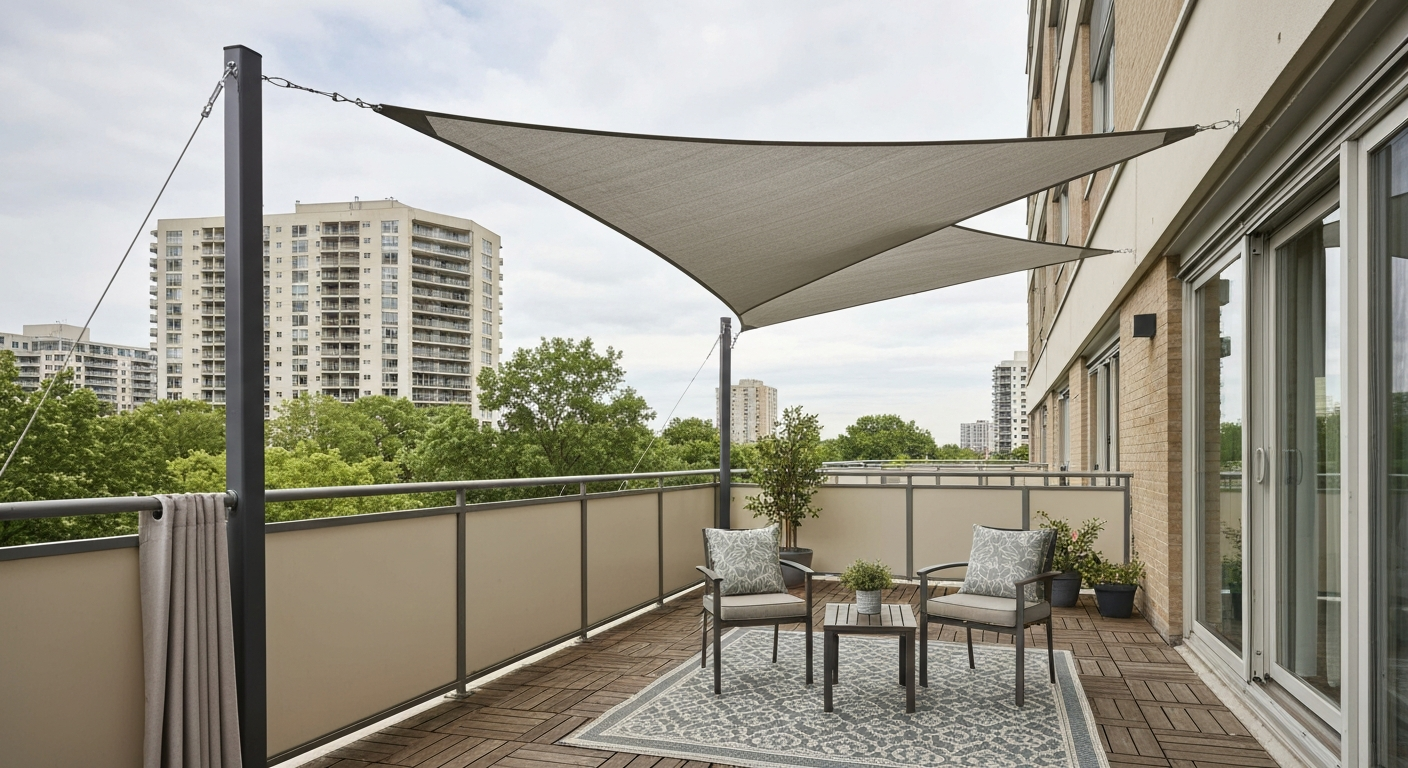
How to cover an apartment patio: apartment-safe DIY plans, materials, costs, permissions, and step-by-step installs
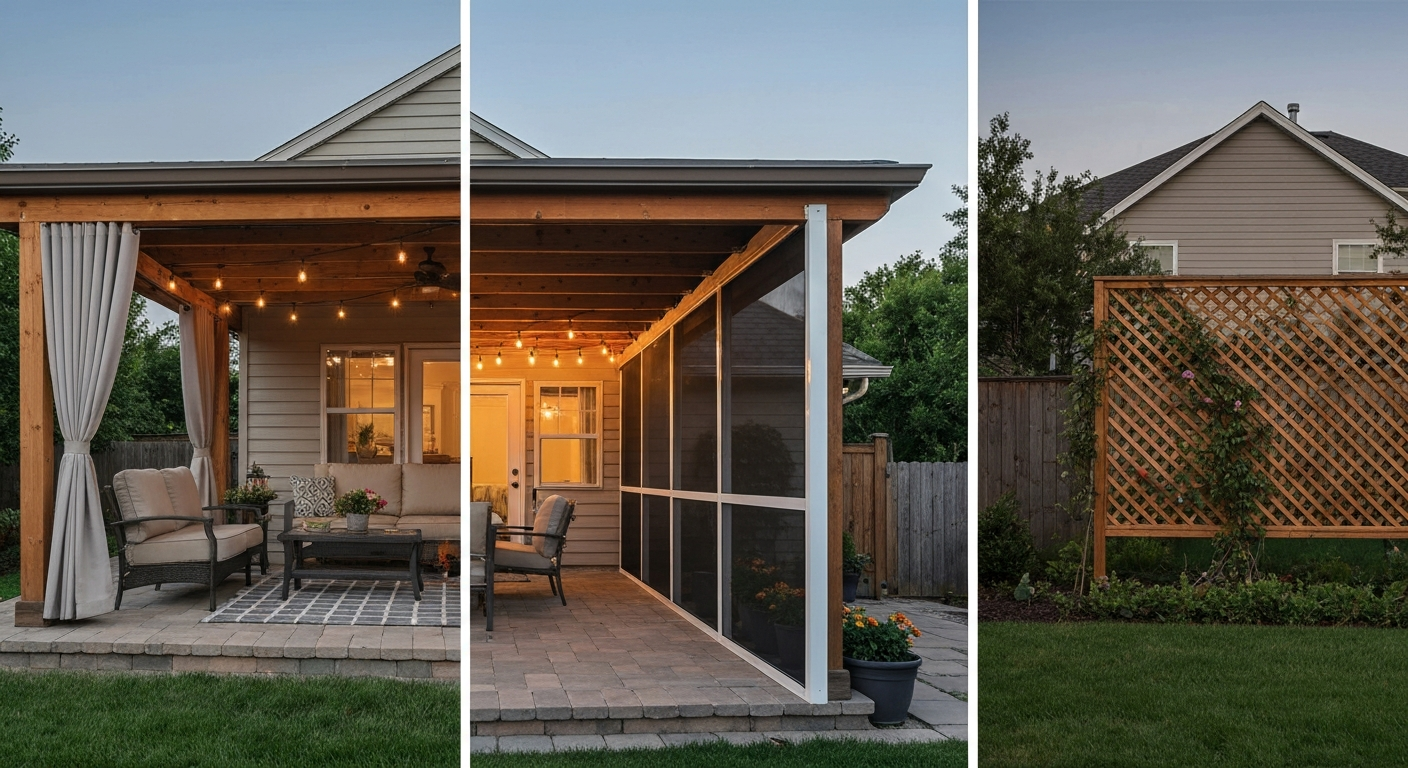
Practical DIY ways to cover patio sides for shade, privacy and weather, step‑by‑step plans, costs, tools, rental options.
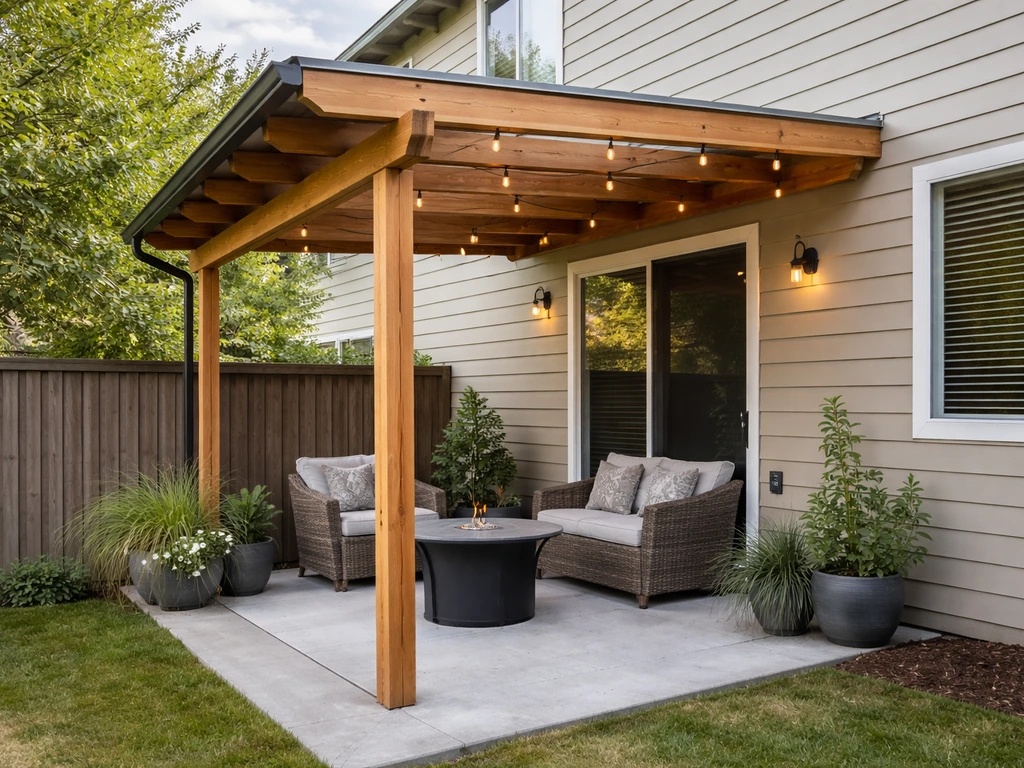
Step-by-step DIY guide to cover a small patio with shade or weather protection, including materials, sizing, drainage, c