
You can build a DIY bug screen for your patio in a weekend using aluminum frame extrusions, fiberglass or aluminum mesh, spline, and a handful of basic tools. The most common approach, fixed framed screen panels, costs roughly $3 to $6 per square foot in materials and keeps insects out reliably for years with minimal maintenance. If you want something you can take down seasonally or adjust for different openings, removable panels, roll-up screens, and screen doors are all real options you can install yourself. This guide walks through every approach so you can pick the one that fits your space, your budget, and your skill level.
DIY Bug Screen for Patio: Complete Build, Repair Guide

Felix Brennan
25 Jul 2026
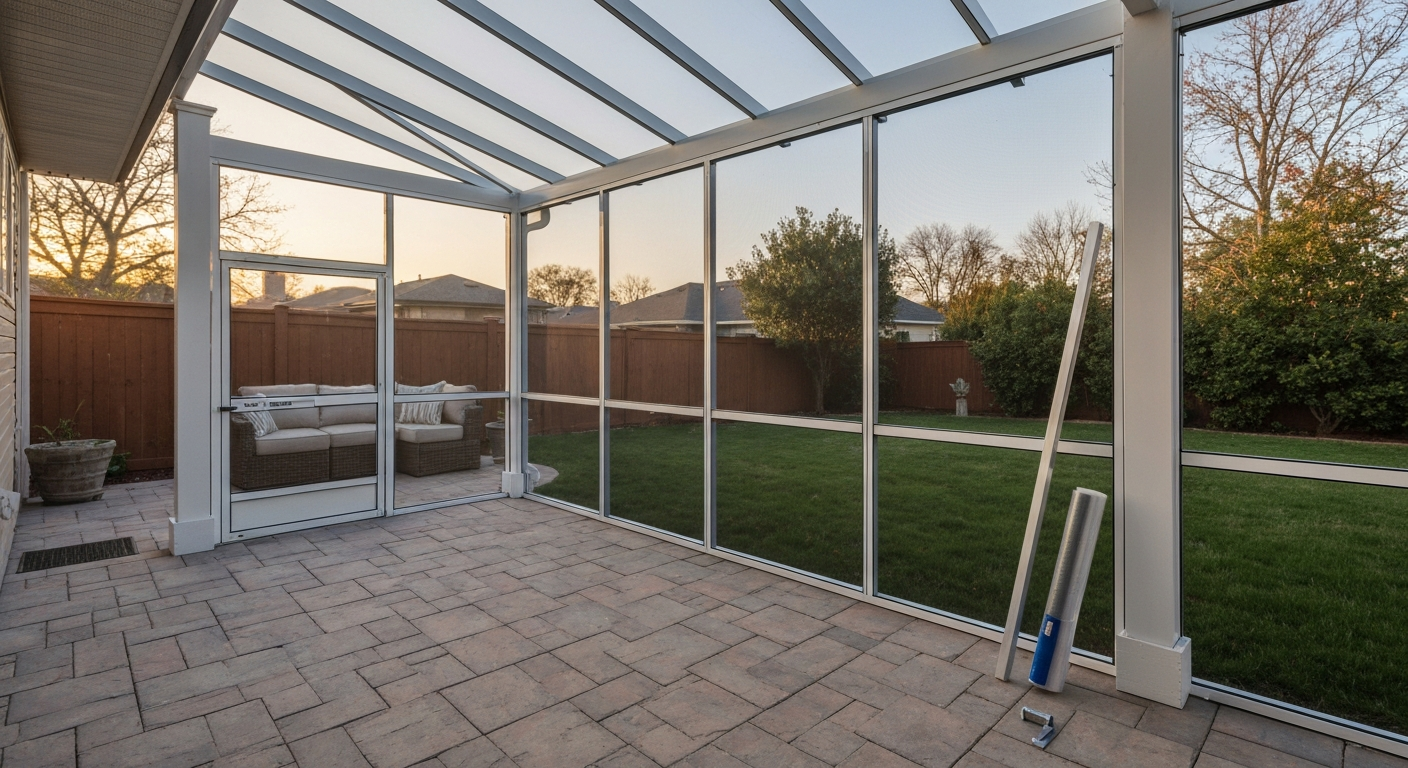
What this guide covers and who it's for
Whether you're screening in a simple open patio, adding a screen door to an existing structure, or working toward a full enclosure, this guide is written for you. We cover five practical approaches: fixed framed panels, removable panels, roll-up screens, screen doors, and full enclosures. Each section gives you the measurements, materials, and step-by-step process you need, with honest notes on time, cost, and difficulty. You don't need advanced carpentry skills to follow along, but we do expect you to own a tape measure and not be afraid of a utility knife.
This guide also covers every repair task that eventually comes up once your screens are installed: patching holes, replacing torn mesh, rescreening entire panels, and handling sagging or wrinkled screen. Those repair topics connect directly to the build steps here, so read through the full guide before you start shopping for materials. For step-by-step instructions on fixing holes, replacing torn mesh, and rescreening entire panels, see how to repair screen patio.
Choose the right patio screen solution
Before you buy anything, pick the approach that actually suits your patio. The five common DIY options each have genuine strengths and real tradeoffs. Here's a plain-language comparison to help you decide.
| Option | Best For | Typical Cost (Materials) | Difficulty | Removable? |
|---|---|---|---|---|
| Fixed framed panels | Permanent bug protection, open patios, pergolas | $3–$6/sq ft | Beginner–Intermediate | No (bolted in place) |
| Removable framed panels | Seasonal use, renters, flexible layouts | $3–$6/sq ft | Beginner | Yes |
| Roll-up/retractable screens | Large open spans, clean look when retracted | $150–$600+ per opening | Intermediate | Yes (retracts into cassette) |
| Screen doors | Doorway openings, existing framed structures | $40–$200 per door | Beginner | Hinged or sliding |
| Full screen enclosure | Whole-patio coverage, maximum bug protection | $8–$20/sq ft | Intermediate–Advanced | No |
Fixed framed panels are the most cost-effective permanent solution and the easiest place to start if you've never done this before. Removable panels use the same frame-and-spline construction but mount with hooks, clips, or tension systems so you can pull them down before a storm or store them in winter. Roll-up screens (retractable cassette systems like those from Phantom Screens) give you a clean look when not in use, but large openings need oversized roller systems and wind load verification from the manufacturer's sizing tables. Screen doors work best when you already have a framed opening measuring 30, 32, or 36 inches wide by 80 inches tall, which are the standard nominal door widths. Full enclosures are a bigger project, but if that's where you're headed, the panel-building skills in this guide are exactly what you'll use.
Decision checklist
- Do you want to leave the screens up year-round, or take them down seasonally? (Permanent vs. removable)
- Is your patio already partially enclosed with posts and a roof, or is it open on all sides?
- Are any openings wider than 8 feet? (Consider roll-up/retractable systems with proper sizing from the manufacturer)
- Do you have pets or kids who are rough on screens? (Choose pet-resistant or heavy-duty mesh)
- Are you in a coastal or high-humidity climate? (Corrosion-resistant hardware is non-negotiable)
- Do you need sun or privacy control in addition to bug protection? (Solar mesh handles both)
- Is this a rental property or do you want to avoid permanent alterations? (Removable or tension-mounted panels)
Project planning and measurements
Accurate measurements are where most DIY screen projects succeed or fail. A panel that's a quarter-inch too wide won't fit; one that's a quarter-inch too narrow lets bugs through at the edges. Spend 20 minutes measuring carefully and you'll save hours of rework.
How to measure your openings
- Measure each opening width at three points: top, middle, and bottom. Use the smallest measurement as your reference dimension.
- Measure each opening height at three points: left side, center, and right side. Use the smallest measurement.
- For framed panel systems, subtract 1/4 inch from both width and height to leave a small clearance gap for installation and seasonal expansion.
- For screen doors, measure the jamb opening (not the existing door if one is present). Standard stock doors are available in 30", 32", and 36" widths at 80" height — always confirm your actual rough opening before buying.
- Write down every opening individually. Even openings that look identical rarely measure exactly the same on a built patio.
Accounting for trim, doors, and obstructions
If your patio has decorative trim or molding around the posts, measure to the inner face of the trim, not the post itself. That's where your panel will actually sit. Mark obstructions like electrical outlets, light fixtures, and hose bibs on a simple sketch before you finalize panel dimensions. A panel that blocks a light switch is going to annoy you every single day. For openings with a door, leave at least 1.5 inches on the latch side for the door hardware and swing clearance. If you're planning a full enclosure, sketch a simple plan view of the patio showing all panel locations, door positions, and corner connections before ordering materials.
Complete materials and tools checklist
Fixed framed panels (primary approach)
- Aluminum screen frame extrusion, 3/4" profile (sold by the foot or in standard lengths at home centers)
- Corner connectors sized to match your frame profile (5/16" or 7/16" insertion width, metal die-cast for large panels)
- Screen mesh (see mesh selection section below for type)
- Screen spline, 0.140" or 0.165" diameter (confirm to match your frame groove and mesh thickness)
- Screen roll tool (spline roller with concave wheel on one side, convex on the other)
- Utility knife with fresh blades
- Hacksaw or miter saw with a metal-cutting blade
- Tape measure, speed square, and pencil
- Flat work surface at least as large as your biggest panel
- Corrosion-resistant mounting hardware: 300-series stainless steel screws or aluminum screws
- Exterior-grade L-brackets or Z-clips for mounting panels to posts or framing
Removable panels (additions to the above)
- Spring-tension clips, screen turn buttons, or hook-and-eye fasteners for removable mounting
- Rubber bumpers or foam weatherstripping to seal edges without permanent fasteners
- Storage bags or a dedicated rack for off-season panel storage
Roll-up/retractable screens
- Retractable cassette screen unit sized to your opening (verify max width/height from manufacturer's sizing table)
- Level and laser level (critical for cassette alignment)
- Stainless steel or coated lag screws and wall anchors appropriate for your mounting surface
- Drill and bits
- Track or channel guides (typically included in kit)
Screen doors
- Pre-hung or flat-pack screen door in the correct nominal width (30", 32", or 36")
- Hinges rated for exterior use (stainless or coated)
- Door closer (spring-loaded or pneumatic cylinder)
- Hook-and-eye or magnetic latch
- Shims and a level for plumb installation
- Casing nails or exterior screws
Budget-friendly alternatives
Fiberglass frame screening is widely available in 36-inch, 48-inch, and 60-inch wide rolls, which can reduce cuts if your panels happen to match standard roll widths. PVC or composite frame material is cheaper than aluminum but less rigid over long spans and may bow in heat. For mounting, exterior hook-and-loop screen tape products are a legitimate short-term option for very lightweight panels in sheltered locations, but they won't hold up through a season of wind and rain on an exposed patio.
Mesh types and selection guide
The mesh you choose has a bigger impact on your day-to-day experience than almost any other decision in this project. Here's a plain breakdown of the main options, drawn from Phifer's published technical data and installer guidance.
| Mesh Type | Mesh Count | Material | Best For | Key Tradeoff |
|---|---|---|---|---|
| Standard fiberglass (18x14) | 18×14 | Fiberglass | General patio insect control, pools, patios | Affordable, easy to work; less tear-resistant than metal |
| Standard aluminum (18x14) | 18×14 | Aluminum | General use, slightly more rigid | Can crease permanently if bent; conducts heat |
| 18×16 or 20×20 fiberglass | 18×16 or 20×20 | Fiberglass | Tighter insect control in buggy climates | Reduced airflow vs. 18×14 |
| No-See-Um / high-count mesh | 20×20 and above | Fiberglass | Biting midges, gnats, small insects | Noticeably reduced airflow; choose carefully in hot climates |
| PetScreen (vinyl-coated polyester) | — | Vinyl-coated polyester (0.036" thick) | Pets, high-traffic areas, puncture resistance | Heavier, requires compatible spline; reduced visibility slightly |
| TuffScreen heavy-duty | — | Vinyl-coated polyester (~0.026–0.027" thick, ~7 oz/yd²) | Heavy use, patios with kids and pets | Premium price; slightly less open than standard mesh |
| SunTex 80 solar mesh | ~25% openness | Vinyl-coated polyester | Sun control + insect protection combined | Noticeably reduced outward view; more privacy |
| SunTex 90 solar mesh | ~10% openness | Vinyl-coated polyester | Maximum sun/privacy control | Significantly reduced view and natural light inside |
For most homeowners, Phifer's 18x14 fiberglass Pool & Patio mesh is the right starting point. It's the standard specification for residential patio and pool enclosures, comes in roll widths from 30 inches up to 134 inches with common 25-foot and 100-foot roll lengths, and it's easy to work with using a standard spline roller. The nominal yarn diameter is about 0.013 inches, which gives good visibility and airflow. If you have pets or kids, move up to PetScreen (nominal thickness 0.036 inches) or TuffScreen, and confirm your spline and frame groove will accommodate the thicker fabric before you buy. If you want to cut glare and heat as well as keep bugs out, SunTex solar mesh does both jobs. The openness factor is the key number: SunTex 80 sits at about 25% openness (good view and airflow, moderate sun control) while SunTex 90 drops to about 10% openness (much more shade and privacy, but you'll notice the reduced light indoors).
Fiberglass vs. aluminum: the practical comparison
Fiberglass is softer and more flexible, which makes it easier to cut and install without creasing. It won't corrode and it's the preferred choice for coastal or high-humidity environments. Aluminum mesh is stiffer, which helps it hold its shape in larger spans, but it creases permanently if you fold or bend it and it can oxidize over time. For DIY patio panels, fiberglass is almost always the easier and more forgiving choice, particularly for first-time builders.
Hardware and fastening methods explained
Getting the hardware right means the difference between a screen that lasts a decade and one that starts falling apart in two seasons. There are four main fastening systems used in DIY patio screen work: spline-in-channel (for attaching mesh to the frame), corner connectors (for assembling the frame itself), mounting hardware (for attaching the panel to the patio structure), and door hardware (hinges, closers, latches). Each has specific sizing and compatibility rules that are easy to get wrong if you skip the details.
Spline: sizing and compatibility
Screen spline is the rubber or vinyl rope that locks the mesh into the frame's groove channel. Common residential spline diameters are 0.125 inch, 0.140 inch, 0.165 inch, 0.175 inch, 0.185 inch, and 0.190 inch. The two most commonly used sizes for standard residential frames are 0.140 inch and 0.160/0.165 inch. The rule is simple: spline plus mesh thickness must fill the groove snugly without requiring you to force it in. If you force oversized spline into a groove, you'll either crack the frame or pull the spline loose under tension. Standard 18x14 fiberglass mesh typically uses 0.140 or 0.160 inch spline. Heavier meshes like PetScreen (0.036 inch fabric thickness) or TuffScreen may require a smaller spline diameter or a frame with a wider groove because the mesh itself takes up more space in the channel. See Window Screen Spline, RiteScreen for manufacturer guidance that standard fiberglass/aluminum screening commonly uses 0.140" or 0.160" spline and that heavier meshes (PetScreen/TuffScreen) can require different spline diameters or groove choices; always confirm mesh thickness vs. groove width before ordering spline Window Screen Spline — RiteScreen. Check the mesh product specs and the frame groove width before ordering spline.
Frame profiles and corner connectors
Standard aluminum screen frame extrusions for DIY panels have an outside dimension of 3/4 inch (0.750 inch), the most common profile at home centers. The spline channel is typically sized for 5/16 inch or 7/16 inch corner connector insertion tabs, depending on the profile. You must match your corner connectors to your exact frame profile. There are two main corner connector styles: internal miter connectors (for 45-degree mitered corners, which give a clean finished look but require precise cuts) and square-cut stab-in connectors (simpler, more forgiving, recommended for beginners). For large or heavy panels, use die-cast metal corner connectors rather than plastic. Plastic corners can flex and fail under the tension of a tightly splined large panel.
Mounting hardware and fastener selection
For exterior patio applications, use 300-series stainless steel or aluminum fasteners for any hardware that's exposed to weather. The Aluminum Design Manual (Aluminium Association), fastener/corrosion guidance recommends using corrosion‑resistant fasteners (300‑series stainless steel for exposed exterior attachments; compatible aluminum or specified coated fasteners per project specs) and provides detailed guidance on material compatibility and minimum spacing/edge distances for rivets and screws on aluminum framing Aluminum Design Manual (Aluminium Association) — fastener/corrosion guidance. Plain carbon steel screws will rust and can cause galvanic corrosion where they contact aluminum frames, especially in humid or coastal climates. This is a real failure mode, not just a cosmetic issue. Zinc-plated or bright-zinc screws are not a good substitute for stainless in exterior screen work. If you're attaching panels to wood posts or a wood beam, 1-5/8 inch stainless wood screws with exterior-grade L-brackets work well. For masonry or concrete, use stainless sleeve anchors or concrete screws rated for exterior use.
Roll-up screen hardware
Retractable cassette systems use a spring-loaded or motorized roller housed in an aluminum or composite hood. The cassette mounts at the top of the opening; side tracks guide the screen down and hold it taut when deployed. Manufacturers like Phantom Screens publish specific maximum width and height limits by model. Oversized openings require the manufacturer's larger 'Executive' or oversized roller system. Never exceed the published size limits, as wind load on an undersized roller spring will cause premature failure and can be a safety hazard. For large patio spans, splitting the opening into two roll-up panels is often a simpler and more reliable solution than one wide cassette.
Preparing frames and tracks
Good preparation before assembly eliminates most of the common frustrations in DIY screen panel builds: frames that aren't square, corners that don't fit flush, and mesh that goes on crooked. Take the extra 30 minutes here and the rest of the build goes smoothly.
Cutting aluminum frame stock
Cut aluminum frame extrusions with a hacksaw, miter saw with a fine-tooth metal-cutting blade, or a circular saw with a metal-cutting blade. Always clamp the piece securely before cutting. Deburr the cut ends with a fine-tooth metal file or 220-grit sandpaper. Rough or burred ends prevent corner connectors from seating fully and create sharp edges that will cut the mesh during installation. If you're using miter corners, make your 45-degree cuts carefully and check each pair with a speed square before proceeding.
Squaring the frame
After assembling the four sides and corner connectors, check the frame for square by measuring both diagonals (corner to corner). The two measurements must match within 1/8 inch. If they don't, apply gentle pressure to the longer diagonal corner until they equalize, then set the frame on a flat surface to hold it while you move on. A frame that goes into the wall out of square will cause the mesh to look wavy and will make the panel hard to mount level.
Corrosion protection and pre-assembly tips
Aluminum frame extrusions are naturally corrosion-resistant, but the cut ends are exposed and can oxidize faster. A quick coat of clear lacquer or aluminum primer on the cut ends adds years of life, especially in coastal or high-humidity environments. If you're installing tracks or channels in concrete or masonry, apply a bead of exterior silicone sealant at the base of the track before fastening to prevent water from wicking under the track and causing staining or frost heave in cold climates. Pre-drill pilot holes through aluminum to prevent the material from cracking or distorting when you drive screws.
Working with tracks for removable panels
Track systems (J-channel, U-channel, or C-channel extrusions) mounted to the patio framing let you slide removable panels in and out without tools. For a vertical sliding track, mount the channels plumb with a level and confirm the track width matches your frame thickness. A snug but not tight fit (about 1/16 inch clearance on each side of the frame) lets the panel slide easily while keeping it from rattling in wind. Secure tracks with stainless screws every 12 to 16 inches.
Build: fixed framed screen panels
This is the core skill for most DIY patio screening projects. Once you can build a good fixed panel, you can adapt the technique for removable panels, rescreen existing frames, and understand how enclosure systems go together. For a step-by-step walkthrough on how to make screen panels for patio, see the detailed guide linked here under ". For step-by-step instructions on how to close in a patio with screen, see the dedicated how to close in a patio with screen guide. For a complete step-by-step walkthrough, see our guide on how to build patio screen enclosure. Plan for about 30 to 45 minutes per panel once you've done one or two.
Step-by-step panel assembly
- Cut the four frame pieces to length. Remember that with square-cut stab-in corners, the long dimension of each piece equals your finished panel dimension (width or height). With miter corners, add the frame width to each piece dimension to account for the 45-degree cut. Deburr all cut ends.
- Press the corner connectors into the ends of the short (width) pieces first, then connect the long (height) pieces to form the rectangle. All four connectors should seat fully with firm hand pressure. Use a rubber mallet if needed, but don't crack the frame.
- Check both diagonals and adjust until they match within 1/8 inch. Set the frame on your flat work surface.
- Lay your mesh roll over the assembled frame, leaving at least 2 inches of overhang on all four sides. Cut a rough piece from the roll with your utility knife or scissors.
- Starting on one long side, use the concave wheel of the spline roller to press the spline and mesh into the frame groove together. Work from the center of the side toward each corner, keeping moderate tension on the mesh with your free hand. Do not spline the corners yet.
- Move to the opposite long side. Pull the mesh firmly across the frame to remove slack, then spline this side working center-to-corner in the same way. You should see the mesh lying flat and taut.
- Repeat for both short sides. At each corner, use the convex wheel of the spline roller or a flat-head screwdriver to press the spline fully into the corner of the groove.
- Once all four sides are splined, go back around the entire perimeter and confirm the spline is fully seated. Press down any sections that feel soft or loose.
- Trim excess mesh flush with the outer edge of the spline using a sharp utility knife. Hold the knife at a slight angle so you cut into the spline channel rather than across the face of the frame. One clean pass per side is all you need with a fresh blade.
- Inspect the finished panel: mesh should be drum-tight with no visible sags, wrinkles, or loose spline. If you see a sag, remove the spline from that section, re-tension, and re-spline.
Tensioning the mesh correctly
Proper tension is the single biggest factor in how professional your finished panel looks. The mesh should feel firm when tapped, like a snare drum, not soft like a pillow. The most common mistake is splintering two adjacent sides first and then finding you've locked in a wrinkle on the third side. The fix is to always spline opposing sides in sequence: long side 1, long side 2 (pulling tension across), short side 1, short side 2. This keeps tension balanced in both directions and prevents diagonal wrinkles. On panels larger than 4 feet in any dimension, a second pair of hands makes a real difference on the tension-pulling step.
Mounting the panel to your patio
Hold the finished panel in the opening and confirm it fits with the 1/4-inch clearance gap you planned for. Mark mounting hole positions with a pencil. For permanent installation, use stainless steel Z-clips or L-brackets screwed to both the panel frame and the patio post or beam. Space fasteners no more than 24 inches apart for panels up to 6 feet tall, and no more than 16 inches apart for taller panels. Pre-drill pilot holes through the aluminum frame before driving screws. If you're mounting to concrete or masonry posts, use stainless concrete screws or sleeve anchors. After mounting, run a bead of clear exterior silicone where the panel frame meets the patio structure to close any gaps bugs could squeeze through.
Finishing details and weatherproofing
For a clean finished look, aluminum screen molding (a flat or L-shaped aluminum trim strip) can be pinned over the panel edges where they meet posts or beams. This covers any gap between the panel and the structure and gives the installation a more polished appearance. Use stainless or aluminum brads or small nails to tack the molding in place. Caulk the joint between the molding and the patio framing with paintable exterior caulk if you want a weather-tight seal. On painted wood structures, prime the molding before painting to match.
Troubleshooting: sagging, wrinkles, and tears
Sagging mesh almost always means the spline wasn't seated fully in the groove channel. Remove the spline from the affected side, re-tension the mesh, and re-spline. Persistent sagging on a large panel can also mean the frame itself has bowed; add a center support or divider bar across the span to stiffen it. Wrinkles running diagonally from a corner mean uneven tension during installation; the only reliable fix is to remove the spline from all four sides and start over. Small tears in fiberglass mesh can be patched with a self-adhesive screen repair patch in minutes; larger tears or holes bigger than a few inches are better handled by rescreening the whole panel, which uses the same spline-roller process described above. For a full rescreen walkthrough, the process is essentially identical to new installation: remove old spline and mesh, clean the groove channel, and install fresh mesh.
Time and cost estimates by approach
| Approach | DIY Time Estimate | Material Cost Estimate | Skill Level |
|---|---|---|---|
| Single fixed framed panel (up to 3×7 ft) | 1–2 hours | $25–$60 | Beginner |
| Full patio screened with fixed panels (200 sq ft) | 1–2 weekends | $600–$1,200 | Beginner–Intermediate |
| Removable panel system (same size) | 1–2 weekends | $650–$1,300 (adds track hardware) | Beginner–Intermediate |
| Single retractable roll-up screen | 2–4 hours | $150–$600+ | Intermediate |
| Screen door installation | 2–4 hours | $40–$200 | Beginner |
| Full screen enclosure (new framing) | 2–4 weekends | $1,600–$4,000+ | Intermediate–Advanced |
These estimates assume standard rectangular openings with no unusual obstructions. Add 30 to 50 percent to your time estimate for your first project as you work through unfamiliar steps. Material costs vary by region, mesh type, and frame quality. Heavy-duty or solar mesh runs 20 to 40 percent more than standard fiberglass, which is usually worth it in high-traffic or sun-exposed situations.
Seasonal maintenance and removal
Fixed patio screens need surprisingly little maintenance if they're built with the right materials. Once or twice a year, rinse the mesh with a garden hose to remove pollen, dust, and debris that reduce airflow and accelerate fiber breakdown. Inspect the spline for sections that have popped out or dried and cracked; re-seat loose spline while the mesh is still in good condition rather than waiting for the mesh to sag. Check all mounting hardware for rust or loosening and replace any steel fasteners that are corroding.
In climates with heavy snow or ice storms, removing fiberglass screen panels and storing them flat in a dry location is good practice. Fiberglass mesh can be damaged by branches falling on it under snow load, and freezing water in the frame groove can crack the spline. Aluminum frames can be left in place if you clear snow away promptly. For removable panel systems, seasonal storage is already built into the design. Stack panels flat or hang them vertically on a wall rack. Never store screen panels in a humid basement without desiccant packs nearby; prolonged moisture exposure will corrode aluminum frames over several years even though aluminum is generally corrosion-resistant.
Repairs: patching, replacing, and rescreening
Most screen repairs fall into three categories: small patches for minor damage, full mesh replacement on an existing frame, and frame replacement when the aluminum has bent or corroded beyond saving. For a small hole or tear up to about 2 inches, a self-adhesive fiberglass or aluminum repair patch (available at any hardware store) does the job in minutes. Press firmly on all edges and the patch will hold through a full season in most climates. For larger damage, you're better off rescreening the whole panel using the same spline-roller process described in the build section above. Remove the old spline with a flat-head screwdriver or a spline-removal tool, clear the groove channel of old spline fragments, and install new mesh as if building fresh. Matching the existing mesh type makes the repair less visible, but if you're upgrading to PetScreen or TuffScreen, this is a good time to do it.
If the frame itself is bent, cracked at a corner, or visibly corroded through the anodized surface, replace the frame rather than patching around it. Bent aluminum frames can't be straightened reliably; they'll warp again under mesh tension. Building a replacement frame from new extrusion stock takes about 30 minutes and costs less than $15 in most cases, which is nearly always the better call versus wrestling with a damaged frame.
Regional and climate considerations
Coastal homeowners within a mile or two of saltwater should treat every fastener and hardware choice as a corrosion issue, not just a preference. Stainless steel fasteners are not optional in these environments; plain steel will rust visibly within one season and cause lasting staining on aluminum frames. Consider marine-grade aluminum or powder-coated frames for long-term installations. In the Southeast and Gulf Coast states where no-see-ums and biting midges are common, standard 18x14 mesh won't stop them. Move to a 20x20 mesh count or a dedicated no-see-um mesh, and accept the modest reduction in airflow as the trade-off. In the desert Southwest, solar mesh makes a lot of sense because glare and radiant heat are often bigger quality-of-life issues than insects. In cold climates, plan your panel system for easy seasonal removal from the start rather than retrofitting a removal system later.
FAQ
What are the main DIY approaches for adding a bug screen to a patio and when should I choose each?
Main approaches: (1) Fixed framed panels — best for permanent, low‑maintenance coverage on defined openings; good where wind/load low. (2) Removable panels (snap‑in or framed panels on track) — choose when you need seasonal removal or access for furniture. (3) Roll‑up/retractable screens (cassette or open roller) — good for clean aesthetics and occasional use; choose manufacturer size table for large openings and consider professional install for very wide/high spans. (4) Screen doors — use for single door openings where swinging access is required. (5) Full patio enclosure (aluminum or wood framing with screening) — for full weather/bug protection and integrated upgrades (lighting, fans); requires more skills/permits. Choose based on permanence, budget, opening geometry, wind exposure and desired aesthetics.
How do I measure my patio opening for framed panels, removable panels, and retractable screens?
Framed panels: measure finished opening width and height at three points each (top/middle/bottom and left/middle/right). Use smallest width and height and subtract recommended clearances per frame system (typically 1/8"–1/4"). Removable panels: measure track width and height; allow 1/8" clearance on sides, 1/4" at top/bottom for easy removal. Retractable/roll‑up screens: consult manufacturer sizing charts; measure rough opening and jambs at three points and use smallest dimensions; verify maximum single‑span width/height from product spec (oversized openings may need double units or reinforced systems). For screen doors: measure jamb width at three heights and door height in three places; use smallest measurement.
What materials and mesh types should I consider and which are best for common needs?
Mesh options: Standard fiberglass (18×14) — best balance of insect protection, visibility and airflow; common for patios and pool screens. Pet‑resistant (Phifer PetScreen/vinyl‑coated polyester) — thicker, high puncture resistance for homes with pets. Heavy‑duty vinyl‑coated (TuffScreen) — for high‑traffic, durability and longevity. Solar/privacy (SunTex family) — specified by openness factor (e.g., SunTex 80 ≈25% openness, SunTex 90 ≈10% openness) for sun control/privacy; lower openness = more shade/privacy, less view/air. Fine meshes (No‑See‑Um/higher mesh counts) — used where gnats/midges are a problem but reduce airflow/visibility. Choose based on durability needs, view preference, pet use, and insect type.
What frame and fastener materials are recommended for exterior screen frames?
Use aluminum extrusions sized for screen frames (common profiles with 3/4" frame widths and corresponding spline channels). For connectors use internal miter corners for neat 45° joints or stab‑in corner connectors for simpler builds; use die‑cast metal corners for larger/heavier panels. For exposed fasteners choose corrosion‑resistant materials — 300‑series stainless steel or aluminum/coated fasteners to avoid galvanic corrosion with aluminum frames. Avoid plain carbon steel in wet/coastal environments.
What spline sizes should I buy and how do I match spline to mesh and frame?
Common spline diameters stocked: 0.125" (1/8"), 0.140", 0.165/0.175", 0.185/0.190" and larger. Standard fiberglass/aluminum mesh typically uses 0.140" or 0.160/0.165" spline. Heavy‑duty meshes (PetScreen/TuffScreen) are thicker; check mesh thickness vs. frame groove width and choose spline accordingly. Do not force oversized spline into a too‑narrow groove. Confirm groove width on your frame extrusion and match spline diameter from manufacturer compatibility guidance before buying.
What tools and materials do I need for building a simple framed screen panel?
Tools: tape measure, utility knife, spline roller, screen frame cutting miter saw or hacksaw with miter box, corner connectors, straightedge, clamps, rubber mallet, drill and countersink, level. Materials: aluminum screen frame extrusions sized to opening, corner connectors, appropriate spline (by diameter), chosen mesh (e.g., 18×14 fiberglass or PetScreen), stainless or coated screws/fasteners if attaching frame to structure, weatherstripping or gasket if needed, optional paint/trim for aesthetics. Optional: screen clamps or velcro for removable panels.
Next Articles
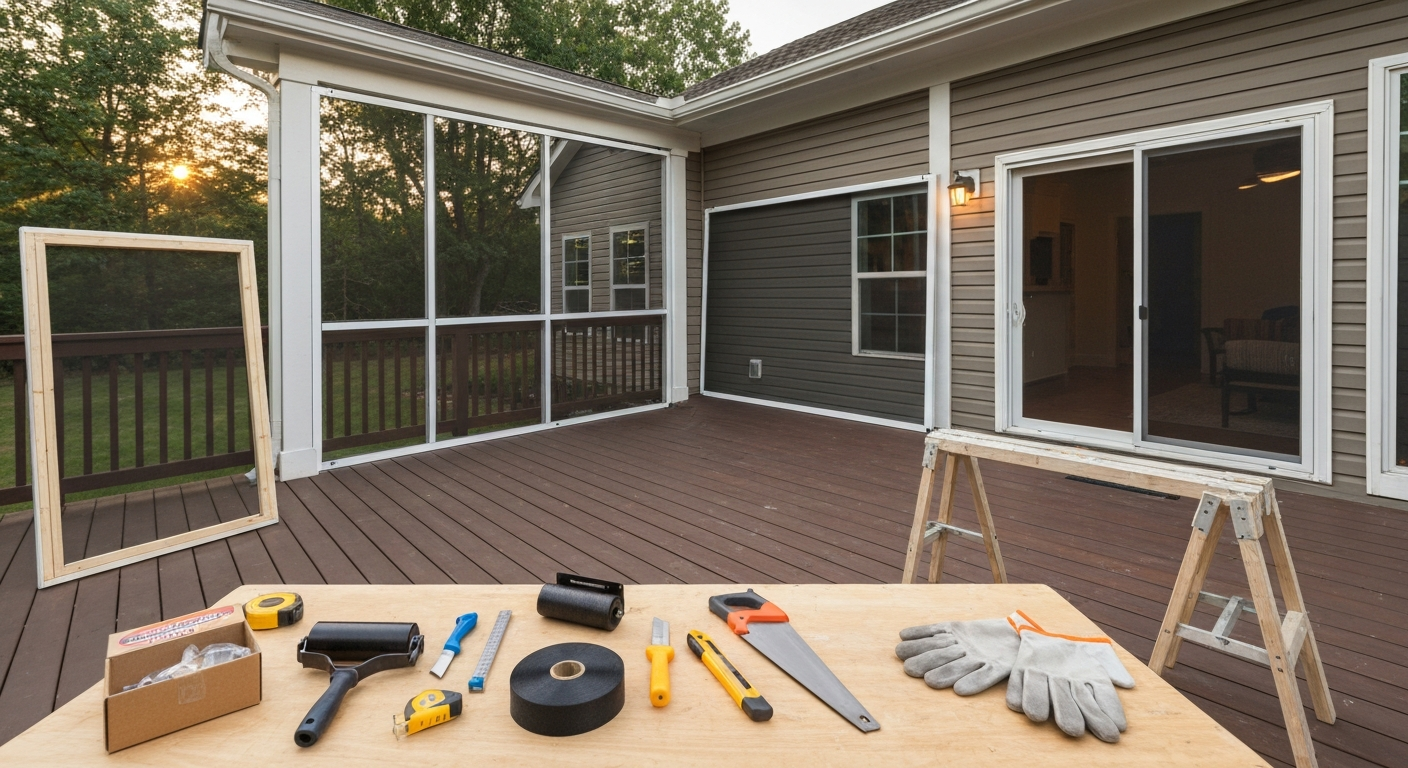
How to Make Screen Panels for Patio: DIY Guide & Plans
DIY guide to build, repair, and install patio screen panels: materials, step-by-step plans, attachments, costs.
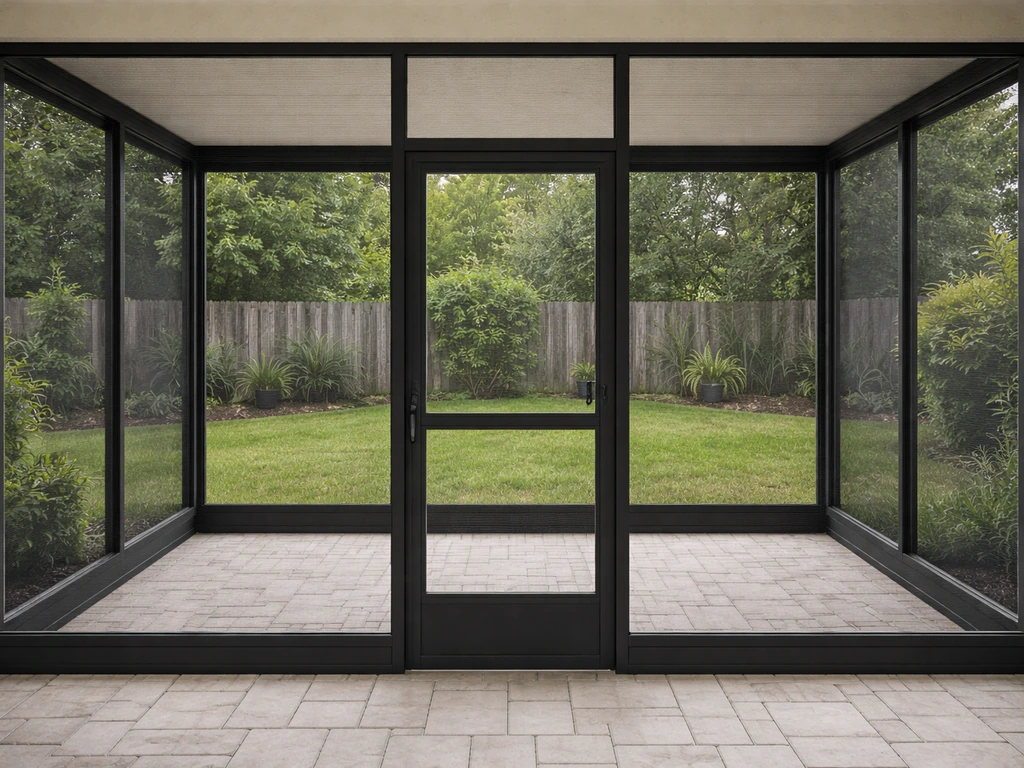
How to Close in a Patio With Screen: DIY Steps
DIY step-by-step guide to close in a patio with screen panels, doors, framing, sealing, and troubleshooting gaps and lea
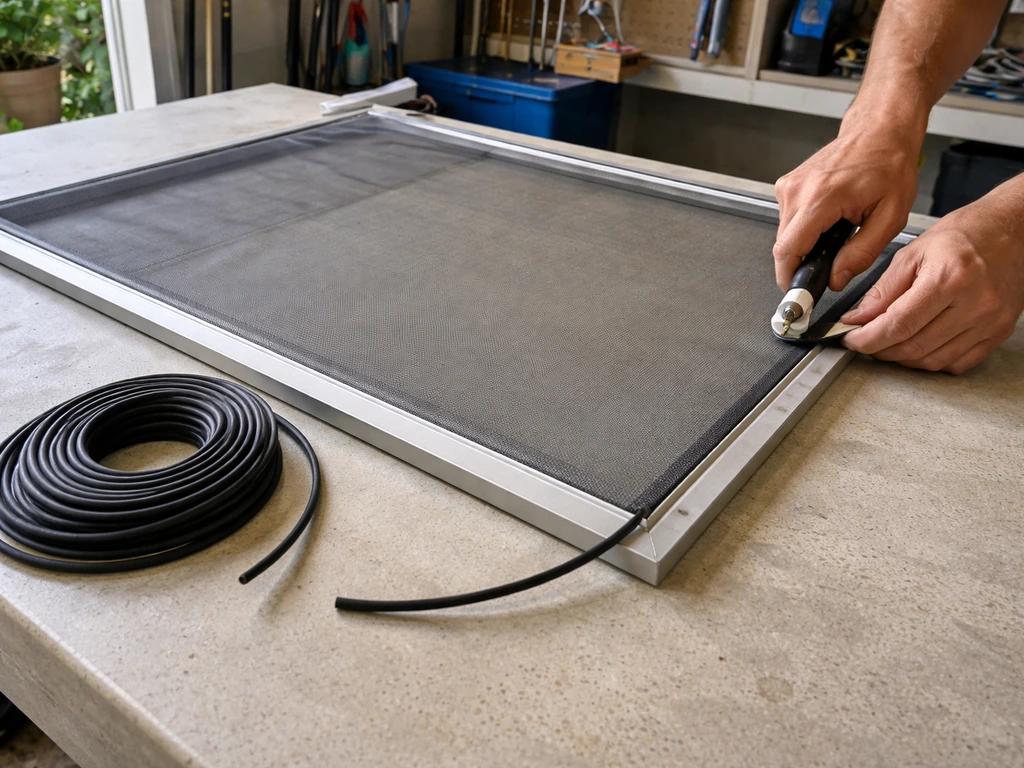
How to Patch Patio Screen: Step-by-Step Repair Guide
Learn how to patch patio screen: fix holes, sagging, or loose seams by swapping fabric and reinstalling spline tightly.