
The quickest way to make your patio look intentional and alive is to group flower pots in odd numbers, vary their heights, and place the tallest pot at the back or center of each cluster. Subirrigated Containers for the Mississippi Gardener (Mississippi State University Extension) notes that Sub‑irrigated (self‑watering) container systems require soilless mixes and are compatible with commercial potting media (peat, coir, pine bark, perlite/vermiculite); Mississippi State Extension recommends soilless mixes for subirrigated containers and details medium composition and management. Start with that one move and everything else, plant choice, container material, drainage, and surface protection, builds from there. This guide walks you through every practical decision from first assessment to winter storage, with layouts, DIY build templates, and a maintenance checklist you can actually use.
How to Display Flower Pots on Patio: DIY Layouts & Care Tips

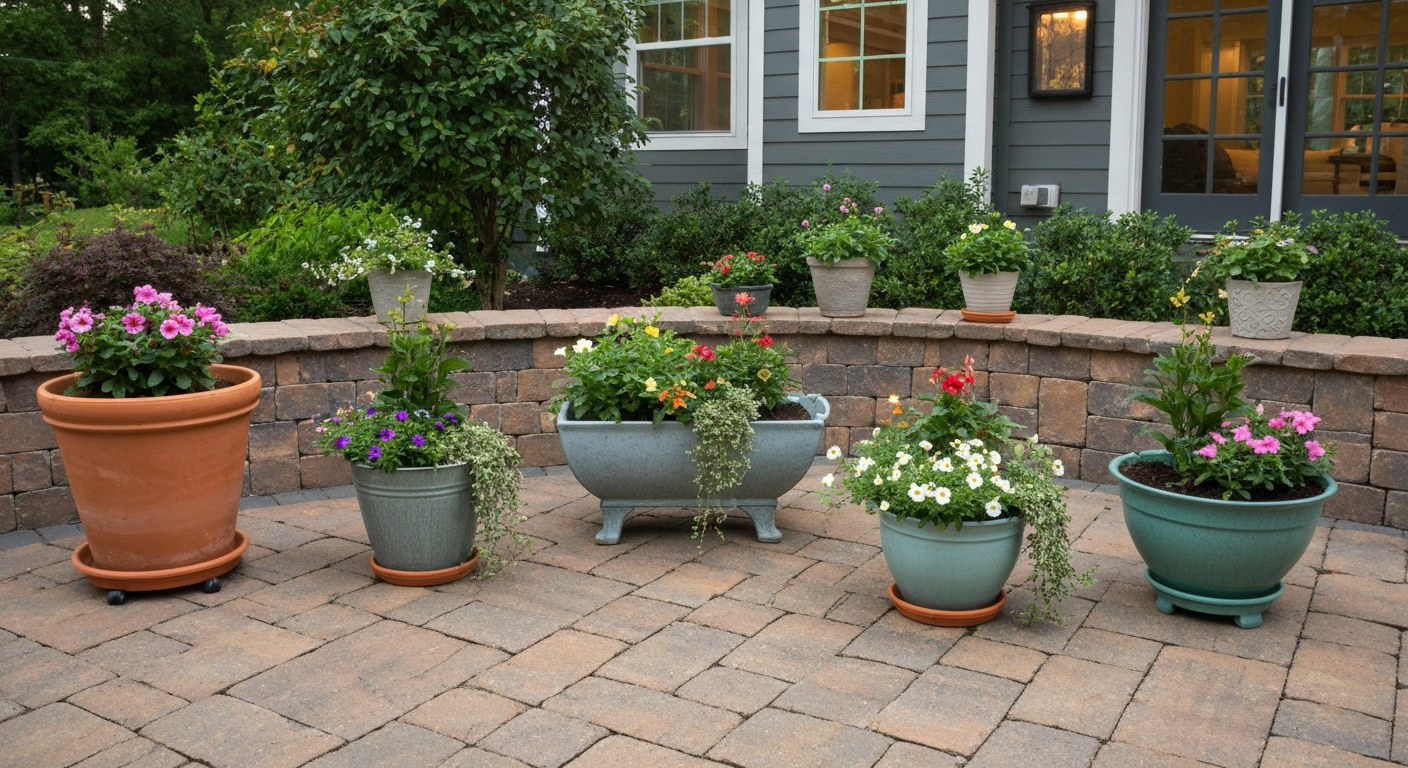
Quick action plan: 6 steps to an attractive, functional display
- Assess your patio: measure the usable floor area, note which zones get full sun, part shade, or deep shade, check your surface type (pavers, flagstone, concrete, decking) and estimate how much weight your base can handle before you buy a single pot.
- Choose containers to match your conditions: pick materials and sizes suited to your light levels, climate, and maintenance willingness, and make sure every pot has a drainage hole.
- Select plants for your actual light and enclosure: match annuals, perennials, or edibles to measured sun hours and to any screening or overhead shade your patio has.
- Plan your layout on paper first: sketch a top-down view, mark circulation paths (keep at least 30 inches clear), identify your focal point, and assign pot groupings before moving anything outside.
- Install your display method: whether that is pot stands, wall shelves, railing boxes, hanging planters, or a tiered system, follow the DIY templates in this article so the structure is stable and the surface beneath is protected.
- Set up drainage, watering, and a maintenance schedule: use a quality soilless potting mix, add saucers or feet to protect pavers, and commit to the weekly and seasonal checklist at the end of this article.
Assess your patio before buying anything
Spend 20 minutes outside with a tape measure and a notepad before you spend money. Measure the total floor area, then measure the clear path you need to leave for movement. A comfortable main circulation path is 36 inches wide; a secondary path between furniture and pots can be 30 inches at minimum. Anything narrower feels cramped and becomes a trip hazard.
Track sun hours across the day. Full sun means 6 or more hours of direct sun; part shade is 3 to 6 hours; deep shade is under 3 hours. A patio that seems sunny at noon may be shaded by the house or a fence by mid-afternoon, which changes every plant decision you make. If your patio is screened or covered, account for the light reduction the screening material adds, which can push a part-sun zone into shade territory.
Check your surface type and what is under it. A standard pedestrian paver or flagstone patio is typically installed on roughly 4 inches of compacted aggregate base plus about 1 inch of bedding sand. That system handles normal foot traffic well, but large filled planters can weigh well over 100 lbs and create concentrated point loads that can cause settlement or cracking over time. If you are placing heavy pots, use rubber or paver risers to spread the load, or plan a continuous low bed or slab zone for your heaviest containers. Note whether your joints are mortared, dry-laid, or filled with polymeric sand, because that affects how you protect the surface from staining and moisture damage.
Choosing containers: materials, sizes, and styles
Container materials fall into three porosity categories, and that distinction matters more than aesthetics. Nonporous containers (plastic, metal, glazed ceramic, fiberglass) hold moisture longer, dry out slowly, and are safe in freeze-thaw climates because water cannot soak into the walls. Semi-porous materials like wood and pressed fiber breathe a little and degrade over several seasons. Porous unglazed terracotta and clay look beautiful but absorb water, dry out faster so you water more often, and are vulnerable to cracking in freezing temperatures unless the product is specifically rated as frost-resistant (some lines are rated down to -22°F, but ask the supplier for documentation rather than assuming).
Match pot depth to the plant's root system. A practical minimum depth for most annuals and small perennials is about 8 inches (20 cm). Small annuals like lobelia or alyssum can manage in 6-inch pots, but most flowers and vegetables want 8 to 12 inches. Larger perennials, ornamental grasses, and shrubs need 18 to 24 inches or more. Undersizing the pot forces the plant to become rootbound within one season and makes watering a constant battle.
| Material | Porosity | Weight (approx.) | Freeze-thaw safety | Best for |
|---|---|---|---|---|
| Plastic | Nonporous | Light | Excellent | Full sun/high-water plants, budget builds |
| Fiberglass | Nonporous | Light-medium | Excellent | Mimicking terracotta or stone without the weight |
| Glazed ceramic | Nonporous | Medium-heavy | Good (check glaze integrity) | Decorative focal-point pots |
| Unglazed terracotta/clay | Porous | Medium-heavy | Poor unless frost-rated | Drought-tolerant plants, mild climates |
| Wood (cedar, teak) | Semi-porous | Medium | Good with liner | Custom built-in planters, raised beds |
| Metal (galvanized, Corten) | Nonporous | Heavy | Excellent | Modern and industrial styles |
| Pressed fiber/coir | Semi-porous | Light | Fair (1-3 seasons) | Hanging baskets, single-season use |
For screened patios, lighter containers matter more because you will likely be moving things seasonally, and the enclosed environment stays slightly more humid, which means nonporous pots reduce the risk of overwatering. For open sunny patios, heavier glazed or metal containers anchor well against wind and hold moisture longer in hot weather.
Selecting plants by light and enclosure
The single biggest mistake people make is buying plants they like the look of and then wondering why they died by July. Match the plant to the actual measured light condition of the spot where the pot will live, not where you wish it would live.
Full sun (6+ hours direct sun)
- Annuals: Petunias, geraniums (Pelargonium), zinnias, marigolds, lantana, calibrachoa, portulaca
- Perennials: Lavender, salvia, agapanthus, echinacea, rudbeckia
- Edibles: Tomatoes, peppers, basil, thyme, rosemary
- Pollinator-friendly: Lavender, salvia, and lantana are particularly attractive to bees and butterflies
Part shade (3 to 6 hours sun)
- Annuals: Impatiens, begonias, torenia, nicotiana, snapdragons
- Perennials: Astilbe, heuchera, Japanese forest grass (Hakonechloa), ferns
- Edibles: Lettuce, spinach, parsley, mint, strawberries
Deep shade (under 3 hours sun) and screened patios
- Annuals: Impatiens (standard), caladiums, coleus (grown for foliage)
- Perennials: Hostas, ferns, tiarella, coral bells, cast iron plant
- Foliage focus: In deep shade, lean into texture and leaf color rather than flowers
- Screened patio note: Fine mesh screening reduces light by 10 to 30 percent; treat a screened space that faces south or west as part shade, not full sun
For more ideas on combining plants and pots across a whole patio scheme, the broader topic of how to decorate a patio with flower pots covers plant combination strategies in depth. If you are working with very limited floor space, the guidance on how to decorate a small patio with flowers is worth reading alongside this article. For step-by-step layouts and plant lists, see our guide on how to decorate a small patio with flowers. For a full walkthrough on arranging blooms and maximizing color in tight, shaded spaces, see how to decorate my patio with flowers. For broader inspiration and step-by-step styling tips, see the guide on how to decorate a deck or patio with flowers.
Design principles for arranging pots
You do not need a design degree to arrange pots well. Four principles cover most situations: balance, scale, focal points, and circulation.
Balance does not mean symmetry. A single large pot on the left can balance three smaller pots on the right if the overall visual weight feels even. Symmetrical arrangements (one matching pot each side of a door) work well for formal entries; asymmetrical groupings feel more relaxed and are easier to pull off on irregular patios.
Scale means matching pot size to the space. A 10-inch pot sitting alone in the center of a 12-by-16-foot patio disappears. Large patios need anchor pots of at least 18 to 24 inches in diameter, with smaller pots clustered around them. On a small or screened patio, a single large pot can overwhelm the space, so max out at 14 to 16 inches for your biggest container and keep groupings tight.
Every display needs one focal point, whether that is a large statement pot with a dramatic plant, a tiered planter in a corner, or a hanging basket centered in a screened bay. Everything else in the arrangement should support that focal point rather than compete with it.
Circulation is where most people go wrong. Measure your paths before placing a single pot. Main paths need 36 inches clear; secondary paths between furniture and plantings need 30 inches at minimum. Keeping pots clustered to the perimeter and corners naturally preserves the middle of the patio for movement and furniture.
Layouts and templates for different patio types
Small patio (under 100 square feet)
Prioritize vertical space. Use wall-mounted shelves, a single tall tiered planter in one corner, and a railing box along one edge. Keep the floor clear except for one or two anchor pots near the entry. A top-down view of a small patio looks like this: furniture cluster in the center, one corner tiered planter (roughly 18 by 18 inches footprint), one wall shelf running 3 to 4 feet along the longest wall, and railing boxes if there is a railing. Leave the diagonal from entry to seating completely clear.
Narrow patio (6 to 8 feet wide)
Line one or both long walls with staggered pots rather than a flat single row. A staggered row alternates a taller pot (14 to 18 inches) with a shorter pot (8 to 10 inches) so the eye moves up and down rather than across a flat shelf. Keep the center corridor completely clear. Railing boxes and wall-hung planters are your best friends on a narrow patio because they take up zero floor space.
Multi-use patio (dining, seating, and planting zones)
Divide the patio into zones visually using pot groupings as soft dividers. A cluster of three to five pots of varying height placed between the dining table and the seating area signals the zone change without a wall. Keep each zone's pot grouping within a 3-by-3-foot footprint so it reads as a deliberate arrangement rather than clutter. Use similar container materials or colors across zones to tie the whole patio together.
Screened enclosure
A screened patio is an outdoor room, so treat it like one. Anchor the corners with floor pots (one statement pot per corner works well), use hanging planters from the ceiling structure for trailing plants like pothos, string-of-pearls, or bacopa, and run a shelf or railing box along at least one wall for seasonal color. Keep drainage management tight because water cannot drain away as freely as it can on an open patio. Every pot needs a saucer, and you will need to empty saucers after watering to prevent standing water attracting insects.
Display methods with DIY installation tips
Pot stands and risers
Pot stands serve two purposes: they lift pots to a better visual height and they raise the drainage hole off the surface so water can escape without pooling under the pot and staining or softening the joint material below. Basic wrought-iron stands are inexpensive and widely available. For a DIY version, cut three pieces of 2x4 lumber to 6-inch lengths, arrange them in a triangle, and screw a plywood circle or square on top sized to your pot base. Sand and seal before use. Cost is under $5 in materials.
Rubber pot feet (small silicone or rubber discs) are an even simpler solution for heavy pots you do not want to lift further. Place three or four under each large pot to keep it off the paver surface, allow airflow, and prevent the suction-seal that forms between a wet pot base and a flat paver (that suction can chip the glaze or pull up the paver when you move the pot).
Shelves and wall-mounted systems
Wall-mounted shelves are the most effective way to add planting space without using floor area. For outdoor use, stick to pressure-treated lumber, cedar, or powder-coated metal brackets. A shelf depth of 8 to 10 inches holds most standard pot sizes. Spacing between shelves should be at least 12 inches for short plants and 18 to 24 inches for taller specimens.
Installation: locate studs or solid masonry before drilling. On wood-frame walls or screened patio posts, use 3-inch lag screws into studs for brackets rated to hold at least 30 lbs per bracket. On masonry or concrete block, use 3/8-inch masonry anchors. Space brackets no more than 24 inches apart along the shelf for a 3/4-inch shelf board; go to 16 inches if you are using thinner material. Always pre-drill on masonry to avoid splitting. For a screened patio, attach shelving to the structural frame posts, not to the screen frame itself, which is not load-bearing.
Hanging planters and ceiling-mounted options for screened patios
Hanging baskets are perfect for screened patios because the ceiling structure gives you solid attachment points. Locate a ceiling joist or structural rafter and use a 3/8-inch screw hook with a locking nut rated for outdoor use. A standard 12-inch hanging basket filled with damp potting mix and plants can weigh 15 to 20 lbs, so never hang from screen framing alone. Space hanging baskets at least 18 to 24 inches apart to allow each plant enough light and air circulation, and hang them at a height where the bottom of the basket is at or above head height (at least 6 feet 6 inches from the floor) for a clear walking path beneath.
For open patios without overhead structure, a freestanding shepherd's hook driven 8 to 10 inches into a pot of ballast (gravel or concrete) works well and does not require any drilling into your patio surface. Use two hooks flanking an entry or corner for a symmetrical look.
Railing boxes and attachments
Railing boxes attach to the top of a railing or fence and hold a rectangular planter that drapes plants over the edge. They add color without using any floor space and work on screened patio perimeter railings, deck railings, and low masonry walls. A standard railing box is 24 to 36 inches long, 6 to 8 inches wide, and 6 to 7 inches deep. Most commercial versions attach with adjustable hooks that fit railings from 1.5 to 3.5 inches wide.
DIY version: cut a box from 3/4-inch cedar or pressure-treated pine. A simple 30-inch box needs two side pieces at 7 inches tall by 7 inches wide, two end pieces at 7 inches tall by 7 inches wide, and a bottom at 30 by 7 inches. Drill 3/4-inch drainage holes every 6 inches along the bottom. Cut two mounting brackets from 1.5-inch angle iron (or use heavy-duty J-hooks from hardware store) and screw them to the back of the box to hang over the railing. Use exterior screws throughout and seal with exterior paint or stain.
Safety note: always check the railing's load capacity before adding heavy boxes. A filled 36-inch railing box with damp soil can weigh 25 to 35 lbs. If your railing feels at all loose, reinforce the post bases before adding any load.
Tiered systems and step-planters
A three-tier plant stand packs multiple pots into a footprint as small as 18 by 18 inches and creates height variation without wall attachment. You can buy commercial powder-coated steel versions for $30 to $80, or build a modular wooden version in an afternoon.
DIY 3-tier step-planter build: cut three platform frames from 2x6 lumber at widths of 24 inches, 18 inches, and 12 inches (depth 12 inches each). Stack them like stairs, each step raised 8 to 10 inches above the one below. Join adjacent steps with 2x4 uprights (4 inches long per step height), and screw through from the upright into the platform boards with 2.5-inch exterior screws. The total footprint is 24 by 12 inches; total height is roughly 24 to 28 inches depending on your riser height. Seal all cut lumber with exterior finish before assembly. This design holds three pot groupings and costs under $25 in lumber.
Built-in planter beds and low-profile edge planters
Built-in planters at the edge of a patio integrate planting with the hardscape and look intentional. The simplest version is a low timber frame (two or three courses of 4x6 landscape timbers stacked and through-bolted) set at the patio perimeter, lined with heavy polyethylene sheeting, filled with a quality potting mix, and planted up like a large container. Keep the internal depth to at least 10 to 12 inches for annuals and perennials, and 18 inches or more for shrubs. Drill or cut drainage weep holes through the liner and the bottom course of the frame so water cannot pond.
Low-profile edge planters that sit directly on the paving should be placed on rubber pads or pot feet to keep the wood or metal base off the wet surface. This extends the life of the planter and avoids staining the paver surface with tannins from cedar or pine.
Protecting flagstones and pavers under your pots
Pots on pavers cause four types of damage: concentrated point loads that crack or settle the base, moisture retention under the pot that softens joint material or stains the stone, organic staining from soil, water, and plant roots, and freeze-thaw damage to joint material in cold climates. Here is how to avoid all four. For step-by-step instructions on protecting joints and addressing mortar or sand issues, see the guide on how to point patio flags.
For point loads: a standard paver patio base (around 4 inches of compacted aggregate plus 1 inch of bedding sand) handles normal pedestrian loads fine, but a large pot filled with damp potting mix, drainage gravel, and a mature plant can easily exceed 80 to 120 lbs in a footprint of 12 to 16 inches. Spread that load with a rubber paver riser, a wider pot saucer, or a small concrete tile placed under the pot. If you are planning a row of large pots along one edge, consider having that zone poured as a continuous reinforced concrete strip rather than relying on the standard paver base.
For joint and surface protection: keep pots elevated on feet or stands so water drains freely and air can circulate beneath the base. Never let a pot sit flat on polymeric sand joints for extended periods. Polymeric sand is water-activated and requires dry conditions to cure properly; prolonged moisture sitting in one spot can cause incomplete cure, washout, or white haze. If you have dry-laid joints or standard jointing sand, note that constant moisture can erode the joint material and allow weeds to establish. Check joints around pot positions at least once per season and re-point as needed. For more detail on how pointing works and when it needs attention, the article on how to point patio flags is a good companion read. For step-by-step instructions on restoring or re‑laying flagstones, see our guide on how to flag a patio. If you're planning or replacing flagstones, see how many flags do i need for my patio for quick guidance on calculating the number required.
For staining: always use saucers under pots. Empty saucers every day or two in hot weather so you are not leaving standing, soil-tinted water on light-colored stone. Cedar planters and some metal containers can leach tannins or rust stains onto pale limestone or sandstone. A rubber mat or waterproof liner between the planter base and the paving prevents this effectively.
Drainage, soil, and watering strategies
The most important thing to know about container soil is this: do not add rocks or gravel to the bottom of a pot to improve drainage. University of Maryland Extension research confirms this does not work. Adding a coarse layer at the bottom actually creates a perched water table effect that keeps the soil above it wetter for longer, reducing effective root volume. Just use a quality soilless potting mix and make sure the drainage hole is clear.
A good container substrate has total porosity of at least 50 percent, air-filled porosity of at least 10 percent, and water-holding capacity of around 40 percent. Commercial potting mixes engineered to these targets are available at any garden center. If you want to make your own, the reliable starting point is the Cornell peat-lite formula: roughly 50 percent sphagnum peat moss (or coir as a more sustainable alternative) and 50 percent perlite or vermiculite. This gives consistent porosity without guesswork. Avoid garden soil or topsoil in pots entirely; it compacts, reduces drainage, and introduces pests and diseases.
For self-watering (sub-irrigated) containers, use a soilless mix specifically. Standard potting mixes with bark or compost components can compact in a wicking system and reduce water movement up to the root zone. Sub-irrigated systems are excellent for busy homeowners because they buffer water supply and reduce daily watering frequency, particularly on hot screened patios where pots dry out unevenly.
For drip or micro-irrigation on a patio: a 1.0 GPH (gallon per hour) emitter per pot is the most common size for medium containers (10 to 14 inches). Small pots (6 to 8 inches) can share a 0.5 GPH emitter or use a short 15-minute cycle at 1.0 GPH. Large containers (18 inches and up) may need two emitters or a 2.0 GPH rate. Use a timer to run short daily cycles rather than one long weekly soak, which waterloggs the mix. Adjust frequency based on season: daily in high summer, every 2 to 3 days in spring and fall.
Winter care and seasonal rotation
The biggest winter risk to patio pots is not temperature alone but freeze-thaw cycles. Water in the pot mix expands when it freezes and can crack both the container and the root ball of any overwintering plant. Here is a practical approach by container type.
Plastic, fiberglass, and glazed ceramic: these are your safest overwinter containers. Before the first hard freeze, move tender perennials or tropical plants indoors or into a frost-free garage. Hardy perennials can stay outside in these containers if you cluster the pots together (which insulates the root zones), wrap them in burlap or horticultural fleece, and raise them on feet so the drainage holes do not freeze shut against the ground.
Unglazed terracotta: if it is not frost-rated, bring it inside. Period. Even one freeze-thaw cycle can crack an unrated pot. Frost-rated terracotta (confirm with the supplier) can be left outside if the pot is moved against a wall, not overfilled with wet mix, and the drainage hole is kept clear.
Wood planters and built-ins: empty annual plantings in late fall, top up the mix, and cover the soil surface with bark mulch to insulate any overwintering roots. Drain all irrigation lines and emitters completely before freezing temperatures arrive.
Seasonal rotation keeps the display looking fresh year-round. A simple four-season plan: spring bulbs (tulips, narcissus) in late winter; summer annuals and edibles from late spring through early fall; autumn chrysanthemums, ornamental kale, and grasses from September; winter evergreen cuttings, hellebores, or cyclamens from November. Keep three or four large permanent evergreen or structural plants in your biggest pots year-round as anchors, and rotate the smaller seasonal pots around them.
Materials and tools checklist by project type
| Project | Materials | Tools |
|---|---|---|
| Pot stand (DIY wood) | 2x4 lumber offcuts, plywood scrap, exterior screws (2 inch), exterior wood sealant | Saw, drill/driver, sandpaper |
| Wall shelf | Cedar or pressure-treated 1x8 board, heavy-duty outdoor brackets, 3-inch lag screws or masonry anchors | Drill, level, stud finder, tape measure |
| Railing box (DIY) | 3/4-inch cedar boards, exterior screws (2 inch), J-hooks or angle iron, exterior sealant | Saw, drill/driver, measuring tape |
| Hanging planter (ceiling mount) | 3/8-inch screw hook (outdoor rated), swivel clip, hanging basket with liner | Drill, joist finder, ladder |
| 3-tier step-planter | 2x6 and 2x4 lumber, 2.5-inch exterior screws, exterior sealant or paint | Saw, drill/driver, level, tape measure |
| Drip irrigation (basic) | 1/2-inch mainline tubing, 1/4-inch drip tubing, 1.0 GPH emitters, timer, hose fitting | Hole punch, tubing cutter, hose connector |
Step-by-step DIY build templates
Build 1: simple pot stand
- Cut three pieces of 2x4 to 6-inch lengths (these are your feet).
- Cut one piece of 3/4-inch plywood to a 12 by 12-inch square (or circle with jigsaw) for the top platform.
- Arrange the three feet in a triangle on a flat surface, spaced evenly.
- Drill pilot holes and screw the plywood top to each foot using two 2-inch exterior screws per foot.
- Sand all edges, apply two coats of exterior wood sealant, and let dry fully before use.
- Total cost: under $5. Build time: 20 minutes.
Build 2: wall shelf (36 inches)
- Cut one 1x8 cedar board to 36 inches for the shelf.
- Mark bracket positions at 6 inches from each end and one in the center (at 18 inches).
- Locate studs or solid masonry at your target height; mark with pencil.
- Drill pilot holes and attach each bracket with 3-inch lag screws into studs, or 3/8-inch masonry anchors into block/brick.
- Check level across all three brackets before final tightening.
- Set the shelf board on the brackets and secure with 1.5-inch screws from below.
- Seal the shelf board with exterior finish before loading with pots.
- Maximum recommended load: 25 lbs per bracket (75 lbs total for three-bracket setup).
Build 3: railing box (30 inches)
- Cut pieces from 3/4-inch cedar: two side panels at 7 by 7 inches, two end panels at 7 by 7 inches, and one base at 30 by 7 inches.
- Assemble the box with exterior screws (2 inch), pre-drilling to avoid splitting.
- Drill 3/4-inch drainage holes every 6 inches along the base.
- Cut two J-hook brackets from 1.5-inch angle iron at 6-inch lengths and screw to the back top edge of the box to hang over the railing.
- Sand, seal with exterior finish, and let cure 24 hours before filling.
- Fill with soilless potting mix to within 1 inch of the rim.
Build 4: 3-tier step-planter
- Cut three shelf platforms from 2x6 lumber: 24 inches, 18 inches, and 12 inches (all 12 inches deep).
- Cut six riser uprights from 2x4 at 9 inches each (two uprights per step transition).
- Assemble from the bottom up: attach two uprights to the back edge of the bottom shelf, set the middle shelf on top of those uprights, attach the next two uprights, then set the top shelf.
- Secure each connection with two 2.5-inch exterior screws per joint, pre-drilled.
- Check for wobble; add a 1x2 diagonal brace on the back if needed.
- Seal all surfaces with exterior finish before use.
- Footprint: 24 by 12 inches. Total height: approximately 28 inches. Cost: under $25.
Maintenance checklist
Weekly tasks
- Water pots as needed based on soil moisture check (finger-test the top inch of mix); adjust drip timer if using irrigation
- Deadhead spent flowers to encourage continued blooming
- Check saucers and empty any standing water within 24 hours
- Look for signs of pests or disease; catch problems early
- Clear leaves or debris from around pot bases on paving to prevent moisture buildup and joint staining
Monthly tasks
- Fertilize actively growing plants (liquid fertilizer every 3 to 4 weeks or per product directions)
- Check pot stands, shelf brackets, and railing box hooks for any loosening or corrosion
- Inspect paving joints around pot positions for erosion, softening, or staining
- Rotate pots a quarter-turn if they are leaning toward a light source
- Check hanging basket hooks and swivel clips for wear
Seasonal tasks
- Spring: repot or top-dress containers that were overwintered; refresh potting mix in any pot that has not been repotted in two years; re-point any paving joints damaged over winter; check and flush drip lines
- Summer: increase watering frequency in heat spells; check for rootbound plants and move up a size if needed
- Autumn: rotate out summer annuals, replace with autumn and winter plants; prep tender pots for moving indoors; drain drip irrigation lines before first frost
- Winter: inspect all DIY structures (shelves, stands, tiered planters) for water damage or split wood; treat or repair as needed before spring planting begins
Finishing touches: color, companion planting, lighting, and seasonal rhythm
Color schemes across your pot groupings work best when you pick two or three colors and repeat them throughout the display rather than using every color available. A classic approach is to choose one dominant color (say, soft purple), one contrasting accent (yellow or white), and one neutral (silver foliage like dusty miller or artemisia). That foliage neutral does the work of making the flower colors pop without adding visual noise.
Companion planting in containers follows the 'thriller, filler, spiller' model: one tall dramatic plant (thriller) like a grass, standard geranium, or canna; one mid-height mounding plant (filler) like petunias, begonias, or salvia; and one trailing plant (spiller) like calibrachoa, bacopa, or sweet potato vine that hangs over the pot edge. This combination works in containers of 12 inches and up and creates a complete, layered look in a single pot.
Lighting transforms a patio display from daytime-only to evening-usable. Solar stake lights pushed into large pots cast a warm glow upward through foliage at night. Battery-powered LED string lights woven through a tiered planter or draped between shepherd's hooks cost very little and last a full season. For a screened patio, small outdoor-rated LED spotlights mounted on the structural frame and aimed at a statement plant or a wall shelf create a dramatic focal point after dark. Keep it subtle: two or three lit focal points are more effective than illuminating every pot.
Integrate your pot display with any existing shade or screening features rather than treating them as separate elements. If you have a shade sail or pergola, hang baskets from the support points. If you have a screened enclosure, use the color of your screen frame as a neutral that your pot colors should either complement or contrast against. A consistent approach across decoration, shade, and structure is what makes a patio feel like a finished outdoor room rather than a collection of individual projects.
Suggested images and diagrams to include
- Top-down layout diagram of a small patio (under 100 sq ft) showing corner tiered planter, wall shelf, and clear circulation path marked in dimensions
- Top-down layout diagram of a multi-use patio with dining and seating zones separated by pot clusters
- Before/after side-by-side photos of a screened patio with and without hanging baskets and corner anchor pots
- Close-up photo of polymeric sand joints with a pot on rubber feet beside them, showing the gap between pot base and paving surface
- Construction detail photos for each DIY build: pot stand assembly, shelf bracket installation, railing box joints, and 3-tier planter stacking sequence
- Plant combination photo showing the thriller-filler-spiller arrangement in a 14-inch pot
- Seasonal rotation flat-lay showing the same large anchor pot replanted for each of the four seasons
- Drip irrigation diagram showing mainline, 1/4-inch feeder lines, and emitter placement for five pots in a row
FAQ
What are the first steps to plan a flower‑pot display on my patio or screened patio?
Walk the space and record light, wind and clearance: note hours of sun, shaded areas, screened enclosure shading and any prevailing winds. Measure usable patio dimensions and note fixed features (doors, railings, steps). Decide primary uses (seating area, dining, circulation path or mixed use). From those facts, sketch a simple plan (see templates below) and set goals: plant types (annuals, perennials, herbs), maintenance level, and whether pots must be moved seasonally. These steps guide container size, placement and surface protection needs.
How do I choose container materials and sizes for different light and screened conditions?
Match material to water needs and frost exposure. Nonporous: plastic, fiberglass, glazed ceramic — retain moisture and are lighter; good for hot sun and low‑maintenance. Semi‑porous: wood, pressed fiber — moderate moisture control. Porous: unglazed terracotta/clay — wick water and dry faster; need more frequent watering and can be frost‑sensitive unless rated frost‑resistant. Size by root system: small annuals 6–8 in (15–20 cm) depth, most patio plants and many herbs 8–12 in (20–30 cm), larger edibles, shrubs or long‑term specimen pots 18–24+ in (45–60+ cm). Use containers large enough that plants won’t be rootbound in year one. For screened patios, consider shade‑tolerant species and slightly larger pots to offset lower light (to allow more root volume and slower drying).
Which plants work best for full sun, part shade and screened patios?
Select plants for the actual light you measured. Full sun (6+ hours): petunias, geraniums, lavender, sedum, rosemary, many edibles (tomatoes in large containers). Part shade (3–6 hours): impatiens, begonias, ferns, coleus, some herbs (mint, chives). Deep shade (<3 hours, often in screened patios): hostas, ferns, heuchera, small begonias, caladiums. Use vetted plant lists (e.g., RHS or local extension) and pick varieties labelled for containers. For pollinators, include sun‑loving plants like lavender and bee‑friendly annuals in sunny spots. Match plant water needs — group thirsty plants together.
How should I arrange and group pots for balance, scale and circulation, including small and multi‑use patios?
Principles: anchor, repeat, vary scale and leave circulation. Action steps: 1) Anchor: place one large container at a focal point (corner, beside door or at end of sightline). 2) Grouping: cluster odd numbers (3,5) of mixed heights to create cohesion — tallest at back or center, trailing at edges. 3) Scale: keep path widths 30–36 in (76–91 cm) for comfortable passage; on small patios prioritize wall/rail mounting and vertical solutions. 4) Multi‑use: keep a minimum 18–24 in (46–61 cm) clear from table edges for seating clearance, and use wheeled plant caddies for moveable displays. 5) Circulation layouts: a) Linear: a single row along the wall to maximize open space; b) Perimeter: pots around the edge to frame the area; c) Corner anchor: group in one corner to leave center free; d) Vertical focus: shelves/hanging when floor space is limited. Use repetition of container color or plant type to unify the scheme.
What are practical layout templates I can sketch and use?
Three simple scalable templates (measurements assume adult circulation): 1) Small patio (6 ft x 8 ft / 1.8 x 2.4 m): perimeter plan — 3‑tier shelf along one long side, narrow railing boxes on opposite side, single large 14–18 in pot in corner. Leave 30 in center. 2) Medium patio (10 ft x 12 ft / 3 x 3.6 m): anchor plan — large pot at corner (18–24 in), two clusters of 3 pots (small, medium, tall) flanking seating, rail boxes on railing, one hanging planter above seating. 3) Multi‑use patio (dining + garden): divide into zones: 36 in circulation aisle between dining set and planted border; use movable planters on casters to convert to open space. Draw to scale with each pot represented by diameter to test clearances.
What DIY display methods work well and what are simple construction tips?
Options and quick construction tips: 1) Pot stands/caddies: use metal or wooden stands to raise pots — add rubber feet to prevent scuffing and use casters for mobility. 2) Shelves: weatherproof cedar/plastic shelving secured to wall or free‑standing; allow 1.5–2 in gap behind each shelf for drainage run‑off. 3) Hanging planters: use hardware rated for outdoor load (lag screws into studs or use toggle anchors on hollow screens) and use coated chain or stainless hardware. 4) Railing boxes: secure with adjustable railing brackets sized to rail width; ensure drainage doesn’t spill on decking — use drip trays or install internal liners with drainage holes. 5) Tiered systems: DIY using stacked crates, cinderblocks or purchasable tiered stands — wide base and anchored to avoid tipping. 6) Built‑in planter beds: small raised beds at patio edge with proper separation from paving; include root barrier and drainage layer. Construction tips: always pre‑drill and use stainless or hot‑dipped galvanized fasteners, slope shelves slightly for drainage if needed, and test weight before adding plants.
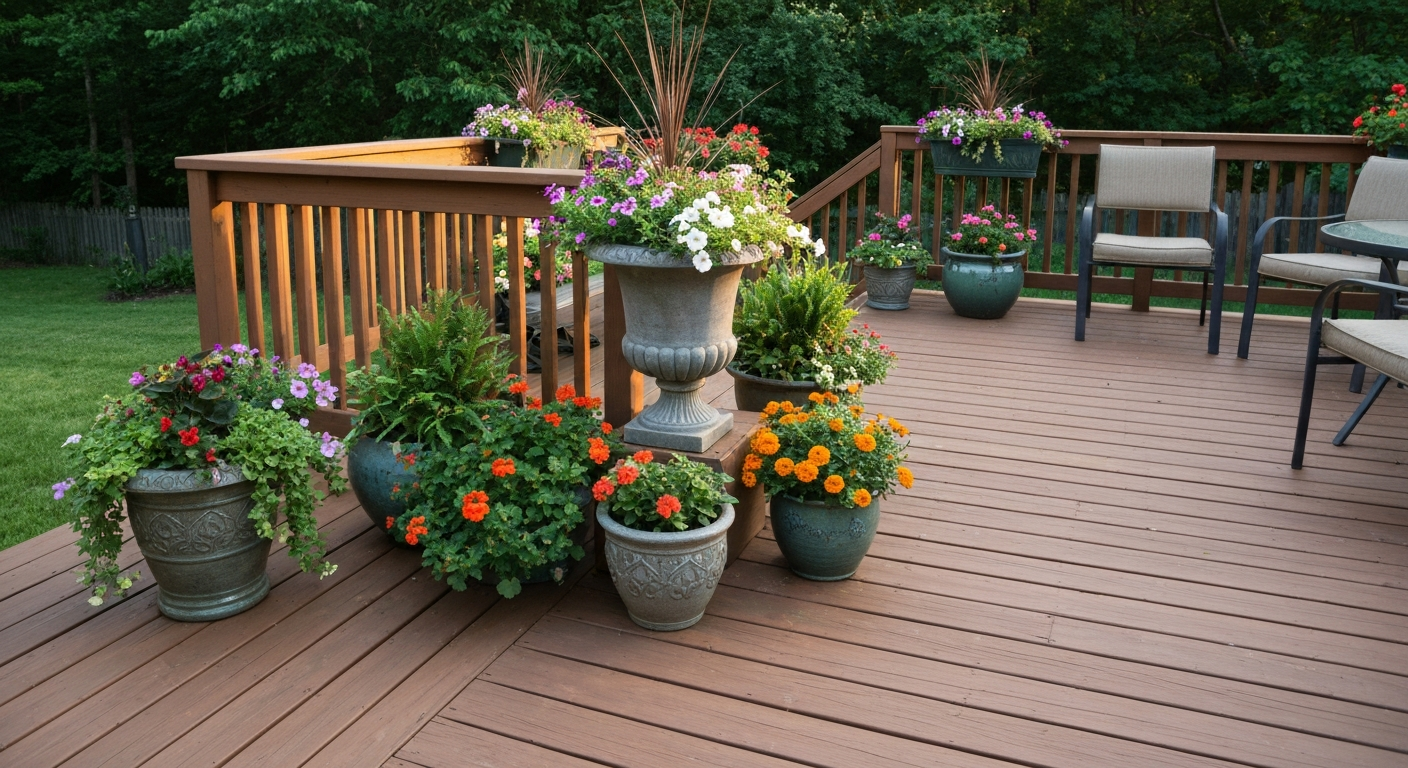
DIY guide to decorate your deck or patio with flowers: plant picks, containers, planters, watering, styling & load tips.
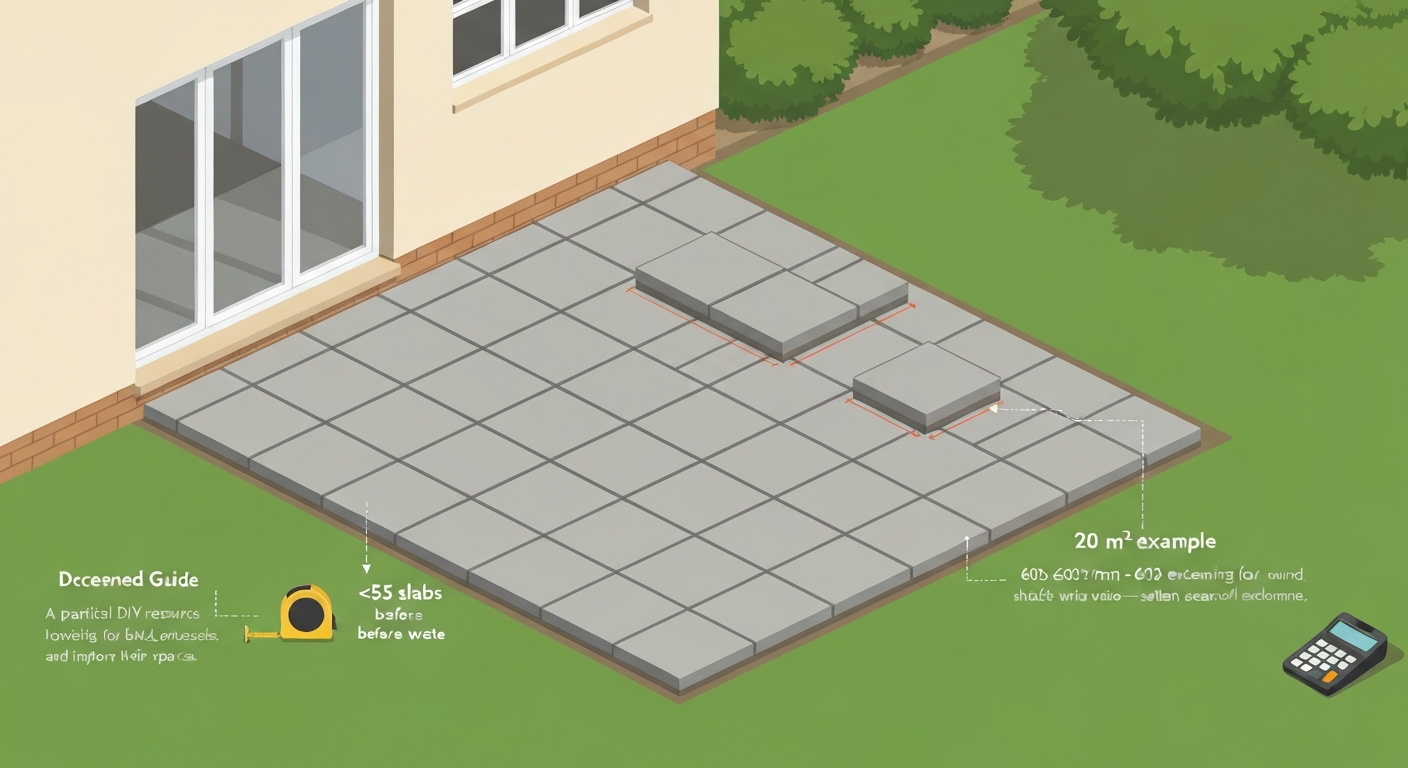
Calculate exactly how many paving flags your patio needs, measurements, waste allowance, pack counts & sample examples.
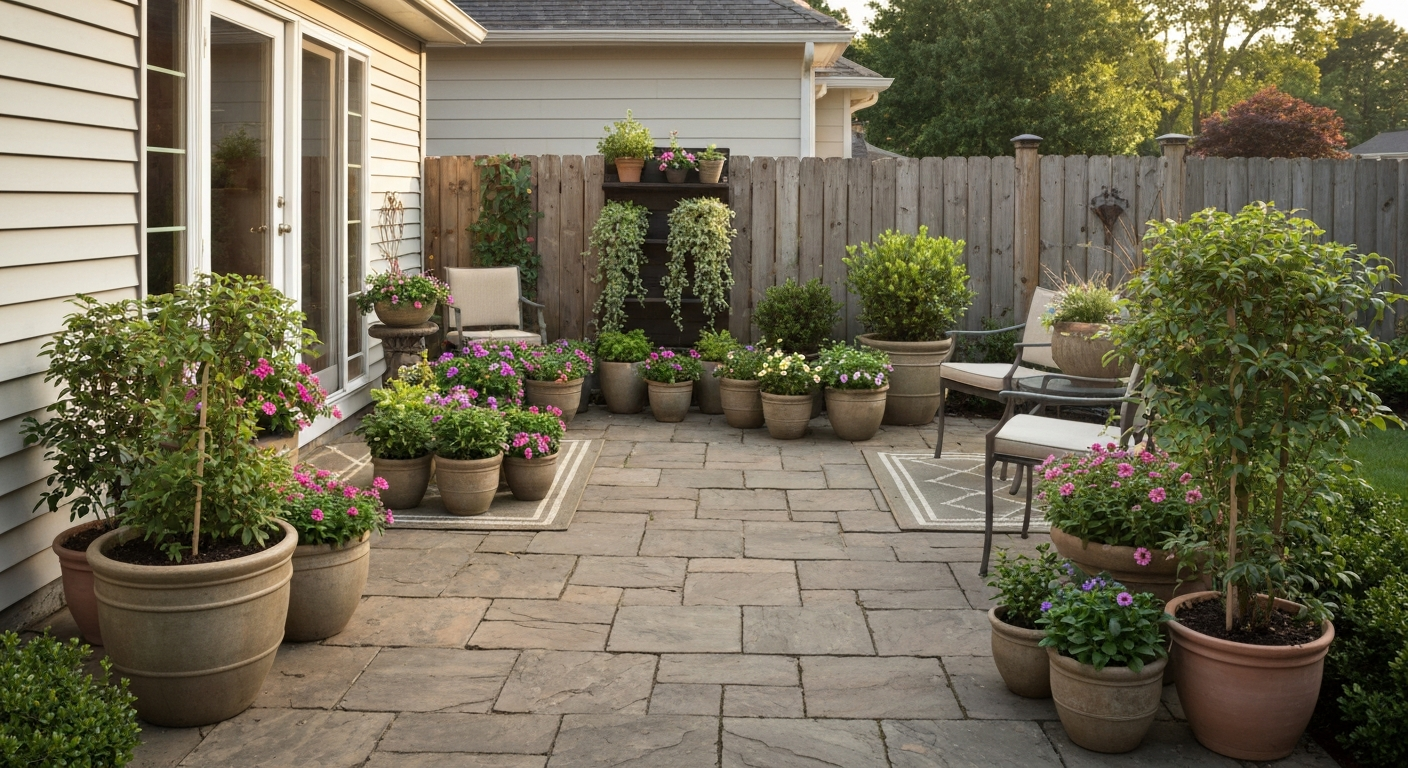
DIY patio flower-pot guide: planning, pot & plant picks, small-space layouts, vertical displays, drainage, seasonal care