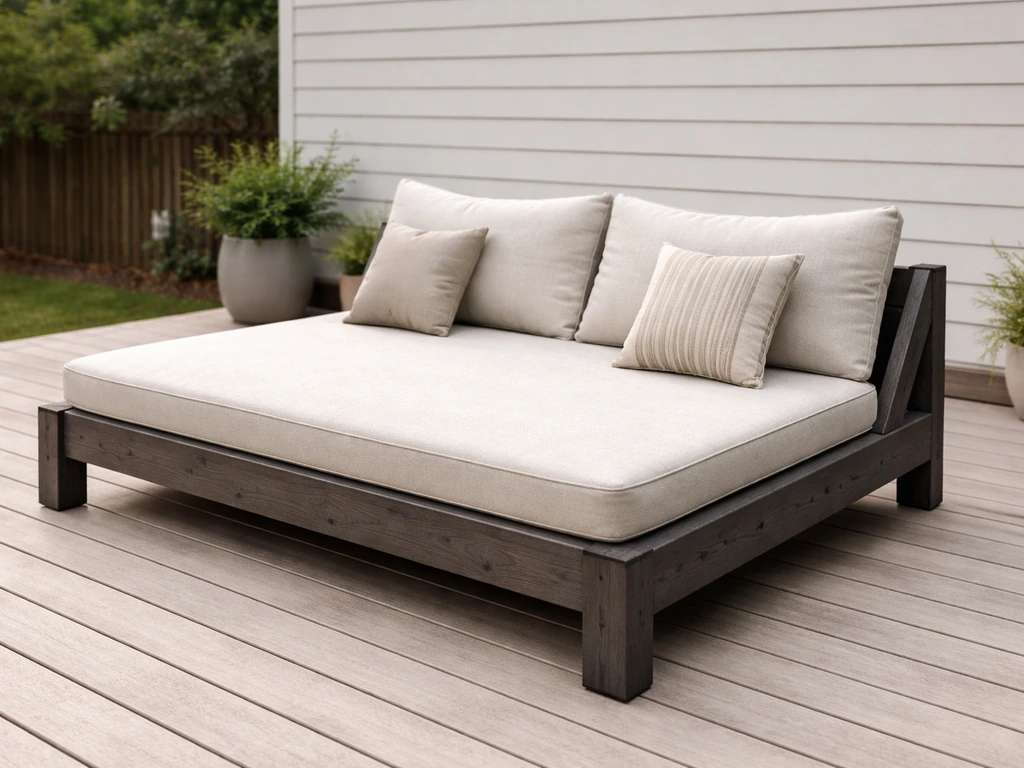
You can build a solid, comfortable patio daybed in a weekend using pressure-treated lumber or a rot-resistant hardwood, exterior-rated hardware, and outdoor cushions built for rain and sun. The basic frame is a rectangular box with a slatted platform on top, a low backrest on one long side, and optional arms at each end. Most builds run about 80 inches long by 36 inches deep, cost roughly $150–$400 in materials depending on wood choice, and require only basic tools: a circular saw, drill, tape measure, and square. Here is exactly how to do it, start to finish.
How to Build a Patio Daybed Step by Step DIY Guide

Felix Brennan
7 Jun 2026
Plan the patio daybed design and size
Before you buy a single board, get the dimensions locked down. A daybed used for lounging and occasional napping needs to be at least 75 inches long and 30 inches deep to fit a person comfortably. Going to 80 by 36 inches gives you genuine stretch-out room and accommodates most adults without feeling cramped. That extra six inches of depth also makes a big difference once you add a thick cushion, so 36 inches is the target if your patio has the space.
Seat height matters too. A finished platform height of 16–18 inches off the ground feels like a low sofa, which is right for a lounger. Add a 4–5 inch cushion and you land at a comfortable 20–23 inches, which is easy to get on and off. If you want the daybed to double as additional seating when you have people over, keep it at the higher end of that range.
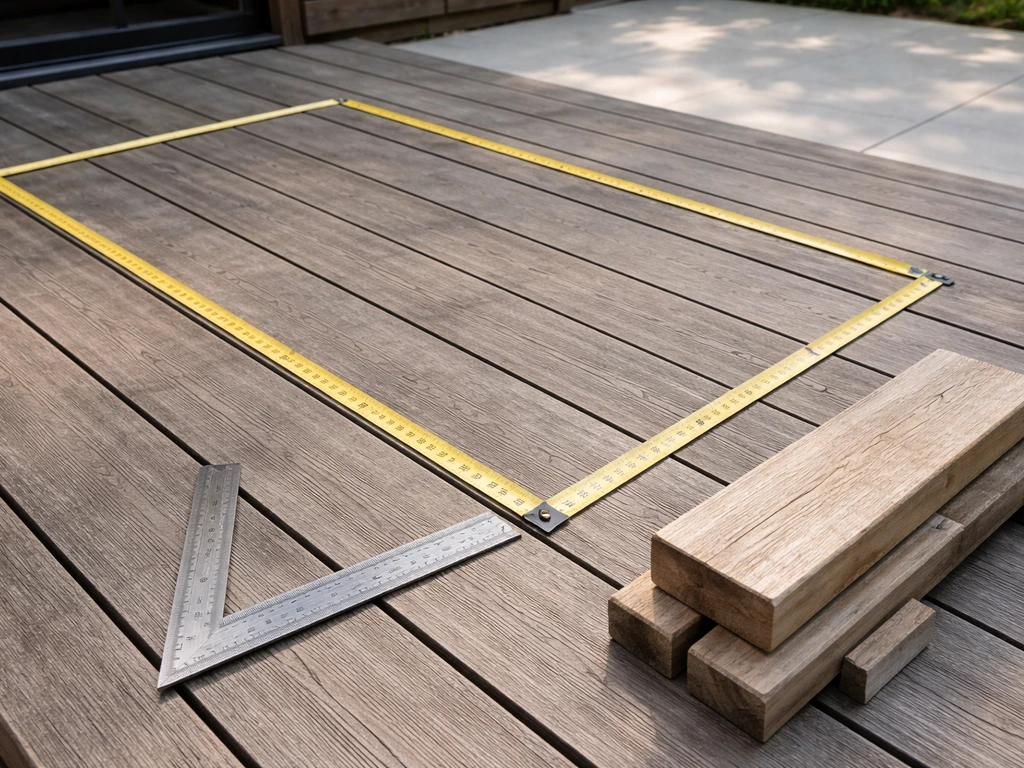
When you are measuring your patio, leave at least 24 inches of clear walkway on all sides of the finished daybed. This gives you room to drop a side table, walk around without squeezing, and access the storage drawer if you build one. On a small patio, sketch the footprint on paper first so you know exactly what fits before committing to lumber. If you are working around a tight layout, the approach is similar to how you would think about arranging any large patio furniture piece: clearance and traffic flow come before placement preference.
Think about backrest angle now, not later. A fixed backrest angled at 15–20 degrees back from vertical is comfortable for reading or sitting upright. If you want a more reclined feel, go to 25–30 degrees, but that will add a few inches to your overall depth footprint. Pick your angle before cutting, and cut a test scrap to check it against your body before you commit.
Choose materials, cushions, and weatherproofing
Wood options
Pressure-treated lumber is the most practical and budget-friendly choice for most homeowners. For a patio daybed that sits above ground and does not touch soil, look for lumber rated UC3B (above-ground exterior exposure). If the legs will rest directly on a concrete slab that stays wet, or you live somewhere with heavy rain or ground moisture, go with UC4B (heavy-duty ground contact) for the legs and base frame. The AWPA use categories are stamped right on the lumber tag, so check before you buy. Southern yellow pine is the most common pressure-treated species and holds up very well when properly sealed.
Ipe and other tropical hardwoods like teak or cumaru are genuinely beautiful and last decades without rotting or being attacked by insects. Ipe does not require oiling for structural protection, but periodic oiling maintains that rich brown color if you care about appearance. Ipe Woods USA notes that how often you re-oil depends on factors like sun exposure, local climate, and foot traffic, so exact schedules can vary periodic oiling maintains that rich brown color.
The trade-off is cost: Ipe can run three to five times the price of pressure-treated pine, and it is dense enough that you will want carbide-tipped saw blades and pre-drilled pilot holes for every fastener. For a first build, pressure-treated pine with a good exterior stain gets you 90% of the durability at a fraction of the cost.
| Material | Cost (relative) | Rot Resistance | Maintenance | Best For |
|---|---|---|---|---|
| Pressure-treated pine (UC3B/UC4B) | Low | Good (with sealer) | Seal/stain every 2–4 years | Budget-conscious builds, first-timers |
| Cedar | Medium | Good naturally | Oil or stain every 2–3 years | Lighter weight, nice appearance |
| Ipe / tropical hardwood | High | Excellent (natural) | Oil for color; not structural | Long-term investment, premium look |
| Composite deck boards (slats only) | Medium–High | Excellent | Minimal | Platform slats over a wood frame |
Composite boards like Trex work great as platform slats but are not ideal for structural framing. If you want low-maintenance slats, use composite for the top surface and pressure-treated lumber for the frame underneath. When spacing composite slats, maintain a 3/16-inch gap between boards to allow for expansion and drainage. Do not use standard exterior wood screws with composite boards; follow the manufacturer's fastener recommendations exactly or you risk voiding the warranty and getting ugly surface staining.
Cushions and fabric
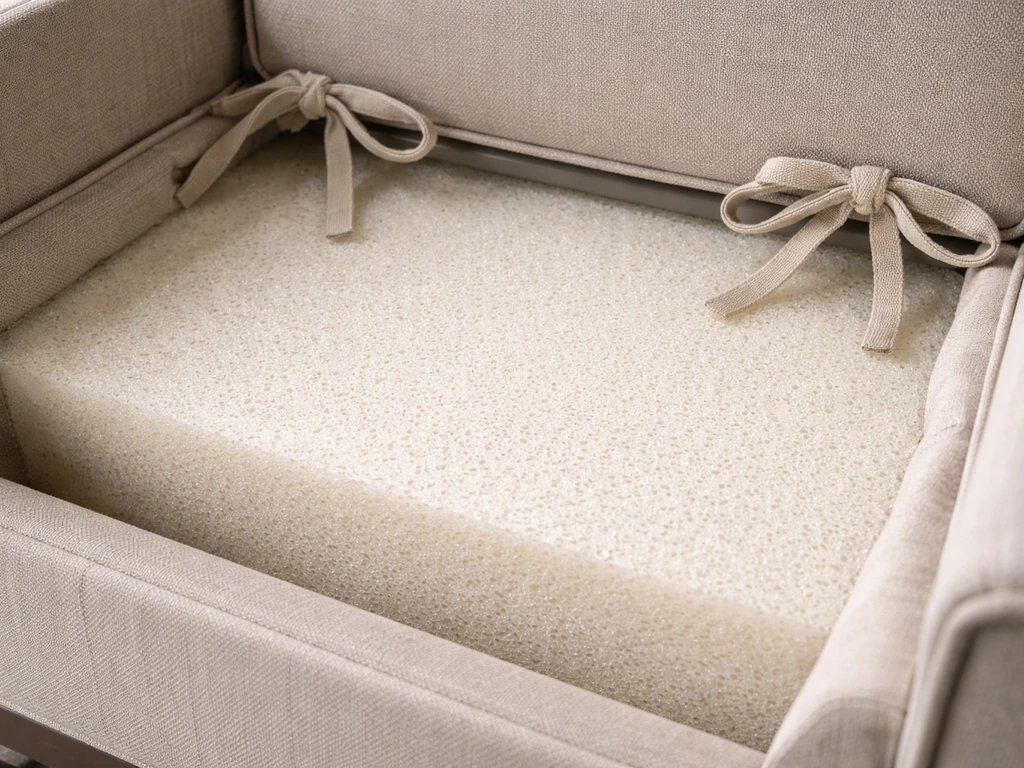
This is where a lot of builds fall apart after the first season. Cheap cushions turn into mold sponges. The fix is simple: use open-cell reticulated foam (often sold as "Dry Fast" foam) for the cushion core. It drains rainwater in minutes and resists mold and mildew. A 4-inch thickness works well for most daybeds; go to 5 inches if you want extra comfort. For the cover fabric, Sunbrella is the benchmark. It is 100% solution-dyed acrylic, meaning the color goes all the way through the fiber rather than just sitting on the surface. That means UV fade resistance and mildew resistance that holds up over years of direct sun and rain exposure.
Size your cushion to sit inside a small lip or between the arms so it does not slide. Add cushion ties at the back and corners if the platform is fully open. Most fabric shops and online upholstery suppliers will cut Dry Fast foam to your exact dimensions for a modest fee, which saves a lot of wrestling with an electric knife.
Hardware and fasteners
Every fastener on this build should be rated for exterior use. For most inland or moderate-humidity environments, Grade 305 stainless steel screws and bolts are the right call. If you live near the coast or in a saltwater environment, upgrade to Grade 316 stainless steel, which offers the highest corrosion resistance available in standard exterior hardware. Hot-dipped galvanized joist hangers and brackets are also acceptable for inland builds. Avoid standard zinc-plated or bright-finish screws entirely; they will rust and stain the wood within one season.
Build the frame and base structure
This is the foundation of the whole piece, so do not rush it. The base frame needs to support people lounging, sitting, and occasionally two adults at once. If you are setting this daybed near a pool, arrange it so there is clear walk space to the water and keep all seating at comfortable sightlines around the deck people lounging. A good design target is the residential deck standard of 40 psf live load, which is the IRC Section R301.5 baseline for outdoor floor systems. For a daybed this size, that means using 2x6 lumber for the outer frame and cross supports, not 2x4s.
Cutting your frame parts
For an 80x36-inch daybed, you will cut two long side rails at 80 inches and two short end rails at 33 inches (the end rails fit between the side rails, so the overall width works out to 36 inches with the 1.5-inch thickness of the side rails on each side). Use 2x6 lumber throughout the base frame. Cut four legs at your target height minus the thickness of the frame (if you want an 18-inch finished platform height and your frame is 5.5 inches tall, cut legs at 12.5 inches). You will also cut interior cross supports: three pieces at 33 inches, spaced evenly across the length to prevent sagging in the middle of the platform.
- Cut two side rails at 80 inches (2x6)
- Cut two end rails at 33 inches (2x6)
- Cut four corner legs at 12.5 inches (4x4 or doubled 2x6)
- Cut three interior cross supports at 33 inches (2x6)
- Sand all cut ends lightly and apply a brush coat of end-cut sealer to any pressure-treated cuts before assembly
Assembling the base
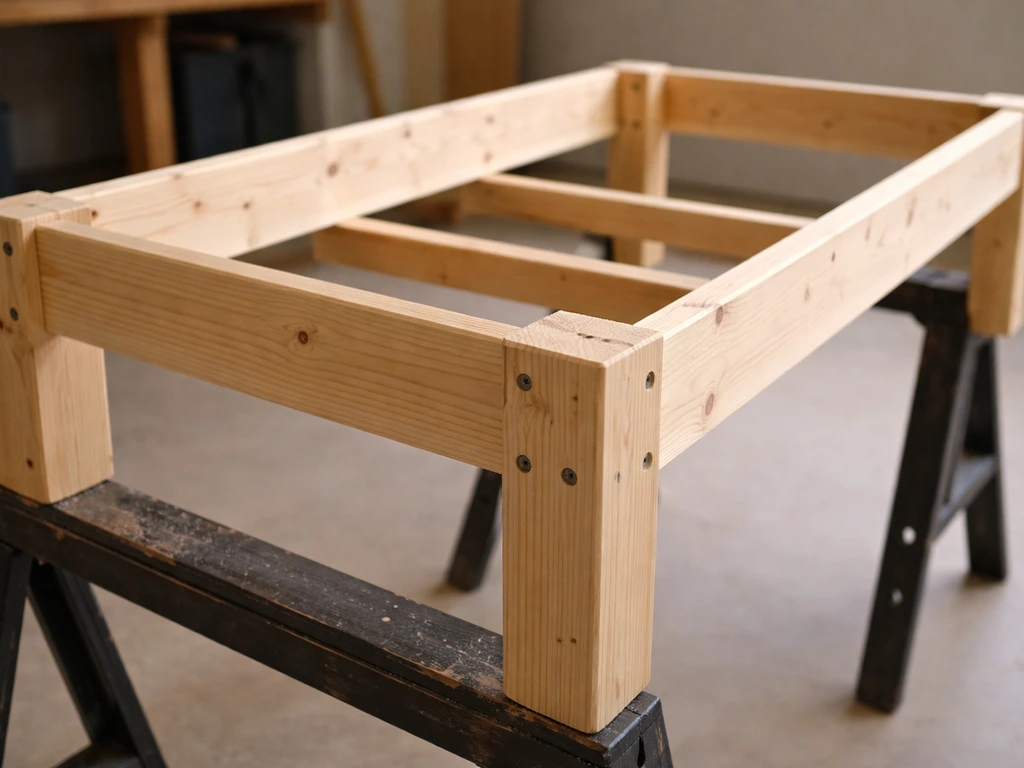
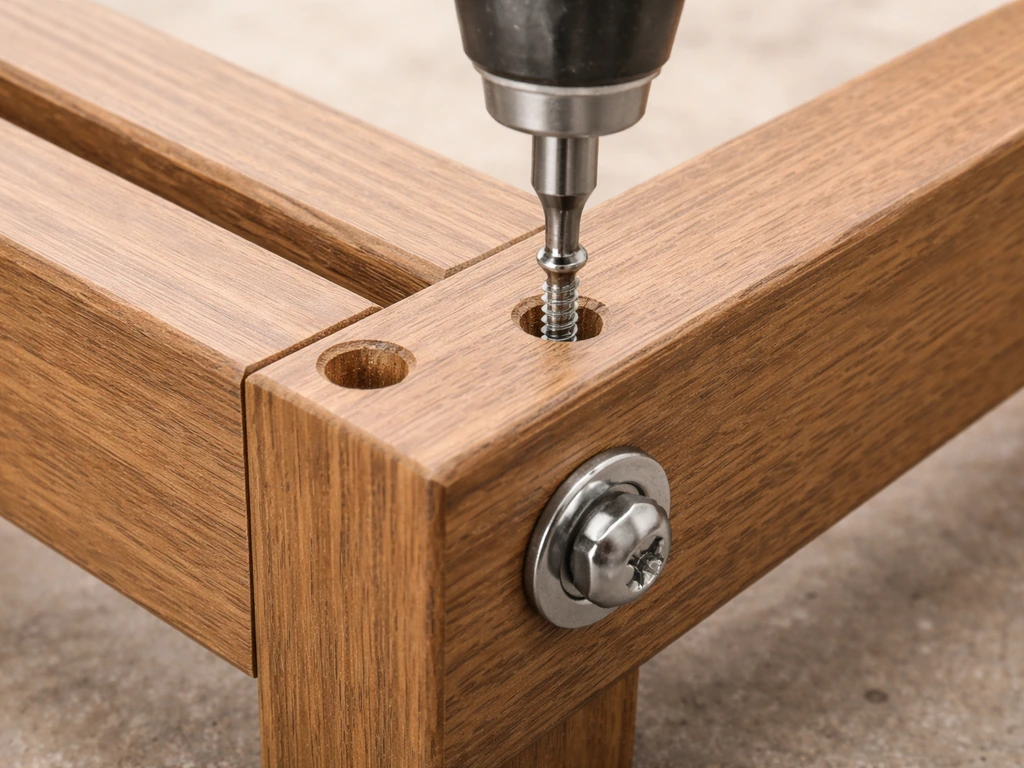
Attach the end rails between the side rails using two 3-inch exterior screws at each corner, pre-drilling to prevent splitting. Then install the legs at each corner on the inside face of the frame using 3-inch structural screws or carriage bolts. Carriage bolts look cleaner and are worth the extra few minutes if this is going somewhere visible. Drop in the three interior cross supports and fasten them flush with the top of the frame so your slats sit level. Check for square by measuring diagonally across both corners: the two measurements should match within 1/8 inch. If they do not, clamp one corner and nudge the frame before the screws fully seat.
Joist span and spacing matter as much as lumber size. Three cross supports across an 80-inch length means your slats span no more than about 20 inches between supports, which is plenty for 1x4 or 5/4 decking boards. Do not skip the center support to save material; it is what prevents the platform from flexing under weight over time.
Assemble the platform, backrest, and arms
The seating platform
For platform slats, 1x4 or 5/4x4 boards work well and give you a clean look with consistent gaps. Lay them across the width of the frame (so each slat runs the 36-inch dimension) and space them at 3/16 inch apart for drainage. For composite boards, use the same spacing. For wood slats, a 1/4-inch gap is fine and allows slightly more drainage, which matters if your patio collects rain. Fasten each slat with two screws per support, pre-drilling to avoid splitting. Do not nail these; nails back out over time with expansion and contraction cycles.
Work from one end to the other and check your gap spacing every few boards with a spacer cut from scrap. It is easy to drift and find yourself with a problem gap at the far end. A consistent gap not only looks better, it performs better too.
Building the backrest
The backrest attaches to one long side of the frame. Cut two angled support legs from 2x4 lumber: these are the pieces that hold the backrest at your chosen angle (15–20 degrees for upright, up to 30 degrees for reclined). To find the cut angle, hold a 2x4 against the back rail at your desired tilt and mark where it meets the platform frame at the bottom. Cut both supports identically. Bolt them to the back frame rail using 3/8-inch carriage bolts and locking nuts, two bolts per support. Then run 1x4 backrest slats across those supports, spaced the same as your platform slats, and fasten with two screws each.
The top backrest rail ties everything together. Cut a 2x4 to the full 80-inch length and attach it across the top of the two support legs to complete the backrest frame. This adds rigidity and also gives you a natural ledge to rest a drink or a book, which is a small detail that ends up being very useful.
Adding the arms
Arms are optional but they make the daybed feel more like furniture and less like a platform. Cut two arm supports from 4x4 or doubled 2x4 stock, running from the end rail up to arm height (roughly 24–26 inches above the platform surface). Attach them to the outside of the end rails with carriage bolts. Then cap each arm with a wide flat board: a 2x6 or 2x8 laid flat on top of each arm support makes a generous armrest surface. Overhang it slightly on each side for a cleaner look, and round the corners with a sander or router if you want to soften the edges.
Weatherproof finishing, hardware, and storage upgrades
Sealing and staining the wood
Do not skip this step, especially with pressure-treated pine. Let any freshly pressure-treated lumber dry for at least two to four weeks before applying stain or sealer, otherwise the product will not penetrate properly. When ready, clean the wood with a dedicated exterior wood cleaner (Penofin Pro-Tech or a similar product), let it dry fully, then apply a penetrating exterior stain or sealer with a brush, working it into all the joints and end grain.
A quality semi-solid exterior stain can protect a horizontal surface like this for two to four years between recoats. If you choose a Penofin product, the recoat window is about one hour between coats on the same day.
Plan to recoat every two to three years for the platform surface, which takes the most sun and rain exposure.
Pay extra attention to the end grain of every board. End grain absorbs water far faster than face grain and is where rot starts. A double coat on all ends before and after assembly is cheap insurance.
Hardware upgrades worth doing
- Replace any pilot-hole screws with Grade 305 or 316 stainless steel screws for all visible or exposed connections
- Use stainless or hot-dipped galvanized carriage bolts and locking nuts for the backrest and arm connections
- Add stainless steel corner brackets inside the base frame for extra rigidity if the daybed will be used frequently
- Install rubber or composite furniture feet under each leg to keep the frame off wet concrete and prevent moisture wicking
Optional storage under the platform
The space under the platform is too useful to ignore. The simplest upgrade is a pull-out drawer built from a second small 2x4 frame with a plywood bottom and slat front. Mount it on a pair of heavy-duty drawer slides rated for outdoor use and attach a simple rope or dowel pull. This is where you stash the extra cushion when it rains or store throw blankets for cooler evenings. It does not add much build time but dramatically improves how functional the whole piece feels.
Placement, shade, wind protection, and year-round maintenance
Where to put it on your patio
Orient the daybed so the backrest faces away from the sun during your peak-use hours, which keeps you comfortable without squinting. Leave that 24-inch clearance on all sides, more if you want to tuck a small table beside it. On a covered patio or screened enclosure, position the daybed where it catches natural airflow rather than sitting in a dead corner. If your patio is open, consider how the daybed interacts with other furniture. If you also want to arrange seating around the daybed, focus on keeping clear walkways and centering the main pieces so the patio feels bigger arrange furniture on small patio.
That same traffic-flow and clearance approach also helps you figure out how to arrange patio furniture around a fire pit so everyone has comfortable seating and safe walkways arranging patio furniture around a fire pit. If you are furnishing a large patio, plan the layout around conversation zones, walkways, and focal pieces like seating, shade, and lighting other furniture.
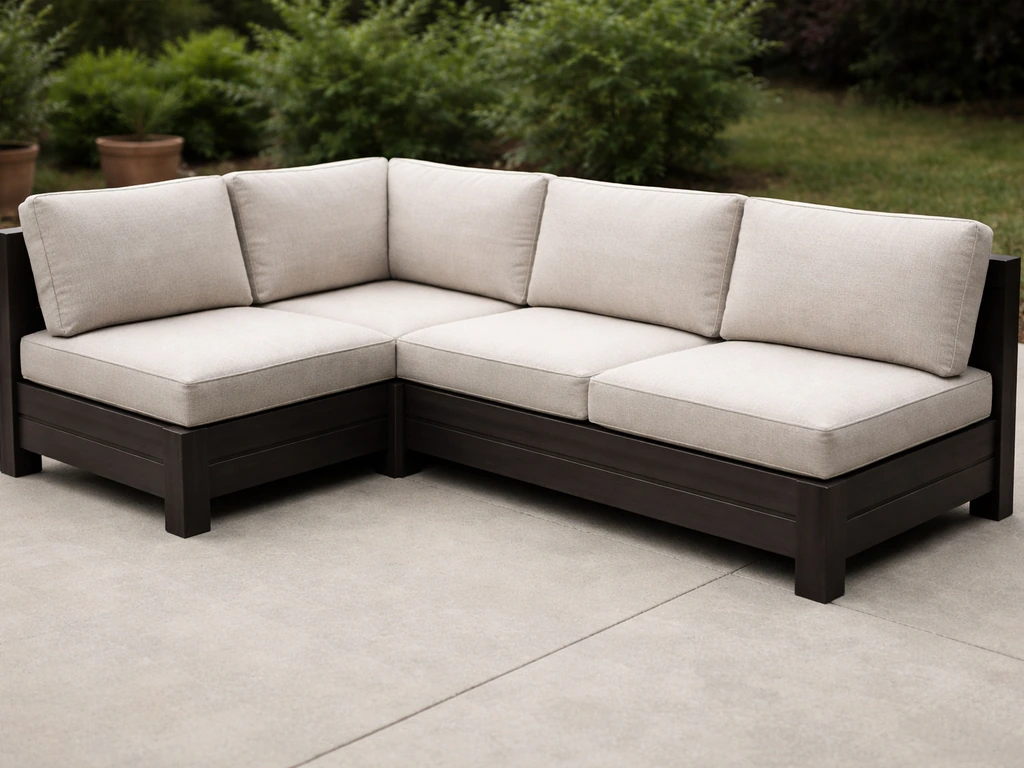
For small patios, furniture arrangement comes down to keeping clear walkways and choosing the right-sized pieces so everything feels open and functional how to arrange furniture on small patio. If you want a sectional-style layout, the planning and weatherproofing principles in this patio daybed guide will translate well to a how to build patio sectional project.
A daybed this size is a dominant anchor piece, so let it define the seating zone and arrange supplementary chairs and tables around it, similar to how you would approach planning any major furniture piece for your outdoor space. If you want more ideas beyond a single daybed, learn how to furnish patio spaces by building around comfort, flow, and practical accessories. If you are also furnishing the rest of the patio, use these same placement and clearance principles to build a cohesive seating layout how to furnish patio.
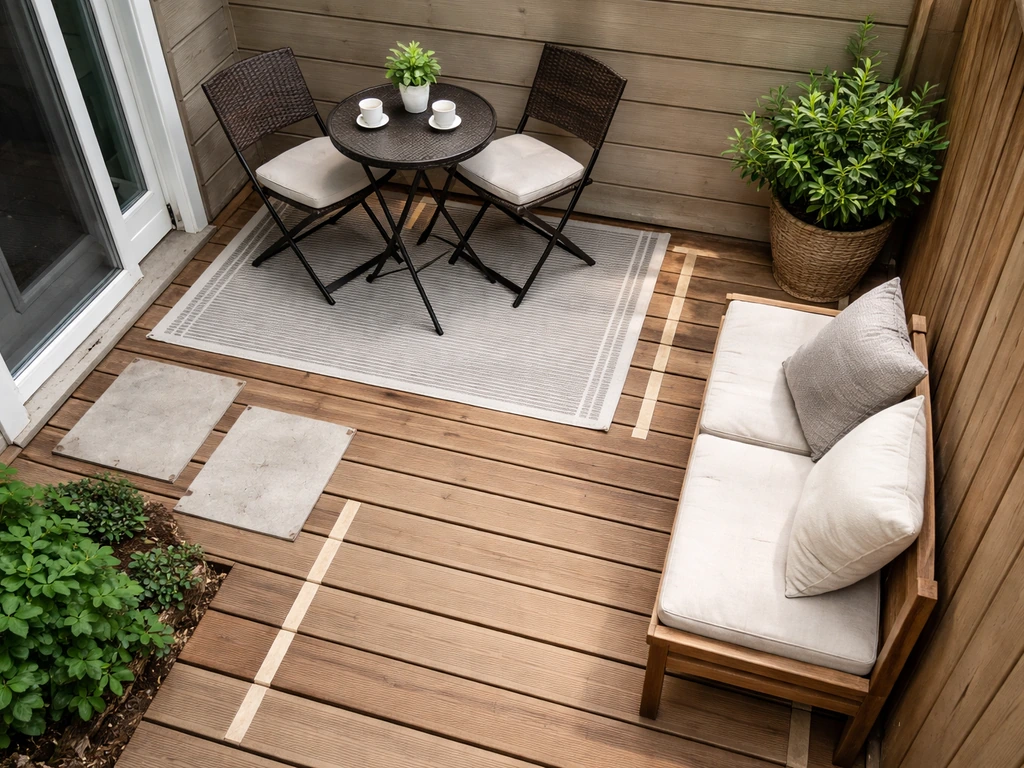
On a small deck, you can use the daybed as the anchor and place smaller chairs and a narrow side table so walkways stay clear arrange patio furniture on a small deck.
Shade and wind protection
A daybed without shade overhead is uncomfortable for most of the day in summer, and will degrade your cushions faster than almost anything else. A cantilever umbrella with a 9 or 11-foot canopy is the easiest retrofit: it clears the backrest, shades the whole platform, and does not require any permanent structure.
For a more permanent solution, a sail shade anchored to existing posts or a pergola overhead works beautifully and filters about 90% of UV while still letting air move. If your patio is exposed to wind, a side shade panel or a solid windscreen on the prevailing wind side will make the daybed usable on days when a bare open patio feels uncomfortable.
This fits squarely into the kind of patio enclosure thinking that makes an outdoor room genuinely livable rather than just decorative.
Seasonal maintenance routine
Once per year in spring, inspect every fastener for rust or corrosion, tighten any that have loosened, and re-drive any that have backed out slightly. Check the wood surface for gray weathering or peeling finish and reapply stain or sealer as needed. If you are in a freeze-thaw climate, pay special attention to the leg-to-frame connections where water can pool and expand.
For the cushions: even with Dry Fast foam and Sunbrella fabric, end-of-season storage is worth doing right. Before storing, let the cushions air-dry completely, at least 24 to 48 hours, before putting them in any enclosed bag or bin. Wet storage leads to mold, odor, and rusted zippers even on quality materials. Indoor storage in a dry space is always better than leaving them in an outdoor deck box through a wet winter. If you have the under-platform storage drawer, use it for mild shoulder-season storage but bring cushions inside for hard winters.
Quick-reference build checklist
- Finalize dimensions (target 80x36 inches, 16–18 inch platform height) and sketch the footprint on your patio
- Buy lumber (pressure-treated UC3B or UC4B, or your chosen species), exterior screws (Grade 305 or 316 stainless), carriage bolts, and locking nuts
- Allow pressure-treated lumber to dry 2–4 weeks if freshly treated
- Cut and assemble the base frame: side rails, end rails, legs, and three interior cross supports
- Check for square, install rubber feet under legs
- Install platform slats with 3/16 to 1/4 inch gaps, fastened with exterior screws
- Build and attach the angled backrest supports and slats
- Add arm supports and armrest caps if desired
- Apply exterior wood cleaner, let dry, then apply penetrating stain or sealer with double coat on all end grain
- Order or cut Dry Fast foam cushion to size, have it covered in solution-dyed acrylic outdoor fabric
- Add cushion ties to keep the pad in place
- Position the daybed with 24 inches of clearance on all sides and add shade overhead
- Schedule annual inspection and recoat every 2–3 years
FAQ
How should I adapt the build if I live in a freeze-thaw climate?
If your daybed will be used for lounging in colder months, increase the cushion thickness and use a removable cover, but keep the frame finish schedule the same. The key is preventing moisture in the leg-to-frame and end-grain areas during freeze-thaw cycles, so seal end grain thoroughly and consider leaving the underside slightly protected from standing water (for example, elevate feet slightly or improve drainage around the patio surface).
Can I build this daybed for an area near wet soil or frequent standing water?
If your patio is on soil that stays damp, pressure-treated UC4B helps for the lumber, but you still need airflow and drainage. Do not bury the frame directly in soil, keep the legs off wet puddling zones if possible, and verify that your cushion storage drawer does not create a moisture trap under the platform.
What if my patio does not allow 24 inches of clearance on all sides?
If you want to place the daybed near a wall or railing, the 24-inch clearance guideline should be treated as the minimum for the side(s) where you need access and movement, especially if you plan to pull out the storage drawer. Reduce clearance only on the side that is permanently unobstructed by traffic, and keep the backrest side unobstructed so air can reach the cushions when they dry.
How do I pick the correct slat spacing if I mix wood and composite?
Choose slat spacing based on the top material, because different boards move differently. For composite slats, stick to a tight 3/16-inch gap to prevent uneven rubbing and to support drainage and expansion, while wood slats can use about a 1/4-inch gap for a little extra water escape. If you mix materials, keep the gaps consistent within each surface type so the deck looks uniform.
What should I change if I increase the daybed length beyond 80 inches?
For a sturdier feel with less visible bounce, add a fourth interior support or widen cross-support spacing only if your platform slats are thicker and shorter-span. The article’s 3-support approach prevents sag over time for the stated dimensions, but if you change overall length, increase support count proportionally so the slats never have long unsupported runs.
How do I know when my pressure-treated lumber is actually ready for stain or sealer?
Use a paint-friendly exterior cleaner and let the wood dry before you test any coating. Pressure-treated lumber can be ready sooner than 2 to 4 weeks in warm, dry weather, but you should still verify dryness before staining, otherwise penetration will be uneven and you may get blotchy color on horizontal slats.
Should I re-tighten hardware after the first week or two?
Drive screws in at the correct locations and pre-drill, then re-tighten after the first few outings. Exterior builds benefit from an initial re-check because wood movement and cushion loading can slightly settle joints, so plan a quick inspection after the first 2 to 4 weeks of use.
Is the 40 psf style load guidance enough if two adults will sit on the daybed often?
Not necessarily. The frame design targets a specific live load for the typical lounge use case, but local safety requirements, how many people will sit at once, and the support conditions under the legs matter. If you expect frequent gatherings, consider adding one extra cross support or upgrading leg fasteners to structural bolts rather than relying on only screws.
Can I enclose the underside of the daybed or add skirt boards for a cleaner look?
Yes, but keep the backrest slats and the platform slat layout aligned with drainage. Avoid adding solid panels that trap water under cushions, and make sure any attachment points do not create hidden pockets where runoff can pool against the frame.
What parts of the daybed should I recoat first to extend the finish life?
For color retention, treat horizontal surfaces as the priority, especially the platform top and the front edge where water lingers. If you only recoat every few years, focus first on ends and high-wet areas, and do spot touch-ups on end grain as soon as you see darkening or peeling.
Can I leave the cushions in a covered deck box instead of bringing them inside?
If you store cushions in an enclosed space, keep them in a dry area and use breathable storage if possible. Even with Dry Fast foam, wet cushions stored in sealed bins can develop mildew odor, so air-dry thoroughly (24 to 48 hours) and avoid compressing them tightly, which slows drying.
What’s the best way to dry cushions if they get soaked but I still need to use the daybed?
If you expect heavy rain, plan a “daybed off” drying routine. After a storm, pull cushions up and remove covers so air can circulate, and check that your under-platform drawer is not preventing airflow. A small fan during drying can help prevent mildew before storage.
Should I anchor the daybed to the patio surface?
If you want to bolt the daybed down, do it through the base rails at the legs, not through the slats, and use exterior-rated fasteners that match your patio surface. However, if your patio surface shifts with freeze-thaw or settlement, rigid anchoring can stress the frame, so consider leaving the frame unpinned or using adjustable anchors that tolerate slight movement.
How do coastal conditions change hardware and maintenance for this build?
If you are near the coast, default to higher grade stainless hardware and expect faster coating wear from salt air. You will still need the same annual inspection, but be more aggressive about checking for corrosion around bolt heads, washers, and the leg-to-frame joints where water collects.
Next Articles
How to Build a Patio Sectional Step by Step
Step by step DIY guide to build a weatherproof patio sectional with plans, materials, frame assembly, and stable L conne
How to Arrange Patio Furniture on a Small Deck
Step by step layouts for small decks, space saving seating and tables with clearance rules, traffic flow, and comfort ti

How to Decorate a Long Narrow Patio: Layout Tips
Practical DIY layout and decor tips to widen a long narrow patio using zoning, furniture spacing, lighting, greenery, an