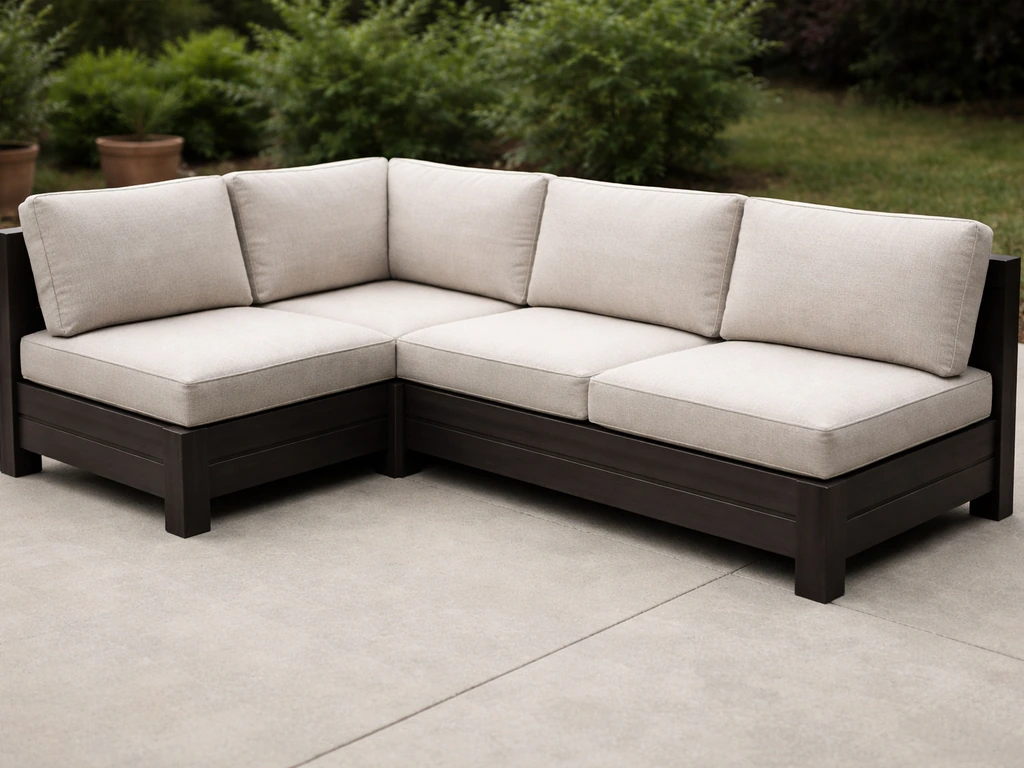
You can build a solid, weatherproof outdoor patio sectional in a weekend or two using basic tools, construction-grade lumber or cedar, and the right hardware. The process comes down to six steps: measure your patio and plan the layout, choose your materials and configuration, build the base frames, add seat and backrest supports, weatherproof and finish every surface, then fit it with outdoor cushions. Once you have your sectional built, you can focus on how to furnish patio seating and accessories so the space feels complete and comfortable. If you can cut boards to length and drive screws, you can do this. Expect to spend $150–$400 in materials depending on wood species and size, and budget one full weekend for the build if you have everything prepped.
How to Build a Patio Sectional Step by Step

Plan the layout and take accurate patio measurements

Before you cut a single board, walk your patio with a tape measure and sketch out the footprint on paper. Once you have accurate measurements, you can plan how to arrange furniture on a small patio without crowding walkways or blocking doors walk your patio with a tape measure. The goal is to figure out the maximum space the sectional can occupy while still leaving room for people to actually move around it. When you plan how to furnish a large patio, start by mapping your seating zones and leaving clear walkways so the layout feels open and functional. To arrange patio furniture around a pool, keep clear walkways and leave space for people to get in and out comfortably. A good rule of thumb is to leave at least 30 to 36 inches of walkway clearance around the perimeter of the sectional. That might feel generous on paper, but once you add a coffee table in front and a couple of people sitting down, you will be glad you left the room. If you are working with a small deck, the same planning approach helps you arrange patio furniture so it looks good and still leaves comfortable walking space arrange patio furniture on a small deck.
Measure the total usable floor area, then subtract those clearance zones. What is left is your sectional's maximum footprint. If you are planning around a fire pit or want to leave room for a planter edge, account for those too before you commit to dimensions. When planning how to arrange patio furniture around a fire pit, keep the seating area comfortable while leaving safe clearance from heat. L-shaped sectionals are one of the most popular configurations for patios because they anchor a corner, define a lounge zone, and leave the rest of the patio open. A common starter size is a sofa section roughly 80 to 96 inches long paired with a chaise or shorter section around 60 inches, forming an L.
Write down three numbers before you do anything else: the total length of each section, the seat depth, and the overall height. For reference, a standard outdoor sectional seat depth runs 20 to 24 inches (not counting cushion overhang), and seat height lands around 14 to 16 inches off the ground at the frame, which puts the finished seated surface at 16 to 18 inches once a cushion is in place. Those are your baseline dimensions. You can adjust slightly for your space, but staying in that range keeps proportions comfortable.
Choose weatherproof materials and design the sectional configuration
Wood is the most beginner-friendly frame material because it is easy to cut, forgiving to assemble, and can be finished to last years outdoors. Your two best affordable options are pressure-treated pine and cedar. Pressure-treated lumber is cheaper and very rot-resistant but can be heavy and tends to warp as it dries, so let it acclimate in your yard for a few days before building. Cedar costs a bit more but is lighter, stable, and naturally rot-resistant. It also looks better with a clear finish if aesthetics matter to you. Avoid untreated pine or generic construction-grade fir for anything that will sit outside year-round.
| Material | Cost (relative) | Rot Resistance | Weight | Best For |
|---|---|---|---|---|
| Pressure-treated pine | Low | Excellent | Heavy | Budget builds, painted finishes |
| Cedar | Medium | Very good | Light-medium | Natural/stained look, lighter frames |
| Redwood | High | Excellent | Medium | Premium builds in dry climates |
| Teak | Very high | Outstanding | Heavy | Coastal or long-term investment builds |
For hardware, do not cut corners. Use 304 stainless steel screws and bolts for most outdoor builds. If you are near the coast or in a high-humidity, salt-air environment, step up to 316 marine-grade stainless. Galvanized hardware is an acceptable budget alternative, but stainless holds up significantly better over years of outdoor exposure and will not leave rust streaks on your wood. Use 2.5-inch to 3-inch exterior screws for frame assembly and 3/8-inch carriage bolts where sections join together.
For an L-shaped sectional, design two independent frame boxes: a longer sofa section and a shorter corner or chaise section. They connect at the corner with bolts so they stay locked together on the patio but can be separated if you ever need to move them. Sketch out each box with exact board dimensions before buying lumber so you can calculate a cut list and avoid wasting material at the hardware store.
Basic cut list for a two-piece L-shaped sectional
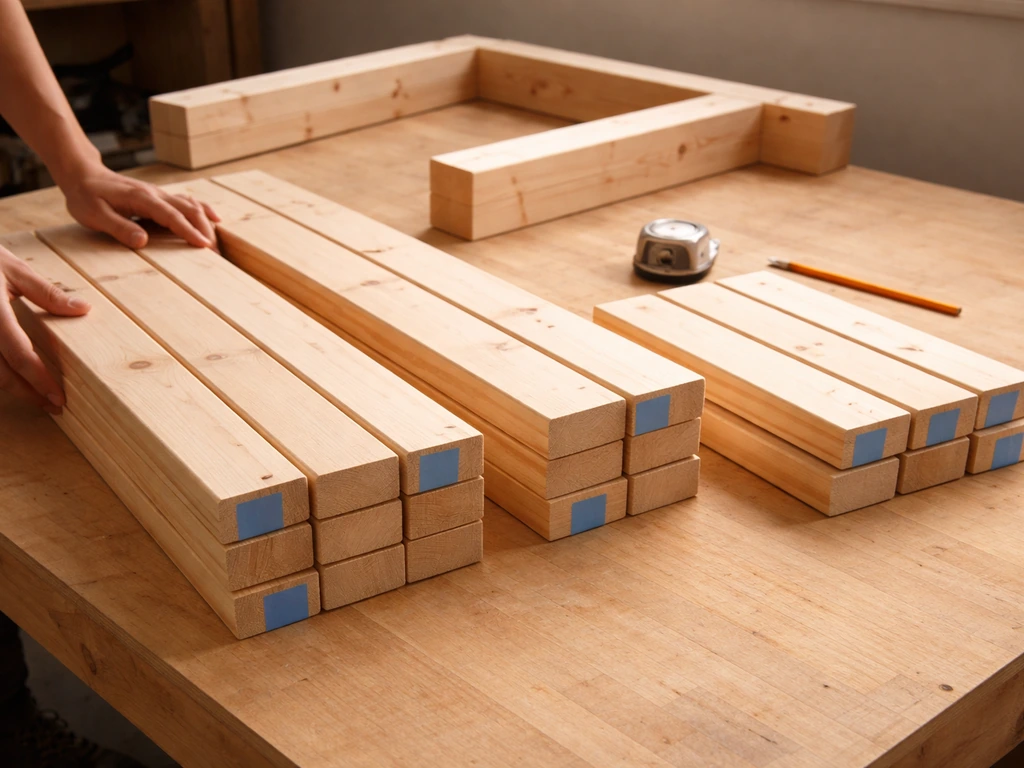
Here is a starting cut list for a common size: one sofa section at 84 inches wide by 28 inches deep (overall frame), and one chaise section at 60 inches wide by 28 inches deep. Both sections sit at a frame height of 14 inches, finished seat height around 16 to 17 inches with cushion. Adjust these numbers to match your patio measurements.
- 2x4 lumber for all frame rails, legs, and seat supports (primary structural members)
- 2x6 lumber for seat slats (gives a wider surface and better support span)
- 4x4 posts for corner legs if you want extra stability on longer sections
- 1x4 or 1x6 boards for optional back slat panels
- 3/8-inch carriage bolts, washers, and nuts for joining sections
- 2.5-inch and 3-inch stainless exterior screws for frame assembly
- Exterior wood glue for glue-and-screw joints at high-stress connections
Build the base frame for each section piece
Start with the base rectangle for each section. Cut your four outer frame rails to length, then cut your legs. For a 14-inch seat frame height, the legs will be 14 inches if you are building a flat-bottom box that sits directly on legs. Square everything up on a flat surface before driving screws. Use a framing square constantly here because a frame that is even slightly out of square will cause headaches when you try to add the seat slats and join the sections later.
- Cut your two long side rails and two short end rails to length from 2x4 stock.
- Cut four legs to 14 inches (adjust if you want a higher or lower seat height).
- Attach the end rails to the inside faces of the side rails using two 3-inch screws per corner, pre-drilling to prevent splitting. Add exterior wood glue at each joint.
- Drop the legs into each corner of the box frame and secure with two screws per face (four screws per leg total).
- Add two or three internal cross braces along the length of the frame, spaced evenly, to prevent the frame from racking. These run perpendicular to the long side rails.
- Flip the frame right-side up and check that it sits flat. If it rocks, trim the offending leg slightly with a handsaw or belt sander.
- Leave a small gap (about 1/4 inch) between seat slats when you add them later to allow rainwater to drain through rather than pool on the surface.
Repeat this process for the second section. Once both base frames are built, stand them up next to each other in the L configuration and check that the heights match before moving on. Minor height discrepancies are much easier to fix now than after you have built the whole thing.
Assemble seat supports and backrest structure
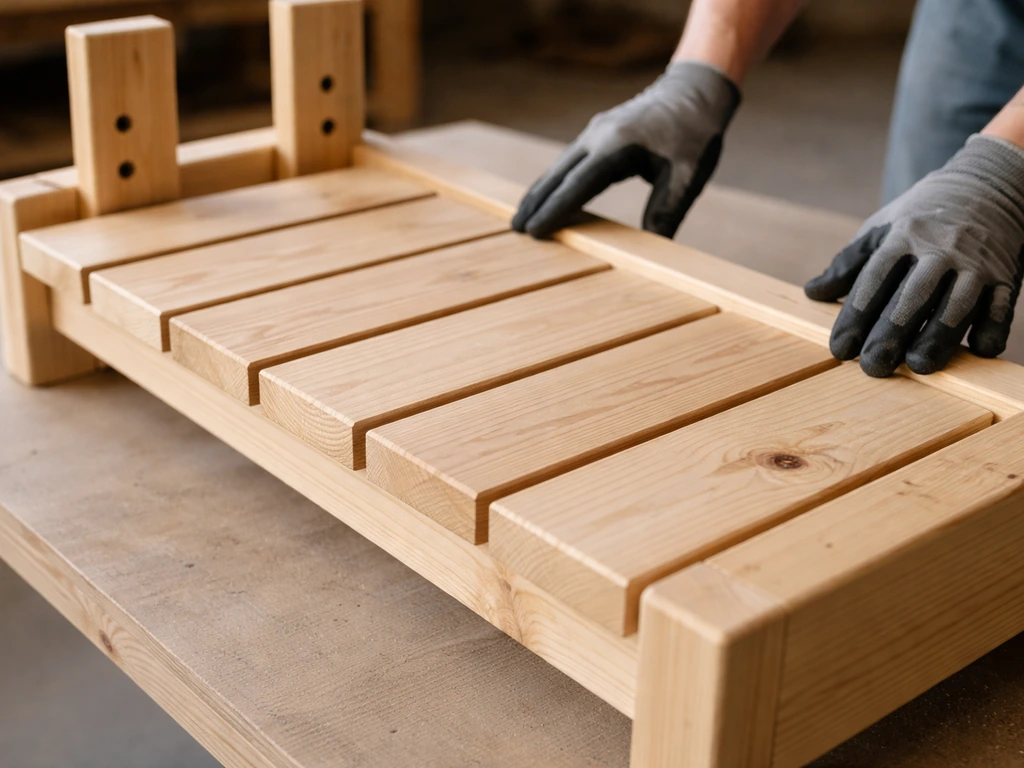
The seat surface is made from 2x6 slats running across the short dimension of the frame. Cut them to the same width as the outside measurement of your frame's short dimension, then space them about 1/4 inch apart using a scrap piece of plywood as a spacer. Screw each slat down through pre-drilled holes into the top of the cross braces and side rails. Two screws per slat end, countersunk slightly, so the surface stays smooth for cushions.
The backrest is the part most builders rush, and it shows. A solid backrest needs its own vertical support posts anchored to the rear of the seat frame, not just boards leaning against the wall. Cut two or three 2x4 uprights to about 24 to 26 inches tall (measured from the seat frame top, this puts the finished backrest height around 16 inches above the seat surface once the back slats are on, which is a comfortable backrest angle). Angle these uprights slightly backward at about 5 to 10 degrees from vertical using a bevel gauge. That slight recline makes a significant difference in how comfortable the seat feels.
- Mark and cut your backrest upright posts to length, with the bottom cut angled to match your desired recline (5–10 degrees works well for a lounge feel).
- Bolt the uprights to the back rail of the seat frame using 3/8-inch carriage bolts, two per upright. Bolts hold better than screws here because this joint takes the most stress.
- Cut horizontal back slats from 1x4 or 1x6 boards and attach them to the uprights, spacing them evenly with about 1/2-inch gaps between each slat.
- Add a top cap rail across the top of the uprights using a 2x4, screwed down flat. This ties the uprights together and adds a shelf-like detail that looks intentional and finished.
- Add armrest supports at each end of the sofa section: two short vertical posts at the front and back corners, connected by a flat 2x4 or 2x6 arm cap. Arm width of about 2.5 inches on the top cap looks slim and modern; a 5.5-inch wide 2x6 arm is more traditional and doubles as a drink ledge.
Connecting the L-shaped sections
Once both sections are fully assembled, place them in their final L configuration and clamp them together at the point where they meet. Drill two or three 3/8-inch holes through the adjoining side rails of each section, offset vertically so they do not hit each other. Run carriage bolts through the holes, add washers, and tighten with nuts. This keeps the sections locked together so they do not drift apart when people sit down or shift around, which is the most common complaint with modular sectionals on hard patio surfaces.
Weatherproofing, finishing, and anchoring outdoors
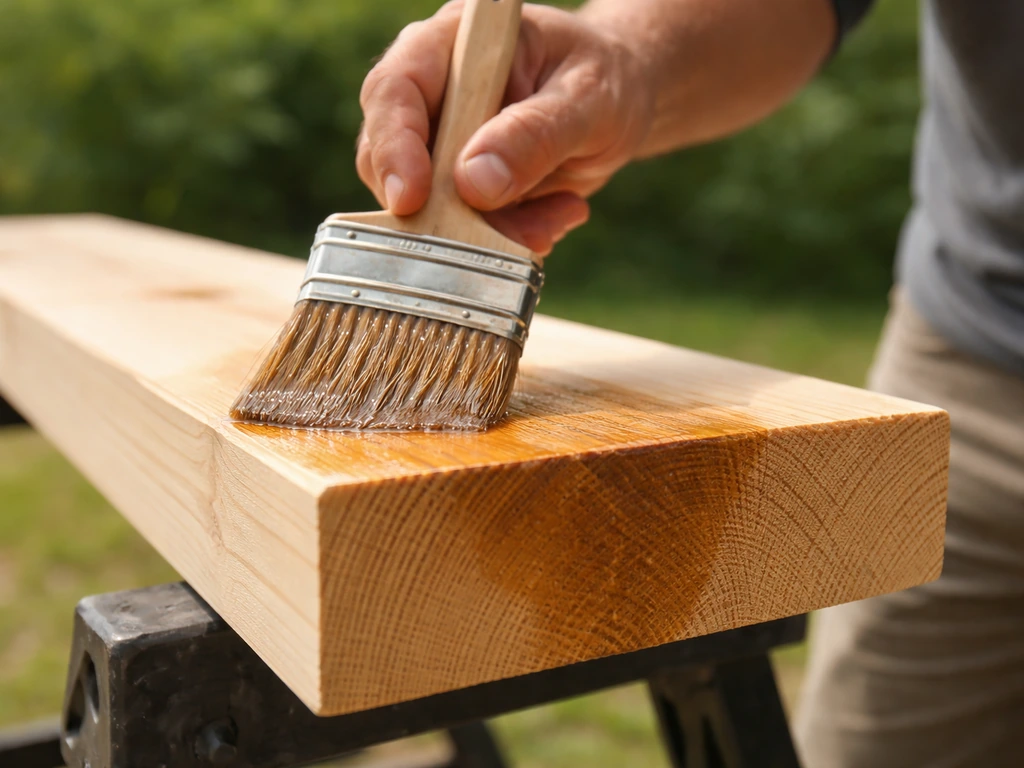
This step is where a lot of DIY outdoor furniture fails within a couple of years. Wood rot almost always starts at end grain, the cut ends of boards where the wood fibers are exposed and absorb moisture like a straw. Before you apply any finish, saturate every cut end liberally with exterior epoxy consolidant or an end-grain sealer. Let it absorb fully and cure before moving on. This single step extends the life of the piece more than any topcoat will.
Sand all surfaces starting with 180-grit and finishing with 220-grit. blank" rel="noopener noreferrer">Do not go finer than 220 on open-grain woods because very fine sanding can close the grain and actually reduce how well your finish soaks in. Remove all sanding dust with a tack cloth or compressed air. The wood must be dry before you apply any finish, ideally below 15% moisture content. If you have been building in humid weather, let the frames sit in a covered area for a day or two before finishing.
For the topcoat, you have two solid options: an exterior spar varnish for a clear, glossy look that shows off the wood grain, or an exterior deck stain and sealer for a more matte, color-tinted look that is easier to reapply in future years. Apply two to three coats, sanding lightly with 220-grit between coats. Pay extra attention to the underside of the frame and the legs, which are closest to a wet patio surface and most vulnerable to moisture wicking up from below.
Anchoring and stability on patio surfaces
On a concrete or tile patio, the sectional can shift under wind or when people get up and sit down. The simplest fix is furniture leg pads or rubber non-slip feet on the bottom of each leg. These grip smooth surfaces surprisingly well and also protect the patio surface from scratches. For a more permanent solution, especially if you live somewhere with strong winds, you can use low-profile L-brackets anchored to the patio floor with concrete anchors at the back corners of the sectional. The brackets are hidden behind the frame and barely visible. If your patio is screened or enclosed, you can sometimes anchor to a wall or post instead, which is even less visible and very secure.
Add cushions, comfort details, and maintenance next steps
The frame is the structure, but the cushions are what make it a place people actually want to sit. For outdoor use, you need foam that handles water without staying soggy. Look for reticulated or open-cell foam labeled for outdoor or marine use. This type of foam lets water drain through it and dries quickly rather than holding moisture and developing mold inside the cushion. Cut foam to match your seat depth (around 20 to 24 inches) and the length of each seat section, at a thickness of 4 to 5 inches for a comfortable lounge cushion.
For the fabric cover, Sunbrella is the standard recommendation for a reason. It is solution-dyed acrylic, which means the color goes all the way through the fiber rather than sitting on the surface, so it resists UV fading and holds up to mold and mildew. Sunbrella's upholstery line even carries a 5-year limited warranty covering loss of strength or color under normal exposure. If budget is a concern, look for other solution-dyed acrylic fabrics with similar specs. Avoid cheap polyester covers, which fade and deteriorate within a season or two in direct sun.
Keeping cushions in place is a small but real problem, especially on a sectional with a slight backrest angle and on windy days. Velcro strips sewn into the cushion cover and stapled to the seat slats work well. Cushion clips or grip-tight straps at the back edge of the seat cushion add another layer of hold, especially for the back cushions which tend to slide down or forward. Hook & Loop recommends cushion retention methods like Velcro strips, grip-tight cushion clips, and adjustable straps, and suggests combining methods for best results in windy setups Cushion clips or grip-tight straps at the back edge of the seat cushion add another layer of hold. Combining two retention methods gives the best results in breezy setups.
Keeping your sectional in good shape year after year
Once a year, do a quick inspection: check all carriage bolts at the section joints and tighten any that have loosened, look at the leg bottoms and any areas close to the ground for early signs of finish wear or soft spots in the wood, and re-apply a coat of exterior finish to any areas that look dry or weathered. Catching a small worn spot early takes five minutes and a brush. Ignoring it for another season can mean replacing a board. Store cushions indoors or in a weather-resistant bin when the sectional is not in regular use, especially in winter if you are in a climate with snow or extended rain. The frame can handle the elements if it is properly finished, but even the best outdoor cushions last longer with basic shelter when not in use.
If you end up wanting to build out the rest of your outdoor room, the same material choices and construction principles here apply to companion pieces like a patio daybed or a coffee table to anchor the L-shape. Getting the sectional right first gives you a solid reference point for sizing and finishing everything else around it, and makes the whole patio feel like a cohesive space rather than a collection of mismatched furniture.
FAQ
Do I need to build it in exactly an L shape, or can I make a U-shaped or straight sectional instead?
You can, but the framing approach changes. For straight runs, build one continuous frame box with extra blocking under the seat slats. For U-shaped layouts, plan three separate modules and add connection bolts and joint hardware at two corners, so movement stays localized instead of stressing one long frame span.
What should I do if my patio surface is not perfectly level (or has a slight slope)?
Level the frame plan before you cut final legs. Use a shim-and-mark method: set one corner frame in position, verify seat height at each leg, then adjust leg lengths or add concealed leveling shims at the bottom before you screw everything together.
How do I prevent the end-grain sealing step from being missed or uneven?
Treat cut ends as a separate workflow item. After cutting and before any sanding cleanup, brush or flood end grain with epoxy consolidant, then repeat after the first application has soaked in and partially cured. Make sure the underside and any exposed underside edges get the same attention, not just the top.
Can I use pressure-treated lumber outdoors without it looking blotchy or unfinished?
Yes, but plan for extra prep. Pressure-treated wood can have varying moisture content, so let it acclimate longer if it feels cool or damp. Also consider using an exterior deck stain and sealer, it hides some surface variation better than clear spar varnish.
What is the best way to space the seat slats if my frame is slightly off-square?
First fix squareness at the base. If the frame is off, the slat gaps will become inconsistent and the seat will feel wobbly. After squaring, use a spacer like a scrap plywood strip for uniform gaps, and pre-drill each slat location so screws do not pull the slats sideways.
Should I stain or seal the underside of the sectional first, or after assembly?
Do it before final assembly when possible. Undersides and inner faces are hard to reach later, and those areas wick moisture from below. If you must assemble first, use a foam brush or small roller and pay extra attention to leg bottoms and the underside corners.
How can I stop the sectional from wobbling on tile or smooth pavers?
Use non-slip feet that match your leg diameter and patio material. If wobble persists, add furniture leg pads plus a small adjustable shim at the specific leg that rocks, then re-check after the next dry or humid day since wood can move slightly.
What cushion foam thickness works best if I want deeper comfort than standard lounge seating?
If you want a softer, deeper sit, target 5 to 6 inches of cushion thickness, but confirm you still maintain the intended backrest height for posture. Thicker cushions can also change how often people shift, so consider extra cushion retention like clips at the back edge.
Are there outdoor cushion fabrics besides solution-dyed acrylic that work well?
Yes. Look for fabrics specifically labeled for solution-dyed acrylic or for high fastness UV performance, then compare mildew resistance and whether the fabric includes a water-repellent finish. Avoid untreated polyester unless you plan frequent replacement, UV fading tends to be faster.
How do I keep cushions from sliding if my backrest has a recline angle?
Add retention in layers. Use Velcro or hook-and-loop on the cushion bottom, then add cushion clips or straps near the top edge so the back cushions cannot migrate downward. If you have breezes, add one more retention point toward the center of each cushion, not only at the ends.
What routine maintenance actually matters after the first year?
Focus on fasteners and film integrity. Recheck carriage bolt tightness at the section joints, inspect end-grain and leg bottoms for dryness, and touch up only those areas with the same exterior finish system you used originally. Full sanding and recoating is usually unnecessary until widespread dulling or peeling appears.
How long should I wait after building before applying the final topcoat?
Let moisture equalize first. If the wood still feels damp or the smell of treated lumber is strong, give it more time in a covered, ventilated area. A practical rule is to finish when the wood surface is dry and you can’t feel cool dampness on your hands, ideally aiming for low moisture content as described in the article.
Step by step layouts for small decks, space saving seating and tables with clearance rules, traffic flow, and comfort ti

Practical DIY layout and decor tips to widen a long narrow patio using zoning, furniture spacing, lighting, greenery, an

Step-by-step plan to decorate a rectangular patio with smart layout, zones, furniture fit, lighting, plants, and seasona