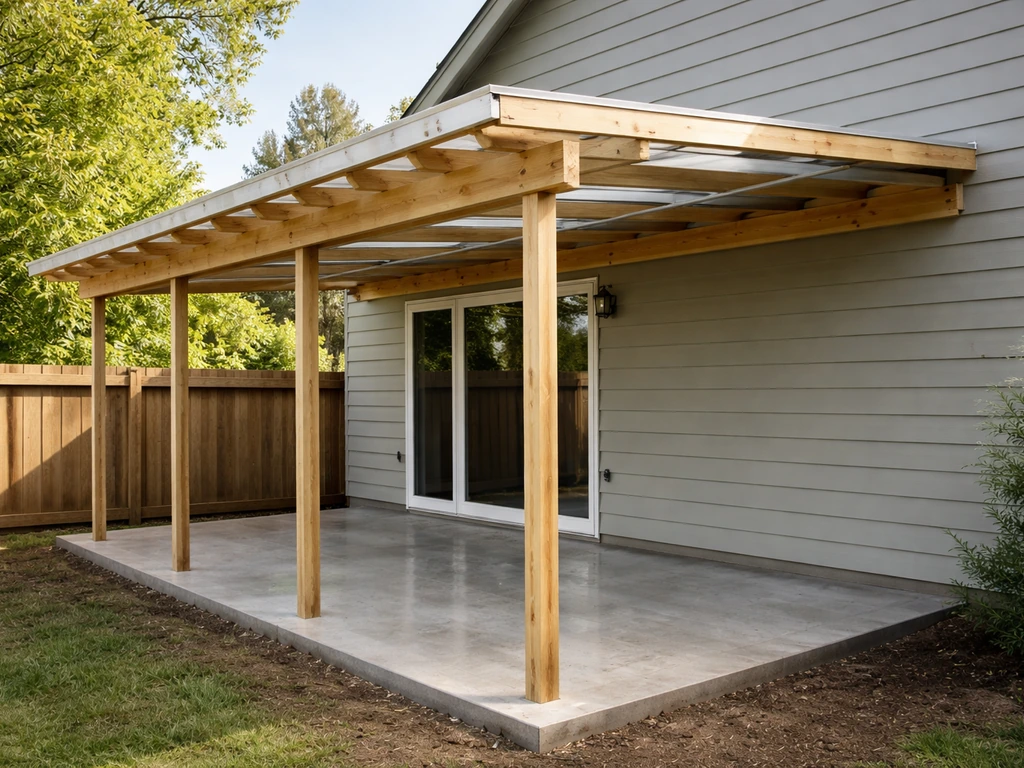
You can cover an outdoor patio with a solid-roof structure, polycarbonate panels, a pergola-style lattice cover, or a retractable awning, and the right choice comes down to three things: how much rain and wind you get, whether you want full shade or dappled light, and how permanent you want the structure to be. A solid roof attached to the house is the most weather-proof option. Polycarbonate panels split the difference between open and closed. A retractable awning is the fastest install but the least durable in high winds. Pick your type first, then the rest of the project falls into a logical sequence.
How to Cover an Outdoor Patio: Step-by-Step DIY Guide

Felix Brennan
5 Jul 2026
Quickly pick the best patio-cover type for your goals
Before you buy a single board or panel, nail down what problem you're actually solving. If you're wondering how to cover your patio, start by clarifying your main goals so you pick the right cover type and materials. Are you trying to block afternoon sun? Stay dry during summer thunderstorms? Use the patio through winter? Each goal points to a different structure.
| Cover Type | Rain Protection | Sun Shade | Wind Resistance | DIY Difficulty | Relative Cost |
|---|---|---|---|---|---|
| Solid roof (shingles or metal) | Full | Full | Excellent | Moderate–Hard | $$$$ |
| Polycarbonate panels | Full (if pitched correctly) | Partial (diffused light) | Good | Moderate | $$$ |
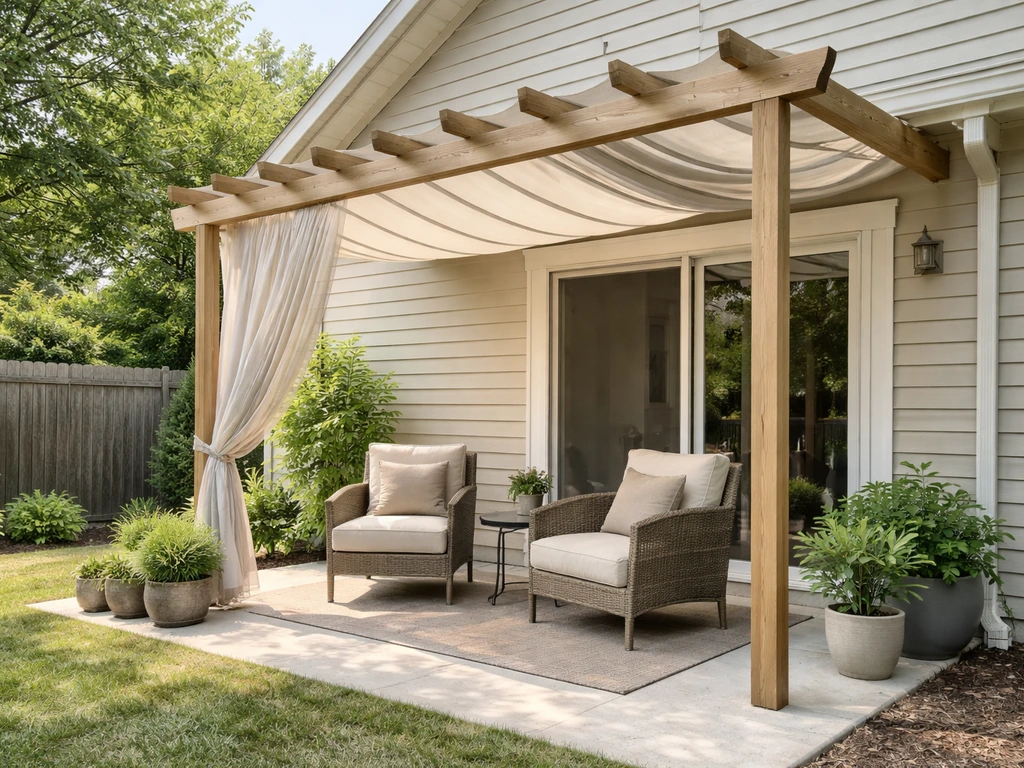
| Pergola with lattice/slats | None to minimal | Dappled | Low | Easy–Moderate | $$ |
| Retractable fabric awning | Light rain only | Good when extended | Poor — must retract in gusts | Easy | $$–$$$ |
| Fixed fabric shade sail | None | Good | Low–Moderate | Easy | $ |
If you're in a climate with real rain (think Pacific Northwest, Gulf Coast, or anywhere that gets 40+ inches per year), a solid roof or polycarbonate panel system is worth the extra investment. A pergola alone won't keep you dry. A common next step in the planning process is deciding how to cover an open patio in a way that matches your weather and comfort goals. Retractable awnings are genuinely useful for sun control, but they need to be retracted in gusty or high winds, leaving one extended in a storm is how they get destroyed. For full year-round comfort, especially if you plan to add screens or enclosure sides later, build toward a solid or polycarbonate roof from the start. It's much easier to screen in a solid-roofed cover than to retrofit a pergola.
Measure and evaluate your patio for fit, water runoff, and safety

Walk out to your patio right now and take these measurements before you do anything else. Skipping this step is the single most common reason DIY patio covers end up with drainage problems, structural issues, or a roof that's too low to walk under comfortably.
- Measure the full patio slab: length and width in feet and inches. Note any irregular shapes, steps, or bump-outs.
- Find the attachment point on the house: measure the height from the patio surface to the bottom of the eave, soffit, or rim joist where you'll attach the ledger board. Write it down.
- Check the existing roof overhang: how far does the eave extend past the house wall? This affects where your ledger goes and whether you'll need to cut into the soffit.
- Measure from the house wall out to where you want posts: this is your cover's depth (often 10–16 feet for a standard patio cover).
- Check the patio slope: lay a long level on the slab and measure how many inches it drops over 10 feet. Most slabs slope away from the house at about 1/8 inch per foot — make sure your roof pitch goes the same direction.
- Note any obstacles: gas meters, electrical outlets, hose bibs, AC condensers, or buried utility lines near where posts will go.
A minimum finished ceiling height of 7 feet is required under the IRC's Appendix H provisions for patio covers, but honestly, 8 to 9 feet feels much better in practice. If your eave attachment point is only 8 feet off the slab and you need roof pitch on top of that, you may need to drop the ledger below the eave rather than attach to it directly. Plan for this now, not after you've framed the whole thing. Also check for overhead utilities before you start digging post holes, call 811 (the US dig-safe line) at least three days before you break ground.
Design planning: layout, height, clearance, and attachment
Most DIY patio covers follow one of two attachment configurations: attached (one side ties into the house, posts support the outer edge) or freestanding (four or more posts carry everything). Attached covers are more common and more stable for residential patios, the house wall becomes a built-in anchor point. Freestanding covers work well when you can't or don't want to attach to the house structure. If you want the cheapest way to cover a patio, prioritize a simple attached layout, basic framing sizes, and roof materials that match your climate rather than paying for upgrades you do not need.
Setting the roof pitch
Every patio cover roof needs pitch to drain. For polycarbonate panels, the minimum recommended slope is 5 degrees, which works out to roughly 1 inch of rise per foot of run, so a 12-foot-deep cover needs at least 12 inches of height difference between the high (house) side and the low (outer post) side. For shingles or metal roofing, a 2:12 to 4:12 pitch is more typical. The practical way to achieve this on an attached cover: set the ledger board higher on the house than the finished beam height at the outer posts. On a 12-foot cover with a 2:12 pitch, the ledger sits 24 inches higher than the outer beam.
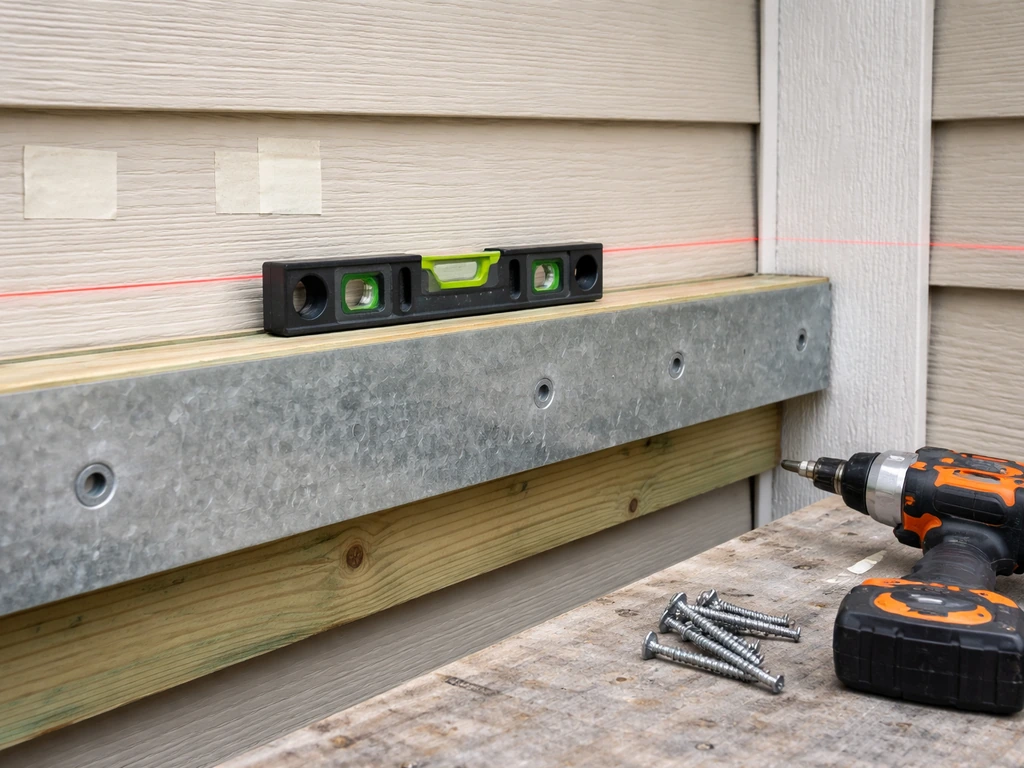
Ledger attachment basics
The ledger is the board that bolts to your house and carries half the roof load. It must attach to the house's structural framing, rim joist, band joist, or wall studs, not just the siding or sheathing. Use 1/2-inch lag screws or through-bolts, staggered every 16 inches. If you have stucco or brick veneer, you'll need to flash the ledger carefully so water doesn't sneak behind it. Flashing at the ledger is one of the most critical weatherproofing details in the whole project.
Post placement and footing depth
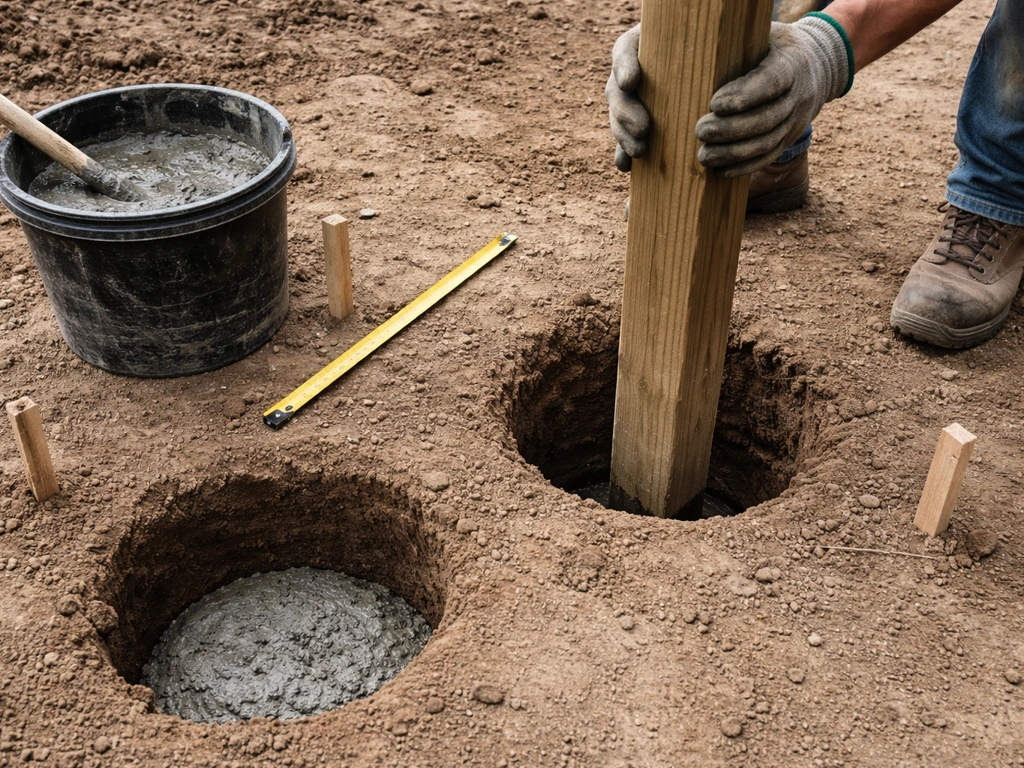
Outer posts sit on concrete footings. Footing depth depends on your local frost line, in warm climates, 12 inches may be fine; in cold climates, you may need 36 to 48 inches. Check your local building department for the required depth. A common footing size for a residential patio cover post is 12 inches in diameter and deep enough to get below frost. You can use tube forms (Sonotubes) filled with ready-mix concrete, with a post base anchor set into the wet concrete so the post doesn't sit directly in the ground.
Materials and roofing choices
The framing material and the roofing surface are two separate decisions. Framing is almost always pressure-treated lumber (PT) or structural steel for DIY builds. Roofing is where you choose your look, light level, and weather performance.
Framing lumber
Use pressure-treated lumber for any framing member that's within 6 inches of the ground or exposed to weather. Standard sizing for a patio cover: 6x6 posts, 2x8 or 2x10 beams (doubled or tripled depending on span), and 2x6 rafters at 16 or 24 inches on center. If you're spanning more than 14 feet with a single beam, get a structural span table or have an engineer size it, undersized beams sag, and that's both a safety and a drainage problem.
Roofing surface options
- Asphalt shingles: matches the house roof, fully weatherproof, requires solid roof decking (OSB or plywood), best for permanent structures. Heaviest option — your framing must be sized for the load.
- Metal roofing panels: lighter than shingles, very durable, sheds water and snow well, can be installed at lower pitches (as low as 1:12 for some standing seam systems). Popular for a modern or farmhouse look.
- Polycarbonate panels: lets diffused natural light through, fully rainproof when installed with correct pitch (minimum 5 degrees) and proper overlaps and flashing. Multiwall panels have better insulation value than single-wall. Must be installed with UV-protected side facing up.
- Fabric (shade cloth or woven HDPE): not waterproof but great for sun filtration. Works on pergola-style structures. Inexpensive and easy to replace seasonally.
- Lattice/slatted wood or vinyl: purely decorative shade, no rain protection. Good if you just want dappled shade and a finished look without a full roof.
For most DIYers who want solid rain protection without blocking all the light, polycarbonate panels on a well-pitched frame hit the sweet spot. They're lighter than shingles, easier to cut and install than metal, and they still let the space feel open. Just don't try to install them flat, that's where leaks happen every time.
Step-by-step build workflow
This workflow covers an attached solid-or-polycarbonate-roof patio cover, the most common and practical DIY project. Adjust as needed for your specific cover type.
- Pull your permit (more on this below) and mark your post locations on the slab with chalk or tape. Double-check your measurements — measure diagonally corner to corner to confirm the layout is square.
- Dig post holes or core-drill through the existing slab if posts sit on top of it. Set tube forms, pour concrete, and embed post base anchors. Let cure for at least 48 hours before loading.
- Install the ledger board on the house. Remove siding in that area, apply flashing tape or metal flashing behind and over the ledger, then lag-bolt it into the rim joist or studs. Seal all fastener holes.
- Set posts in the post base anchors and brace them temporarily with diagonal 2x4 braces. Check for plumb in both directions with a level.
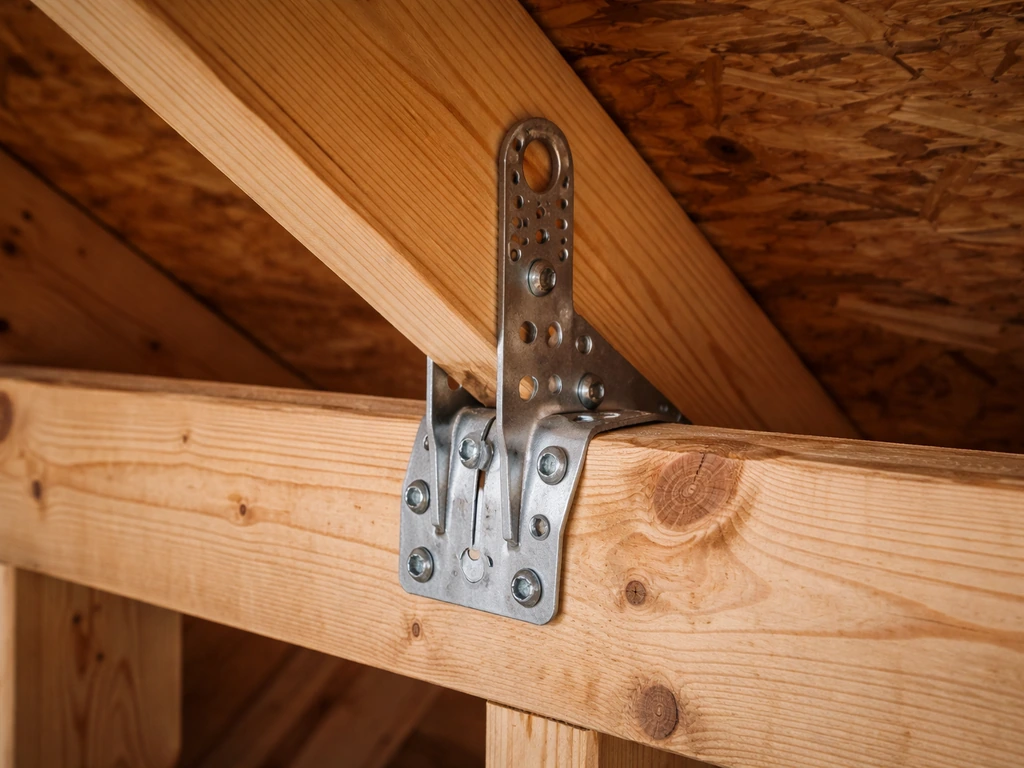
- Install the outer beam across the tops of the posts. Use structural post caps or notch the posts to seat the beam securely. Bolt through, don't just nail.
- Cut and install rafters from the ledger to the outer beam. Use rafter hangers at both ends. Space at 16 or 24 inches on center depending on your roofing load.
- For polycarbonate: install purlins (horizontal support strips) between rafters if needed for panel support. For shingles: sheath the roof with OSB or plywood, then felt/underlayment, then shingles.
- Install roofing panels or shingles, working from the low end up. For polycarbonate, use manufacturer-provided H-channel connectors between panels and closure strips at the top and bottom edges.
- Flash where the roof meets the house wall. Install step flashing and counter-flashing (or a continuous metal flashing piece) so water sheds outward, not into the wall.
- Install gutters on the low edge of the roof to direct runoff away from the slab and foundation. Pitch the gutter at least 1/4 inch per 10 feet toward the downspout.
Weatherproofing details: flashing, sealing, drainage, and wind
This is the part most DIYers rush through and later regret. A cover that keeps you dry for 10 years is built on good flashing and drainage details, not just the roofing material itself.
Flashing at the house wall
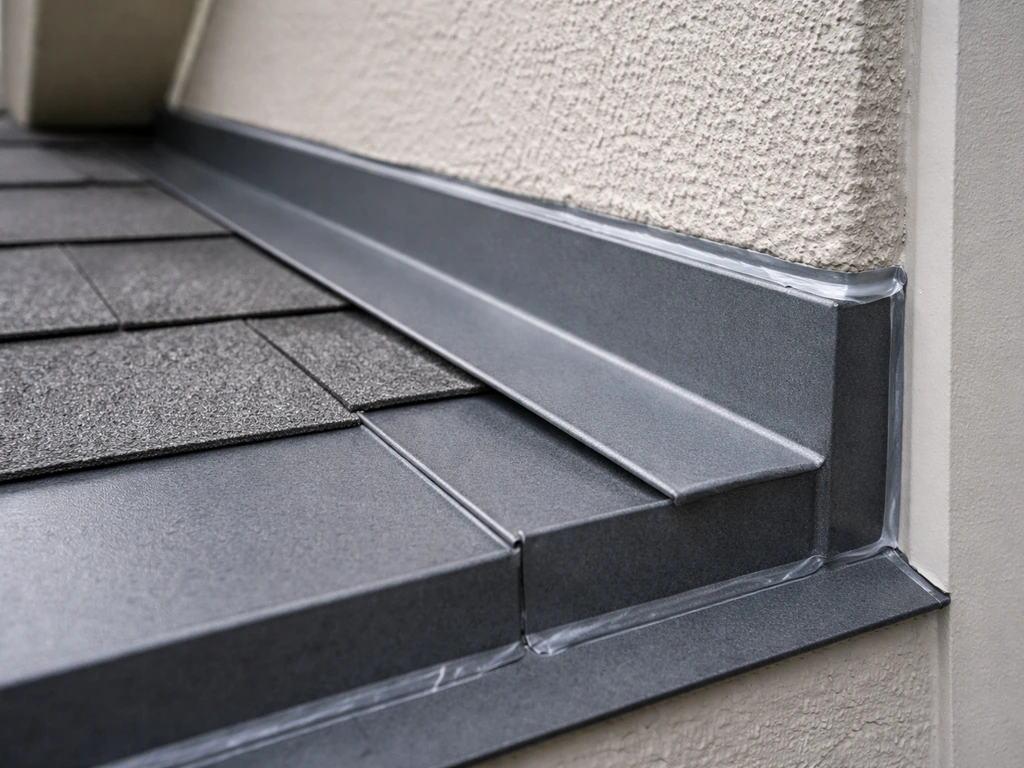
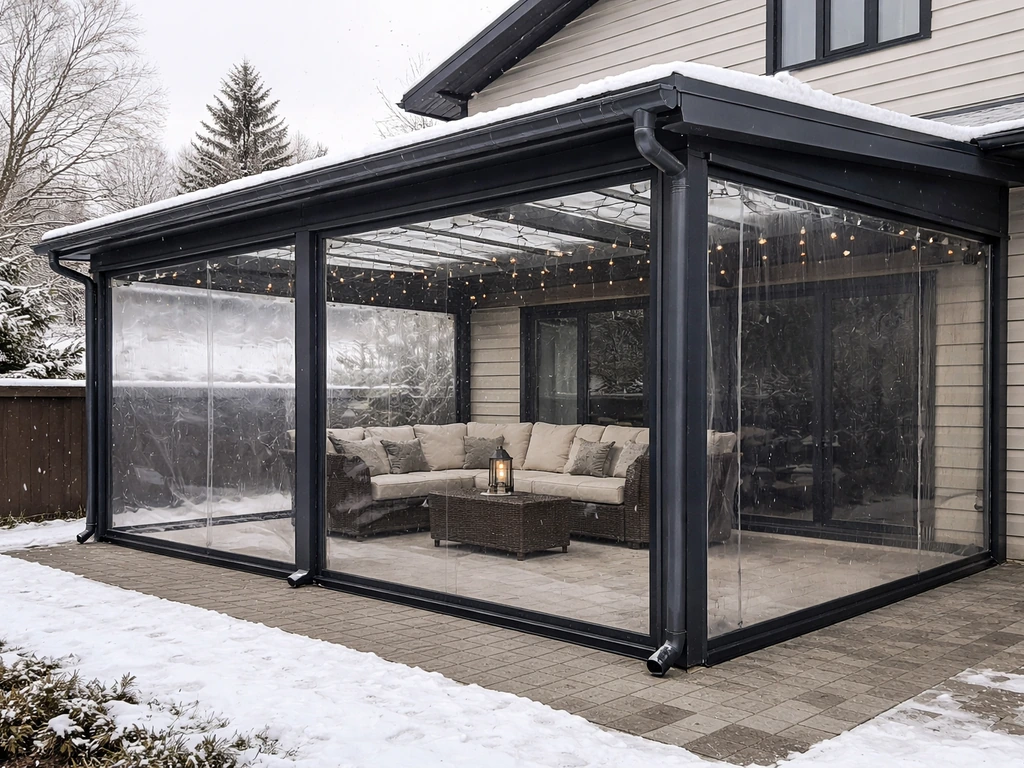
Where the roof surface meets the house wall is the single most likely leak point. If you’re planning for winter, focus on tight weatherproofing, proper drainage, and a roof system that sheds snow and rain safely likely leak point. The goal is to create a continuous water path that always drains outward. Use metal step flashing (individual L-shaped pieces woven between shingles and the wall) for shingled roofs. For polycarbonate or metal panel roofs meeting a stucco or lap siding wall, use a continuous piece of bent aluminum or galvanized flashing tucked at least 4 inches up under the siding or house wrap and lapped over the top edge of the roof panel. Seal the top edge of this flashing to the wall with a paintable polyurethane caulk, not silicone alone, UV exposure breaks down silicone faster here.
Gutters and runoff
A patio cover that dumps water off the outer edge directly onto the patio slab, or worse, toward the house foundation, is going to cause problems. Install a 5-inch K-style aluminum gutter on the low fascia edge. To finish the project, plan for how to cover patio railing so the posts and openings stay protected while keeping the look clean. Pitch it toward a downspout that exits at least 6 feet from the foundation. If you can't run a downspout that far, use a splash block and make sure grading slopes away from the house. Don't skip the gutters just because the patio cover is small, even a 10x12 cover concentrates a surprising amount of water off the edge in a heavy rain.
Wind anchoring
In high-wind zones (coastal areas, tornado-prone regions, or anywhere with regular gusts over 60 mph), your cover needs hurricane ties or rafter ties connecting every rafter to the beam, and the posts need to be engineered for uplift, not just gravity loads. Post base anchors rated for your wind zone are available at any lumber yard, they cost a few dollars more than basic post bases and are absolutely worth it. If you're in a zone rated for 130 mph or higher wind speeds, consult a structural engineer before building. This is not an area to guess.
Optional upgrades for comfort: screens, enclosure sides, and airflow
A covered patio with open sides is a huge improvement over nothing, but if you want to actually use the space in the evening without being eaten alive by mosquitoes, or push it into shoulder-season use in the fall and spring, adding screens or partial walls is the natural next step. If you want to extend your patio cheaply, start with low-cost upgrades like screens or partial wall sections to boost comfort without a full rebuild adding screens or partial walls. A solid-roofed patio cover is basically already the structural shell of a screened porch. You're adding the roof first (smart), and the screens can come later.
For screen panels, the typical approach is to frame in the open sides with 2x4 or 2x6 bays and staple fiberglass or aluminum screen mesh into spline channel. The standard DIY method uses a spline roller tool to press screen into a routed channel in the frame, it's faster and cleaner than stapling. If you want a more finished look, use vinyl or aluminum screen frames that snap or screw into the bays. For a more robust enclosure that handles wind-driven rain, consider adding solid knee walls (24 to 36 inches of solid material at the bottom) under the screen panels, this blocks most of the rain that blows in at an angle during storms.
Airflow matters more than most people realize once you've enclosed or partially enclosed the space. A covered patio with screens on three sides and solid wall on one side (the house) can feel like an oven in summer if there's no cross-ventilation. Orient your screen panels so the prevailing summer breeze can pass through, and consider a ceiling fan rated for damp or wet locations. A 52-inch outdoor ceiling fan makes an enormous difference in comfort and can extend the usability of a covered patio through most of the year in moderate climates.
Permits, realistic timeline, and maintenance after installation
Do you need a permit?
Almost certainly yes, if the cover is attached to the house or has permanent footings. The IRC's Appendix H addresses patio covers specifically, they're treated as structures with their own code provisions covering structural loads, footings, glazing, and ventilation. The IRC’s Appendix H explicitly addresses patio covers’ permitted uses and requirements for structural design loads and footings, along with glazing and ventilation/egress provisions structural loads, footings, glazing, and ventilation. Most counties follow this framework. In practice, expect to submit a site plan showing the cover's dimensions and position relative to the house and property lines, a framing plan showing post/beam/rafter sizes and spacing, a footing detail, and a ledger attachment detail. Some jurisdictions have a streamlined residential patio cover permit that's faster than a full structural permit, but you still need to file it. Unpermitted structures can become a real problem when you sell the house, and an insurance claim for a structure damaged in a storm can be denied if it wasn't permitted. Pull the permit, it's usually $150 to $500 and takes 2 to 4 weeks for approval in most areas.
Realistic project timeline
| Phase | What Happens | Time Estimate |
|---|---|---|
| Planning and design | Measure, sketch, choose materials, create permit drawings | 1–2 weekends |
| Permit application and approval | Submit drawings, wait for review | 2–4 weeks |
| Materials procurement | Order lumber, roofing, hardware | 3–7 days (or longer for special orders) |
| Footings | Dig, pour, cure | 1 day work + 2 days cure |
| Framing (posts, beams, rafters) | Main structural assembly | 1–2 days |
| Roofing and flashing | Sheathing, roofing material, flashings | 1–2 days |
| Gutters and finish details | Gutters, trim, caulking, paint/stain | 1 day |
| Inspection and close-out | Final inspection by building department | 1 day (scheduled) |
A typical DIY patio cover from permit application to final inspection runs 6 to 10 weeks total, with about 4 to 6 full work days of actual construction. The waiting time (permit approval, concrete cure, material delivery) is often longer than the build time itself. Plan accordingly and don't schedule a backyard party for the week after you start digging.
Maintenance checklist to keep it solid for years
Once it's built, the maintenance is minimal if you installed it right, but there are a few things to check every year to catch small problems before they become big ones.
- Every spring: clear gutters and downspouts of debris; check that water flows freely and downspouts are directing runoff away from the foundation.
- Every spring: inspect the ledger flashing and the wall flashing where the roof meets the house. Look for lifted edges, cracked caulk, or rust stains that signal water intrusion.
- Every spring: check all post bases for rust or signs of moisture. Look at the slab around the post bases for cracks or heaving.
- Every year: re-torque any lag screws at the ledger that have worked loose; tighten rafter hanger nails or screws.
- Every 2–3 years: re-apply a wood sealant or stain to exposed pressure-treated framing, especially end cuts. This dramatically extends the life of the lumber.
- After every major storm: walk the cover and look for lifted roofing material, loose panels, or shifted flashing. Fix anything immediately — storm damage compounds fast.
- For polycarbonate panels: clean with mild soap and water (no abrasives); check UV-protective film on top surface for clouding or peeling every 3–5 years.
- For retractable awnings: retract before any predicted high winds or hail; clean the fabric seasonally and inspect the mechanism for corrosion.
When to call a pro instead of DIYing it
Most patio covers are well within DIY range, but there are a few situations where it's worth bringing in a structural engineer or licensed contractor: if your house has an unusual roof line (hip roof, multiple gables) that makes ledger attachment complicated; if you're in a high-wind or high-snow-load zone; if the span between posts exceeds 16 feet; or if the permit submission requires stamped engineering drawings. A few hundred dollars for an engineer's review on a large or complex cover is cheap insurance against structural failure and permit rejection.
FAQ
Can I cover an outdoor patio without permits if it is small or temporary?
Even if the cover is small, if it is attached to the house or uses permanent posts and footings, most jurisdictions still treat it as a structure. Temporary-looking covers can still require permits, especially if they change roof drainage or add new load paths. If you are unsure, call your local building department with the proposed dimensions and attachment method before you buy materials.
What are the most common causes of leaks on attached patio covers?
The biggest leak drivers are roof-to-wall transitions, poor flashing at the ledger, and gutters or drainage that let water run into the wrong place. Another frequent mistake is installing polycarbonate flat or under-pitch, which prevents proper water shedding and causes pooling at fastener lines. After installation, check that water consistently drains outward away from the foundation, not sideways behind trim.
How do I choose the right slope for my patio cover if I mix roofing types?
Use the most strict requirement among the materials you are using. For example, polycarbonate typically needs a steeper minimum slope than shingle or metal, so you may need to raise the ledger more than you would for shingles. If you are transitioning between roof surfaces, keep a continuous pitch and avoid creating low valleys where water can collect.
Do I need gutters even if the cover is just over part of the patio?
Yes, because roof covers concentrate runoff at the low edge regardless of size. Without a gutter, water can splash off fascia, saturate the patio slab, and re-route toward the foundation during heavy rain. If you install a gutter, also plan the downspout outlet so it discharges at least several feet from the house and consider a splash block for added protection.
What spacing or design issues cause roof sagging over time?
Sagging usually comes from undersized or undersupported beams, spans that are too long for typical DIY lumber, or incorrect rafter spacing. If your span exceeds common DIY comfort limits, verify sizing with a span table or engineer, because drainage issues often follow structural deflection. Also make sure beams and rafters are properly doubled or tripled where specified, not just single members.
Can I attach the ledger to siding, stucco finish, or sheathing?
No, the ledger needs to connect to structural framing elements like studs, rim joists, band joists, or other load-bearing members. Attaching to exterior finish materials can fail during load transfer and also undermines proper flashing. If you are unsure where studs or joists are, locate them before drilling and use an attachment plan that reaches structure.
How should I handle overhead utilities before I start digging post holes?
Call the dig-safe service ahead of time and also verify clearances for any overhead lines near the proposed roof footprint. Post holes require extra care because utility lines can be offset from drive paths, and roof framing changes can shift the final position. If utilities conflict, adjust the layout early rather than trying to route around obstacles after the footing layout is set.
What footing depth should I use if I am not sure about my frost line?
Base footing depth on your local frost line requirements, because uplift and heaving can damage posts if they are too shallow. If you cannot easily find the frost line guidance, check with your building department or use an engineer for the footing plan. For cold climates, it is often safer to go deeper than the minimum assumptions people use for warmer areas.
Are hurricane ties and uplift anchors really necessary for every wind zone?
If you live in a high-wind or gusty area, uplift resistance is essential, not optional. Low-and-leaning attachment mistakes can cause partial failure even if the roof looks solid when installed. Use rated post bases and roof-to-beam connections where required, and if your jurisdiction has specific wind speed requirements, follow those thresholds rather than general DIY rules.
Will screen panels reduce airflow and make the patio too hot?
Yes, partially enclosed spaces can become stagnant if there is no cross-ventilation. The practical fix is to align openings with prevailing summer breezes and leave intentional airflow paths, for example screens on multiple sides rather than blocking airflow on all sides. A ceiling fan rated for damp or wet locations can also reduce perceived heat and improve comfort.
How often should I inspect my patio cover after the build?
Plan on at least annual inspections, ideally after the rainy season or after major storms. Focus on flashing seams at the ledger and roof-to-wall joint, check gutters for clogging, look for fasteners that have loosened, and confirm that water is still draining outward. Catching small gaps early prevents rot and recurring leak patterns.
When should I bring in an engineer or contractor instead of DIY?
Consider professional help if your cover span is large, the roof geometry is complex (multiple gables, hip roof tie-ins), or you are in high-snow-load or high-wind zones. Also bring in an engineer if your permit requires stamped calculations or if you are not confident about ledger attachment into structural framing. For many projects, a short engineering review of the framing layout can prevent costly rework.
Next Articles
How to Cover an Open Patio: DIY Options and Steps
DIY steps to cover an open patio with awnings, pergolas, shade sails or roofs, plus mounting, drainage, and wind options
How to Cover Patio for Winter: DIY Guide and Checklist
Step-by-step winter patio cover guide, DIY checklist, enclosure options, safe installation, and upkeep for cold rain and

How Can I Extend My Patio Cheaply A DIY Step by Step Guide
Step-by-step DIY ways to extend a concrete, paver, or brick patio cheaply, with leveling, base prep, costs, and quick up