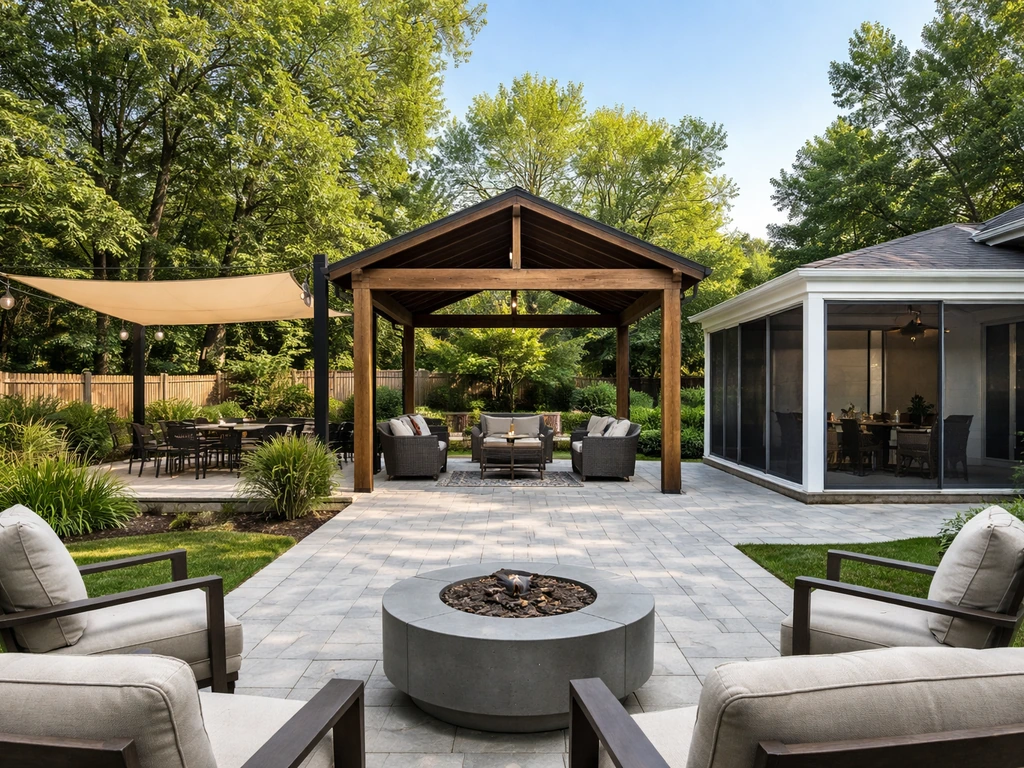
Covering your patio comes down to one core question: what are you protecting against? If it's mostly sun, a pergola or shade sail can do the job cheaply. If you need rain protection, you want a solid or semi-solid roof. If wind, bugs, or privacy are the issue, a partial or full enclosure makes more sense. Once you know that, you can pick the right structure, plan it to code, and install it yourself with basic tools and a weekend or two. You can then follow the material, slope, and permit guidance in the rest of the article to cover your outdoor patio the right way cover an outdoor patio.
How to Cover Your Patio: Shade, Roof, or Enclosure DIY

Felix Brennan
29 May 2026
First, decide what 'cover' actually means for your patio
This sounds obvious, but most homeowners run into trouble because they buy or build the wrong type of cover for what they actually need. There are five broad categories, and they are not interchangeable.
| Cover Type | Best For | Rain Protection | DIY Difficulty | Relative Cost |
|---|---|---|---|---|
| Solid-roof cover (aluminum, steel, insulated panels) | Full sun + rain + consistent shade | Yes, fully watertight | Moderate | $$–$$$ |
| Pergola (open framework) | Sun filtering, aesthetics, airflow | No, not rain-proof | Moderate | $$–$$$ |
| Awning or retractable canopy | Sun + light rain, flexible use | Partial, wind-dependent | Easy–Moderate | $–$$ |
| Lightweight/semi-solid roof (polycarbonate, shade panels) | Sun + partial rain | Partial to good | Moderate | $$ |
| Partial or full enclosure (roof + screens or panels) | Sun, rain, wind, bugs, privacy | Yes, when fully enclosed | Moderate–Hard | $$$–$$$$ |
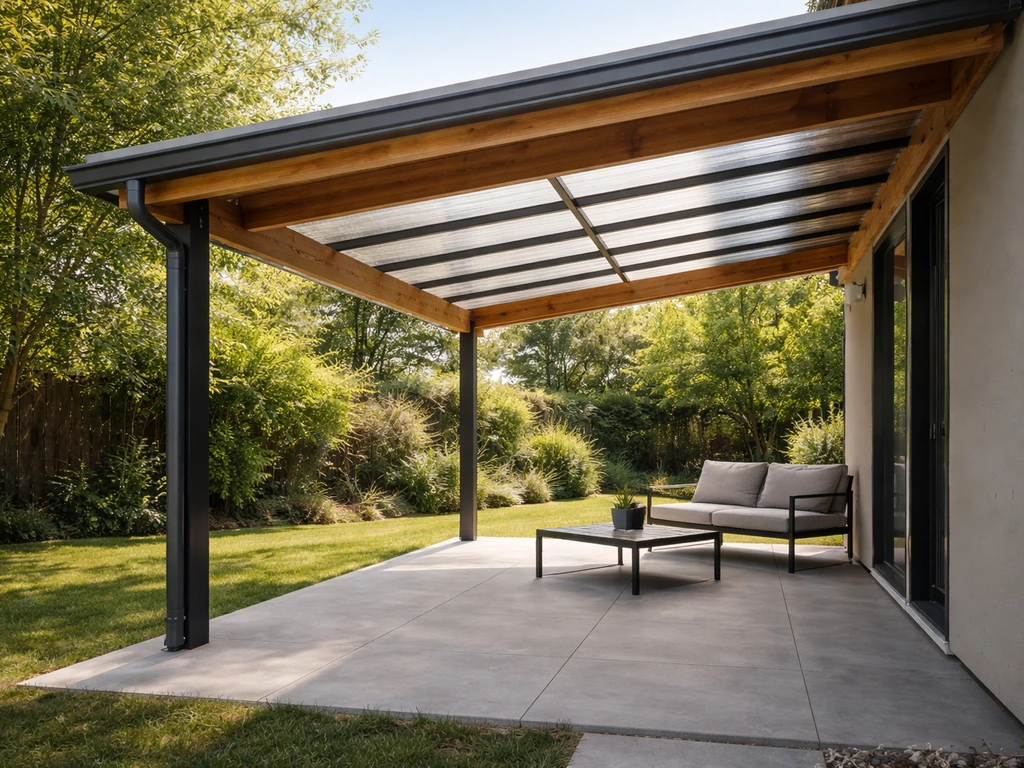
A solid patio cover is an attached or freestanding extension that provides reliable rain protection and consistent shade year-round. If you want help comparing options, review our guide on how to cover an outdoor patio based on the weather you face rain protection. A pergola, by contrast, is an open framework that filters sunlight but does not shelter you from rain the way a solid roof does.
Awnings and retractable canopies block sun well and offer limited rain protection depending on pitch and wind conditions. Polycarbonate and semi-solid panel systems sit in the middle, letting in diffused light while handling moderate rainfall. Full enclosures add sides (screens, glass, or panels) to the roof equation, managing wind exposure and insects on top of shade and rain.
If you already know you need rain coverage specifically, or want to button things up for winter, the choice narrows quickly to solid-roof systems or full enclosures. If sun is your main enemy and aesthetics matter, a pergola or retractable awning is easier to build and less expensive to maintain.
Assess your patio before you pick anything
Spend an hour outside at different times of day before you buy a single piece of lumber. Write down where the sun hits hardest, which direction the prevailing wind comes from, whether you get heavy rain or light seasonal showers, and whether your patio is attached to the house or fully detached. These four factors determine your structure type, your materials, and whether you need footings or just a ledger board.
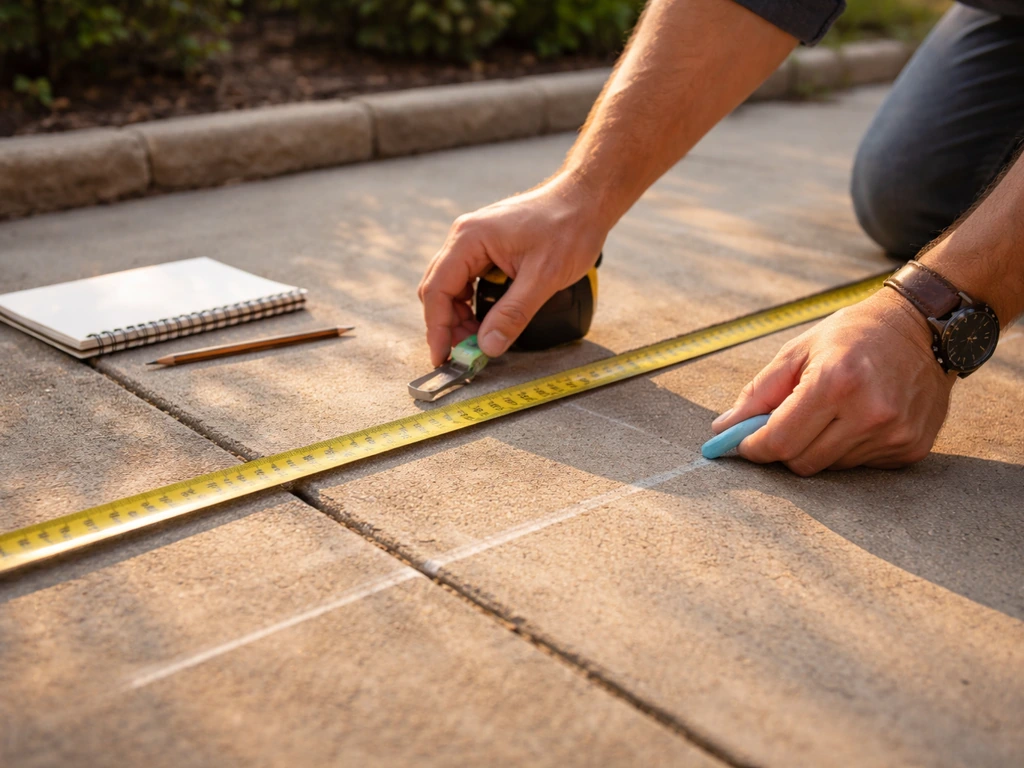
Measure your patio accurately
Measure the full length and width of the patio footprint. Note the height of the eave or the wall where an attached ledger would sit. Also measure the distance from any doors or windows to the proposed ledger location, because you cannot notch through a header or window frame. For a freestanding structure, mark where footings would go and check for underground utilities before you dig. A kit manufacturer's typical measure guide asks for the patio cover width, the planned eave overhang, and the roof termination point, so sketch those numbers on paper first.
Check your attachment options
For an attached cover, you need to anchor a ledger or header directly into the house's structural framing, which usually means locating wall studs or a rim joist. If your wall is stucco, EIFS, or fiber cement over a non-structural layer, you need to find the sheathing and studs beneath. If you cannot get a clean ledger attachment, a freestanding post-and-footing system is often the smarter option even if it costs a bit more upfront. Freestanding also avoids the flashing and water-management issues that come with cutting into the house envelope.
Factor in your local climate
Wind load matters more than most DIYers expect. The 2024 IRC Appendix BF requires patio covers to handle a minimum vertical live load of 10 lb/ft² plus any applicable snow loads, and wind pressure acting both upward and downward on the roof surface. If you live in a high-wind zone, hurricane region, or anywhere that gets serious snow, you need to design (or buy) a cover rated for those conditions. A lightweight pergola or shade sail is not the right call in coastal Florida or the upper Midwest in winter.
Choose the right materials and style for your situation
Material choice drives long-term cost and maintenance as much as initial price. Here is how the main options stack up.
Wood
Pressure-treated lumber is the most DIY-friendly framing choice for pergolas and solid-roof covers alike. It is easy to cut, widely available, and works with standard hardware. The downside is maintenance: wood needs periodic sealing or painting and is vulnerable to rot in wet climates. If you go with wood framing under a solid roof panel, make sure any fasteners are rated for treated lumber, because standard zinc-coated fasteners can corrode rapidly when in contact with modern pressure-treated wood.
Aluminum and steel

Aluminum patio cover kits are the most popular solid-roof option for DIYers. They are lightweight, rust-resistant, and come pre-cut in most cases. Steel is stronger but heavier and more prone to corrosion if the finish gets scratched. One important note with any metal system: avoid mixing dissimilar metals in your fasteners and brackets. Galvanic corrosion between, say, aluminum panels and steel screws will eat fasteners faster than you expect and create leak points at the panel seams.
Polycarbonate panels
Polycarbonate (twin-wall or corrugated) is a popular semi-solid option because it lets in diffused light while blocking most rain. The critical thing to know is UV protection: without a UV-rated coating or UV-stabilized panels, polycarbonate yellows and becomes brittle within a few years in direct sun. Always buy UV-protected panels and install them with the UV-coated side facing up. They handle moderate rain well but are not ideal for heavy snow loads without additional structural support.
Fabric awnings and retractable canopies
A motorized retractable awning can cover a 10 to 20-foot span and retract when wind picks up, which is their real advantage over fixed structures. Solution-dyed acrylic fabric (Sunbrella is the most common brand name) holds color for years and resists mold far better than cheaper polyester options. Manual crank awnings cost considerably less than motorized versions. Fabric covers are not a good primary rain solution for open patios in rainy climates, but for sun control with occasional light showers, they work very well.
Screened enclosures and panel systems
If bugs, wind, or privacy are driving your project alongside rain and sun, adding screens or panels to a solid-roof cover transforms it into an outdoor room. Screen enclosure systems range from simple DIY screen door kits to engineered motorized track systems that roll down on demand. When designing any enclosure, make sure wind pressure on the screen surfaces is transferred to the ground through the frame, as required by IRC Appendix BF, and design for ventilation so you do not trap condensation under the roof.
Plan it properly before you build anything
Set a realistic budget
A basic wood pergola over a 12x12 ft patio runs roughly $500 to $1,500 in materials for a DIY build. An aluminum solid-roof kit over the same footprint typically runs $1,500 to $4,000 depending on quality. If you are wondering how can i extend my patio cheaply, an aluminum solid-roof kit over your existing footprint is often one of the most budget-friendly ways to get real coverage. Full enclosures with solid roofs and screen or glass walls can easily reach $8,000 to $15,000 installed, or $3,000 to $7,000 if you do most of the labor yourself. Get real quotes from suppliers before finalizing your design, because kit prices vary significantly by region and panel type.
Check permits before you touch a single post
Most jurisdictions require a building permit for any permanent patio cover attached to the house. Freestanding pergolas under a certain height and area threshold sometimes get a pass, but that threshold varies widely. Some municipalities also restrict how you can enclose a patio cover after the fact: one California city's permitting guidance explicitly states that no enclosure of walls of any kind is permitted to the sides of a patio cover under a specific permit category. Check with your local building department before you design anything, because redesigning after the fact is expensive and frustrating. You will also need to confirm setback requirements from property lines.
Layout, drainage, and slope
Any solid or semi-solid roof needs a positive drainage slope. The IBC recommends a minimum slope of 1/4 inch per foot (roughly 2%) for membrane-type roofs, and that is a good rule of thumb for patio cover panels too. Slope always runs away from the house. Plan your rafter heights accordingly: the ledger or header at the house sits higher than the beam at the outer edge, creating the slope. Also plan for a drip edge that extends at least 2 inches beyond the outer framing so water clears the beam and does not rot it.
Framing plan and post spacing
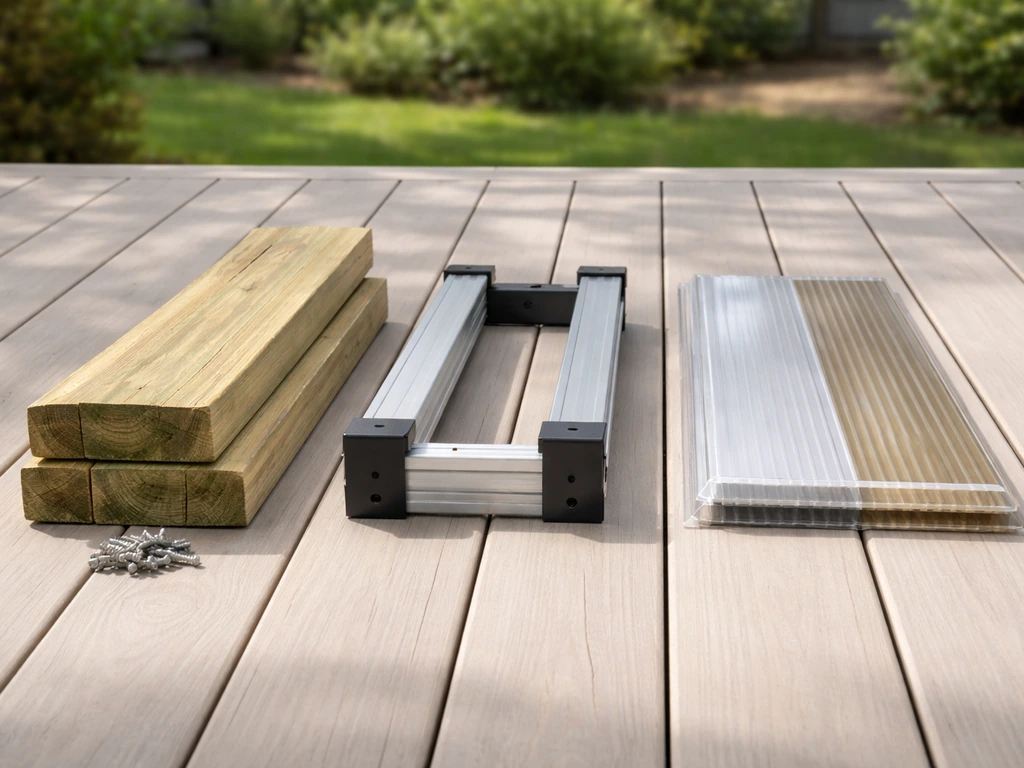
For spans up to 12 feet, 2x6 or 2x8 rafters at 24 inches on center work well for light loads. For spans 12 to 20 feet, move to 2x10 or a built-up beam, or use the beam sizing tables in your kit instructions. Post spacing for freestanding structures is typically 8 to 10 feet on center. Sketch your framing layout to scale on paper and confirm rafter count, beam size, and post locations before ordering materials.
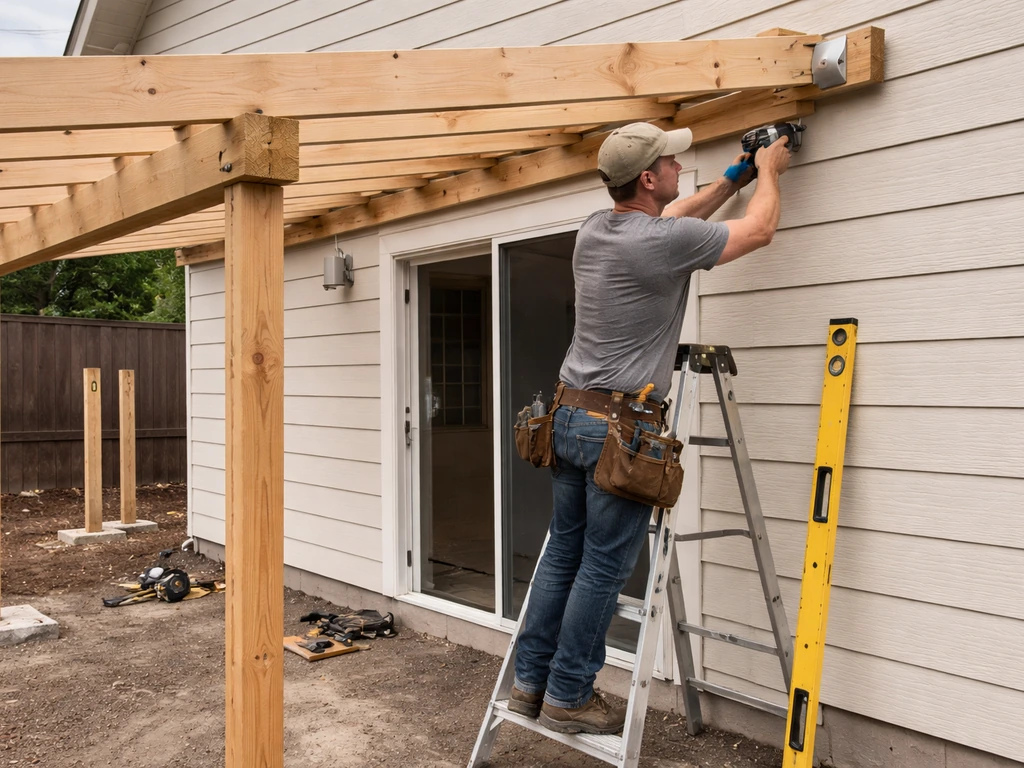
How to install a patio cover, step by step
This sequence covers a standard attached solid-roof patio cover, which is the most common project. Freestanding variations are noted where the steps differ.
- Mark your layout. Snap chalk lines on the patio surface to define post locations and the outer edge of the cover. Double-check by measuring diagonals to confirm the layout is square.
- Locate and mark house framing. Use a stud finder to locate wall studs or the rim joist where the ledger will attach. Mark each stud location with tape so you can see them clearly when the ledger is in position.
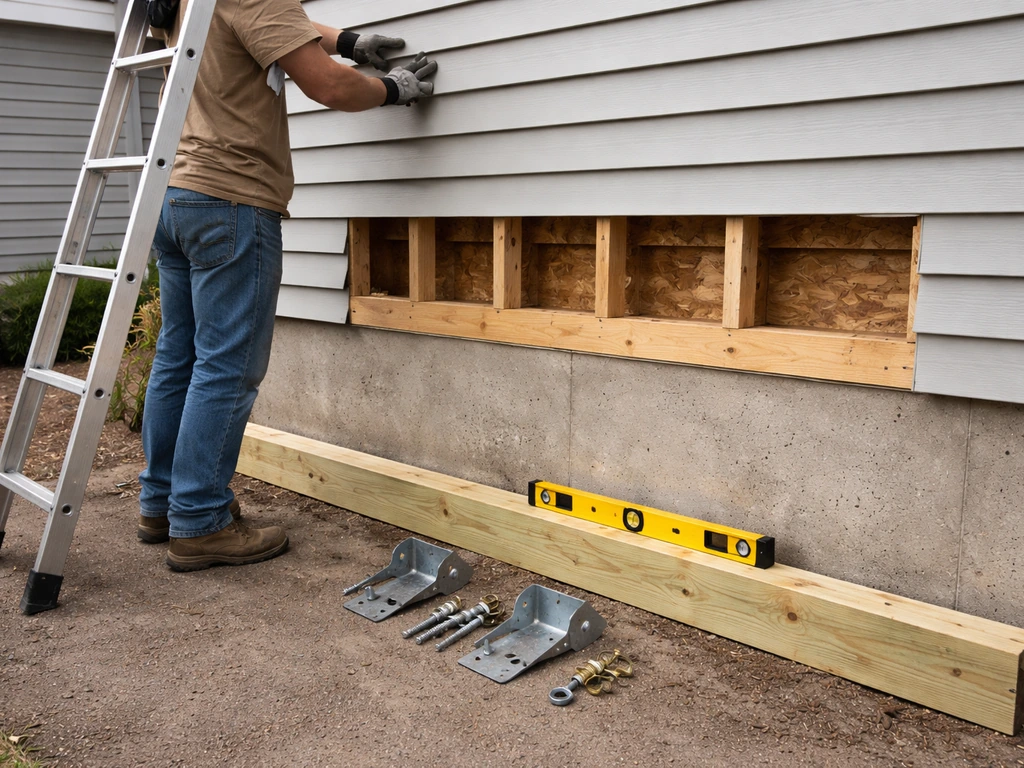
- Install the ledger or header. Cut the ledger board to length and drill pilot holes aligned with each stud location. Apply a bead of exterior-grade sealant behind the ledger before fastening, then secure it with structural lag screws or through-bolts into the house framing. Never fasten a ledger only into sheathing.
- Flash the ledger immediately. Slide metal z-flashing behind the house's weather-resistant barrier and over the top of the ledger. Extend it at least 2 inches behind the wall surface and lap it over the ledger face. In wet climates, add a secondary flashing layer and tape the top edge to the house wrap. This is the single most important step to prevent rot at the wall.
- Dig and pour footings for posts. For attached covers, you typically need at least two front posts. Footing depth depends on your local frost depth (check your local code), but 18 to 24 inches is a common minimum. Pour concrete and set post bases or embed posts directly, then allow 48 hours to cure.
- Set posts and install the outer beam. Cut posts to height, accounting for the drainage slope. The outer beam sits lower than the ledger to create the slope. Brace posts plumb while you fasten the beam. For freestanding covers, set all four corner posts at this stage.
- Install rafters. Space rafters as planned (24 inches on center is standard for most residential covers). Use metal rafter hangers at the ledger end and toe-nail or use metal connectors at the beam end. Check that each rafter is plumb before fastening.
- Install roof panels or material. For aluminum patio cover kits, panels typically interlock or slide into channels in the rafters. For polycarbonate sheets, pre-drill with a bit slightly larger than the screw shank to allow thermal expansion, and seal panel ends with UV-resistant tape and closure strips. Start from one end and work to the other, overlapping in the direction of the slope.
- Install drip edge and gutters. A drip edge on the outer beam edge keeps water off the fascia. Adding a gutter with a downspout keeps water away from your foundation and patio surface, especially important for solid-roof systems that concentrate rainfall into a single runoff point.
For a freestanding structure like a pergola, you skip the ledger and flashing steps entirely, but footings become more critical because all loads transfer through the posts. Freestanding structures also need diagonal bracing or a rigid beam-to-post connection to resist racking from wind.
Finishing touches that make your covered patio actually livable
Lighting
A covered patio without lighting is unusable after dark. String lights are the easiest and cheapest option: attach eye hooks to the underside of the rafters and run weatherproof LED string lights on a timer. For a cleaner look, surface-mount LED fixtures directly to the underside of the beam or rafter. If you are running a circuit from the house, plan conduit routing before the roof panels go on, not after.
Privacy and wind screens
A solid roof helps with wind-driven rain, but sides remain open. Adding outdoor privacy screens or shade panels to one or two sides significantly reduces wind intrusion and creates a more enclosed feel without a full enclosure project. Motorized drop screens on track systems are the premium version; DIY-friendly options include tension-mounted shade fabric or bamboo roll-down panels that attach to the outer beam. For full bug protection, fiberglass insect screen in an aluminum frame is durable, inexpensive, and easy to install between posts.
Flooring and weatherproofing
If your patio is concrete, check that it still slopes away from the house at about 1/8 inch per foot. A covered patio catches more concentrated runoff than an open one, so drainage matters more. Outdoor porcelain tile, composite decking, or interlocking pavers all work well under a covered structure. If you are working around the railing, make sure the cover plan keeps the patio railing area protected while still allowing safe clearance and airflow under a covered structure. Seal concrete with a penetrating concrete sealer every two to three years to prevent moisture absorption and cracking, especially in freeze-thaw climates.
Common problems and how to stay ahead of them
Leaks at the ledger or wall transition
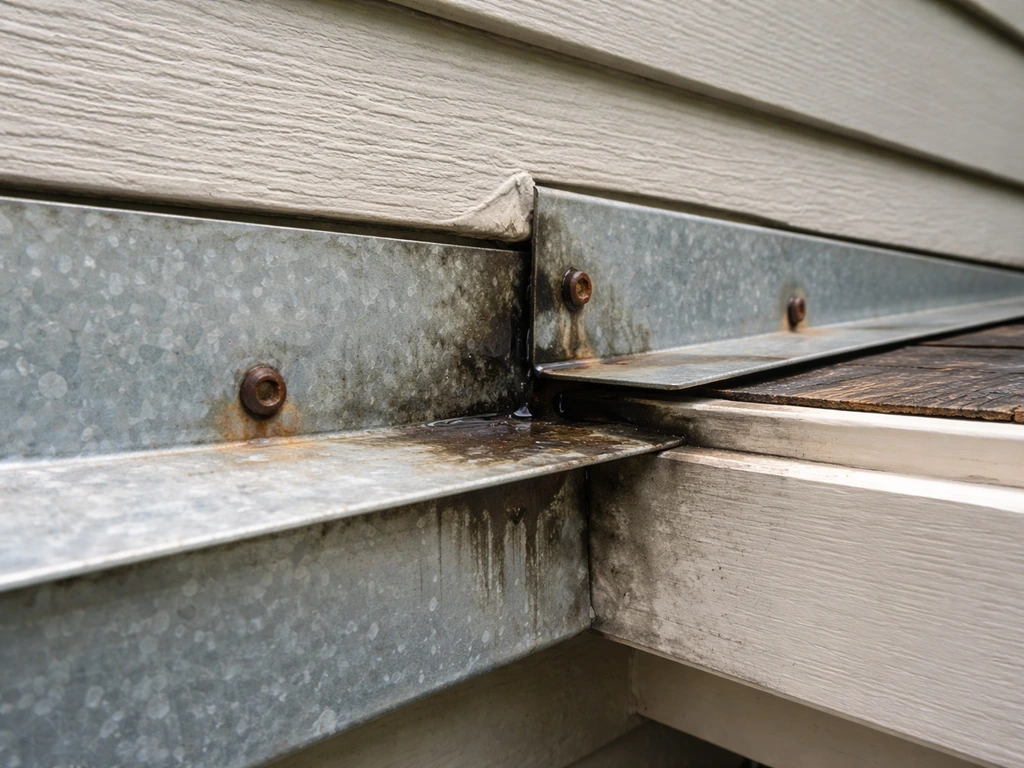
The most common leak point on any attached patio cover is the roof-to-wall junction, specifically where the ledger meets the house. Water works behind the flashing if it was not installed correctly or if caulk was used as the primary water barrier instead of proper z-flashing. When you see a leak, trace it carefully before you start caulking randomly. Caulk can temporarily mask the entry point while water finds a new path deeper into the wall. The fix is almost always to re-flash properly rather than to add more sealant on top.
Rust and corrosion on metal systems
Aluminum patio covers are largely corrosion-resistant, but the fasteners and brackets are a vulnerability. If you used steel screws or mixed fastener metals, galvanic corrosion between dissimilar metals will cause discoloration and structural degradation at those points long before the panels themselves fail. Inspect fasteners annually. Replace any that show rust or white/black staining and switch to stainless steel or aluminum-compatible fasteners.
Rot on wood structures
Wood pergolas and framed covers need a reapplication of sealant or paint every two to three years. Pay special attention to end grain on rafter tails and the tops of posts, where water sits longest. Post bases that hold moisture against the post bottom are the most common rot origin point. Consider using adjustable post bases that hold the post slightly above the concrete surface to allow airflow.
Condensation and moisture under enclosures
Fully enclosed spaces trap warm humid air against a cooler roof surface, leading to condensation drip and mold on furniture and framing. Even if the roof is not fully waterproof, enclosures can trap hidden condensation and create maintenance problems, so design and material choices should prevent moisture buildup trap hidden condensation under the cover. The fix is ventilation: leave gap venting at the ridge or eave, use louvered panels on at least one side, or install a small ceiling fan to keep air moving. Materials matter here too: vinyl and aluminum frames resist mold far better than wood in a closed, humid environment.
Seasonal maintenance checklist
- Spring: Clear debris from gutters and roof panels, inspect all flashing seams and re-caulk any gaps, tighten any fasteners that have worked loose over winter
- Summer: Check screen panels for tears, inspect awning fabric for mold or UV degradation, ensure drainage slope is clear and functioning
- Fall: Remove standing leaves from roof panels before rain season to prevent clogged drainage, retract or lower awnings if wind events are forecast
- Winter (cold climates): Assess snow load capacity before the first heavy snow, add temporary supports under the outer beam if needed for heavy accumulation, and store removable fabric panels indoors
A covered patio is one of the highest-return home projects you can tackle yourself. Get the cover type right for your climate, flash the ledger properly if you are attaching to the house, build in drainage slope from the start, and pull the permit if your jurisdiction requires it. If you are still deciding how to cover an open patio, start by matching the structure to your sun, rain, wind, and privacy needs cover type. Do those four things and the rest of the project is very manageable, even for a first-time builder.
FAQ
Can I start with a pergola and later add panels or a roof to make it more rainproof?
Yes, but only if the fix matches the structure you built. A solid or semi-solid roof can be extended with an adjacent panel system or tie-in brackets, but you must keep the same drainage slope and add proper flashing at the new roof-to-wall or roof-to-roof junction. If you are extending a pergola that was never designed for rain loads, add rafters and reinforcement first, otherwise leaks and sagging are likely.
If I add screens or side curtains later, do I need a different wind design?
Many DIYers underestimate how much wind the sidewalls add. If you plan to add screens or curtains to a solid-roof cover, design the frame and attachments to transfer wind pressure back to the posts and footings, not just to the roof rafters. Also confirm you can ventilate the enclosure, so moisture does not condense under the roof.
How do I find out whether my specific patio cover will need a permit, especially if it is freestanding or partial?
Do not assume a permit is “not required” just because a pergola seems small. Rules often depend on attachment method, roof area, height, and whether it functions as an actual cover. Some places treat partially roofed structures differently than fully roofed systems, so it helps to ask your building department what category your exact plan falls under.
What if my ideal ledger location is next to a door or window, can I notch or work around it?
Often you cannot, especially with an attached cover. If your chosen ledger location lines up with a window or structural header, you may be forced to move the plan or use a freestanding post-and-beam design. The key is to confirm stud and sheathing layout early, because relocating a ledger after fabrication usually costs more than choosing the right support strategy from the start.
Can I install electrical lighting under the cover myself, or should I have an electrician handle it?
For attached covers, plan wiring and plumbing pathways before roof panels go on, and use exterior-rated conduit and junction boxes. In most cases, you will also need to seal penetrations carefully to avoid leaks at the roof-to-wall junction. If you are not comfortable with electrical code requirements, hire an electrician for anything beyond simple low-voltage lighting.
What cover should I choose if my main issue is heavy rain, not just sun?
Yes, but only if you match the roof type. For example, retractable awnings are usually best for sun control and occasional light rain, while solid and semi-solid roofs handle heavier rainfall better. For frequent storms or steady runoff, choose a system that you can slope and flash correctly, then verify the material’s water-shedding behavior at panel seams.
What are the most common mistakes that cause a covered patio to fail early (especially with polycarbonate)?
Check three things: UV protection on semi-solid panels, fastening compatibility, and ventilation if it is enclosed. Polycarbonate without UV stabilization yellows and gets brittle in direct sun, and installing it upside down can break the UV side orientation. For enclosures, trapped humidity can cause condensation even when the roof itself is leak-free.
Do I need to change my outdoor floor materials if I cover the patio?
Tile, pavers, and composite decking can be fine under a cover, but you still need to verify drainage and airflow clearance at edges. In cold climates, also consider freeze-thaw stress on joints and any grout or mortar. If you are sealing concrete, reapply on schedule so absorbed moisture does not undermine the finish when the covered area catches concentrated runoff.
If I do not want a full enclosure, how can I reduce wind and improve privacy?
The quickest way to reduce glare and wind-driven rain entry is targeted side treatment. Add privacy screens or shade panels on the sides that get the prevailing wind, or use motorized drop screens on a track if you want the most flexibility. A full enclosure is not always necessary to get noticeable comfort improvements, but the side additions must be braced to the ground.
What is the proper way to troubleshoot and fix leaks on an attached patio cover?
Yes. If a roof leaks, re-flashing the roof-to-wall junction is usually the real fix rather than adding more caulk. Caulk can temporarily seal the surface while water travels behind the flashing and reappears elsewhere. When troubleshooting, look for gaps around z-flashing and verify that water sheds outward, not into the wall assembly.
How do I prevent corrosion on metal patio cover kits and how often should I inspect fasteners?
You generally want fasteners and brackets compatible with the metals in the kit to prevent corrosion at contact points. If the system is aluminum-based, use aluminum-compatible or stainless hardware, and avoid mixing dissimilar metals that can create galvanic corrosion. Also replace corroded fasteners promptly, because failures at brackets often precede panel problems.
Are retractable awnings a good option if I want year-round coverage, including winter and storms?
You can often cover a 10 to 20 foot span with a retractable awning, but you still need to think about wind behavior and water pooling. If you are repeatedly getting gusts or driving rain, awnings may retract during bad weather and leave parts of the patio exposed. For all-day rain coverage or winter use, a solid or semi-solid roof is the safer choice.
Why do I get condensation inside a fully enclosed patio cover, and how do I fix it?
Plan for ventilation even if the roof is sealed. A fully enclosed patio can create condensation when warm humid air hits a cooler roof surface, leading to mold on nearby framing and furniture. Common fixes include venting at the eave or ridge, adding louvered panels on at least one side, and sometimes a small ceiling fan to keep air moving.
Next Articles
Best Way to Cover a Patio: DIY Options, Steps, Tips
DIY guide to choosing and installing the best patio cover for shade, rain, wind, and style with clear steps.

How to Cover Patio From Rain: DIY Options and Steps
DIY steps to cover patio from rain: choose awning, canopy or enclosure, plan pitch, flashing, overlap, drainage, sealing

How to Decorate a Long Narrow Patio: Layout Tips
Practical DIY layout and decor tips to widen a long narrow patio using zoning, furniture spacing, lighting, greenery, an