Dressing up a patio comes down to four things done in the right order: clean and repair the surface, define the space with furniture and a rug, layer in lighting and textiles for comfort and mood, then add shade or privacy so the space actually gets used. If you want a step-by-step starting point for how to decorate patio on a budget, this same order of operations is the easiest way to plan upgrades without overspending patio decor in the right order. If you want more specific ideas on how to style an outdoor patio, the sections below walk through layout, lighting, and finishing touches step by step. You don't need a huge budget or a contractor. Most of these upgrades are weekend projects, and the ones that make the biggest visual difference cost the least.
How to Dress Up a Patio: Easy DIY Upgrades for Comfort

Quick patio refresh plan
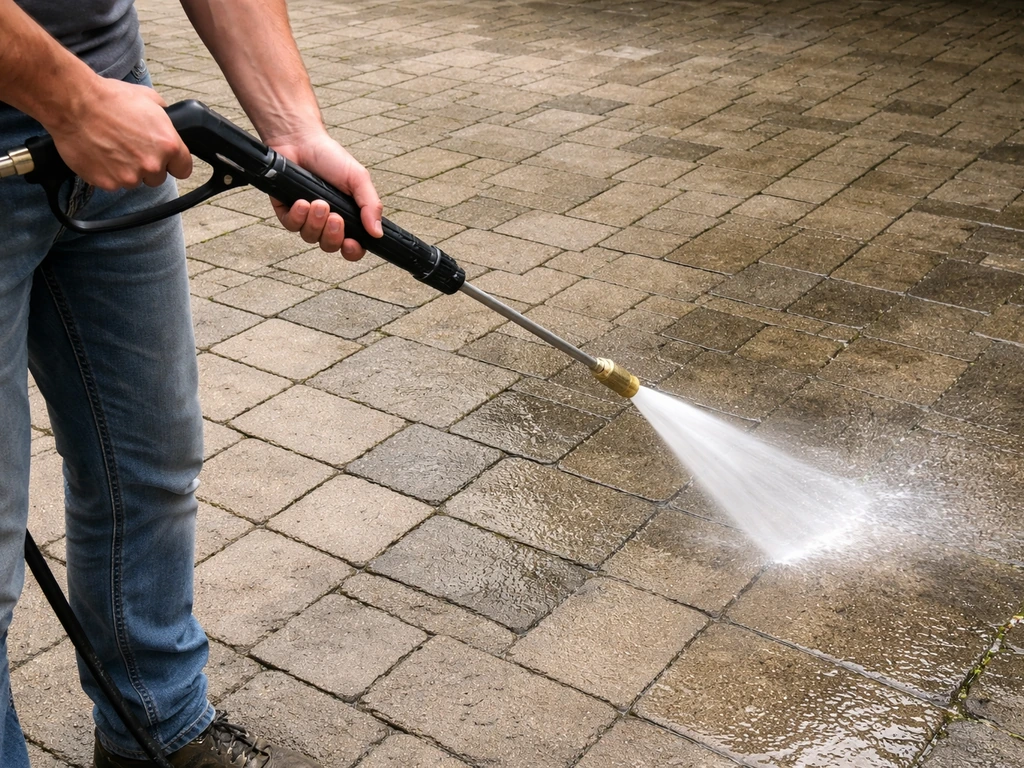
Before you spend a dollar on decor, spend an hour assessing what you're working with. Walk the space and note cracked pavers, stained concrete, missing joint sand, or a surface that just looks dull and grimy. A clean, solid surface makes every decorating choice look intentional. A dirty one makes even expensive furniture look like an afterthought.
Start with a pressure wash. Keep the spray tip at least 12 inches from the surface and work from the house outward. Use a 25-degree (green) or 40-degree (white) nozzle and start at 12 to 18 inches away, moving closer only if needed. If you're working on pavers, know that pressure washing can dislodge joint sand, so plan to re-sand after. Let the surface dry fully, 24 to 48 hours, before doing anything else. Rushing this step causes problems with both sealer adhesion and polymeric sand activation. Surfacelogix notes that walking on pavers too soon after sealing can ruin the job by leaving footprints and trapping dirt before the sealer has fully cured rushing the cure time after sealing pavers.
If your paver joints are low or empty after cleaning, refill them with polymeric sand. Sweep it in, then blank" rel="noopener noreferrer">blow off the dust residue with a leaf blower before wetting. When you wet, use a fine mist, not a direct stream, and make sure joints are never flush with the paver surface so drainage is maintained. If the patio surface looks dull or faded, a sealer can bring it back. Apply only when air and surface temperature is between 50°F and 90°F, and don't reseal more often than every two years to avoid buildup. New polymeric sand needs 28 days to cure before you seal over it.
Once the surface is clean and solid, you have a blank canvas. Now you can dress it up in layers and every layer will look its best.
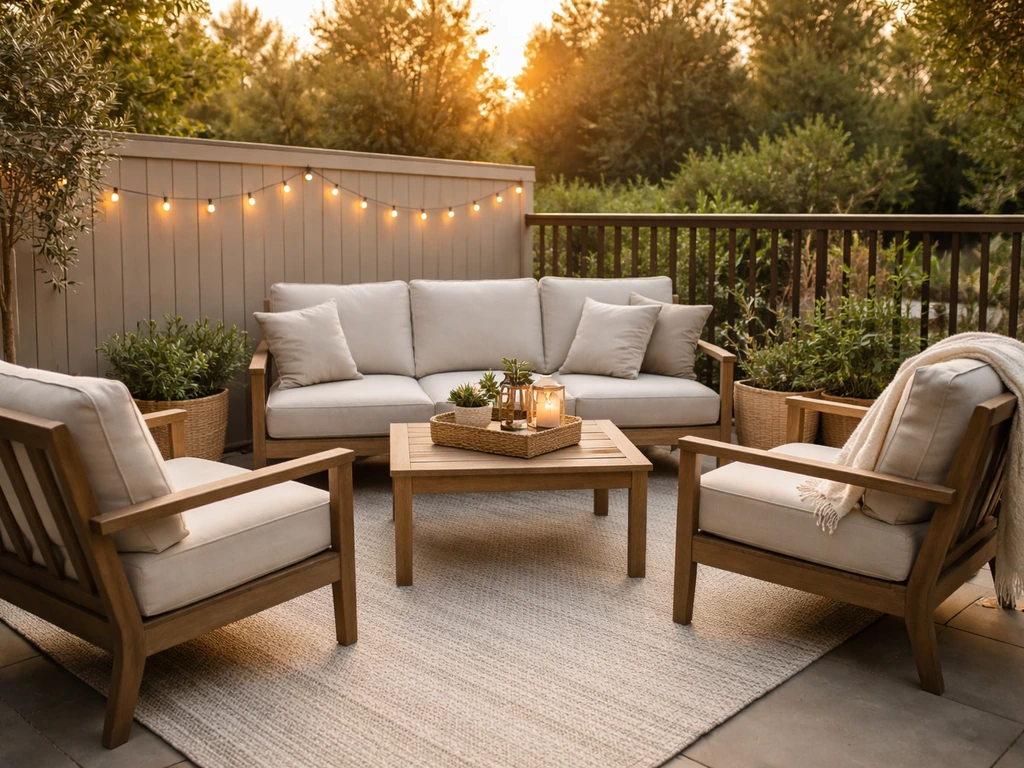
Furniture and layout upgrades
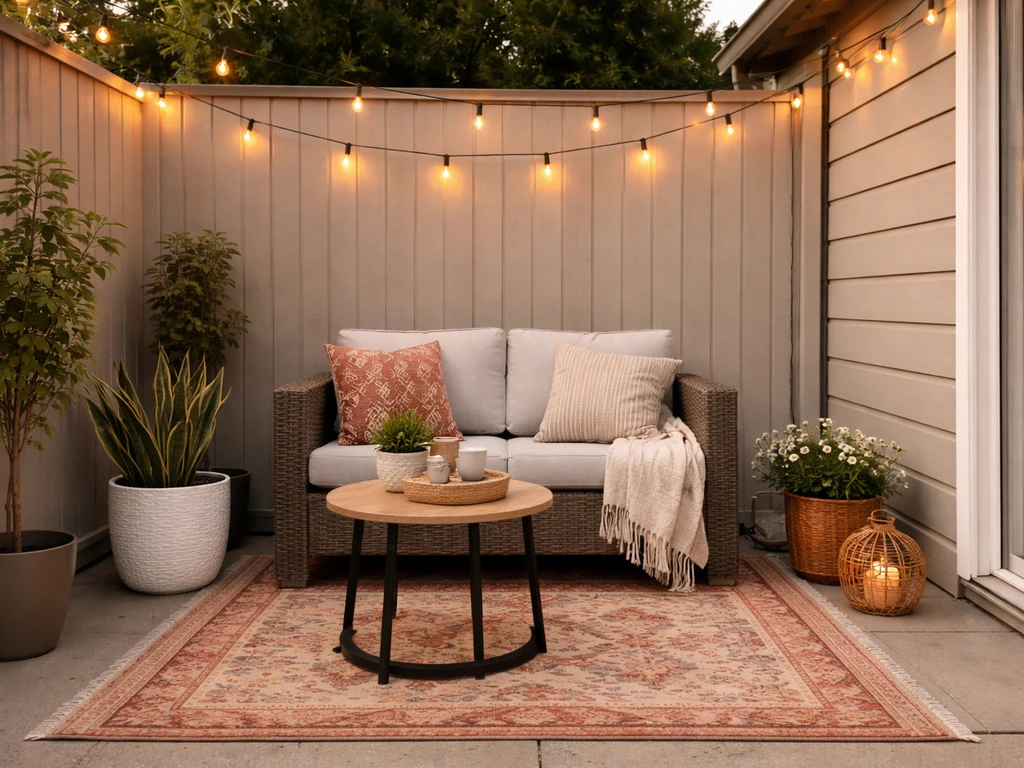
The most common patio layout mistake is pushing all the furniture against the walls like a waiting room. Pull everything toward the center, create a defined seating zone, and suddenly the space feels intentional. For a small patio (roughly 6 by 10 feet to 8 by 12 feet), a loveseat or two-seat bench plus a pair of chairs and a small coffee table is usually the right amount. Anything more crowds the walkways.
Leave about 14 to 18 inches between your sofa or chairs and the coffee table. That's the sweet spot where you can set a drink down or put your feet up without the table feeling too far away. Keep main walkways at 30 to 36 inches so people can move around the furniture without squeezing. If you can't get both of those measurements right with your current furniture, something is either the wrong size or there's too much of it.
For material, think about your climate before you shop. Powder-coated aluminum is lightweight, rust-resistant, and works well in humid climates. Teak and eucalyptus hold up in most conditions but need occasional oiling if you want them to stay golden brown rather than silvering. Resin wicker is the budget-friendly option that handles moisture well, though the frames vary widely in quality, so check the frame material (you want steel or aluminum, not plain iron). For cushions, look for solution-dyed acrylic fabric. This type of fabric, Sunbrella being the most recognized brand, is dyed before weaving, which is what makes the color UV-stable rather than just surface-treated. It resists mold and mildew and cleans with soap and water.
If you're working on a tight budget, a coat of spray paint formulated for outdoor metal or plastic can transform old furniture for under $30. Add new cushion covers (not whole cushions) for another $40 to $60 and you've effectively refreshed a full seating set for under $100.
Lighting and ambiance
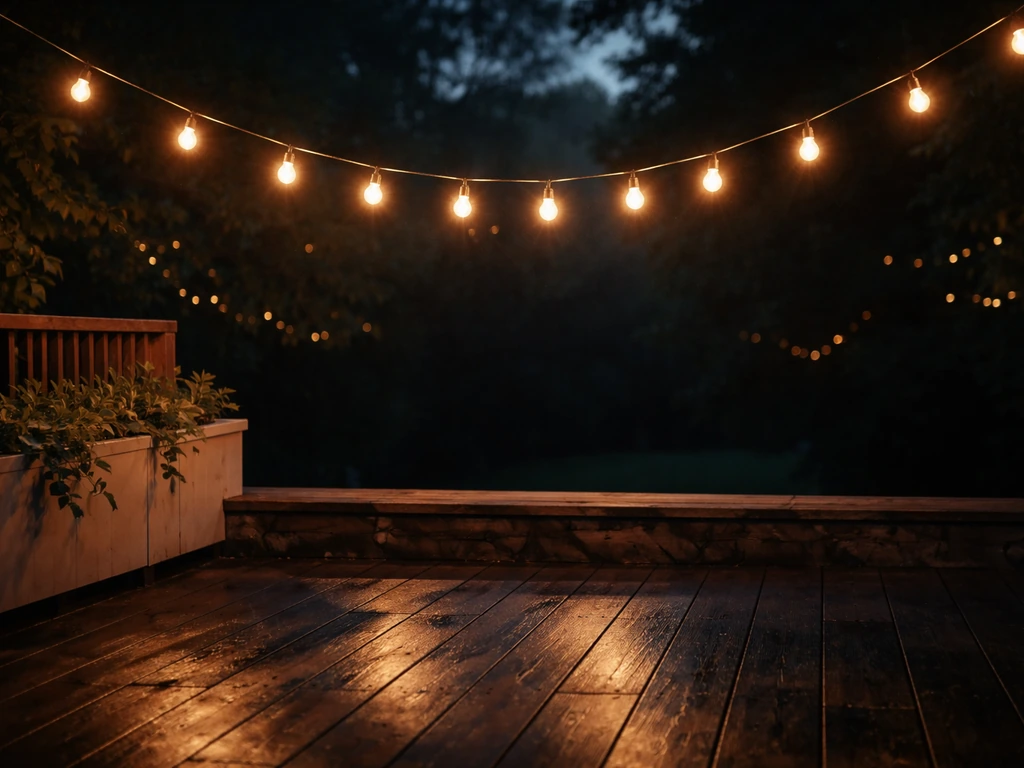
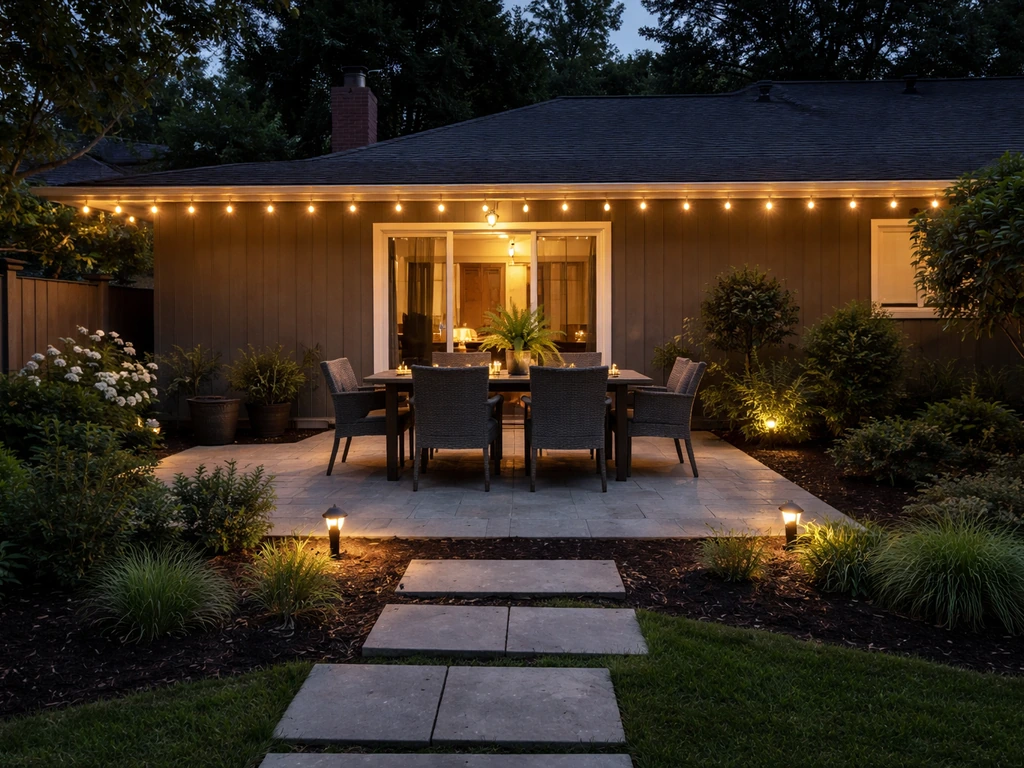
Good patio lighting is the single upgrade that changes how much time you actually spend outside. The goal is warm, layered light that makes the space feel like an outdoor room rather than a parking lot. If you're aiming for brighter evenings, use the same warm, layered approach with additional fixtures and brighter bulbs where needed warm, layered light. Aim for 2700K to 3000K color temperature across all your fixtures. This range is what lighting designers use for residential outdoor spaces because it's flattering, creates a relaxed atmosphere, and attracts fewer insects than cooler white light.
String lights are the easiest starting point. Hang them overhead in a grid or catenary pattern between the house and a pergola, fence post, or a simple 4x4 post you install in a weighted base. For permanent fixtures like path lights, step lights, or wall-mounted spots, a low-voltage landscape lighting system is the practical choice. Size your transformer by adding up the wattage of all your fixtures, then multiply by 1.25 to give yourself a 25% capacity buffer. Use 12/2 or 10/2 wire for longer runs to reduce voltage drop, which causes fixtures at the end of a run to look dimmer than the ones near the transformer.
Layer your lighting rather than relying on one source. Combine overhead string lights or a ceiling fixture with a couple of lanterns at ground level and maybe a wall sconce near the door. Three sources at different heights create depth and make the space feel designed. One bright overhead light creates a flat, utilitarian feel that doesn't encourage anyone to linger.
Outdoor rug, textiles, and decor
An outdoor rug does two things: it anchors the furniture grouping visually and makes the space feel softer underfoot. Size matters more than pattern. For a small to medium patio with a four-chair conversation set and coffee table, go with at least a 6x9 or 8x10. For larger dining areas, a 9x12 or 10x14 is the right range. The front legs of all your seating pieces should sit on the rug, ideally all four legs when the space allows. A rug that's too small leaves furniture floating and makes the whole setup look like it doesn't belong together.
Choose polypropylene or polyester outdoor rugs. They're mildew-resistant, handle rain and humidity well, and hose off easily. Avoid natural fiber rugs like jute or sisal outdoors unless they're specifically rated for outdoor use and your patio stays dry.
Throw pillows and blankets add color and comfort but need to be outdoor-rated fabrics if they're staying outside. Again, solution-dyed acrylic is worth the extra cost versus generic polyester for anything that stays out year-round. For planters and vertical accents, think in odd numbers and vary heights. Three planters at different heights, a wall-mounted trellis with trailing plants, or a simple planter box along a railing edge adds life without clutter. Vertical decor is especially useful on small patios because it draws the eye up and makes the space feel larger. For a more detailed look at styling choices across different patio sizes and setups, the approach shifts when you're working with an apartment balcony versus a full backyard patio, so it's worth thinking through what constraints your specific space has. If you want a polished, livable look fast, use these apartment-friendly patio decorating ideas alongside your upgrade plan how to decorate an apartment patio.
Shade, privacy, and weather comfort
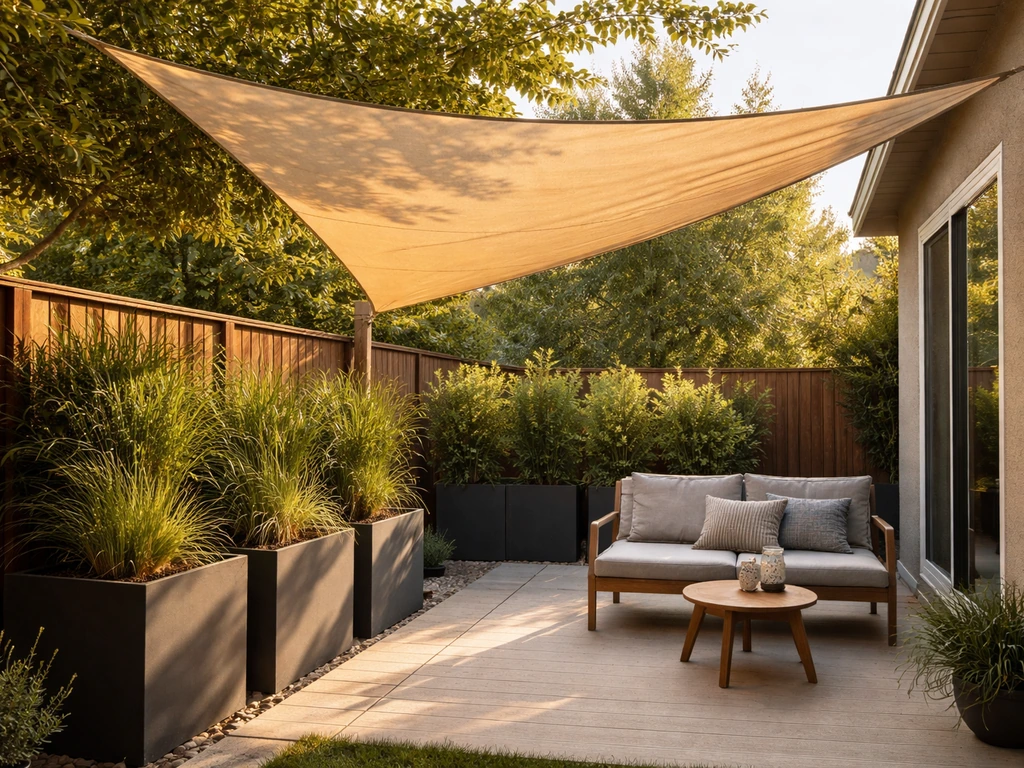
Decor looks great in photos but doesn't matter if the space is too hot, too exposed to wind, or too visible to neighbors to actually use. Shade and privacy are structural upgrades that make everything else worth having.
For shade, the three most accessible options for DIYers are shade sails, retractable awnings, and pergola covers. Shade sails are the most affordable, typically stretching between anchor points at different heights to create a diagonal canopy. They're rated for residential wind conditions around 30 to 40 mph, but you should always retract or remove them during storms. Mount them properly with hardware rated for the load, not just a screw into wood siding. Retractable awnings attach to a soffit or exterior wall and roll out to cover the patio. They work well but should be retracted before wind exceeds their load rating, so get into that habit or look for a motorized model with an automatic wind sensor.
For privacy, lattice panels are a classic DIY-friendly option. Home Depot's installation guidance suggests mounting lattice with fasteners every 12 inches along the top for stability. Pair lattice with climbing plants like clematis or a fast-growing vine and within a season or two you have a living privacy screen. Outdoor curtains hung from a pergola or a tension wire are a softer option that also provide sun filtering, and they can be pulled back when you want an open feel. If wind is more of a problem than sun, a simple windbreak, whether that's a fence extension, a dense planting, or a freestanding screen panel, can drop the perceived temperature on the patio by several degrees.
| Option | Cost Range | DIY Difficulty | Best For |
|---|---|---|---|
| Shade sail | $50–$300 | Easy | Open patios needing overhead sun block |
| Retractable awning | $300–$2,000+ | Moderate | Patios attached to the house with soffit or wall mounting |
| Pergola with shade fabric | $200–$1,500 DIY | Moderate to hard | Permanent structure with design flexibility |
| Outdoor curtains | $40–$150 | Easy | Privacy and soft shade on covered patios |
| Lattice privacy panel | $30–$120 per panel | Easy | Side privacy from neighbors or street |
Finishing touches and seasonal maintenance
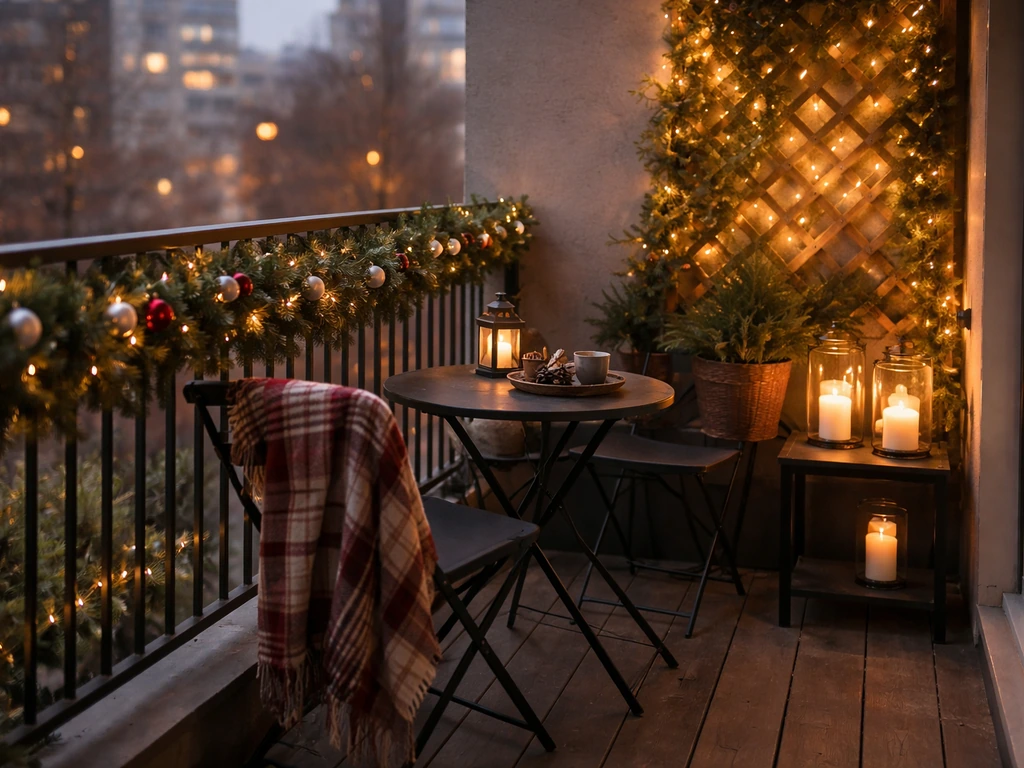
Once the big pieces are in place, the finishing touches are what pull it all together. With Christmas decor, the finishing touches are where you add festive color, lights, and cozy textiles without overwhelming the layout finish it all together. A small side table or drink table between chairs eliminates the need to lean forward every time. An outdoor-rated wall clock, a hanging lantern near the door, or a simple doormat at the patio entrance adds polish without effort. If you want color without committing to paint, a cluster of potted plants near seating adds life instantly and can be swapped out seasonally.
For seasonal maintenance, get in the habit of treating the patio like an outdoor room you maintain, not just a surface you ignore. Here's a practical checklist to keep things looking sharp year-round and protect your investment.
Seasonal maintenance checklist
- Spring: Pressure wash the patio surface, inspect paver joints and refill with polymeric sand if needed, check sealer condition and reseal if the surface is no longer beading water (but no more often than every two years).
- Spring/Summer: Rehang string lights and check all electrical connections, inspect shade sails and awning hardware for rust or wear before the season starts.
- Summer: Wipe cushions monthly with mild soap and water, hose off the outdoor rug and let it dry flat, check planters for drainage.
- Before storms: Retract or remove shade sails, retract awnings, bring cushions or throw pillows inside if high winds are expected.
- Fall: Air-dry all cushions for 24 to 48 hours completely before storing. Damp storage leads to mold, mildew, and rust on zippers. Use a weatherproof deck box if indoor storage isn't available.
- Fall: Fold and store outdoor textiles, bring in potted plants sensitive to frost, and cover furniture you're leaving out with breathable (not plastic) covers.
- Winter (or off-season): Do a final walk-through of all hardware, check that any sealer applied is fully cured and joints are intact heading into freeze-thaw cycles.
The patio upgrades that hold their value are the ones maintained consistently. A well-kept modest patio beats a neglected expensive one every time. If you're planning to add lighting, changing out furniture, or considering a full enclosure or screening project down the road, the steps in this guide set up a solid foundation that works with those bigger upgrades rather than against them. Start with the surface, layer in comfort and style, and the space will earn its place as a room you actually use.
FAQ
How do I dress up a patio when I cannot pressure wash or seal the surface right now?
Start with non-adhesive upgrades, like rearranging the seating layout, adding an outdoor rug, and swapping cushions or slipcovers. If you plan to paint metal furniture, scuff lightly with fine-grit sandpaper first, and wait to seal the patio until the surface is fully dry and not covered by new polymeric sand.
What rug size should I choose if my patio is irregular (not a rectangle)?
Use the “all seating legs on the rug” rule as your target. If the shape is L-shaped or has a dining wing, choose a size that places at least the front legs of every seating piece on the rug, and consider two smaller rugs for separate zones (conversation and dining) instead of one oversized rug that will look skewed.
Can I use indoor furniture and still dress up a patio?
Yes only if you keep it sheltered from constant moisture and you replace cushions with outdoor-rated covers. Otherwise, indoor wood and fabrics often warp, stain, or fade quickly, especially in humid climates or areas with frequent rain. Metal pieces also need exterior paint or proper rust protection.
How do I prevent outdoor fabrics and cushions from going moldy?
Use solution-dyed acrylic, and also protect cushions from soaking when storms hit. Store cushions in sealed bins or bring them in during long wet stretches, and leave them slightly ventilated rather than stacking tightly against damp furniture.
What’s the safest way to handle string lights if my patio is exposed to wind?
Use outdoor-rated string lights with slack to reduce stress on connectors, and route the cable so it does not act like a taut line that can whip in gusts. Anchor at multiple points, and remove or retract them during storms, especially if you notice sagging, torn housings, or frayed cords.
How many light sources do I need to get the “designed” look without glare?
Aim for at least three layers, one higher (string lights or a fixture), one near seating height (lanterns), and one low accent near a path, door, or feature. Choose warm bulbs around 2700K to 3000K, and use diffusers or lantern shades to avoid harsh direct beams.
Can I mount lattice or privacy screens on a rental patio?
Look for tension-based or freestanding options, like modular screen panels on weighted bases or lattice attached to existing rails only with hardware that does not drill into surfaces. If you must drill, confirm landlord approval first, because many patio rail posts are not rated for added structural loads.
What should I do if my patio paver joints won’t stay filled after polymeric sand?
Wait for full curing time before walking or resealing, and make sure joints are not flushing with the paver tops so water can drain away. If joints were already unstable or the patio has drainage issues, you may need re-leveling or professional re-sanding before the sand can hold consistently.
How can I dress up a small patio without making it feel cramped?
Use a smaller conversation footprint, keep walkways at least 30 to 36 inches, and choose furniture that visually opens the space, like slim chairs or a bench with legs. Add vertical interest with a trellis or planters at staggered heights rather than piling decor on tabletops.
What are common mistakes when dressing up patio lighting?
The most common are using cool white bulbs, relying on one bright overhead light, and oversizing fixtures so they produce glare into windows or direct lines into seating eyes. Start with warm bulbs, keep brightness balanced across layers, and test after dark before adding more fixtures.
How do I choose shade without overbuilding or blocking airflow?
Prefer solutions that allow some ventilation, like shade sails or a pergola cover with a breathable fabric, especially in humid areas. For retractable awnings, get into the habit of retracting before wind exceeds the rating, and plan the fabric direction so it does not trap water in pooling areas.
What quick finishing touches actually make a difference in photos and in real life?
Add one functional item between seats, like a small drink table, and one grounding texture like a rug. Then finish with a simple outdoor wall clock, a doormat at the entry, and a small cluster of potted plants near a focal point, rather than many small decor pieces spread everywhere.
Step-by-step patio decor on a budget with small-space layout, budget buys, DIY upgrades, and lighting tips.
Step-by-step DIY tips to decorate any patio for Christmas, including small and apartment balconies, layout, lighting, an
Step-by-step DIY guide to light a patio: fixtures, placement, power safety, and troubleshooting for even, glare-free out