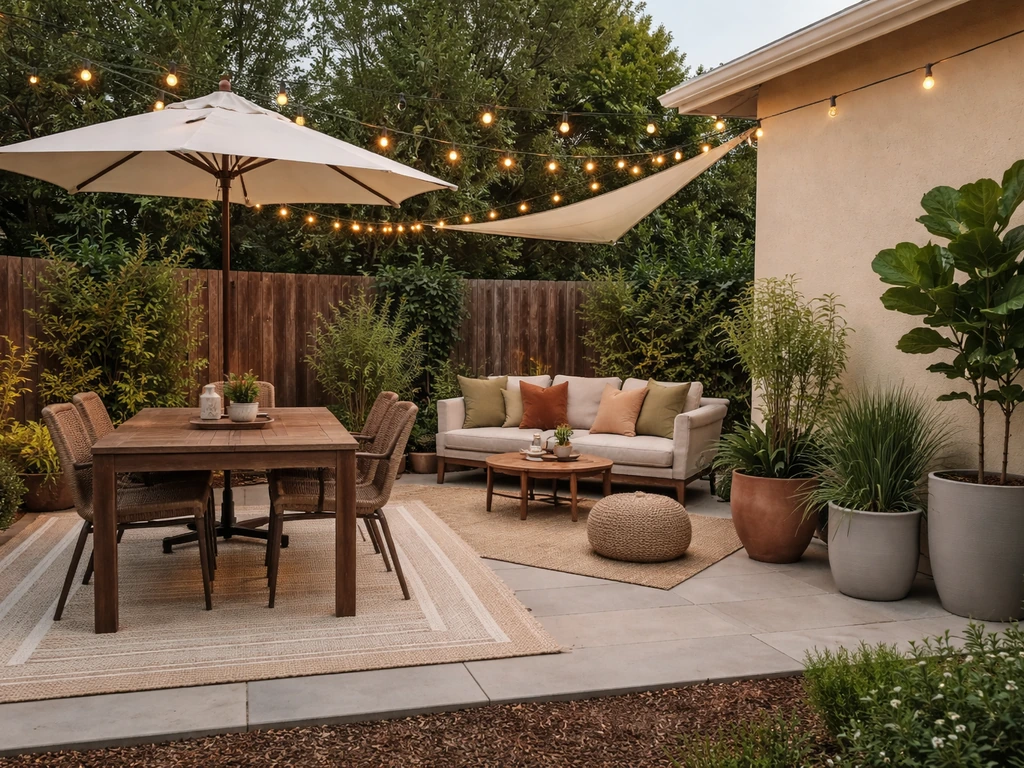
Styling an outdoor patio well comes down to one idea: treat it like an outdoor room, not just a patch of concrete with some chairs on it. That means starting with a real layout plan, picking materials that hold up to weather, defining zones for different activities, and then layering in comfort, light, and personality. Whether your patio is open-air, screened, or fully enclosed, the same process applies. Start with measurements, work outward to furniture and zones, then finish with lighting, textiles, decor, and plants.
How to Style an Outdoor Patio: Easy DIY Guide

Felix Brennan
17 Jun 2026
Step 1: Measure your patio and sketch a layout plan
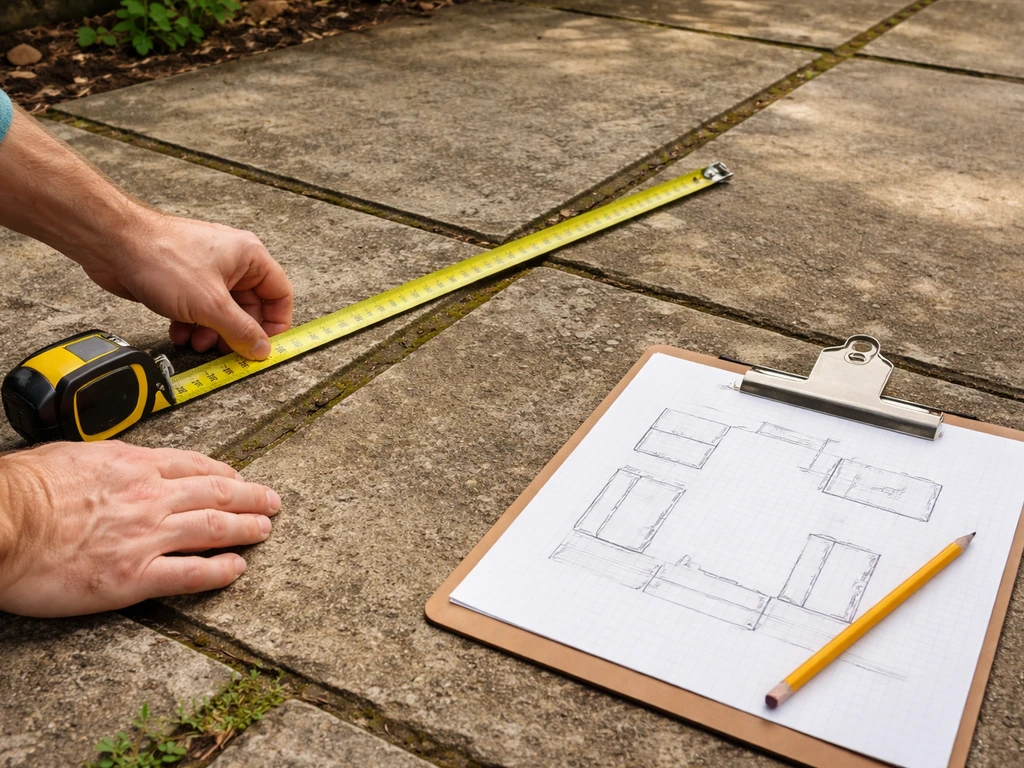
Before you buy a single piece of furniture, grab a tape measure and write down the exact dimensions of your patio. Note every obstacle: doors, windows, steps, support posts, HVAC units, and hose bibs. Then sketch it out on graph paper or use a free tool like RoomSketcher. This one step prevents the most expensive styling mistake homeowners make, which is buying furniture that technically fits but leaves no room to actually move around.
The golden rule for traffic flow is 36 inches of clear walking path minimum. That applies to paths from the door to the yard, paths around dining tables, and routes between furniture groupings. If you have a dining setup, you need at least 24 to 30 inches behind each chair so people can push back and stand up, and 30 to 36 inches in the main walking zones around the table. If your patio is near a grill or outdoor kitchen, bump traffic clearances up to 42 inches around the cooking area so nobody's walking through a heat zone.
One trick worth doing before you commit to any furniture: the painter's tape test. Tape out the footprint of your proposed table, chairs, sofa, or sectional on the patio surface and walk through it at full stride. Check every angle, including from the back door, around to the grill, and through to the yard. If you're bumping into tape lines, adjust the layout before you spend money. This takes 20 minutes and saves hours of returns and regret.
A note on screened and enclosed patios
If your patio is screened or enclosed, your layout plan needs one extra consideration: door placement. The screen door (or entry door on an enclosed porch) should not open directly into your main seating zone. Position furniture so the door swings into a clear path, not the side of a sofa. This keeps traffic flow natural and avoids the awkward dance every time someone walks in or out.
Step 2: Pick a style direction, color palette, and outdoor-safe materials
You don't need a full interior design brief, but you do need a loose style direction before you start buying things. Pick one: modern and minimal, relaxed coastal, rustic farmhouse, tropical, or classic traditional. Having a direction prevents the random mix of pieces that ends up looking like a yard sale. From there, build a simple color palette: two or three colors, max.
For small patios especially, lighter and softer shades do a lot of work. They reflect more light, reduce visual weight, and make the space feel larger. Neutral base tones like warm white, soft gray, natural wood, or stone work well because they read cleanly in strong sunlight and pair with almost any accent color. One thing worth doing: pull a paint chip or fabric swatch outside and check it at different times of day. Colors shift significantly from morning light to afternoon sun to evening shade, so check your palette under all three before you commit.
Materials that actually survive outdoors
Outdoor-rated materials are not optional. Using indoor furniture or non-rated fabrics outside is how you end up with rust stains, rotted cushions, and faded frames after one season. For furniture frames, teak, powder-coated aluminum, HDPE lumber (like POLYWOOD), and all-weather wicker over aluminum frames are the most durable choices. For soft goods, look for solution-dyed acrylic fabrics like Sunbrella. Solution-dyed means the color goes all the way through the fiber rather than sitting on the surface, so the fabric resists UV fading, moisture, and mildew far better than standard outdoor fabric. For rugs, stick to solution-dyed polypropylene: it dries fast, resists mold and mildew, and can be cleaned with a hose.
| Material | Best For | Durability Notes |
|---|---|---|
| Teak | Dining tables, benches | Naturally weather-resistant; needs occasional oiling to maintain color |
| Powder-coated aluminum | Frames, chairs, dining sets | Lightweight, rust-proof, very low maintenance |
| HDPE lumber (e.g., POLYWOOD) | Adirondacks, chairs, occasional tables | Won't rot, splinter, or fade; recyclable material |
| All-weather wicker over aluminum | Sectionals, lounge chairs | Classic look with modern durability; avoid wicker over steel (rusts) |
| Sunbrella / solution-dyed acrylic | Cushions, pillows, curtains | UV, fade, mildew, and stain resistant; clean with soap or diluted bleach |
| Polypropylene (solution-dyed) | Outdoor rugs | Mold/mildew resistant, UV stabilized, hose-cleanable |
Step 3: Place your furniture and define your zones
Most patios work best when they're divided into two or three functional zones: a dining zone, a lounge zone, and a cooking or grill zone if space allows. Zoning makes the patio feel intentional and prevents the jumbled feeling of a space where everything is shoved together. You don't need walls or hard dividers to create zones; outdoor rugs, furniture arrangement, and lighting do the same job.
Dining zone
Place your dining table and chairs in the zone with the most direct access from the kitchen or indoor eating area. Position the table so chairs can pull out fully on all sides without hitting walls, railings, or planter boxes. Remember: 24 to 30 inches behind each chair for movement, and a 36-inch walking path around the perimeter. An outdoor rug under the dining set anchors the zone visually and defines its edges.
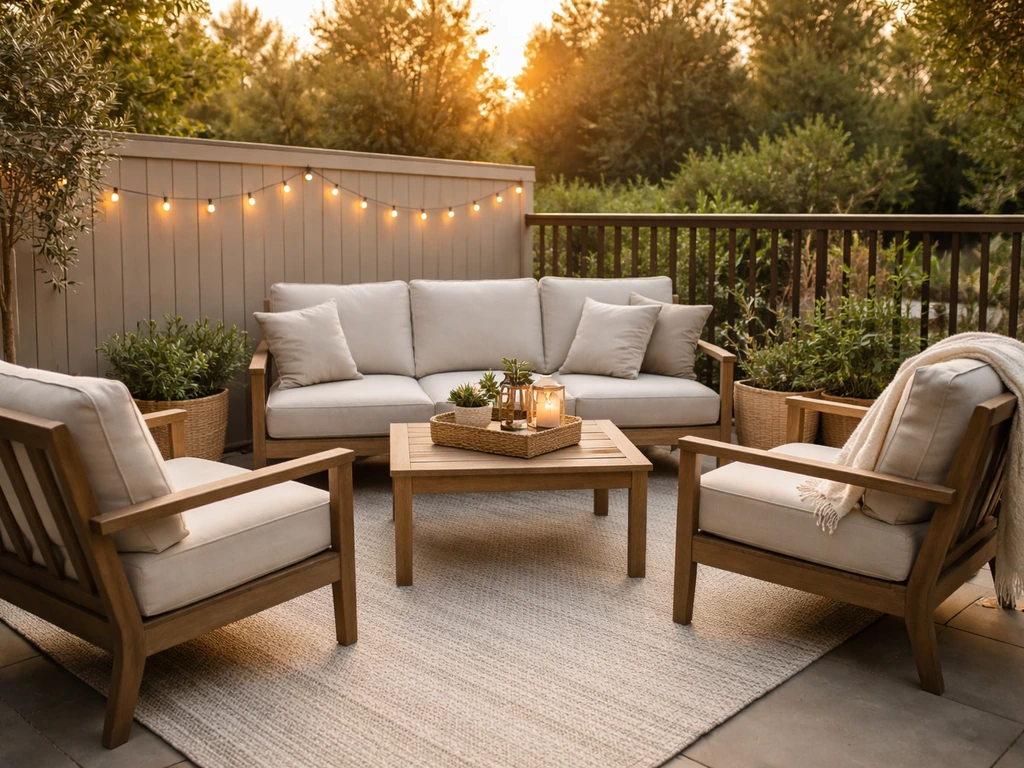
Lounge zone
The lounge zone is your conversational seating area: sofa, sectional, or a cluster of chairs around a low coffee table or fire pit. Arrange seats so people face each other at roughly a 90-degree angle rather than lined up side by side. Leave a clear gap of at least 36 inches between the lounge zone and the dining zone so the two areas feel distinct and traffic can move between them naturally.
Grill and cooking zone
The grill or outdoor kitchen zone needs its own dedicated space with practical clearances: enough room for the lid to open fully, landing space on at least one side of the grill for plates and tools, and a 42-inch clear path around active cooking areas. Plan this zone so the natural circulation route from the house does not cut directly through the cooking zone. Think of it in three mini-zones within the cooking area itself: prep, cooking, and serving. This keeps the workflow logical and keeps hot surfaces away from main traffic paths.
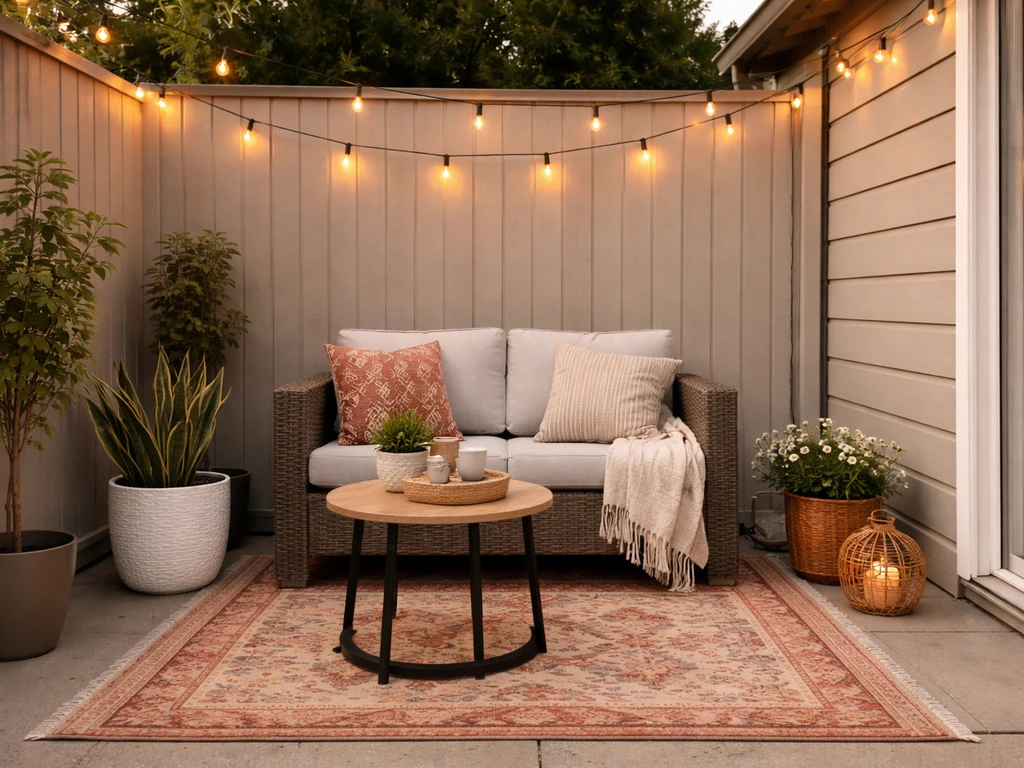
Step 4: Layer in comfort with rugs, cushions, throws, and weatherproof textiles
This is where a patio stops feeling like a furniture showroom and starts feeling like a room. Textiles add softness, warmth, and personality, but only if they're the right kind. Use indoor textiles outside and you'll be washing mildew out of your cushions by August.
Start with an outdoor rug in each defined zone. Size matters: the rug should be large enough that the front legs of all the furniture in the zone sit on it. Start with the layout plan first, then layer in rugs, cushions, and weatherproof decor so you get a patio that feels pulled together outdoor rug in each defined zone. A rug that's too small floats awkwardly in the middle. For rugs, stick with solution-dyed polypropylene. It dries fast, handles UV exposure, and resists mold. One maintenance note: lift the rug periodically, especially after heavy rain, and let both the rug and the surface beneath dry fully. Trapped moisture under a rug is how mold finds its way in.
For cushions and pillows, Sunbrella-grade solution-dyed acrylic is the benchmark. It can be cleaned with mild soap and water or even a diluted bleach solution without damaging the fabric. Fill pillows with quick-dry polyester fill rather than down or standard foam. Throw blankets for cool evenings should be stored inside or in an outdoor storage ottoman when not in use. Even weather-resistant fabrics last longer when they're not sitting in rain.
On a screened or enclosed patio, you have more flexibility with textiles since the space is protected from direct rain and heavy UV exposure. You can use a wider range of fabric types, but solution-dyed materials are still a good call because humidity and condensation can still cause mildew in a screened porch environment.
Step 5: Get the lighting right
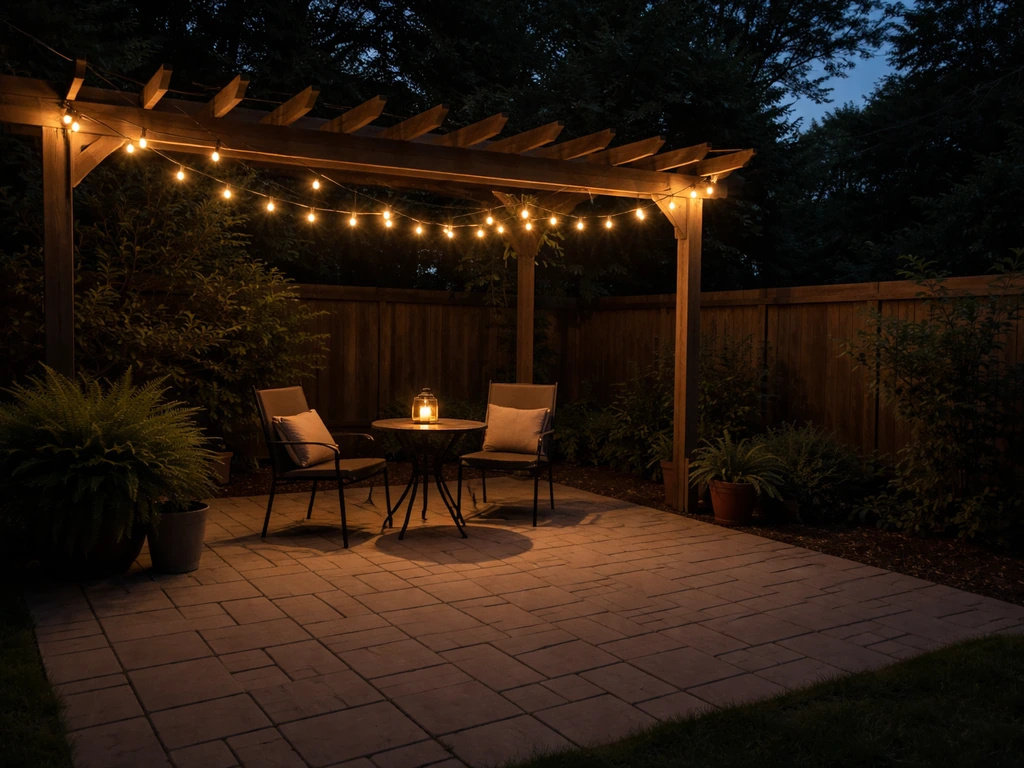
Outdoor lighting is one of the highest-impact, lowest-cost ways to transform a patio, and it's also where a lot of people go wrong. If you want to dress up your patio, lighting is one of the quickest ways to make the whole setup feel styled instead of basic transform a patio. The most common mistake is a single overhead fixture that blasts the whole space with flat, too-bright light. Good patio lighting works in layers: ambient light for the overall space, task lighting for cooking and dining, and accent lighting for atmosphere and visual interest.
For color temperature, stick with 2700K to 3000K bulbs in your ambient and accent fixtures. This range produces warm white light that feels relaxed and flattering rather than the harsh bluish-white of cooler LEDs. String lights in this range are particularly good at creating the layered ambient glow that makes a patio feel inviting after dark. Hang them overhead in a grid pattern, drape them along a pergola, or run them along railings. If you're learning how to light patio areas you use most, string lights are a simple way to get warm ambient glow without harsh overhead lighting. Keep the bulbs shielded or partially concealed: exposed bright bulbs aimed at eye level create glare and squinting.
For the dining table, a pendant lantern or adjustable overhead fixture gives the right level of focused light without drowning the rest of the space. For the grill zone, you need brighter, more directional task lighting so you can actually see what you're cooking. Pathway lights and step lights handle safety lighting around edges and transitions. Aim for a mix of overhead, task, and low-level lighting so your patio looks bright and inviting even after dark Pathway lights and step lights. Aim all path lights downward into the surface, not horizontally where they'll catch people in the eyes.
On the electrical side: any outdoor outlet or extension cord must be GFCI protected, and any extension leads used outside should carry at least an IP65 waterproof rating. This isn't optional. Outdoor electrical safety is not an area to cut corners on, especially near a screened porch or covered patio where water can still find its way in.
Step 6: Add privacy, shade, and wind protection that looks good too
Shade, privacy, and wind protection are where function and style intersect most directly. The good news is that the most effective solutions are also among the best-looking ones. You don't have to choose between a comfortable, weather-controlled patio and an attractive one.
Shade options
A pergola is one of the most versatile shade structures available: it defines the patio space overhead, creates attachment points for string lights and curtains, and can support climbing plants for natural shade. Louvered pergola roofs let you adjust the angle of the slats to control how much sun comes through at different times of day. Awnings and shade sails are good alternatives for patios without a pergola, and both can be retracted or adjusted seasonally. For pure DIY simplicity, a freestanding cantilever umbrella covers a lounge or dining zone without requiring any permanent structure.
Privacy screens and outdoor curtains
Outdoor curtains hung from a pergola or ceiling-mounted rod are one of the most affordable ways to add privacy and soften the look of a patio at the same time. Use panels made from outdoor-rated fabric, and hang them so they sit about half an inch to one inch off the ground. This small gap reduces wind wear at the hem and prevents moisture from wicking up into the fabric. Keep in mind that curtains work best in moderate conditions; in areas with consistent strong wind, a fixed screen panel or lattice with climbing plants will hold up better.
Standalone privacy screens made from powder-coated metal, cedar, or composite materials work well for blocking sightlines from neighbors without requiring any permanent construction. Pair them with tall planters of ornamental grasses, bamboo, or columnar shrubs to soften the edges and blend the screen into the landscape. Trellises with trained vines achieve the same privacy effect over time and add a living, seasonal element to the space.
Wind control
Wind is often overlooked in patio planning and is one of the biggest comfort killers. If your patio gets consistent wind from one direction, a solid or semi-solid screen on that side changes the feel of the space dramatically. For screened patios, the screen itself handles most wind reduction. One homeowner on r/homeowners also reported using screen panels placed behind existing railings for a screened-in porch look, which helped preserve sightlines and can be cheaper than removing the railings entirely. For open patios, a combination of a privacy screen, hedge row, or pergola with side curtain panels manages wind while keeping the space open and attractive.
Step 7: Finishing touches, plants, and keeping it fresh seasonally
Once the structure, furniture, and lighting are in place, the finishing touches are what make the space feel personal and complete. This is also the fun part, and it doesn't require a big budget. You can keep costs down while still making your patio feel styled by focusing on budget-friendly upgrades like rugs, lighting, and layered textiles how to decorate patio on a budget.
Decor and plants
Plants are the single most impactful finishing element for a patio. A cluster of three planters in varying heights in one corner adds color, texture, and life without taking up much space. Choose plants for your climate and sun exposure: succulents and ornamental grasses for dry, sunny patios; ferns, hostas, or caladiums for shaded spots. Mix in at least one trailing plant (like sweet potato vine or creeping Jenny) for visual softness at planter edges.
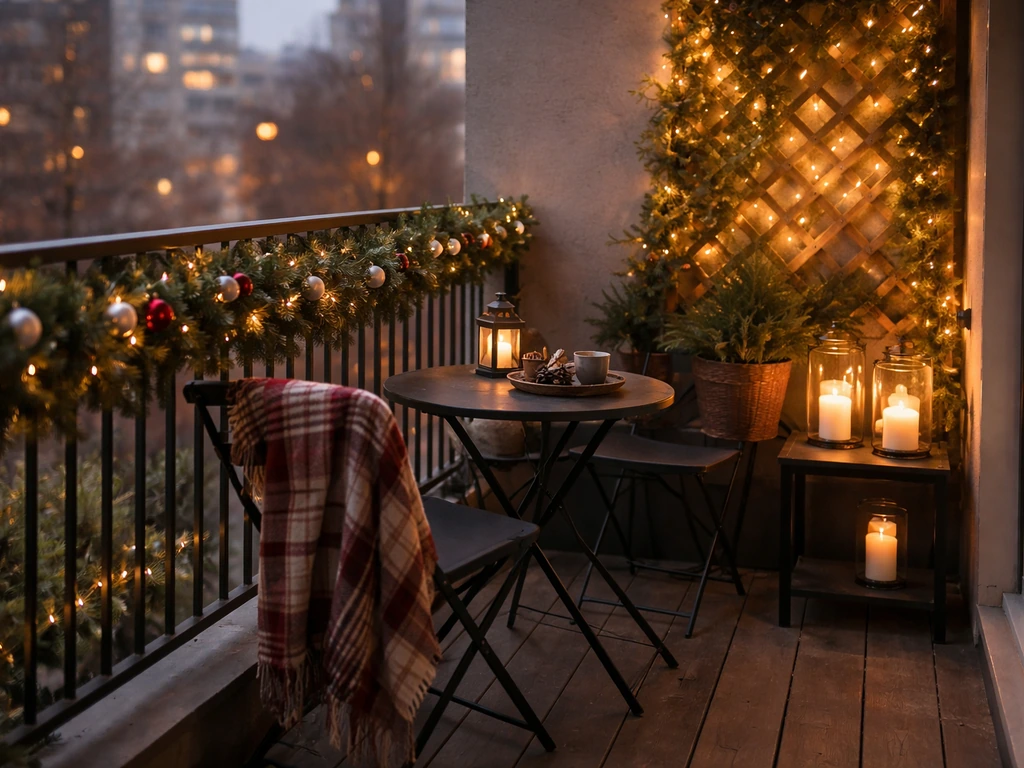
For decor, keep it edited. A few well-chosen pieces beat a cluttered collection every time. Outdoor-rated lanterns (battery-operated or wired) on a side table or step, a single piece of weather-resistant wall art, and a decorative tray on the coffee table are enough to feel finished without feeling busy. If you want to expand into seasonal decor like holiday lighting or fall arrangements, that's a great complement to a well-styled base.
Spring and summer styling
Spring is the time to assess what survived winter and refresh what didn't. Swap out worn cushion covers, check the rug for mildew spots (treat with a diluted bleach solution if needed), clean furniture frames, and re-season any teak pieces. Add brighter accent colors through new throw pillows or a new planter arrangement. Summer is peak use season, so focus on shade and comfort: make sure umbrellas, awnings, or pergola coverage is in place before the hottest weeks hit.
Fall and winter maintenance
As temperatures drop, bring in or cover cushions, pillows, and outdoor rugs before the first hard frost or sustained rain season. Even weather-resistant materials last significantly longer when stored during months they're not in use. Fold and store rugs completely dry to prevent mildew in storage. Cover furniture frames with breathable furniture covers (not plastic tarps, which trap moisture). If you have a screened patio, inspect screens for tears or holes at the end of each season and patch them before winter debris and moisture make small problems into big ones. For enclosed or heated patios, seasonal styling becomes closer to indoor decorating, and you can use a much broader range of materials year-round.
The through-line across all of this is the same: build the structure right, choose materials that actually belong outside, and then layer in the personal touches that make it yours. A well-styled patio doesn't happen all at once. Most people get the furniture and lighting in place first, then add rugs and textiles, then fill in with plants and decor as they use the space and figure out what it needs. That's a perfectly valid approach, and it tends to produce a more cohesive result than trying to buy everything in one go.
FAQ
How do I choose the right outdoor rug size for each patio zone? (My patio shape is not a perfect rectangle.)
Start with a “base layer” sizing rule, measure the furniture first, then choose rug size. The front legs of all seating should land on the rug in each zone, and for dining the rug should extend at least 24 inches beyond the table edges (more if chairs are often pulled out). If your patio is irregular, use the largest rectangle you can fit without blocking doors or rails.
Is it okay to leave outdoor cushions and rugs outside year-round, or should I store them? What’s the safe approach?
Yes, but it needs the right timing and method. Move cushions and rugs indoors after sustained wet weather or heavy rain, and only store them once fully dry. For covers, choose breathable fabric covers, not plastic, and keep air circulating under covers when possible to prevent trapped moisture and mildew.
How can I decorate a patio without making it look cluttered or random?
When placing decor, balance “vertical” and “ground” elements so the patio doesn’t feel visually flat. Try one taller anchor (a planter, trellis, or privacy screen) plus two medium pieces (lanterns or wall decor) and then keep small items to one tray or one console surface. If you see clutter from the main seating spot, edit down by removing the smallest items first.
What are the most common patio lighting mistakes that still look “wrong” even after choosing warm bulbs?
Use two checks: glare control and spacing from eye level. If you are seeing reflections in windows or getting hot spots, lower the mounting height, add shades, or swap to fully shielded fixtures. For string or pathway lights, keep bulbs out of direct sight by aiming downward and using a grid or continuous line so brightness feels even, not spiky.
My patio is small, can I still create zones, or should I use one combined layout?
If your patio is very small, you can skip the separate lounge zone. Instead, create one flexible seating area with a loveseat or two chairs plus a compact coffee table, then use the rug and lighting to signal “living.” Keep at least 36 inches clear paths to any door and avoid placing ottomans where they block traffic when people rearrange.
How do I plan spacing around a grill so it works smoothly (not just looks good)?
Grill zones often fail when people forget the “working triangle” flow. Plan for prep, cooking, and serving, and make sure there is landing space for plates/tools on at least one side where you are not walking through. Also confirm the lid clearance and door swing clearance so nothing jams during cooking.
What if a rug edge interferes with how far dining chairs pull out, how do I fix it?
Measure how far chairs will pull out after seating, then confirm the rug does not force awkward positioning. A common error is anchoring the rug too tightly to the table so chairs scrape the rug edge. If you are between sizes, choose the larger option and ensure you still have clearances around the perimeter and between the dining set and other furniture.
Are solution-dyed fabrics still necessary on screened porches, or can I use regular outdoor fabric?
For screened or enclosed patios, you can be more flexible on fabric type, but you should still choose solution-dyed or at least quick-dry materials for anything that traps moisture (cushion seats, rugs). Screens reduce direct rain, but condensation and humidity can still build up, especially in corners and near planters.
How do I choose the best patio shade option if I have both strong sun and windy afternoons?
Pick a shade solution based on whether you want adjustable sun control or fixed coverage. If you get strong afternoon sun, a louvered pergola or adjustable canopy helps because you can change slat angle. If wind is a big issue, use side panels, lattice with vines, or a cantilever umbrella with anchors rated for your conditions.
I picked plants that looked great at the store, but they’re not thriving. How should I select patio plants more reliably?
Before buying multiple plants, validate light and watering reality. Take a quick “sun map” for a week, note which spots get full sun, partial sun, and shade, then match plants to those conditions. Also group plants by water needs so you are not forced into a complicated watering schedule that leads to dead plants and bare spots.
What’s the safest maintenance routine for outdoor furniture, rugs, and cushions after the season?
Avoid chemical cleaners that leave residue, especially on solution-dyed fabrics and powder-coated finishes. For quick refresh, rinse lightly after rain, spot clean with mild soap and water, and let everything dry fully before covering. If you store items, clean first and dry completely, because trapped grime speeds up staining and mildew.
Next Articles
How to Dress Up a Patio: Easy DIY Upgrades for Comfort
Step-by-step DIY ideas to dress up your patio with furniture, decor, lighting, shade, privacy, and easy seasonal mainten
How to Decorate a Patio on a Budget: Small Ideas
Step-by-step patio decor on a budget with small-space layout, budget buys, DIY upgrades, and lighting tips.
How to Decorate a Patio for Christmas in Any Space
Step-by-step DIY tips to decorate any patio for Christmas, including small and apartment balconies, layout, lighting, an