
A large patio gives you room to do everything a small one forces you to compromise on: a proper dining area that seats eight, a lounge zone where people actually want to sit, a fire pit circle that doesn't feel like you're sitting on top of each other, and still enough open space to move around comfortably. The key is treating it like an outdoor floor plan rather than an open slab where furniture gets randomly pushed against walls. You zone it, scale it right, pick materials that survive your climate, and layer in shade, lighting, and climate control so it works in March and August alike. This guide walks through every step of that process, including two DIY build projects you can tackle yourself.
How to Furnish a Large Patio: Step-by-Step DIY for Year-Round Living

Felix Brennan
6 Aug 2026
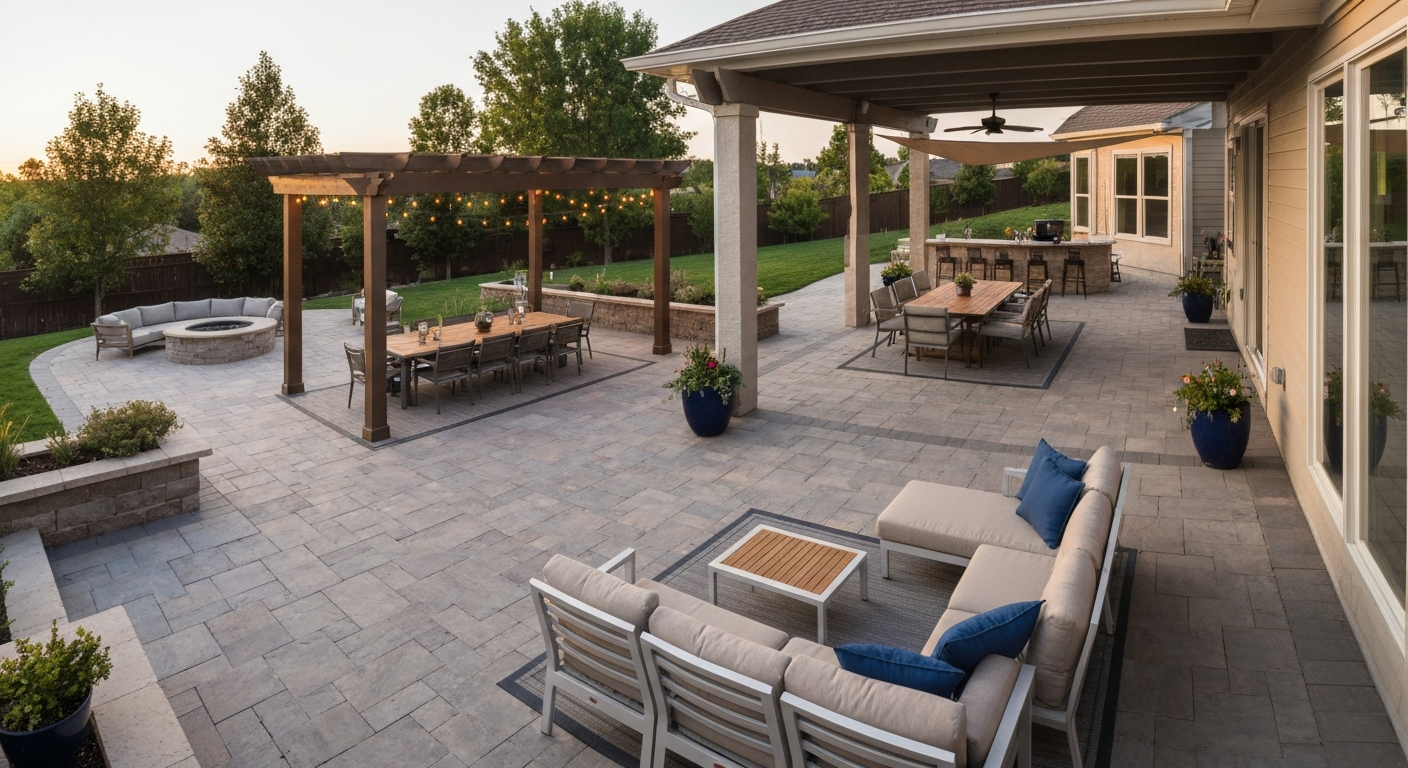
Why a large patio is a different problem than a small one
On a small patio, the challenge is fitting things in. On a large patio, the challenge is making it feel intentional instead of empty. An undersized sectional pushed into one corner of a 600-square-foot slab looks abandoned. Furniture that's perfectly proportioned for a living room looks miniature against an open concrete expanse. If you've read our guide on how to furnish a small patio, you know the small-space game is all about multifunctional pieces and negative space preservation. See our guide on how to furnish a small patio for small-space layout and multifunctional furniture tips. For specific layouts and space-saving arrangements, see our guide on how to arrange furniture on a small patio. For specific arrangements and space-saving layouts on tight decks, see our guide on how to arrange patio furniture on a small deck. Here it's the opposite: you need enough furniture, in the right scale, arranged into defined zones so the space reads as a series of connected rooms rather than a parking lot. For more detail on outfitting compact spaces, see our guide on how to furnish a patio.
The opportunity is real. A large patio can accommodate a full outdoor dining room, a separate conversation lounge, a fire pit gathering area, a poolside relaxation zone, and a bar or serving station, all at the same time, all without crowding. But that only works if you plan it before you buy a single chair. Impulse purchases are how large patios become expensive storage yards.
Assess your space before you buy anything
Walk your patio with a tape measure and a notepad before you look at a single furniture catalog. Skipping this step is the number-one reason people end up with layouts that don't work. Here's the information you need to collect.
Measurement checklist
- Total patio dimensions: measure the full length and width, then note any irregular shapes, bump-outs, or steps
- Door and gate locations: mark every entry point and the direction they swing — these dictate your primary circulation paths
- Utility locations: note any exterior outlets, gas lines, hose bibs, overhead light fixtures, and drainage points
- Fixed obstructions: columns, posts, built-in planters, gas meter boxes, and A/C condenser units all need to stay clear
- Overhead clearance: measure from the slab to any eaves, pergola, or cover — this affects ceiling fan placement and tall furniture
- Adjacent structure setbacks: how far is the patio from the house wall, fence, and any neighboring structures
Sun, wind, sightlines, and traffic flow
Spend time on the patio at different hours over two or three days if you can. Note where direct sun hits in the morning versus late afternoon, because that determines where you'll want shade structures and where you'll want to put the dining table (morning sun on breakfast is pleasant; afternoon sun on dinner is miserable). Check for prevailing wind direction, most locations have a dominant wind angle, and knowing it lets you orient a pergola, shade sail, or screen wall to block it. Mark the best and worst sightlines: the view you want to face when you're seated, the neighbor's fence you'd rather screen, and the direct line from inside the house to the patio so furniture doesn't block natural light through glass doors.
Traffic flow is the invisible architecture of any patio. Your primary path from the house door to the yard or gate needs to be at least 36 inches wide for comfortable single-file movement, and 44 to 48 inches wide anywhere people will pass while carrying plates or drinks. The ADA standard for accessible walking surfaces is 36 inches minimum, which is a useful baseline even if accessibility isn't your primary concern. Mentally trace every likely path people will take, door to dining table, dining table to grill, lounge to fire pit, and make sure your furniture zones don't block those corridors.
Step-by-step planning and zoning
Zoning is the single most useful concept for a large patio. Think of each zone as a room: it has a purpose, it has a defined footprint, and it has enough separation from adjacent zones that it feels distinct. Here's how to sequence the planning process.
- List your priorities in order: dining, lounging, fire gathering, poolside relaxing, outdoor cooking, bar/serving — rank them by how often you'll actually use them
- Assign a rough square footage to each zone based on your list (dining for 8 needs roughly 10x12 ft minimum; a lounge conversation group needs at least 10x10 ft; a fire pit circle needs 12–14 ft diameter clear space)
- Sketch a bubble diagram on graph paper — no furniture yet, just labeled circles or rectangles showing where each zone lives on the patio
- Check that primary paths between zones are at least 36–48 inches wide and that no zone blocks access to a door or gate
- Identify which zones need shade or weather protection first (dining and lounge almost always do) and note where fixed shade structures could go
- Add secondary elements last: bar carts, side tables, planters, lighting, outdoor rugs — these fill in after the major furniture pieces are placed
The sequencing workflow matters as much as the plan itself. Buy or build anchor pieces for your highest-priority zone first, live with them for a few weeks, then add the next zone. This approach prevents the common mistake of over-purchasing for a vision that doesn't match how you actually use the space. It also staggers your budget, which is almost always a practical necessity.
Common zone types and their requirements
| Zone | Minimum footprint | Key furniture | Notes |
|---|---|---|---|
| Dining (6–8 people) | 10 ft x 12 ft | Dining table + chairs | Allow 24" min behind chairs for seated clearance; 36–48" for serving path |
| Lounge / conversation | 10 ft x 10 ft | Sofa, chairs, coffee table | Center on a rug to define the space |
| Fire pit circle | 12–14 ft diameter | Fire pit + 4–6 chairs | Keep combustibles 3 ft from fire pit rim |
| Poolside relaxation | 8 ft x 16 ft per pair | Chaise lounges + side tables | Allow 5 ft clearance from pool edge |
| Outdoor bar / serving | 4 ft x 6 ft | Bar cart or built-in counter | Locate near grill and house door for convenience |
Layout templates and scale guides
Use these common footprints as starting points on your graph paper plan. Scale each square to 1 foot to keep proportions honest, it's easy to convince yourself furniture will fit until you draw it to scale and realize a 10-person dining table won't leave any walking space.
Conversation group (6–8 seats)
A standard conversation group for six uses a 3-seat sofa facing two armchairs across a coffee table, with an optional third chair at one end. The coffee table should sit roughly 16 to 18 inches in front of the sofa so seated guests can reach it without leaning. For an outdoor sectional in an L-configuration, plan for a footprint of about 10 x 10 feet to seat six comfortably, or 12 x 12 feet for eight. Center the group on an outdoor rug with at least 18 to 24 inches of rug visible beyond the furniture edge on all sides, this grounds the zone visually.
Dining for 6–10 people
A rectangular dining table for 6 runs roughly 72 to 84 inches long and 36 to 42 inches wide. For 8, expect 84 to 96 inches. For 10, you're looking at 108 to 120 inches (9 to 10 feet). Add 24 inches on all sides for the chairs when pushed back, plus another 12 to 18 inches for a comfortable walking clearance, that puts the clear zone for a 10-person table at roughly 14 feet x 11 feet. If the dining zone is near the grill or a serving station, widen the path on that side to 44 to 48 inches so you're not navigating around seated guests while carrying hot food.
Fire pit circle
A fire pit circle works best with 4 to 6 chairs arranged in a rough arc or full circle. Allow at least 3 feet between each chair's front edge and the fire pit rim for safety and heat comfort. A typical circle with 6 chairs and a 24-inch-diameter fire pit needs about 12 to 14 feet of total clear diameter. Position it away from low-hanging overhead structures, and make sure prevailing wind doesn't blow smoke toward the main lounge or dining zone. For a dedicated fire pit arrangement guide, the fire pit arrangement article in this series goes deeper on chair types and positioning options.
Poolside layout
Chaise lounges need roughly 24 to 26 inches of width and 72 to 84 inches of length per unit, plus at least 24 to 30 inches between adjacent lounges so people can pass without stepping over each other. Keep all furniture at least 5 feet from the pool edge as a practical safety buffer. For a pair of lounges with a side table between them, plan on a footprint of about 6 feet wide by 7 feet long. Arranging multiple pairs around a pool is covered in the patio furniture around a pool guide in this series.
Choosing furniture: scale, proportion, and circulation
Scale is the thing most people get wrong on a large patio. Standard residential furniture (a 72-inch sofa, a 36-inch round dining table) looks fine indoors but reads as small on an open patio over 400 square feet. You need larger pieces, or more of them, to fill the space without looking sparse. That doesn't mean you need to spend more money: modular and sectional systems let you scale up affordably.
Seating types and when to use them
| Seating type | Best zone | Typical dimensions | Pros | Cons |
|---|---|---|---|---|
| Deep-seat lounge chair | Lounge/conversation | 32–36" W x 32–36" D | Very comfortable for long sits | Takes up more floor space |
| Dining armchair | Dining zone | 22–24" W x 22–24" D | Fits tight to table when not in use | Less comfortable for lounging |
| Chaise lounge | Poolside / sun zone | 24–26" W x 72–84" L | Full recline, built for sun use | Large footprint, single-purpose |
| Sectional module | Lounge/conversation | 24–30" sq per module | Highly scalable, flexible configuration | Needs careful planning to size right |
| Bench / daybed | Lounge / porch zone | 24–30" D x 48–84" L | Multi-use, doubles as extra seating | Needs good cushion spec for outdoor use |
Proportion rules worth knowing
Seat height for most outdoor chairs runs 16 to 18 inches from the floor, with seat depth between 18 and 22 inches for dining chairs and 24 to 28 inches for deep lounge seats. When you're picking a coffee table to pair with a sofa or sectional, aim for a table height 1 to 2 inches below the seat height so drinks and plates land in a natural reach zone. For table length, a coffee table that's about two-thirds of the sofa length works well, it gives everyone within reach without overwhelming the space visually. An ottoman used as a coffee table substitute should match seat height within an inch or two: 16 to 18 inches high is the standard range.
Frame materials compared
| Material | Weight | Weather resistance | Maintenance | Cost | Best for |
|---|---|---|---|---|---|
| Teak | Heavy | Excellent (natural oils) | Low — oil yearly or leave to silver | High | Long-life investment pieces |
| Ipe | Very heavy | Excellent (very dense) | Low — harder to work with | High | Flooring, benches, structural pieces |
| Western red cedar | Light-medium | Good (natural heartwood) | Moderate — seal or stain every 1–2 years | Moderate | DIY builds, budget-conscious frames |
| Powder-coated aluminum | Light | Very good (corrosion resistant) | Very low — wipe clean | Moderate | Low-maintenance modern furniture |
| Powder-coated steel | Heavy | Good with intact coating | Moderate — check coating for chips | Low-moderate | Budget frames; watch in coastal climates |
For most DIY builds, western red cedar is the practical choice: it's readily available at home centers, light enough to work with basic tools, and its heartwood is rated moderately to very durable for exterior use. Teak is the premium long-life option if you're buying finished furniture, its natural oils and silica deliver outstanding rot resistance without any finish required. Powder-coated aluminum is the best call for purchased furniture frames if you want low maintenance and don't want to DIY: it's lightweight, naturally corrosion-resistant, and easy to clean. Powder‑coated aluminum is commonly recommended for low‑maintenance outdoor furniture frames (lightweight with a naturally corrosion‑resistant oxide layer), while powder‑coated steel can be used but generally needs more robust pretreatment and coating systems and is more vulnerable to corrosion if finishes or detailing are imperfect, see Steel vs Aluminum Outdoor Furniture: Which Is Better? (Unispace Furniture).
Modular and sectional strategies for large spaces
Modular outdoor furniture is where large patios really benefit. Instead of buying a fixed sofa and hoping it fits your space, modular systems let you assemble exactly the configuration you need from repeatable units, a corner piece here, an armless center piece there, a chaise end module if you want it. This matters enormously on a large patio because the right configuration can define a zone that would otherwise feel vague and unfurnished.
Sizing and configuring sectionals
The most practical modular dimension for DIY builds is the 24-inch square module, which accepts standard 24 x 24-inch outdoor cushions, widely available, affordable, and replaceable. An L-shaped sectional using this module system with three armless pieces, one corner piece, and one arm piece gives you roughly a 96-inch run on one side and a 72-inch run on the other, seating six to seven people comfortably. A U-shaped configuration adds another 72-inch run facing the first and seats eight to ten people in a defined conversation space. For a patio over 500 square feet, a U-configuration sectional is often the right anchor for a lounge zone, it creates walls of seating that define the space without requiring physical partitions.
Pros and cons of going modular
- Pro: configuration flexibility — rearrange modules for different occasions or zone changes
- Pro: scalable cost — start with a basic L and add pieces over time
- Pro: standard cushion sizes keep replacement costs low
- Pro: easier to move and store in pieces for winter or storm prep
- Con: modules that aren't connected can drift out of alignment on uneven surfaces
- Con: if pieces are from different purchase runs, color/finish matching can be inconsistent
- Con: DIY builds require accurate cuts to keep modules true — small errors multiply across many pieces
DIY project: build a patio sectional
This is one of the most satisfying DIY patio projects you can tackle. A 2x4-framed modular outdoor sectional is beginner-friendly, requires only basic tools, and produces furniture that holds up well when built with the right wood and finished properly. The design here is based on a single armless module sized for a standard 24 x 24-inch outdoor cushion, you build as many modules as you need, then add end-arm pieces to cap the runs. Expect to spend a weekend building a three-module L with corner piece, and roughly $150 to $250 in materials depending on wood choice and local lumber prices. See our how to build patio sectional guide for step-by-step plans, materials lists, and cutting diagrams.
Materials and tools
- Lumber: 2x4 western red cedar or pressure-treated pine (cedar preferred for appearance and natural decay resistance)
- Fasteners: 2.5-inch and 3-inch exterior-rated screws (coated or stainless to prevent rust staining)
- Wood finish: exterior deck oil, semi-transparent stain, or leave cedar natural to weather
- Cushions: 24" x 24" outdoor cushions with quick-dry foam cores (see cushion section below)
- Tools: miter saw or circular saw, drill/driver, tape measure, square, clamps, sander (80 and 120 grit)
Cut list for one armless module (seats one, 24" seat depth)
| Part | Dimension | Qty | Notes |
|---|---|---|---|
| Front/back legs | 2x4 x 17.5" | 4 | Sets seat platform at ~18" finished height |
| Side rails (seat box) | 2x4 x 21" | 2 | Run front to back inside the leg frames |
| Front/back rails (seat box) | 2x4 x 24" | 2 | Face of module width |
| Seat slats | 2x4 x 24" | 3 | Spaced evenly across seat box top |
| Back uprights | 2x4 x 18" | 2 | Set back angle or keep vertical |
| Back rail (top) | 2x4 x 24" | 1 | Top of back frame |
| Back slats | 2x4 x 24" | 3 | Spaced evenly across back frame |
Assembly steps
- Cut all pieces to length and sand cut ends smooth with 80-grit sandpaper
- Build the seat box: attach front and back rails between the four legs using two 3-inch screws at each joint, checking square with a framing square before driving the second screw
- Add side rails: drive two 2.5-inch screws through each side rail into the legs to complete the rectangular seat box
- Attach seat slats across the top of the seat box, spacing them evenly with a small gap (about 3/8") between slats for drainage — pre-drill to prevent splitting
- Build the back frame: attach the top back rail between the two back uprights, then add back slats across the frame at even spacing
- Attach the back assembly to the rear of the seat box: drive 3-inch screws through the back uprights into the rear legs, check that the back is plumb or at your desired recline angle (a slight rearward angle of 5 to 10 degrees adds comfort)
- Sand all surfaces with 120-grit, round all exposed corners and edges slightly to prevent splintering
- Apply your chosen exterior finish and allow to cure fully before placing cushions
Safety notes
- Pre-drill all screw holes near board ends to prevent splitting — especially important in cedar
- Use only exterior-rated fasteners; interior screws will rust and stain the wood within one season
- Check all joints for squareness before final tightening — a racked module won't sit flat and will stress joints over time
- If stacking or moving modules, have a second person help — assembled modules are heavier than they look
- On uneven patios, add rubber furniture feet to the legs to prevent rocking and protect the patio surface
DIY project: build a patio daybed
An outdoor daybed is a statement piece that earns its floor space. It reads as a lounge, a nap spot, and an extra seating surface all at once, and it scales well on a large patio where a single chair would look lost. This build is a platform-style daybed, essentially a wide, cushioned bench with low back support on one end, sized to fit a standard outdoor twin mattress or a pair of 24 x 48-inch cushions. Budget roughly $200 to $350 in materials. For step-by-step measurements, material lists, and detailed assembly instructions, see our guide on how to build a patio daybed. Difficulty level is similar to the sectional build: basic cuts and assembly, no advanced joinery required.
Design options
You have two practical design directions: a flat platform daybed (no back, just a wide cushioned surface) or a single-arm/single-back daybed (one elevated end acting as a headboard or backrest). The platform version is simpler to build and more versatile, you can push it against a wall or railing and lean bolster cushions against the surface. The backed version is more comfortable for sitting upright. The instructions below cover the backed version; omit the back assembly for a flat platform.
Cut list for a standard patio daybed (fits 24" x 48" cushion pair or twin outdoor mattress)
| Part | Dimension | Qty | Notes |
|---|---|---|---|
| Legs | 4x4 x 14" | 4 | Low platform feel at approx 14–16" seat height |
| Long side rails | 2x6 x 72" | 2 | Run full length of platform |
| Short end rails | 2x6 x 27" | 2 | Set platform width at ~27" inside dimension |
| Platform slats | 2x4 x 30" | 8 | Laid across width, spaced with 3/8" gaps |
| Back upright posts | 4x4 x 30" | 2 | Attached to one end for backrest height |
| Back rail (top) | 2x4 x 30" | 1 | Spans the two back posts at top |
| Back slats | 2x4 x 30" | 3 | Fill the back panel area |
Assembly steps
- Cut all pieces, sand cut ends, and lay out all parts before driving any screws
- Build the platform box: attach long side rails to the four legs using 3-inch exterior screws, two per joint — keep the tops of the rails flush with the tops of the legs so the platform sits level
- Attach the short end rails between the side rails at each end to complete the rectangular frame
- Lay platform slats across the top of the frame at even spacing, pre-drill and fasten with 2.5-inch screws at each rail crossing
- If building the backed version, attach the two back upright posts to the inside face of one end's legs using 3-inch screws and construction adhesive for extra rigidity
- Attach the top back rail across the tops of the back posts, then fill in the back slats at even spacing
- Sand the entire assembly with 120-grit, rounding all edges and corners
- Apply exterior finish and allow full cure time before adding cushions
Cushion specs for outdoor use
This is where a lot of DIY daybeds go wrong: indoor cushions rot outdoors within a season. For a patio daybed, you need cushions with a quick-dry (reticulated or open-cell) foam core, this foam is specifically engineered to drain water and dry rapidly, preventing the trapped moisture that causes mold. The cover fabric should be solution-dyed acrylic (Sunbrella is the benchmark brand): the color is locked into the fiber at the manufacturing stage, which gives it strong UV and fade resistance, plus mildew resistance. Sunbrella publishes specific cleaning procedures for routine maintenance and for mildew treatment, which are worth bookmarking. For the platform daybed, two 24 x 48-inch cushions at 4 to 5 inches thick work well side by side, or a custom-cut twin outdoor mattress for a more seamless look.
Flooring, shade, screening, and enclosure
Your patio surface sets the tone for everything on top of it. If you're working with a concrete slab, adding an outdoor rug to each zone is the fastest visual upgrade, it defines the zone, adds softness underfoot, and anchors the furniture grouping. For a more permanent surface upgrade, porcelain pavers are worth considering if you're in a freeze-thaw climate: they're manufactured with water absorption below 0.5 percent, which means they resist frost damage and hold their color far better than standard concrete pavers. Composite/WPC decking is another option for platforms or raised sections, it's lower maintenance than wood over the long run, though the upfront cost is higher.
Shade on a large patio almost always needs to be structural rather than just an umbrella. A single market umbrella covers a roughly 9-foot diameter area, adequate for a small dining table, but not for a full dining zone or lounge group. Pergolas, shade sails, and attached patio covers can span the full zone width and provide the consistent shade that makes a large patio genuinely usable on hot afternoons. One important note: permanent or attached shade structures commonly require building permits in U.S. jurisdictions, particularly when they're attached to the house, involve new footings, exceed local size thresholds, or include electrical work. Many pergola manufacturers supply engineered drawings specifically because building departments request them, factor this into your timeline and budget before starting construction.
Screening or enclosing part or all of a large patio takes the space from seasonal to year-round. A screened enclosure keeps bugs out, reduces wind, and with the right roof system, provides rain protection so you can use the patio during summer storms. Screened patio projects are a core topic on this site, and the screened patio build guides here go into the framing, screening material, and door hardware details you'll need. Even partial screening, a single screened wall on the windward side, can dramatically extend how comfortable the patio is in shoulder seasons.
Climate control: fans and heaters
On a covered or screened patio, a ceiling fan is one of the highest-value additions you can make. A properly sized fan creates enough air movement to make the space feel several degrees cooler in summer and can push warm air down in cooler months. For outdoor or screened locations, use a fan rated for damp or wet locations depending on how much exposure to rain the location gets. Size the fan blade span to the space: a 12 x 14-foot covered area needs at least a 52-inch fan; larger spaces benefit from a 60-inch or dual-fan setup.
For cool-weather use, an outdoor patio heater extends your season meaningfully. Freestanding propane heaters are the most flexible option, no installation required, and they produce enough radiant heat to warm a circle of about 10 to 15 feet diameter. Mounted infrared heaters (electric or natural gas) are more efficient and out of the way, but require either an electrical circuit or gas line connection, which usually means a licensed electrician or plumber and potentially a permit. Wall-mounted or ceiling-mounted infrared units work well in screened or covered patios where the heat isn't immediately dissipated by wind.
Lighting, styling, and outdoor rugs
Lighting transforms a large patio from a daytime space to an evening destination. The most practical approach is to layer three types: ambient (string lights across the overhead structure or pergola beams), task (a pendant or directional light over the dining table), and accent (low-voltage path lighting along the patio edge or uplights in planters). String lights are the easiest DIY addition and have an outsized effect on atmosphere, hang them between pergola posts or along a fence line at 8 to 10 feet high for the best coverage without creating a glare issue at eye level.
Outdoor rugs do double duty on a large patio: they define zone boundaries visually and they make furniture groupings feel deliberate rather than random. Use one rug per zone rather than one large rug covering the whole patio, that distinction between the dining zone rug and the lounge zone rug is what makes the space read as two rooms rather than one oversized area. Size rugs so all furniture legs sit on the rug, or at minimum so the front legs of all seating pieces touch the rug. For durability, look for polypropylene or other synthetic outdoor-rated materials that drain and dry quickly.
Anchoring, safety, and weatherproofing
Large patio furniture, especially lightweight aluminum pieces and tall market umbrellas, can become a hazard in high winds if it's not secured. For umbrella bases, use a base weight of at least 50 pounds for a 9-foot umbrella and close or remove umbrellas when wind speeds exceed about 20 mph. Lightweight chairs and small tables should be moved inside or stacked and covered during storms. For sectional pieces and built furniture, furniture anchoring straps (similar to those used for earthquake-proofing indoor bookcases) can be attached to a wall or railing to prevent tipping. On a screened or enclosed patio, anchoring is less critical since the enclosure blocks most wind load, but any furniture near a screen opening should still be considered.
For DIY-built furniture, weatherproofing the wood is the most important ongoing maintenance task. Cedar and teak are naturally more durable than pine or untreated wood, but any wood left exposed will weather faster than one treated with an exterior oil or semi-transparent stain. Apply finish before the first season and check annually, the right time to reapply is when water stops beading on the surface and starts absorbing. For powder-coated metal frames, inspect the finish for chips each spring and touch up with matching spray paint before rust has a chance to establish.
Seasonal maintenance checklist
A large patio has more furniture surface area than a small one, which means maintenance tasks scale up accordingly. A simple seasonal routine keeps everything looking good and dramatically extends the life of your investment.
| Season | Task |
|---|---|
| Spring | Inspect all wood surfaces for weathering; reapply oil or stain as needed; check fasteners for rust; clean cushion covers per manufacturer instructions; test any electrical lighting and fan connections |
| Summer | Wipe down frames weekly; check umbrella bases for stability; rinse Sunbrella cushions with water monthly; close or remove umbrellas during storms |
| Fall | Deep-clean all cushion covers before storage; apply end-of-season oil to teak and cedar; move lightweight pieces inside or to a covered area; drain and store propane heaters |
| Winter (cold climates) | Store all cushions and fabric pieces indoors in breathable bags; stack and cover or store metal frames; cover built wooden furniture with fitted breathable covers; check for standing water on any patio surfaces that could freeze and crack |
Budget and sourcing guide
Furnishing a large patio well doesn't require a single large purchase. The zone-by-zone approach described earlier is also a zone-by-zone budget approach, tackle your highest-priority zone first and build outward. Here's a rough cost breakdown for common starting points.
| Item | Budget option | Mid-range | Premium |
|---|---|---|---|
| DIY modular sectional (3-seat L) | $150–$250 in lumber + cushions | $350–$500 (pre-built cedar kit) | $800–$1,500 (teak or powder-coat aluminum) |
| Dining set (6-seat) | $300–$500 (big-box resin/steel) | $600–$1,000 (powder-coat aluminum) | $1,500–$3,000+ (teak or cast aluminum) |
| Fire pit + 4 chairs | $200–$400 | $500–$800 | $1,200–$2,500+ |
| Pair of chaise lounges | $150–$300 | $400–$700 | $1,000–$2,000+ |
| Outdoor rug (8x10 ft) | $50–$100 | $150–$300 | $400+ |
| String lights (48 ft) | $20–$50 | $60–$120 | $150+ (commercial grade) |
| DIY patio daybed (built) | $200–$350 in materials | — | — |
| Market umbrella + base | $80–$150 | $200–$400 | $500–$1,000+ |
For sourcing, big-box home improvement stores are the best starting point for DIY lumber and hardware. For cushions, direct-from-manufacturer cushion suppliers (rather than generic foam covered in polyester) give you access to proper outdoor foam cores and Sunbrella fabric at better prices than buying finished cushions from furniture retailers. For metal frame furniture, end-of-season sales (August through October) reliably offer 30 to 50 percent discounts on inventory that retailers need to clear before winter. Buying floor models at outdoor furniture stores, which typically arrive scratched or slightly faded, is another way to access quality pieces at a significant markdown, and a light touch-up of powder coating spray handles most cosmetic issues.
FAQ
What are the first planning steps to furnish a large patio for year‑round use?
Measure the space (length, width, ceiling height if covered). Sketch existing fixed elements (doors, steps, utilities, sightlines). Decide zones you want: dining, lounge, cooking, fire/entertainment, pool circulation. Allocate clear circulation paths 36–48 in wide (36" minimum single‑person; 44–48" if serving or two‑way traffic). Note sun/wind exposure and proximity to the house for power/gas. Create a scaled bubble diagram before buying furniture.
How do I zone and layout a large patio for comfort and flow?
Start with primary circulation and keep it 36–48" wide. Place the largest fixed or heavy element first (outdoor kitchen, fireplace, pool access). Group furniture into distinct zones with 3–4 ft between zones for flow. Orient lounge seating to face a view or focal point; use rugs and planters to define zones. For dining leave 18–24" clearance from table edge to obstruction for comfort (≈24" recommended; up to 36–48" where servers move). Provide separate service paths for cooking/serving.
How should I scale furniture on a large patio compared with a small patio?
On large patios, use proportionally larger pieces or multiple groupings to avoid sparse feeling: longer sectionals (modular modules 24–30" each), larger dining tables (8–10+ seats), and multiple side tables/ottomans. On small patios favor compact, multifunctional pieces and foldable furniture. Maintain human scale—seat heights 16–18" and table heights coordinated so surfaces are within reach (ottomans 1–2" lower than seats; coffee tables ~2/3 sofa length).
What are practical modular/sectional options and DIY build tips?
Use repeatable modules (24–30" square) so cushions and frames align. Common DIY approach: 2x4 or 2x6 framed modules sized for 24"×24" cushions (Ana White plans are a proven reference). Build on sleepers with simple butt joints, exterior screws, and waterproof glue; add angled legs or a base for lift. Provide a simple cut list, basic shopping list (pressure‑treated or rot‑resistant lumber, exterior screws, wood glue, quick‑dry foam cushions, Sunbrella fabric). Finish with exterior paint or oil. Test fit cushion dimensions before final assembly.
What materials should I choose for long‑lasting outdoor furniture and cushions?
Frames: powder‑coated aluminum (low maintenance) or properly detailed stainless/galvanized steel; for wood choose teak, ipe, or western red cedar for durability. Cushions: quick‑dry/reticulated foam cores and solution‑dyed acrylic fabrics (Sunbrella) for UV and mildew resistance. Tables and tops: porcelain pavers, teak, or powder‑coated metal for weather resistance.
How do I weatherproof furniture and fabrics for year‑round use?
Choose rot‑resistant materials and exterior‑grade fasteners. Use quick‑dry foam and solution‑dyed fabrics. Seal wood with penetrating oil or exterior finishes and reapply annually as needed (teak/oiled vs. stained). Store cushions in ventilated bins or under benches during prolonged wet/cold periods. Use breathable furniture covers for short‑term protection; avoid tarps that trap moisture. For permanent installations, design for drainage and airflow under cushions and frames.
Next Articles
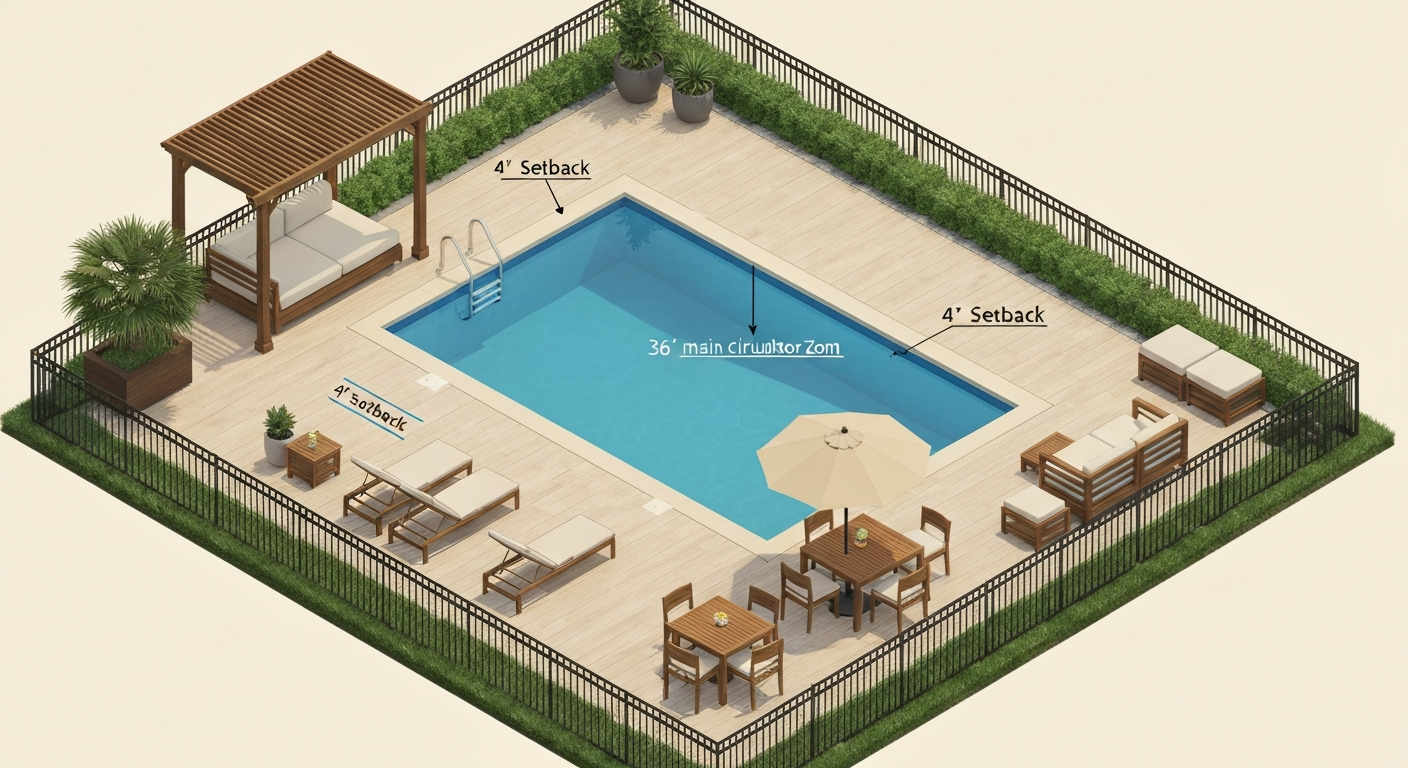
How to Arrange Patio Furniture Around a Pool: Step-by-Step Guide
Arrange patio furniture around a pool with step-by-step layouts, safety rules, DIY builds, and materials guide.
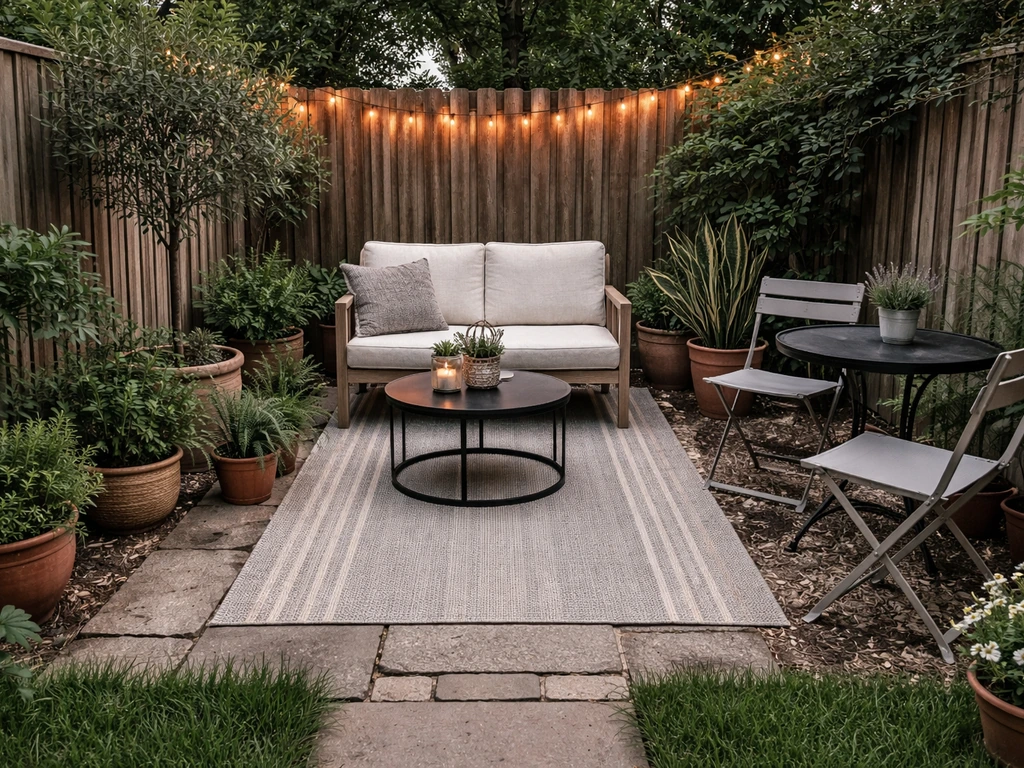
How to Arrange Furniture on a Small Patio Step by Step
Step-by-step tips to arrange small patio furniture for more space, clear walkways, cozy seating, and better flow.
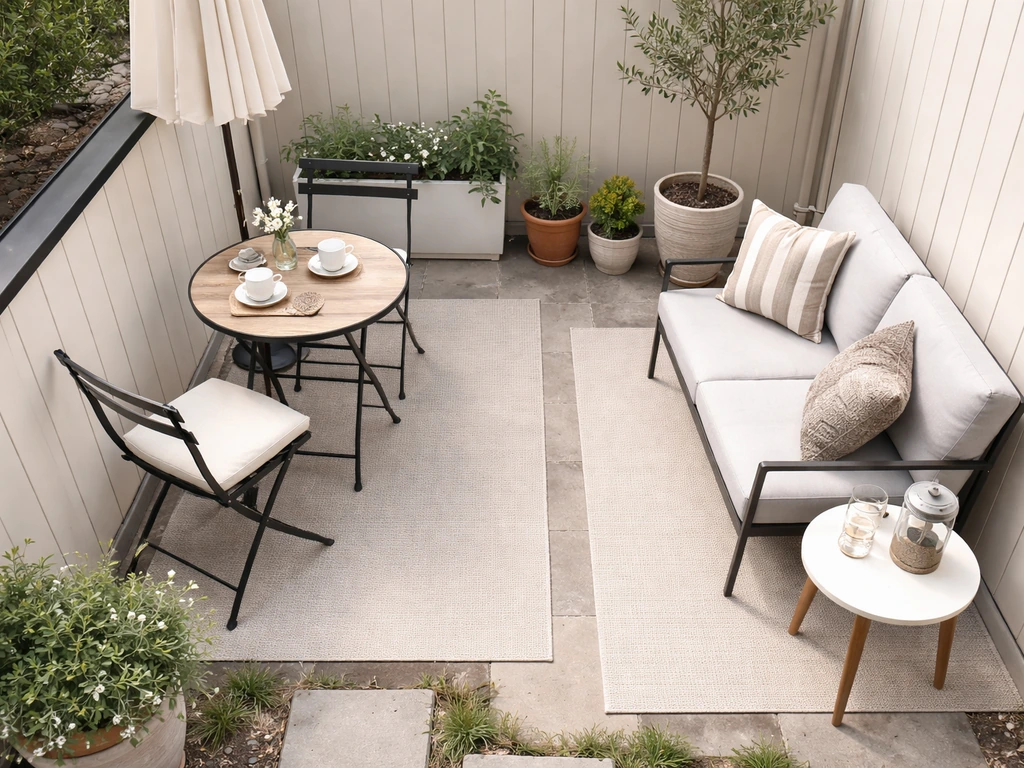
How to Furnish a Small Patio: Layout, Furniture, and Tips
Step-by-step small patio furnishing guide: layout, space-saving outdoor furniture, weather protection, and finishing tou