
To secure a grill to a patio, you have two main paths: non-permanent anchoring (heavy-duty straps, wheel chocks, or portable anchor plates) for grills you move around or store seasonally, and permanent anchoring (expansion anchors, epoxy anchors, or lag bolts through an anchor plate) for grills that live in one spot year-round. Which one you need depends on your grill type, your patio surface, whether you're on a screened or covered patio, and how serious a concern theft or wind displacement actually is at your property. This guide walks through every scenario so you can make the right call and install it safely.
How to Secure Grill to Patio: Anchor, Stabilize & Lock Guide

Felix Brennan
4 Aug 2026
Who this guide is for and what you'll walk away with
If you've got a freestanding gas grill, charcoal kettle, pellet smoker, or cart-style portable that you want to lock down, stabilize against wind, or secure from theft, this guide is written for you. You don't need construction experience. What you do need is a few hours, a short list of hardware, and a clear picture of what your patio surface is made of. By the end, you'll know exactly which anchoring method fits your situation, how to install it step by step on a concrete slab, and how to do it without voiding your grill's warranty, violating local fire code, or creating a hazard under a covered or screened roof.
Quick decision checklist: match your anchoring method to your grill and surface
Before you buy a single bolt, run through this checklist. It'll point you to the right section and save you a wasted trip to the hardware store.
- What is your grill type? Gas (propane or natural gas), charcoal, pellet, or cart/portable? (Gas and pellet grills have stricter clearance and enclosure rules than charcoal or portable.)
- What is your patio surface? Concrete slab, concrete pavers, wood deck, or tile? (Concrete slab gives you the most anchoring options; wood decks require lag bolts or surface-mount plates into structural framing.)
- Is your grill on wheels/a cart, or does it have fixed legs? (Wheeled grills need wheel chocks or strap-to-fixed-anchor systems; fixed-leg grills can be bolted directly through a base plate.)
- Is your patio covered, screened, or open? (Covered and screened patios add clearance requirements, ventilation concerns, and sometimes outright code restrictions on gas grills under roofs.)
- Do you need anti-theft security, wind stability, or both? (Theft prevention usually means a permanent anchor plus a security cable or lock; wind stability can often be handled with a strap or portable plate.)
- Is your installation temporary or permanent? (If you store the grill in winter or rent your home, go non-permanent. If the grill lives in one spot for years, permanent anchoring is more reliable and cleaner-looking.)
| Grill Type | Patio Surface | Best Non-Permanent Option | Best Permanent Option | Notes |
|---|---|---|---|---|
| Gas (propane, cart) | Concrete slab | Locking strap + wheel chocks | Expansion anchor + anchor plate | Check NFPA 58 cylinder enclosure rules before permanent install |
| Gas (natural gas, fixed) | Concrete slab | Not applicable (fixed connection) | Epoxy or expansion anchor through base | Permanent gas line = permanent anchor makes sense |
| Charcoal (kettle/cart) | Concrete slab | Wheel chocks + security cable | Expansion anchor + anchor plate | Fewer code restrictions than gas; simpler install |
| Pellet smoker | Concrete slab | Heavy-duty strap + wheel chocks | Expansion anchor + anchor plate | Tall exhaust stacks increase wind leverage; clearance to combustibles is critical |
| Any type | Wood deck | Strap to deck railing or post | Lag bolt through decking into joist | Never anchor into decking only; must hit framing |
| Any type | Concrete pavers | Portable anchor plate on surface | Epoxy anchor into paver (verify paver depth first) | Thin pavers may not support mechanical anchors; use mortar-bed anchoring if possible |
| Portable/tabletop | Any | Locking cable through frame | Anchor plate bolted to surface | Anti-theft focus; stability less of an issue at low height |
Safety and code checkpoints before you pick up a drill
Anchoring a grill isn't just a mechanical problem. There are clearance rules, ventilation concerns, and in some jurisdictions, outright prohibitions on gas grills in certain locations. Skipping this section is how people create fire hazards or get told by their insurance company that a claim won't be covered. Spend five minutes here and you'll avoid those problems.
Clearance to combustible materials
The NFPA and most grill manufacturers (including Weber and Traeger) specify that grills must be kept a minimum of 10 feet from any combustible structure, including the house wall, fencing, and overhead structures. The CPSC's summer grilling safety guidance reinforces this number. At minimum, maintain 3 feet of clearance on all sides of the grill for safe operation. Always check your specific grill's owner manual for its listed clearances, because some pellet grills and larger gas units require more. Weber Spirit installation guides, for example, state explicit clearances for both side and overhead distances that must be respected whether the grill is anchored or not.
Screened and covered patios: special rules apply
This is the area where most homeowners run into trouble. Gas grills, particularly propane models, are governed by NFPA 58 (Liquefied Petroleum Gas Code) and NFPA 54/ANSI Z223.1 (National Fuel Gas Code). Many jurisdictions that have adopted the International Fuel Gas Code (IFGC) or International Fire Code (IFC) restrict or prohibit the use of propane grills in enclosed or semi-enclosed spaces, including screened patios and covered patios with limited ventilation. Some local codes outright prohibit gas grill use under any roof structure. Pellet grill manuals (Traeger included) contain explicit 'do not install under an overhang' warnings because of heat stack output and fire risk to overhead materials. If your patio has a roof, screen enclosure, or pergola overhead, contact your local building or fire department before you commit to a permanent anchor location. Anchoring the grill in a prohibited spot makes the problem worse, not better.
Gas line and ventilation warnings
If your grill runs on natural gas with a hard-piped connection, NFPA 54/ANSI Z223.1 and the IFGC govern the installation of that gas piping and the appliance connection. Any permanent gas line work should be done by a licensed plumber or gas fitter and inspected before use. Never drill anchor holes within 6 inches of any embedded conduit, gas line, or post-tension cable (post-tension slabs are common in Sun Belt states; look for PT warning stamps on the slab edge before drilling). For propane, NFPA 58 limits the cylinder sizes allowed on balconies and inside enclosures and specifies how tanks must be stored and vented. NFPA 58, Liquefied Petroleum Gas Code (ICC/NFPA listing) is the primary U.S. standard for safe storage, handling, allowable cylinder sizes on balconies, and venting/installation requirements for propane. Check IFC Chapter 61 for your jurisdiction's adopted limits on LP cylinder storage near structures.
Electrical connections near the grill
Rotisseries, pellet grill controllers, and outdoor lighting near the grill area all require properly installed outdoor receptacles. NEC Article 210.8 requires GFCI protection for all outdoor receptacles, and NEC 406.9 requires weatherproof 'in-use' (extra-duty) covers for any outdoor wet-location outlet. Use UL-listed, weather-resistant (WR-marked) devices and extra-duty while-in-use covers. NEC 406.9 requires listed in‑use (extra‑duty) weatherproof covers and WR‑marked weather‑resistant receptacles for outdoor wet‑location outlets NEC 406.9 requires listed in‑use (extra‑duty) weatherproof covers and WR‑marked weather‑resistant receptacles for outdoor wet‑location outlets.. If you're running power to a pellet grill or accessories near the anchoring area, get the electrical right at the same time.
When to check local code
- You live in a condo, HOA, or multi-family property (many prohibit propane grills on balconies or require specific anchoring)
- Your patio has a roof, screen enclosure, or pergola overhead
- You're making a permanent gas line connection to anchor a natural gas grill
- Your property is in a high-fire-risk zone (many western U.S. jurisdictions have additional restrictions)
- You're anchoring into a post-tension concrete slab (extremely common in Florida, Texas, Arizona)
Tools and materials: the complete list
Here's the master list of tools and materials you might need across the different anchoring methods. You won't need everything on this list for every job, so the scenario callouts below the main list help you pare it down.
Tools
- Rotary hammer drill (corded or heavy-duty cordless) with SDS chuck — for drilling into concrete
- Masonry drill bits sized to your anchor diameter (typically 3/8 in. to 1/2 in. for grill anchoring)
- Cordless drill/driver for driving lag bolts into wood framing
- Torque wrench or torque-setting drill adapter (critical for expansion anchors — over-torquing cracks concrete)
- Wire brush, nylon brush, and compressed air can or hand pump for hole cleaning before epoxy anchors
- Tape measure and chalk line
- Pencil or scribe for marking hole locations
- Safety glasses and dust mask (N95 minimum for concrete drilling)
- Work gloves
- Level (to confirm anchor plate or base is plumb before setting)
- Socket set and wrenches (for tightening nuts on anchor hardware)
- Caulk gun (for cartridge-style epoxy systems)
- Wire brush for cleaning anchor rod before epoxy injection
- Post-tension slab probe or stud/rebar finder rated for concrete (use before any drilling)
Materials
- Heavy-duty ratchet straps or security straps rated for outdoor use (UV and weather resistant) — non-permanent method
- Rubber wheel chocks (sold in pairs; use chocks rated for cart weight) — non-permanent method
- Portable anchor plate with pre-drilled holes and lag-screw capability — non-permanent method
- Ground anchors (auger-style, for non-concrete surfaces like soil or grass adjacent to patio) — non-permanent method
- Steel anchor plate or grill base bracket with pre-drilled bolt holes — permanent method
- Wedge expansion anchors (Simpson Strong-Bolt 2 or equivalent) in 3/8 in. or 1/2 in. diameter, minimum 2.25 in. embedment into concrete — permanent method
- Epoxy anchor adhesive system in cartridge form (ITW Red Head Epcon G5, Hilti HIT-RE 500 V4, or equivalent with ICC-ES ESR rating) — permanent method
- All-thread anchor rod (zinc or hot-dip galvanized for outdoor use) to use with epoxy — permanent method
- Lag bolts (3/8 in. x 3 in. minimum, structural grade, exterior-coated) — for wood deck anchoring
- Heavy-duty security cable (3/8 in. diameter, vinyl coated, with locking eye) for anti-theft
- Hardened steel padlock (pick-resistant, weatherproof, minimum boron-shackle)
- Anchor cover cap or decorative cover plate (to conceal exposed hardware)
- Silicone sealant (clear, exterior grade) for sealing around anchors in paver or deck applications
- Concrete patching compound for filling unused holes if you ever remove a permanent anchor
Scenario-specific callouts
| Scenario | Additional Items Needed |
|---|---|
| Concrete slab, strap method | Ratchet straps, wheel chocks, fixed anchor point (eye bolt in slab or wall) |
| Concrete slab, expansion anchor | Rotary hammer, SDS masonry bits, wedge anchors, anchor plate, torque wrench |
| Concrete slab, epoxy anchor | Rotary hammer, SDS bits, epoxy cartridge + nozzle, all-thread rod, caulk gun, hole-cleaning brush/air |
| Wood deck | Cordless drill, lag bolts, structural washers, joist locator, anchor plate |
| Concrete pavers | Epoxy anchor or surface-mount plate; check paver thickness (minimum 2.5 in. for epoxy anchor) |
| Anti-theft focus (any surface) | Security cable, padlock, anchor plate with cable loop, optional anchor cover |
Matching your grill type to the right anchoring method
Not all anchoring approaches work for all grills. The physical design of your grill and the way it connects to fuel sources affect what you can and can't do safely. Here's how to match them up.
Gas grills (propane cart style)
Propane cart grills are the most common type in American backyards, and they're also the trickiest to anchor because the wheels are part of the design. Wheel chocks combined with a strap running to a fixed anchor point (a wall-mounted eye bolt or a ground anchor) handle 95% of stability and anti-theft needs without any drilling. For permanent installs, an anchor plate bolted to the slab with expansion or epoxy anchors, combined with a security cable loop through the cart frame, is the standard approach. Never bolt through the grill's body or frame directly unless the manufacturer's manual specifically shows a bolt-down point, as doing so may void the warranty and could compromise the cart's structural integrity. Always keep the propane cylinder accessible for inspection and tank swaps; anchoring that traps or encloses the cylinder violates NFPA 58 storage and ventilation requirements.
Gas grills (natural gas, fixed connection)
A natural gas grill connected to a hard-piped supply line is essentially already semi-permanent, because the gas connection limits how far it can move. But a permanent anchor plate makes the installation complete and prevents lateral movement or tipping in high wind. Since you're already committing to a fixed location, a permanent expansion or epoxy anchor in the slab is the right call. Make sure anchor holes are drilled at least 6 inches away from any embedded gas or electrical conduit. Confirm with your gas installer that the flexible connector (typically 18-36 in. stainless braided) has appropriate slack so the grill can be shut off and the connection inspected without removing the anchor hardware.
Charcoal grills
Charcoal kettles and cart-style charcoal grills have fewer code restrictions than gas models since there's no fuel connection to worry about. The main concerns are stability (kettle grills on three legs can tip in wind) and theft (they're easy to carry off). A wheel chock set and a security cable looped through the axle or lower cart frame handles both issues affordably. For a kettle on three legs, a ground anchor plate with a cable loop is the cleanest option since there's nothing to chock. Permanent anchoring of a charcoal grill is rarely necessary unless it's a large, heavy offset smoker that lives in one permanent spot.
Pellet grills
Pellet grills deserve extra attention here. They're typically heavy (180 to 300+ pounds with a full hopper), so wind displacement is less of a concern than with lighter carts. But they have tall exhaust stacks and produce significant heat at the chimney, which means clearance to overhead structures is critical. Traeger and similar manufacturer manuals explicitly warn against use under overhangs. Before anchoring a pellet grill in a semi-covered spot, confirm overhead clearance from the stack top to any combustible material is at least the manufacturer's minimum (often 24 to 36 inches or more; check your specific model's manual). The electrical cord for the pellet grill's controller adds another consideration: route and secure it so it's not a trip hazard once the grill is anchored in place. A permanent expansion anchor setup works well for pellet grills that won't be moved.
Portable and tabletop grills
Small portable and tabletop grills are the simplest to secure. A locking cable through the frame and to a fixed anchor point is usually all you need. If you're worried about wind knocking a tabletop grill off a surface, a non-slip mat plus a short tether cable does the job. These grills are certified under ANSI Z21.58/CSA 1.6 for portable use, and that certification assumes they remain freestanding and accessible, so avoid any anchoring that restricts ventilation around the burner area or the LP cylinder if applicable.
Non-permanent anchoring options: when to use them and how they compare
Non-permanent methods are the right choice for renters, homeowners who store grills seasonally, anyone on a covered patio where a permanent anchor would require a permit, or simply anyone who wants flexibility. Here's how each option works.
Heavy-duty ratchet straps
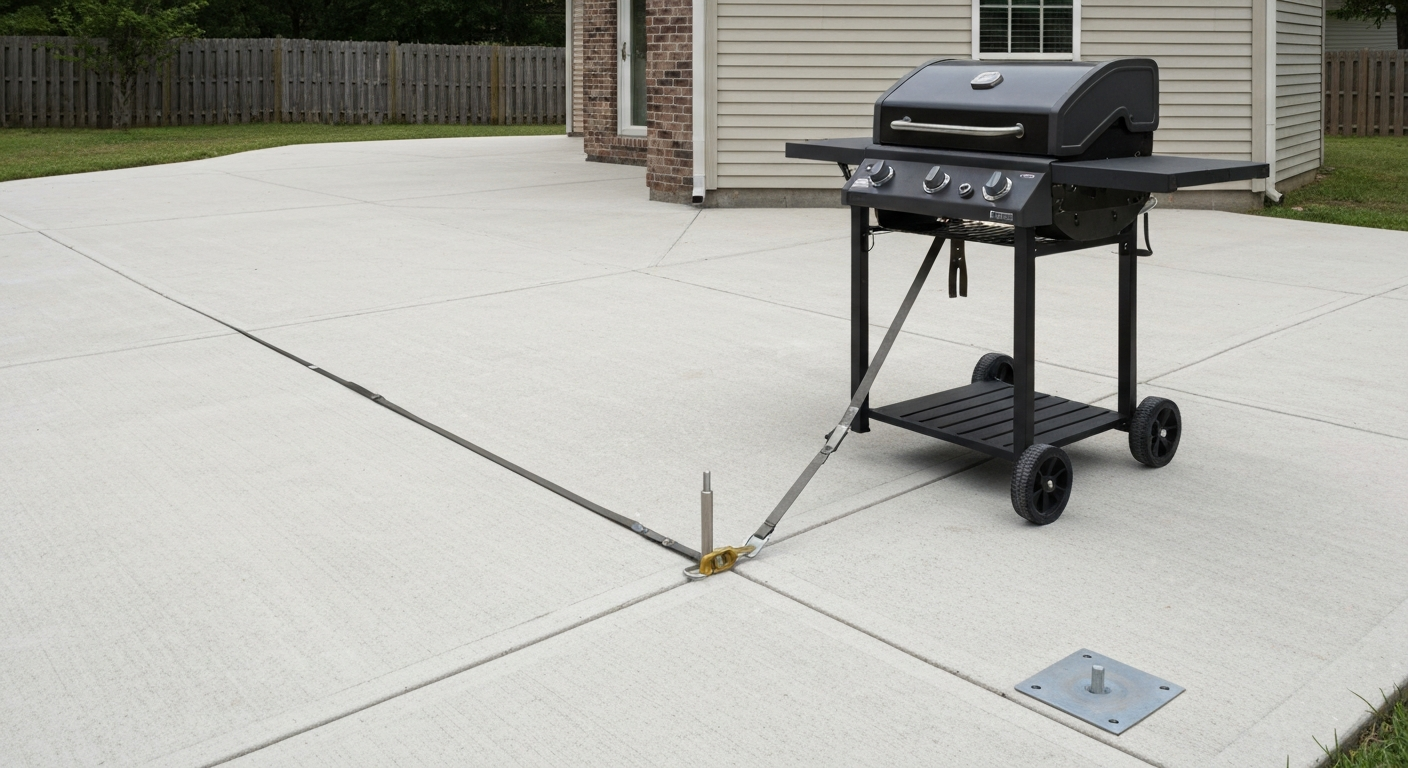
A 1.5 in. to 2 in. wide UV-resistant ratchet strap looped around the grill frame and secured to a fixed anchor point (a wall-mounted eye bolt, a post, or a dedicated ground anchor) is the simplest and most versatile non-permanent method. Cost is typically $15 to $30 for a quality pair. The limitation is that straps can be cut with bolt cutters, so they work better for wind stability and casual deterrence than for serious theft prevention. If you want anti-theft function, pair the strap with a security cable and lock.
Wheel chocks
Rubber wheel chocks placed in front of and behind each rear wheel prevent the cart from rolling on a sloped or windy surface. They're cheap ($10 to $20 per pair), require zero installation, and work on any hard surface. They do nothing against lifting or tipping from the front, and they don't address theft. Combine with a strap or cable for complete coverage.
Portable anchor plates
A portable anchor plate is a heavy steel plate with pre-drilled holes and a cable loop, designed to sit on the patio surface with the grill positioned over it. The plate's weight (typically 20 to 40 pounds) plus the grill's weight keeps everything in place. Some models have straps or brackets that attach to the grill cart legs. These are excellent on pavers or tile where drilling isn't desirable, and they leave no holes when removed. Cost runs $40 to $100 depending on size and capacity.
Ground anchors (auger style)
Auger-style ground anchors screw into soil and are most useful for grills placed at the edge of a patio where the surface transitions to grass or gravel. They're common for anchoring gazebos and patio furniture and work the same way for a grill tether. They don't work in pure concrete or pavers, but they're excellent for partially grassed areas. Installation requires only hand or cordless-drill power, and removal leaves a small hole that self-fills over time.
| Method | Cost (approx.) | Anti-Theft Strength | Wind Resistance | Requires Drilling | Removable |
|---|---|---|---|---|---|
| Ratchet straps | $15–$30 | Low (cuttable) | Good | No (if using existing anchor point) | Yes |
| Wheel chocks | $10–$20 | None | Moderate (rolling only) | No | Yes |
| Portable anchor plate | $40–$100 | Moderate (heavy + cable loop) | Good | No | Yes |
| Ground anchor (auger) | $20–$50 | Moderate | Good | No (soil) | Yes |
Permanent anchoring options: the right hardware for each scenario
Permanent anchoring is the most secure option and the cleanest-looking when done well. It makes sense when the grill won't move, when theft is a real concern, or when the grill is heavy enough that wind events (thunderstorms, tropical weather) pose genuine displacement risk. Here's how the main options compare.
Expansion anchors (wedge anchors)
Wedge expansion anchors like the Simpson Strong-Bolt 2 are the go-to for anchoring into solid concrete. You drill a hole, drop in the anchor, and torque the nut to expand the wedge against the concrete walls of the hole. For grill anchoring, 3/8 in. diameter anchors with a minimum 2.25 in. embedment into uncracked concrete are typically more than sufficient. Simpson's published allowable tension and shear values for their Strong-Bolt 2 anchors in 3,000 psi concrete at that diameter and embedment are well above what any grill loading would generate. Install torque is critical: follow the manufacturer's published torque spec (typically 25 to 35 ft-lbs for 3/8 in.) using a torque wrench. Over-torquing can crack the concrete around the anchor. Expansion anchors are not recommended for cracked concrete, very thin slabs (under 3.5 in.), or concrete pavers, because the expansion force can split the material.
Epoxy anchors
Epoxy (adhesive) anchors are the preferred option for cracked concrete, thinner slabs, concrete pavers, or anywhere you can't generate sufficient expansion force. Products like the ITW Red Head Epcon G5 and Hilti HIT-RE 500 V4 are cartridge-based systems that inject adhesive into a cleaned, drilled hole before an all-thread rod or bolt is set into it. Both products carry ICC-ES Evaluation Service Reports (ESRs) documenting their rated tension and shear values, embedment requirements, edge-distance minimums, and temperature/curing-time specs. The critical step with epoxy anchors is hole cleaning: the hole must be brushed, blown out with air, and brushed again (minimum three cycles per Hilti's installation instructions) before injecting adhesive. Skipping hole cleaning is the most common installation mistake and reduces holding strength dramatically. Cure times vary by temperature: at 70°F, most epoxy anchor systems reach working strength in 30 to 60 minutes; at 40°F, cure time may extend to 4 hours or more.
Lag bolts (wood deck anchoring)
For wood decks, structural lag bolts (3/8 in. x 3 in. minimum, exterior coated) driven through an anchor plate and into deck joists or structural blocking are the correct method. Never anchor into decking boards alone; they don't have the shear or withdrawal capacity to hold an anchor plate under load. Locate a joist with a stud finder before drilling, pre-drill with a bit 1/16 in. smaller than the lag shank diameter to prevent splitting, and use large fender washers under the bolt head to distribute load across the plate.
Anchor plates and through-bolts
An anchor plate is a flat steel plate (typically 10 in. x 10 in. or larger, 3/16 in. thick minimum) with pre-drilled holes for the slab anchors and a cable loop, D-ring, or bolt pattern that connects to the grill cart frame or a security cable. Through-bolting (running an all-thread rod completely through a slab and using a nut and washer on the underside) is the strongest option but requires access to the slab underside, which rules it out for most poured slabs unless you have a crawl space beneath. For most patio installations, a surface-mounted anchor plate with four expansion or epoxy anchors at the corners is both practical and more than adequate.
| Method | Best Surface | Removable | Relative Holding Strength | Approx. Cost (hardware only) | Special Requirements |
|---|---|---|---|---|---|
| Expansion anchor (wedge) | Solid concrete slab | With effort (leaves hole) | High | $5–$15 per anchor | Uncracked concrete, min. 3.5 in. slab thickness |
| Epoxy anchor | Concrete, pavers, cracked slab | No (permanent) | Very High | $25–$60 per cartridge (covers multiple anchors) | Thorough hole cleaning, temperature-appropriate cure time |
| Lag bolt | Wood deck into framing | Yes (with tools) | High (in good wood framing) | $3–$8 per bolt | Must hit joist or structural blocking, not decking only |
| Anchor plate + cable loop | Any (combined with above anchors) | Depends on anchor type | Depends on anchor | $30–$80 for plate | Requires separate anchor fasteners below the plate |
| Through-bolt | Slab with accessible underside | Yes | Highest | $10–$20 per location | Requires slab underside access |
Step-by-step: anchoring a grill to a concrete slab
Concrete slabs are the most common patio surface and give you the widest range of anchoring options. The three methods below cover non-permanent strapping to a fixed point, expansion anchor installation, and epoxy anchor installation. Each has its own tool list and safety notes. Pick the one that matches your situation from the decision table earlier.
Method 1: Non-permanent strap method
This method takes about 30 minutes and requires no drilling into the slab if you use an existing wall-mounted anchor point or install a surface-mount eye bolt into a wall instead.
Tools needed: ratchet straps (2x, 1.5 in. wide minimum, UV-rated), wheel chocks (1 pair per wheel), security cable with lock (optional for anti-theft), existing wall anchor or surface-mount eye bolt.
- Position the grill in its intended location. Confirm clearance on all sides (minimum 10 ft from combustible walls and structures per NFPA guidance; check your grill's manual for its specific clearance spec).
- Place wheel chocks snugly in front of and behind both rear wheels. Push them firmly against the tire/wheel so there is no gap.
- Run the ratchet strap from the grill's lower cart frame (wrap around a sturdy frame member, not a burner control panel or handle) to the fixed anchor point at the wall or post. The strap should be as horizontal as possible and free of kinks.
- Ratchet the strap until it is firm but not forcing the grill to lean or compress the frame. You want resistance to movement, not deformation.
- If adding a security cable: thread the vinyl-coated cable through the cart frame near the axle or through a lower structural crossbar, loop it back on itself, and lock with the padlock. Attach the other end to the wall anchor or a separate cable anchor in the slab.
- Check the installation by gently pushing the grill in multiple directions. There should be minimal movement. Recheck after the first week and after any significant weather event.
Method 2: Expansion anchor method (permanent)
This is the most common permanent method for a solid, uncracked concrete slab at least 3.5 inches thick. Budget 1 to 2 hours including layout, drilling, and installation. Difficulty: moderate.
Tools needed: rotary hammer drill with SDS chuck, SDS masonry bit sized to your anchor diameter (typically 3/8 in.), safety glasses, dust mask, torque wrench, socket set, tape measure, pencil, stud/rebar finder (important: scan for rebar and post-tension cables before drilling).
Materials needed: steel anchor plate (with pre-drilled bolt pattern matching your anchor spacing), 3/8 in. wedge expansion anchors (Simpson Strong-Bolt 2 or equivalent with ICC-ES listing), matching nuts and washers, security cable with D-ring or lock loop (if anti-theft is needed), padlock.
- Position the grill and mark its intended footprint on the slab with chalk or a pencil. Set the grill aside. Place the anchor plate in the correct position within that footprint and mark hole locations through the plate's pre-drilled holes.
- Before drilling: scan each marked hole location with a rebar/post-tension detector. Post-tension slabs have cables running in a grid typically 3 to 5 ft apart; the slab edge usually has a PT warning stamp. If you get a strong reading at any location, shift your hole location at least 3 inches and re-scan.
- Drill each hole to the depth specified for your anchor's embedment (for a 3/8 in. x 2.75 in. Strong-Bolt 2 in 3,000+ psi concrete, minimum embedment is 2.25 in.; drill slightly deeper for the dust plug). Set the drill to hammer mode. Keep the drill perpendicular to the slab surface.
- Blow dust out of each hole with compressed air or a hand pump. Wear eye protection: concrete dust exits fast.
- Drop the expansion anchor into the hole through the anchor plate hole. The anchor's threaded stud should protrude above the plate enough to fit a washer and nut.
- Add the washer and thread the nut down by hand until snug, then use the torque wrench to tighten to the manufacturer's published torque specification (typically 25 ft-lbs for 3/8 in. Simpson Strong-Bolt 2 in 3,000 psi concrete — confirm with the specific product's installation instructions). Do not exceed the published torque value.
- Repeat for all anchor positions. Re-position the grill over the anchor plate. If the plate has a cable loop or D-ring, route the security cable through the cart frame and lock it.
- Give the fully installed setup a firm push test in all directions. Log the installation date and plan to inspect anchor nuts annually for corrosion or loosening.
Method 3: Epoxy anchor method (permanent)
Use this method if your slab is cracked, thinner than 3.5 inches, or made of concrete pavers. It's also the right choice if you need maximum holding strength in any concrete condition. Budget 2 to 3 hours including cure time at 70°F (longer in cold weather).
Tools needed: rotary hammer drill with SDS chuck, SDS masonry bit (sized per epoxy manufacturer's spec for your rod diameter), wire brush and nylon cleaning brush, compressed air or hand pump, caulk gun compatible with the epoxy cartridge size, safety glasses, dust mask, gloves (epoxy is a skin sensitizer), torque wrench, tape measure, pencil, stud/rebar finder.
Materials needed: epoxy anchor cartridge system with mixing nozzle (ITW Red Head Epcon G5, Hilti HIT-RE 500 V4, or equivalent with ICC-ES ESR documentation), all-thread anchor rod in appropriate diameter and length (hot-dip galvanized or 304 stainless for outdoor use), anchor plate, nuts and washers, security cable and padlock if needed.
- Position, mark, and scan hole locations exactly as in Steps 1 and 2 of the expansion anchor method above. Epoxy anchors are less forgiving of hitting rebar because the adhesive bond is the only holding mechanism and a partial hole is useless.
- Drill each hole to the diameter and depth specified in your epoxy system's ICC-ES ESR or product installation instructions. The hole diameter for epoxy anchors is typically slightly larger than the rod diameter (e.g., a 3/8 in. rod typically requires a 1/2 in. hole) to allow adhesive to flow around the rod. Check your specific product's table.
- Clean each hole thoroughly: three full cycles of brush, blow (compressed air), brush. This is not optional. Hilti's HIT-RE 500 V4 installation instructions specify a minimum of three brush-and-blow cycles. Uncleaned holes can reduce bond strength by 50% or more.
- Check the ambient temperature and concrete temperature against the epoxy product's working range. Most systems require a minimum concrete temperature of 14°F and an ambient temperature above 32°F, but working time and cure time vary widely. At 40°F, Hilti HIT-RE 500 V4 cure time to full working load is approximately 5 hours; at 68°F it's approximately 1 hour. Never load an epoxy anchor before the published gel/cure time.
- Attach the mixing nozzle to the cartridge and dispense the first 0.5 in. of mixed adhesive onto a waste surface to ensure the two components are fully combined (it should be a uniform color with no streaks). Discard that purge material.
- Insert the nozzle into the bottom of the hole and inject adhesive while slowly withdrawing the nozzle. Fill the hole from the bottom up to avoid air pockets. Fill approximately 2/3 of the hole depth with adhesive.
- Insert the anchor rod with a slow, rotating motion until it reaches the target embedment depth. A small amount of adhesive should squeeze out at the top of the hole confirming full fill. Wipe excess immediately (cured epoxy is very difficult to remove).
- Use a level to confirm the rod is plumb. Do not move or load the rod until the full cure time has elapsed. Mark the rod with tape and a note so no one accidentally leans against it.
- After full cure: place the anchor plate over the rod(s), add washers and nuts, and torque to the manufacturer's specified installation torque. Route and lock security cable if used.
- Inspect the installation after the first season. Look for adhesive discoloration, corrosion on the rod, and any cracking in the concrete around the anchor. Epoxy anchors in good condition can last decades, but outdoor UV and freeze-thaw cycles should be checked annually.
Anti-theft solutions and aesthetic finishing
Anchoring the grill physically is the foundation, but a few extra steps close the gap on theft and make the installation look intentional rather than jury-rigged. A hardened-steel, boron-shackle padlock rated for outdoor exposure (look for a weather-resistant or marine-grade rating) on your security cable is the single most effective deterrent upgrade, since it defeats casual bolt-cutter attempts. Security cables in 3/8 in. vinyl-coated steel are the right balance of flexibility and strength for this application. For the anchor hardware itself, stainless hex-head bolts and a painted or powder-coated anchor plate blend into a concrete slab much better than raw zinc hardware. Anchor cover caps (low-profile plastic or rubber caps that press over exposed bolt heads) clean up the look and reduce corrosion from standing water.
If aesthetics matter on your screened or covered patio, you might also consider how the grill is visually integrated into the space. Grill carts with side storage cabinets or tile-topped carts effectively hide the anchor hardware within the cart footprint. Some homeowners build a low screen or slatted wood panel around the grill station to conceal the anchor plate and cable, while still maintaining the required clearances and access for inspection. For step-by-step ideas on concealing a grill while preserving ventilation and access, see our guide on how to hide grill on patio. If you're thinking about hiding your grill as part of a broader patio design, that's a separate project worth planning at the same time as your anchoring work. If you're also managing visible equipment, see our guide on how to hide air conditioner on patio for tips on screening and placement that complement grill concealment.
Maintenance, inspection schedule, and troubleshooting
An anchored grill isn't a set-it-and-forget-it installation. Concrete anchors can loosen from freeze-thaw cycling, thermal expansion from the grill's heat, and vibration from regular use. Straps and cables degrade from UV exposure and moisture. Here's a realistic inspection schedule.
| Inspection Task | Frequency | What to Look For | Action if Problem Found |
|---|---|---|---|
| Check anchor nut torque | Annually (spring) | Nuts loose or spinning, visible gap between plate and slab | Re-torque to spec; if anchor spins freely, it may have failed and needs replacement |
| Inspect anchor rods/bolts for corrosion | Annually | Surface rust, pitting, white powder (galvanic corrosion) | Light rust: wire brush and apply cold zinc spray; heavy pitting: replace anchor |
| Check strap or cable condition | Every 6 months | UV cracking, fraying, kinking, rust on cable strands | Replace strap or cable; do not splice |
| Inspect concrete around anchor holes | Annually | Cracking radiating from anchor hole (spider cracks) | Consult a concrete professional; cracked concrete may require epoxy repair before re-anchoring |
| Check padlock and cable loops | Every 6 months | Corrosion on shackle, stiff mechanism, cable fraying at loop | Lubricate with dry graphite lubricant; replace if mechanism is stiff or shackle is pitted |
| Verify clearances haven't changed | Annually or after any patio modification | New structures, furniture, or plantings within 10 ft of grill | Remove obstructions or re-evaluate grill placement before the grilling season |
Common troubleshooting issues
- Expansion anchor spins when you try to torque it: the hole is too large, the concrete has crumbled around it, or the anchor was over-driven. Remove it, fill the hole with hydraulic cement or epoxy repair compound, cure fully, and re-drill. Switch to an epoxy anchor for the new installation.
- Epoxy anchor rod is slightly off-plumb after setting: if adhesive has not yet reached gel time, gently correct alignment and hold in place. If gel time has passed, do not force it — a slightly off-plumb rod will still hold adequately for this application.
- Anchor plate rocks on uneven slab surface: pack the gap with stainless steel shim stock before tightening, or use a non-shrink grout bed under the plate for a flat bearing surface.
- Security cable interferes with grill cart wheel movement: reroute the cable through a lower cart crossbar rather than the axle, using a short extension loop if necessary.
- Ratchet strap loosens over time (common in wide temperature swings): choose straps with a locking ratchet mechanism rather than a friction buckle, and re-check tension at the start of every grilling season.
Time and cost estimates
| Method | Time to Install | Approximate Material Cost | Difficulty Level |
|---|---|---|---|
| Non-permanent strap + chocks | 20–30 minutes | $25–$60 | Beginner |
| Portable anchor plate | 15–20 minutes | $40–$100 | Beginner |
| Expansion anchor (concrete slab) | 1–2 hours | $60–$150 (plate + anchors + tools if needed) | Intermediate |
| Epoxy anchor (concrete slab) | 2–3 hours + cure time | $80–$180 (plate + epoxy system + rods) | Intermediate |
| Lag bolt (wood deck) | 1–2 hours | $50–$120 (plate + bolts) | Intermediate |
| Full anti-theft setup (cable + lock + plate) | 2–3 hours total | $120–$250 depending on anchor method | Intermediate |
Related patio projects to consider at the same time
Anchoring your grill often comes up as part of a broader patio improvement push, and it's worth planning related upgrades together to avoid doing the same prep work twice. For tips on installing outdoor entertainment like a weatherproof TV, see our guide on how to watch TV outside on patio. If you're drilling into your slab or deck for grill anchors, that's also a good time to route and secure any extension cords for pellet grill controllers, rotisserie motors, or outdoor speakers, since you've already got the tools out and know where the anchor points are. For tips on discreetly running and concealing power, see how to hide extension cords on patio. If your patio has a screen enclosure or covered roof, you're likely already thinking about how to manage what's visible from the yard, grill placement and concealment often go hand-in-hand with decisions about how to arrange the whole outdoor room, from managing condensate drain covers in the slab to figuring out where the AC unit lives relative to the grill zone. For simple, practical ideas on hiding or blending drain covers, see our guide on how to disguise drain covers in patio. If you need ideas for concealing an AC unit on a patio, see our guide on how to hide an AC unit on a patio.
Pellet grill owners in particular should think through their full electrical setup before committing to an anchor location, since the controller cord needs a protected, weather-rated outdoor outlet nearby. If you're mounting a TV in the covered patio space near the grill station, the outlet placement and cord management all connect. Getting all of these elements planned before you drill your first anchor hole saves you from moving things around later.
FAQ
What primary model codes and national standards should I consult to ensure grill anchoring and installations are safe and code‑compliant?
Consult NFPA 58 (Liquefied Petroleum Gas Code) for propane storage and cylinder/enclosure rules; NFPA 54 / ANSI Z223.1 (National Fuel Gas Code) and the International Fuel Gas Code (IFGC) for fuel‑gas piping and appliance hookup practices; and the International Fire Code (IFC) for adopted fire‑safety requirements. These model codes set clearance, cylinder, and piping expectations many jurisdictions adopt or reference.
Which electrical codes and product standards are required when planning power for grills, accessories or patio outlets?
Use NFPA 70 (National Electrical Code, NEC) for outdoor receptacle, GFCI, and in‑use cover requirements (see NEC 406.9 and GFCI sections). Specify UL/ETL‑listed weather‑resistant receptacles and UL‑listed extra‑duty ‘in‑use’ covers to meet code and listing requirements.
What consumer‑safety and public guidance should be included for clearance, leak‑checks and general grilling hazards?
Include CPSC grilling safety guidance and fact sheets (e.g., 'Summer Grilling Safety') plus NFPA fire statistics and public‑education materials. These provide recommended clearances, common fire causes, leak‑check procedures, and consumer safety tips that reinforce code guidance.
How important are manufacturer owner and installation manuals for writing model‑specific anchoring advice?
They are essential. Manufacturer manuals (Weber, Traeger, Napoleon, Broil King, etc.) give model‑specific clearances, prohibited installations (e.g., under overhangs), warranty warnings, and any proprietary anchor/bolt‑down accessory instructions. Always cite the exact model manual when recommending anchoring or covered‑patio use.
Which product certification and evaluation reports are needed when specifying anchors, adhesives and mechanical fasteners?
Require ICC‑ES Evaluation Reports (ESRs) and manufacturer technical data for adhesive anchors, epoxy systems and mechanical anchors to verify rated design loads, cracked‑concrete approvals, embedment depths and allowable loads. Use ICC‑ES, UL, ETL and manufacturer MPIIs as procurement and compliance references.
What technical manufacturer resources are authoritative for chemical/epoxy anchoring procedures and curing?
Use injectable epoxy/adhesive technical data and installation guides from manufacturers like Hilti (HIT‑RE series), ITW Red Head and others. These list hole‑cleaning, temperature limits, curing times and rod compatibility required for a safe, code‑defensible installation.
Next Articles
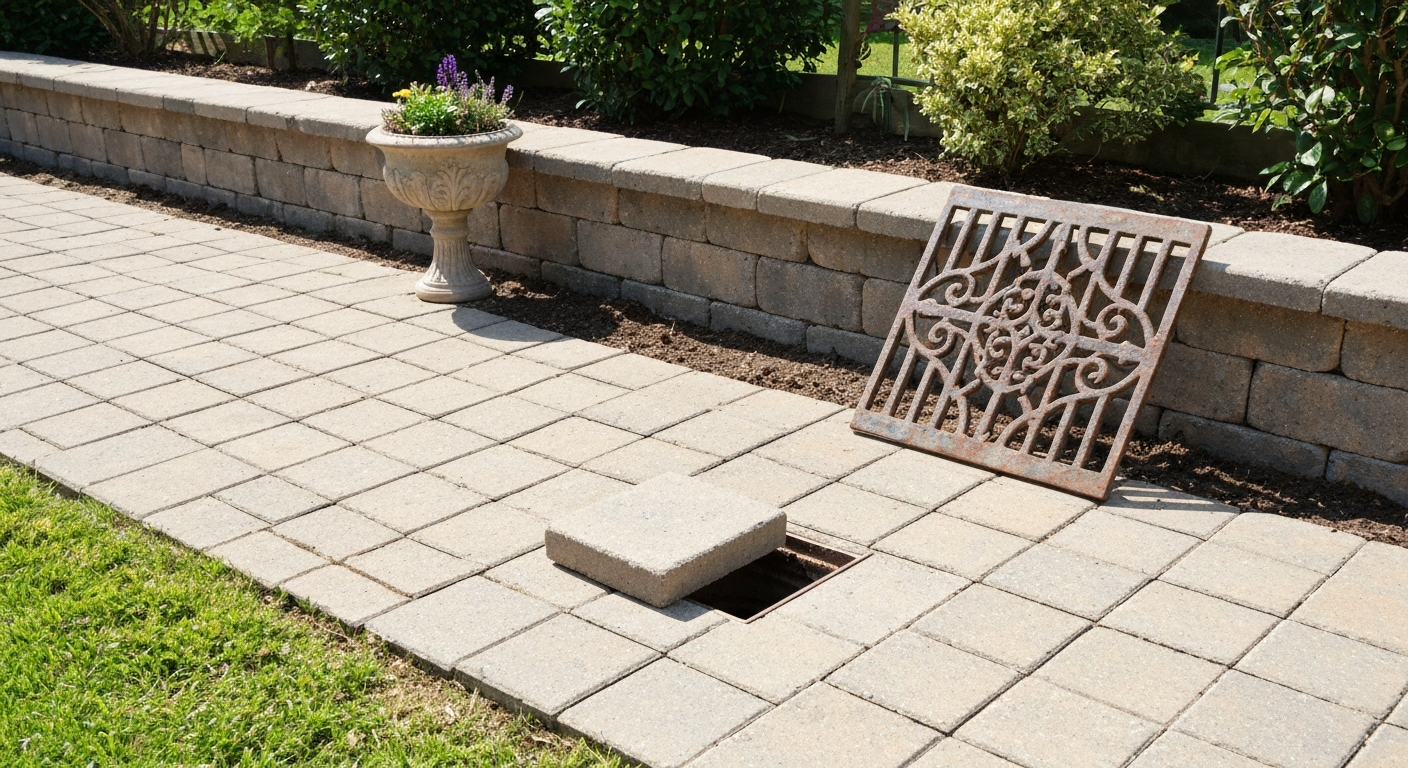
How to Disguise Drain Covers in Patio: Safe, Code‑Smart Tips
Hide patio drain covers without blocking flow: compliant, removable solutions, step-by-step installs, maintenance tips.
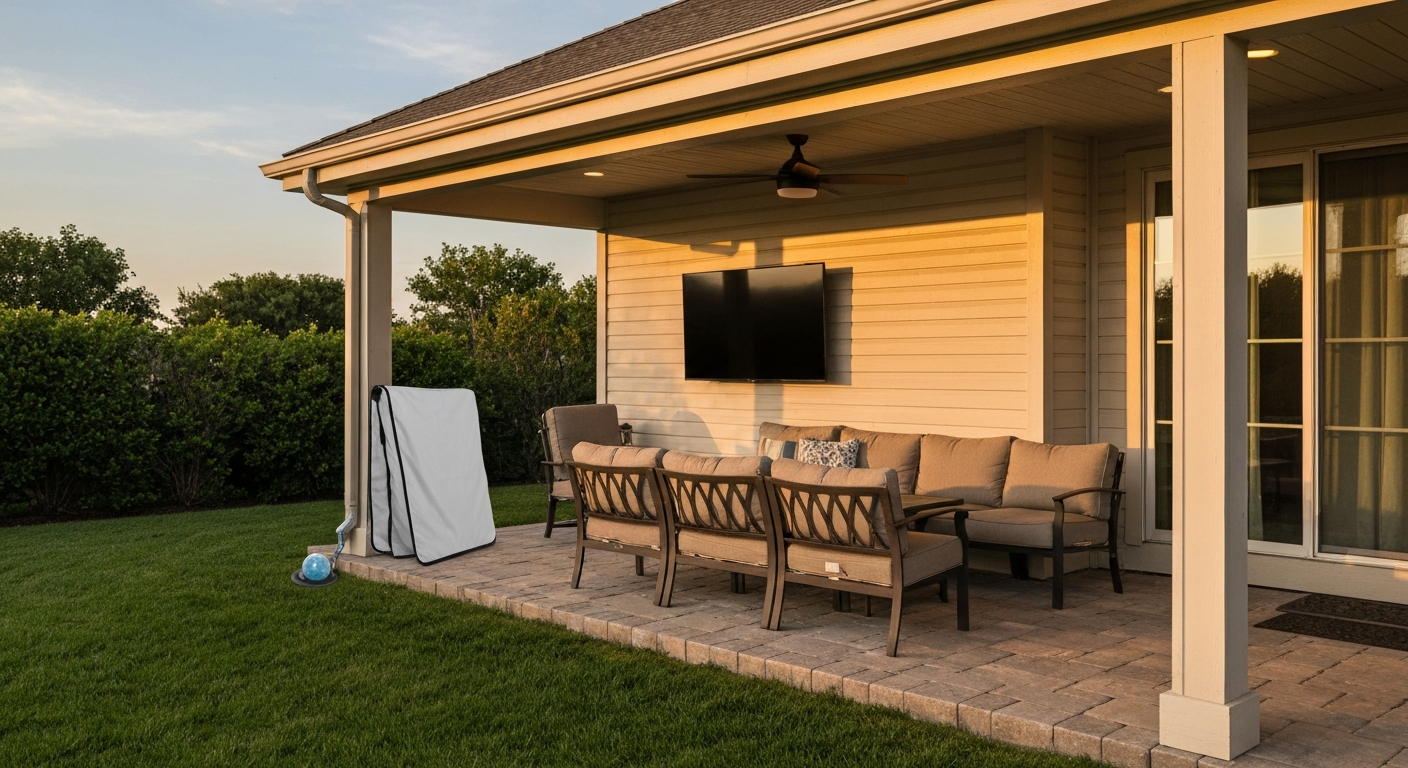
Can You Put a Regular TV on a Covered Patio? Practical Guide
Can you put a regular TV on a covered patio? Practical verdict, safety risks, wiring, weatherproofing, and checklist.
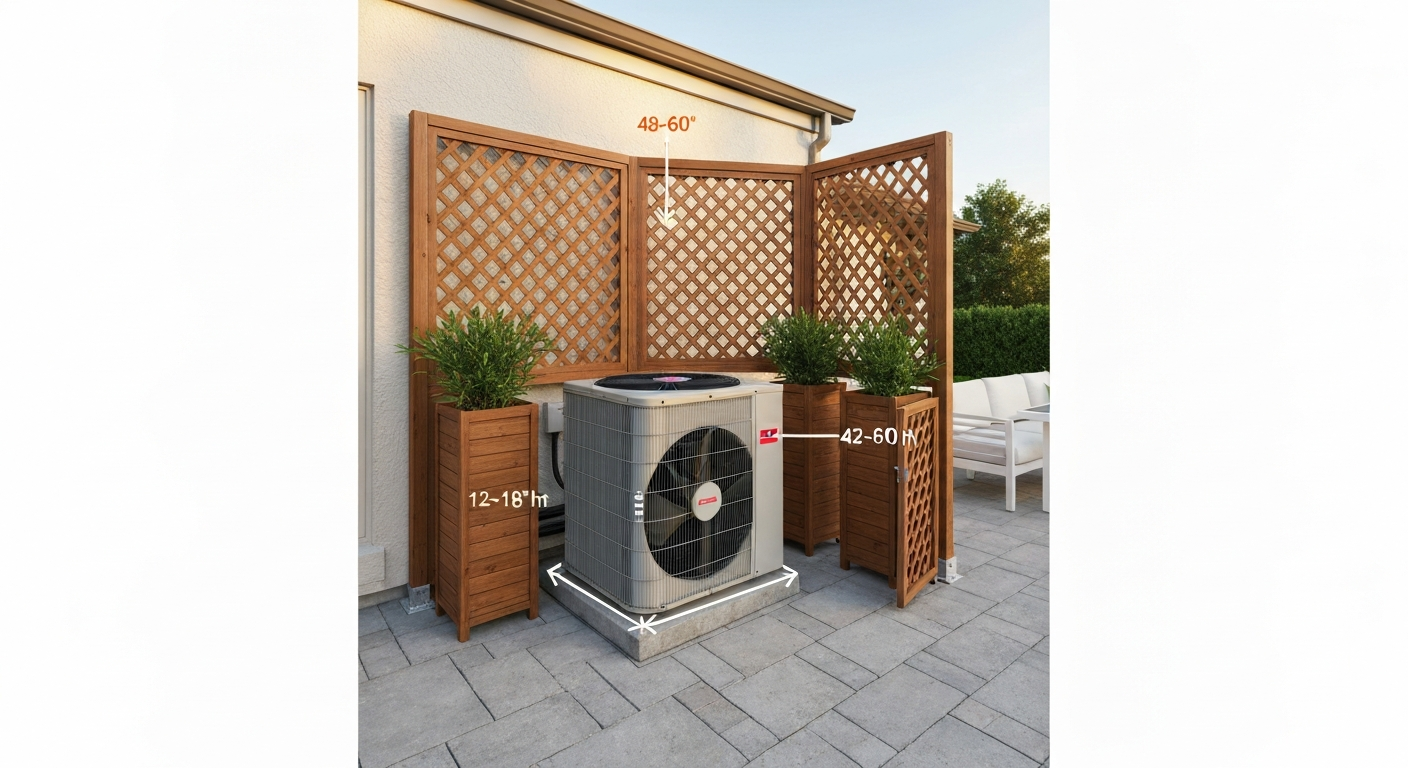
How to Hide Air Conditioner on Patio: DIY Screens, Enclosures
Hide an outdoor AC on your patio: DIY screens, lattice, plantings, cabinets, clearance rules and step-by-step plans.