
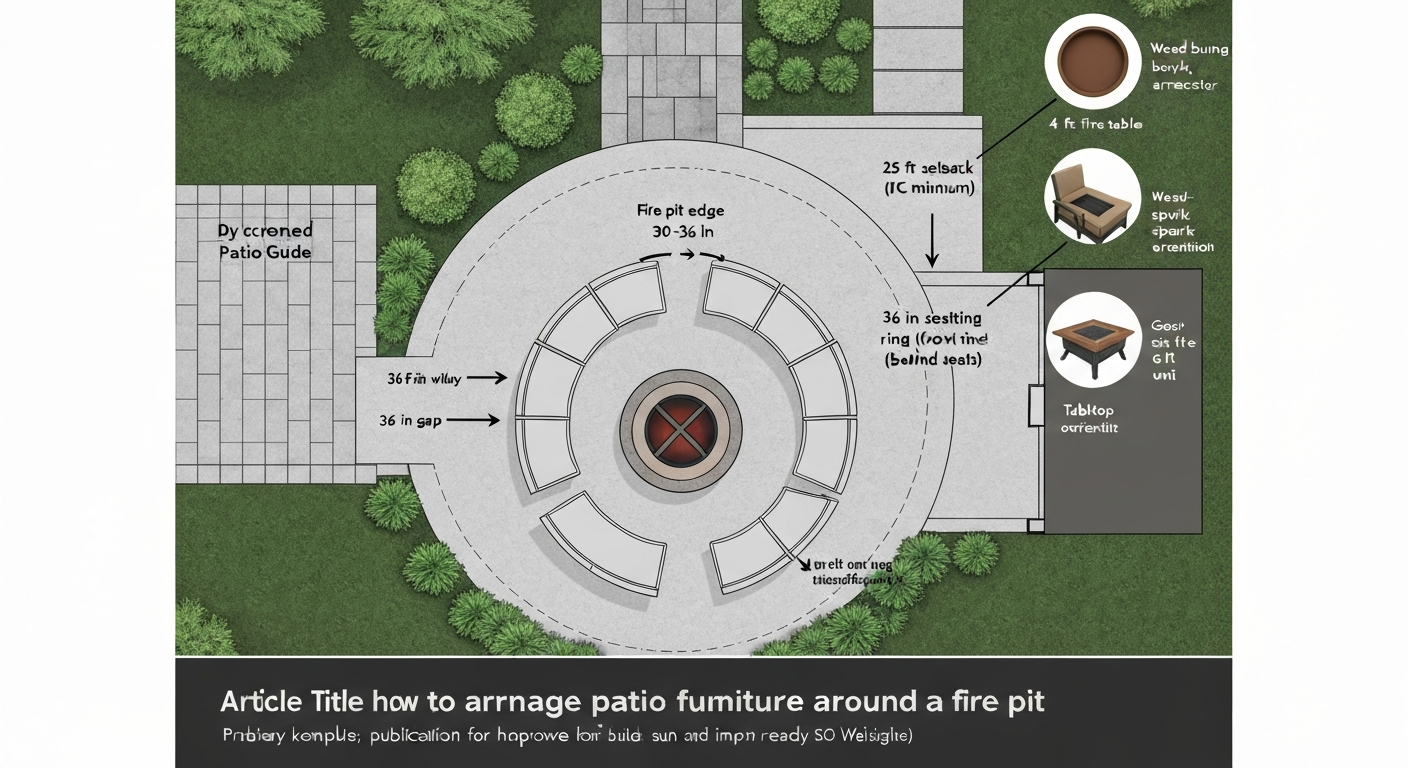
Place seating 36 inches from the edge of your fire pit as a starting minimum, keep a 36-inch walkway behind every chair, and make sure the pit itself sits at least 25 feet from any structure or combustible material per the International Fire Code. Those three numbers are the foundation of every safe, comfortable fire-pit layout, and once you have them locked in, the rest of the arrangement falls into place pretty naturally.
How to Arrange Patio Furniture Around a Fire Pit: Layout Guide

Felix Brennan
11 Aug 2026
What this guide covers and who it's for
Whether you've got a poured-concrete patio, a wood deck, a screened porch, or a poolside pad, the basic challenge is the same: you want people to gather around the fire without crowding it, without blocking the path to get there, and without turning the whole setup into a hazard. This guide walks through every step of that process: fire-pit types and how they change your layout math, exact safe distances by code, a simple measuring and mockup method, seating options and spacing, and three DIY seating builds you can actually finish in a weekend. If you've already wrestled with a small deck or a compact patio, the clearance thinking here is very similar, just with heat and flame added to the equation.
Fire pit types and how they change your layout
The type of fire pit you choose determines everything from the minimum clearance ring around it to whether you need a permit before you even move a chair. Here's how each type behaves differently in a layout context.
Wood-burning pits and bowls
These produce the most heat, the most sparks, and the most smoke. The IFC classifies a recreational fire as no larger than 3 feet in diameter and 2 feet in height. Anything bigger is technically a bonfire with a 50-foot setback from structures. For a standard wood-burning bowl, the 25-foot setback from structures and combustibles is your minimum, and you'll want a spark arrester with mesh openings no larger than 1/2 inch (IWUIC language) to catch embers. On a wood or composite deck, I'd honestly avoid an open wood-burning pit entirely unless you're using a tested, manufacturer-rated heat shield with an air gap underneath the pit.
Gas fire tables and bowls
Propane and natural gas units run cleaner, produce less radiant heat at the surface, and give you a flame you can dial up or down. That said, they still need real clearances. A typical commercial fire table installation guide specifies 4 feet of side clearance and 6 feet of overhead clearance. LP and natural gas installations are governed by NFPA 54/ANSI Z223.1 and NFPA 58, which means the appliance must be listed and installed per the manufacturer's manual, and any hard-plumbed gas line almost certainly requires a permit. Consult NFPA 54 / ANSI Z223. NFPA 211, Standard for Chimneys, Fireplaces, Vents (2024) also requires fireplaces and chimneys to be listed and installed per manufacturer instructions and provides clearance procedures for combustible materials, including options to reduce clearances using tested heat shields blank" rel="noopener noreferrer">NFPA 211 — Standard for Chimneys, Fireplaces, Vents (2024). 1, National Fuel Gas Code (2024) for the baseline requirements on appliance listing, piping, clearances, and propane cylinder/tank separation distances that govern natural gas and LP‑gas fire‑feature installations blank" rel="noopener noreferrer">NFPA 54 / ANSI Z223.1 — National Fuel Gas Code (2024). Portable propane bowls are treated differently by most jurisdictions, but always call your local building or fire-prevention office to confirm before you connect anything.
Tabletop fire bowls
These are small, gel-fuel or propane units that sit on a table surface. The flame height is low, so the heat zone is compact, but the surface the unit sits on still needs to be non-combustible or rated for the appliance. Clearance requirements are lower than full-size pits, but you should still leave 18 to 24 inches of clearance between the flame and any adjacent cushion or fabric. These work especially well in tight spaces or screened porches where a full wood-burning pit isn't an option.
Built-in fire pits
A masonry or hardscape built-in is a permanent fixture, which means permits are nearly always required, especially if it involves a gas line or is attached to a structure. The surround material matters too: dense, low-porosity stone or pavers on a drained base handle thermal cycling far better than porous limestone or wet concrete, which can spall or crack under rapid heating. Refractory firebrick on the interior and natural stone or high-quality pavers on the surrounding patio is the combination most hardscape professionals recommend.
| Fire Pit Type | Typical Setback from Structures | Surface Requirement | Permit Likely? | Best For |
|---|---|---|---|---|
| Wood-burning bowl | 25 ft (IFC minimum) | Non-combustible; heat shield on decks | Sometimes | Concrete patios, gravel areas |
| Gas fire table (portable propane) | 4 ft sides, 6 ft overhead (check manual) | Non-combustible or rated surface | Usually not (portable) | Decks, patios, screened porches |
| Gas fire table (hard-plumbed) | Per manufacturer + local code | Non-combustible | Yes (gas line) | Permanent outdoor rooms |
| Tabletop gel/propane | 18–24 in. from combustibles | Non-combustible table surface | Rarely | Small patios, screened porches, poolside |
| Built-in masonry | 25 ft (IFC) or local code | Refractory interior, paver surround | Yes | Large patios, permanent installs |
Core layout rules and safe distances
There are two separate clearance zones you need to manage: the code-required distance between the pit and any structure, and the comfort-and-safety distance between the pit and your seating. They operate independently, and you need both.
Structure setbacks (code minimums)
The IFC's 25-foot minimum from structures and combustible materials is the baseline across most U.S. jurisdictions. Some municipalities tighten this, and WUI (Wildland-Urban Interface) zones often add additional ember-control requirements. The 25-foot rule applies to the edge of the fire, not the edge of the pit structure. Always confirm your local amendment to the IFC because the number can change, and getting it wrong after a built-in is poured is an expensive fix.
Seating clearances (comfort and heat safety)
The practitioner standard used by landscape architects is 36 inches from the outer edge of the fire pit to the front of the seat. At 24 inches you're close enough to feel uncomfortable on a warm night; at 48 inches you're starting to lose the social intimacy that makes a fire pit worth having. I use 36 inches as my default and move chairs back to 42 to 48 inches when the pit is a high-BTU gas table or when I know the space tends to be windy. Behind each seat, leave at least 36 inches of circulation space so people can walk behind without squeezing.
Overall diameter planning numbers
Landscape professionals use these overall circle diameters as quick planning benchmarks: a small seating circle for 2 to 4 people around a 30 to 36-inch pit runs about 12 to 14 feet in total diameter; a medium setup for 4 to 6 people around a 36 to 48-inch pit lands at 15 to 20 feet; a large social layout for 6 or more people exceeds 20 feet. If your patio is smaller than these numbers, a tabletop unit or a compact gas bowl is almost always the better call. For step-by-step tips on fitting seating and selecting compact furniture, see how to furnish a small patio.
| Layout Size | Pit Diameter | Seating Ring Diameter | Overall Space Needed | People Seated |
|---|---|---|---|---|
| Small | 30–36 in. | ~9–10 ft | 12–14 ft | 2–4 |
| Medium | 36–48 in. | ~12–14 ft | 15–20 ft | 4–6 |
| Large | 48+ in. | 15+ ft | 20+ ft | 6+ |
Circulation, sightlines, and traffic flow
A fire pit arrangement fails most often not because of bad furniture choices, but because nobody thought through how people actually move around the space. Here's how to plan it properly before you drag anything outside.
Entry points and primary walkways
Identify where people enter the patio (door from the house, gate from the yard, steps from the pool deck) and draw imaginary lines from each entry point toward the fire pit. Those lines are your primary circulation paths. No seating should block them. A primary walkway needs at least 36 inches of clear width; 48 inches is more comfortable if multiple people use it simultaneously, like a path between the door and the pit.
Secondary circulation behind seating
The space directly behind your chairs is secondary circulation. This is where people squeeze past to grab a drink or switch seats. Thirty-six inches here is the minimum for comfort. If you're tight on space, pull the chairs slightly inward toward the fire (staying at or above the 36-inch comfort ring) and compress the back walkway to no less than 24 inches for a casual setting, though 36 inches is much better.
Sightlines and conversation angles
Ideally, every seat faces the center of the fire pit within a roughly 45-degree arc of direct eye contact with the person across. That happens naturally in a circular or semicircular layout. A straight-line sofa arrangement forces people at the ends to crane their necks. If you're using a sectional, angle the end pieces inward about 30 to 45 degrees so the whole group can see each other without turning sideways. This is especially relevant for poolside and large patio setups where you might be tempted to run everything parallel to a wall.
Special considerations for screened porches and decks
A screened porch typically rules out an open wood-burning fire pit entirely, both for ember safety and because the IFC setback to a structure makes it geometrically impossible on most porches. A listed, portable propane or gel tabletop unit in a well-ventilated screened porch is a reasonable workaround; just confirm ventilation is sufficient for the BTU output of the unit and keep combustible screening material well outside the clearance zone. On a wood or composite deck, use a tested heat-shield pad, an elevated stand, and follow the manufacturer manual precisely. Solo Stove and Outland Living, for example, publish explicit deck-use guidance including required stand heights and surface-protection requirements.
How to measure your space and create a mockup
This is the step most people skip, and it's the one that prevents the most expensive mistakes. Spending 30 minutes measuring and mocking up before you buy a single piece of furniture will save you from the classic scenario of getting everything delivered only to realize the sectional blocks the door.
Step 1: Measure the patio and mark fixed elements
Measure the full length and width of your patio or deck in feet and inches. Note the location of every door, step, gate, gas line stub-out, and overhead obstruction (roof overhang, pergola beam, tree canopy). Write these down on a rough sketch; don't trust your memory. Mark the intended fire pit location and draw a circle representing the pit's outer edge. From that circle, draw a second circle 36 inches larger in radius: that's your minimum seating ring. From the seating ring, draw a third circle 36 inches larger in radius: that's your minimum circulation ring. Anything outside the circulation ring is where furniture backs and walkway edges can live.
Step 2: Create a scale drawing
On graph paper or a free tool like RoomSketcher or even a piece of 1/4-inch graph paper, draw your patio at 1 inch equals 2 feet (or 1 inch equals 1 foot for smaller spaces). Draw the pit, the seating ring, and the circulation ring to scale. Cut out scale rectangles representing each piece of furniture from separate paper: typical patio chair footprint is about 24 by 24 inches, a loveseat is about 24 by 52 inches, a three-seat sofa is about 26 by 72 inches. Slide the cutouts around the drawing until entry paths are clear, sightlines work, and nothing breaks the clearance rings.
Step 3: Rope or cardboard mockup on the actual patio
Once the scale drawing looks good, take it outside and recreate it full size. Use a length of rope or a garden hose to outline the seating circle on the patio surface. Use cardboard boxes, coolers, or folded lawn chairs to stand in for each piece of furniture. Walk through every entry point, simulate reaching past a seated person, walk behind the seating row. This takes about 20 minutes and reveals problems that even a perfect scale drawing misses, like a tight corner around an HVAC unit or an overhang that's lower than you remembered.
Step 4: Confirm code clearances before finalizing
With the mockup in place, measure from the center of the proposed pit location to the nearest wall, fence, eave, or overhead structure. Confirm you're meeting the 25-foot setback (or local equivalent) from structures. If you're using a gas unit, lay a tape from the pit to every combustible surface within 6 feet overhead and 4 feet to the sides and confirm clearance against the manufacturer's manual. If anything is borderline, move the pit outward, not the furniture inward.
Printable measurement templates and layout diagrams
Print the following template and take it outside with you. It covers the three common layout sizes and gives you a ready-made checklist to fill in with your actual measurements.
Fire pit layout measurement template
| Measurement Point | Code/Design Minimum | Your Measurement | Pass/Fail |
|---|---|---|---|
| Pit edge to nearest structure/wall | 25 ft (IFC) — verify local code | _____ ft | |
| Pit edge to front of nearest seat | 36 in. (comfort minimum) | _____ in. | |
| Back of seat to nearest wall/object | 36 in. (circulation minimum) | _____ in. | |
| Primary walkway clear width | 36 in. minimum / 48 in. preferred | _____ in. | |
| Secondary walkway behind seating | 36 in. recommended / 24 in. minimum | _____ in. | |
| Overhead clearance above flame | 6 ft minimum (verify manufacturer manual) | _____ ft | |
| Side clearance from pit (gas units) | 4 ft minimum (verify manufacturer manual) | _____ ft | |
| Overall seating circle diameter | 12–14 ft (small) / 15–20 ft (medium) | _____ ft | |
| Patio total usable width | Measure and note | _____ ft | |
| Patio total usable length | Measure and note | _____ ft |
Layout diagram: small patio (12–14 ft circle)
Center: fire pit (30–36 in. diameter). First ring at 36 inches out from pit edge: front of seating. Four chairs or a loveseat plus two chairs arranged in a circle or slight arc. Second ring at 36 inches behind seat backs: circulation path. Total footprint: approximately 12 to 14 feet across. Entry path: leave one gap in the seating ring of at least 36 inches wide aligned with the main door or gate.
Layout diagram: medium patio (15–20 ft circle)
Center: fire pit (36–48 in. diameter). First ring at 36 inches out: seating (4 to 6 pieces, a sectional on one side with two or three individual chairs on the opposite side works well). Second ring at 36 inches behind seat backs: circulation. Optional: a side table between each pair of chairs within the seating ring. Total footprint: 15 to 20 feet across. Consider two entry gaps, one on each side of the sectional, to give people multiple ways in.
Layout diagram: large patio or poolside (20+ ft)
Center: fire pit (48 in. or larger). First ring at 36 to 48 inches out: primary seating (sectional plus multiple lounge chairs). Second ring at 36 inches: primary circulation. Optional third ring: secondary seating or occasional chairs at a greater distance for overflow guests. For ideas on arranging furniture and selecting pieces for roomy layouts, see our guide on how to furnish a large patio. On a poolside layout, orient the entire arrangement so the seating backs face away from the pool edge, keeping the pool side open for movement. The fire pit should never be positioned between the pool and the house entry. For detailed guidance on arranging patio furniture specifically around a pool, see how to arrange patio furniture around a pool.
Seating choices and how to position them
The type of seating you choose affects both how close you sit to the fire and how well the layout handles traffic. Here's a practical breakdown of the main options and how to position each one.
Swivel chairs
Swivel patio chairs are one of the best choices for fire-pit seating because people naturally rotate to talk to each other without moving the chair. Position them with the swivel center at exactly 36 inches from the pit edge. Because the seat swings outward, make sure you've left enough room behind each chair for the full arc of rotation: typically 24 to 30 inches behind the back of the chair at its widest swing point.
Fixed lounge chairs and Adirondacks
These are comfortable but they lock you into one position. Angle them inward at about 15 to 30 degrees toward the fire pit center so seated guests naturally face the fire and each other. Adirondacks sit low to the ground (typical seat height: 14 to 17 inches), which puts your face closer to the fire than a standard-height chair; keep them at the outer edge of the 36-inch minimum, leaning toward 42 inches for comfort on warm nights.
Sofas and sectionals
A sectional or sofa works best on one side of the pit rather than wrapping all the way around it. Wrap-around sectionals in a full U-shape are tempting but they bottle up one entry point and make it hard for people in the middle to get out. Position the sofa so its long axis is tangent to the seating ring, not parallel to the pit face. Angle the end pieces inward 30 to 45 degrees. Front edge of the sofa cushion should sit 36 inches from the pit edge.
Benches
Built-in or freestanding benches are space-efficient and very budget-friendly in DIY form. Position the front edge of the bench seat at 36 inches from the pit. Leave 12 to 18 inches behind the bench back for people who want to lean. Benches without backs are flexible (people sit facing either direction) but they're less comfortable for long sessions; adding a low back or using a 2×4 back rail improves usability significantly.
Loungers
Loungers belong at the periphery of a fire-pit layout, not in the primary seating ring. They're great for a large-patio or poolside arrangement where you want a relaxation zone slightly removed from the main fire circle. Keep their feet-end nearest the fire and at least 48 to 60 inches from the pit edge, since you're horizontal and your torso ends up much closer to the heat than a seated position implies.
| Seating Type | Front Edge to Pit Edge | Behind-Seat Clearance | Best Layout Position | Notes |
|---|---|---|---|---|
| Swivel chair | 36 in. | 30 in. (for swing arc) | Around the full circle | Allow for swivel arc behind chair |
| Adirondack / fixed lounge | 36–42 in. | 36 in. | Around the circle, angled in | Sit low; add extra distance on warm nights |
| Sofa / sectional | 36 in. (cushion front) | 36 in. | One side; angle ends inward | Avoid full U-wrap; leaves one entry open |
| Bench (no back) | 36 in. | 12–18 in. | Arc around pit | Space-efficient; less comfortable long-term |
| Lounger | 48–60 in. (foot end) | 36 in. | Peripheral / poolside zone | Keep foot-end toward fire, not head-end |
DIY seating builds: bench, sectional frame, and daybed
Building your own seating is genuinely one of the better weekend projects in outdoor DIY. You control the dimensions to fit your exact clearance rings, you use materials that suit your climate, and you spend a fraction of retail. All three plans below use dimensional lumber (2x4s and 2x6s), exterior-grade screws or pocket screws, and standard deck stain or exterior paint. Budget roughly $60 to $120 per bench, $250 to $400 for a sectional frame, and $150 to $250 for a daybed frame, depending on lumber prices in your area. Expect 4 to 8 hours of build time per project for a competent beginner.
Bench plan: fire-pit arc bench
This is a simple, straight bench with a low back that fits naturally in the seating ring. The finished seat height is 18 inches and the back sits 14 inches above the seat, which is comfortable for fire-side sitting. Build two of these and position them in an arc on opposite sides of the pit for a classic, symmetrical look.
| Part | Material | Quantity | Cut Length |
|---|---|---|---|
| Front legs | 2×4 exterior lumber | 2 | 17.5 in. |
| Rear legs | 2×4 exterior lumber | 2 | 31.5 in. |
| Seat supports (side aprons) | 2×4 exterior lumber | 2 | 14 in. |
| Seat boards | 2×6 exterior lumber | 3 | 72 in. |
| Back rail (top) | 2×4 exterior lumber | 1 | 72 in. |
| Back rail (bottom, optional) | 2×4 exterior lumber | 1 | 72 in. |
| Cross braces | 2×4 exterior lumber | 2 | 14 in. |
- Cut all lumber to the lengths in the table above using a miter saw or circular saw.
- Build each leg assembly: screw a front leg and a rear leg to the side apron using 3-inch exterior screws (two screws per joint, pre-drill to prevent splitting). Make two identical leg assemblies.
- Stand both leg assemblies upright and attach the three seat boards across the top using 3-inch exterior screws, spacing the boards evenly with a 1/4-inch gap between each for drainage.
- Attach the top back rail to the top of the rear legs with two screws per end. If you want a more solid back, add the optional lower back rail 6 inches up from the seat surface.
- Attach cross braces horizontally between front and rear legs near the bottom for stability.
- Sand all surfaces to 120 grit, then finish with two coats of exterior deck stain, solid color or semi-transparent, focusing on end grain.
- Position the finished bench with the front edge of the seat at your measured 36-inch seating ring.
Sectional frame plan: L-shaped fire-pit sectional
This is a two-piece L-shaped sectional frame designed to sit on one side of the fire pit with one arm angled inward. The long section seats three and the short section seats two, giving you five seats in one connected unit. Cushions are standard 24×24-inch and 24×48-inch outdoor cushions available at most home-improvement stores.
| Part | Material | Quantity | Cut Length |
|---|---|---|---|
| Long section side frames (outer) | 2×4 exterior lumber | 2 | 72 in. |
| Long section side frames (inner) | 2×4 exterior lumber | 2 | 72 in. |
| Short section side frames | 2×4 exterior lumber | 4 | 48 in. |
| Seat platform cross supports | 2×4 exterior lumber | 8 | 24 in. |
| Seat decking boards | 2×6 exterior lumber | 10 | Cut to fit each section |
| Back-frame uprights | 2×4 exterior lumber | 8 | 18 in. |
| Back-frame top rail | 2×4 exterior lumber | 2 | 72 in. and 48 in. |
| Legs | 4×4 exterior lumber | 6 | 14 in. |
- Build each section as a box frame: assemble two long side pieces connected by cross supports every 16 inches using 3-inch exterior screws. This forms the seat base for each section.
- Attach 4×4 legs to each corner of the seat frame using two 3.5-inch screws per leg, recessed 1.5 inches from the outer edge so the leg is flush with the frame bottom.
- Deck the seat surface with 2×6 boards laid flat with 1/4-inch gaps, screwed down from above with 2.5-inch exterior screws.
- Build the back frame on each section: attach upright 2×4 posts to the rear of the seat frame every 24 inches, then run a 2×4 top rail across the top of all uprights at 18 inches above seat level.
- Add a 2×4 back-support rail halfway up the back uprights (9 inches above seat) for something to lean against.
- Connect the two sections at a 90-degree angle using 3-inch exterior screws through the inner frame faces at the corner join, or use a metal connector bracket for added strength.
- Sand to 120 grit, apply two coats of exterior stain or paint, and install 4-inch outdoor cushions on the seat and back.
Daybed plan: poolside or patio daybed
This is a platform-style daybed sized for a standard twin mattress or large outdoor cushion (38 by 75 inches). It positions well at the periphery of a large fire-pit layout or as a poolside lounger and doubles as overflow seating when guests are over. For step-by-step plans, cut lists, and material recommendations, see our guide on how to build a patio daybed. Finished height is 14 inches with a simple canopy frame option.
| Part | Material | Quantity | Cut Length |
|---|---|---|---|
| Long frame sides | 2×6 exterior lumber | 2 | 75 in. |
| Short frame ends | 2×6 exterior lumber | 2 | 38 in. |
| Center support | 2×4 exterior lumber | 1 | 38 in. |
| Platform decking | 2×6 exterior lumber | 7 | 38 in. |
| Legs | 4×4 exterior lumber | 4 | 12.5 in. |
| Canopy uprights (optional) | 4×4 exterior lumber | 4 | 84 in. |
| Canopy top rails (optional) | 2×4 exterior lumber | 2 | 75 in. and 2 at 38 in. |
- Assemble the outer box frame: screw the two long sides and two short ends together at each corner using two 3.5-inch exterior screws per joint, pre-drilled.
- Install the center support across the middle of the frame (at the 37.5-inch midpoint) to prevent sagging.
- Attach 4×4 legs to each inside corner of the frame, flush with the bottom edge, using 3.5-inch exterior screws and metal angle brackets for rigidity.
- Lay 2×6 platform boards across the frame from end to end, evenly spaced with 1/4-inch gaps, and screw down from above.
- For the optional canopy: extend 4×4 corner posts to 84 inches, notch the top to accept the 2×4 top rails, and connect the rails at the top to form a rectangle. Hang outdoor fabric, a shade sail, or bamboo reed panels from the frame.
- Sand to 120 grit, finish with two coats of exterior oil or deck stain. For poolside use, choose a finish rated for high-humidity environments.
- Position the daybed with the foot end closest to the fire pit and at least 48 to 60 inches from the pit edge.
Materials, cushions, and finishes worth knowing about
Fire-pit seating takes more abuse than most outdoor furniture: sun, heat radiation, rain, and repeat contact with people who've been carrying food and drinks. The materials you choose really do affect how long the setup holds up.
Frame and surface materials
- Pressure-treated lumber (ACQ or CA): most budget-friendly, widely available, works well for built frames. Use hot-dipped galvanized or stainless steel fasteners only, since standard screws corrode in PT wood.
- Cedar or redwood: naturally rot-resistant, lighter, and better looking without finish. Higher cost but handles moisture and temperature cycling well. No special fastener requirement.
- Powder-coated steel or aluminum: low maintenance, non-combustible, and great for legs and frames when you want a modern look. Aluminum won't rust; steel needs a good powder coat to resist coastal salt air.
- Concrete and stone surrounds: ideal non-combustible surfaces near fire. Use dense, high-quality pavers or natural stone rated for high heat. Avoid porous limestone and wet-poured concrete directly adjacent to the burn zone.
Cushions and fabrics
Sunbrella-brand fabric is the industry standard for outdoor cushions near fire pits because it's solution-dyed acrylic (not a surface coating), which means it resists UV fading, mildew, and moisture absorption without becoming a fire hazard when properly maintained. Keep all fabric cushions outside the minimum clearance ring. For wood-burning pits, store cushions indoors or under a cover when the fire is lit; flying embers can burn small holes in any fabric. For gas fire tables with controlled flames, cushions at 36-inch clearance are generally fine, but pull them back farther on gusty evenings.
Finishes for DIY builds
For lumber frames, a semi-transparent exterior deck stain penetrates the wood grain and breathes better than film-forming paint, which means it won't peel as the wood expands and contracts. Apply two coats to all surfaces, paying extra attention to end grain which absorbs moisture fastest. Recoat every one to two years depending on your climate. In humid or coastal climates, a spar varnish or marine-grade oil is worth the extra cost. For powder-coated steel or aluminum, wipe down annually with a mild cleaner and touch up any chips with appliance paint or cold-galvanizing compound before rust can start.
Screening, shade, and seasonal comfort
A fire pit arrangement that's only comfortable on a perfect 68-degree evening isn't very useful. These are the additions that extend the season and make the space genuinely livable.
Overhead shade and weather protection
A pergola positioned around a gas fire table is one of the more popular combinations right now, but remember the 6-foot overhead clearance requirement for gas units. If the pergola beam is closer than that to the flame, you'll either need to raise the structure, lower the fire table, or switch to a lower-flame unit. For wood-burning pits, an overhead structure of any combustible material is a real problem; keep the sky open above a wood fire. Metal pergolas with polycarbonate roofing panels are a non-combustible overhead option that works reasonably well.
Wind and privacy screening
Wind is the enemy of a comfortable fire pit. It drives smoke into seating areas, whips embers toward cushions, and makes an otherwise pleasant evening miserable. A partial screen on the prevailing-wind side (lattice, cedar screening, or a tall planter box) positioned outside the primary circulation ring can deflect wind significantly without blocking sightlines. Keep any screening material at least 4 feet from the edge of a gas pit and well outside the 25-foot IFC setback zone for wood pits. Bamboo or reed screens within 4 feet of a live flame are a fire risk.
Patio heaters as a supplement
In climates where shoulder-season temperatures drop below 45 degrees, a freestanding infrared patio heater positioned outside the seating ring (pointed inward) adds real warmth without competing with the fire pit. Keep the heater's clearance requirements separate from the fire pit's, and never operate both in the same tight space without checking each unit's manufacturer clearance specs against the other.
Insect control
If your fire-pit area is in a mosquito-heavy region, a screened enclosure around the seating zone is the most effective long-term solution, and it pairs naturally with the kind of screened-patio work this site focuses on. For open-air setups, citronella candles positioned outside the seating ring work reasonably well; dedicated mosquito-repellent patio fans mounted overhead or clip-on fans on seat frames are increasingly popular and don't require any chemical treatment.
Fire safety, code, and permit checklist
Before you light the first fire in your new layout, run through this checklist. Some items are code requirements; others are just good practice that keeps the setup from becoming a problem.
| Checklist Item | Requirement / Recommendation | Done? |
|---|---|---|
| Confirm local fire code setback | 25 ft from structures (IFC) or local amendment | |
| Verify pit size (wood-burning) | Max 3 ft diameter, 2 ft height for recreational fire (IFC) | |
| Obtain permit if required | Built-in pits, gas lines, or local regulations often require permit | |
| Install spark arrester (wood-burning) | Max 1/2-in. mesh openings per IWUIC; verify local code | |
| Non-combustible surface confirmed | Concrete, pavers, compacted gravel, or rated heat-shield pad | |
| Heat shield/pad used on deck | Manufacturer-rated pad with air gap per manual | |
| Gas appliance listed and installed per manual | Follow NFPA 54 / NFPA 58 and manufacturer instructions | |
| Manufacturer manual clearances confirmed | Manufacturer specs override code minimums if stricter | |
| Seating ring at 36 in. or greater | Front of seat to pit edge | |
| Circulation paths at 36 in. or greater | Behind seats and all entry points | |
| Combustible screening/plants outside clearance zone | Min. 4 ft from gas pit; outside IFC zone for wood pits | |
| Fire extinguisher or sand bucket on site | Keep within arm's reach of fire area | |
| CAL FIRE / WUI ember controls checked (if applicable) | Metal flashing at deck-to-wall, under-deck screening, ember vents | |
| Cushions stored or removed for wood-burning fires | Prevent ember damage and fire spread |
Shopping and materials list
Here's a consolidated materials list covering a typical medium-patio layout with a gas fire table, a DIY bench, and two additional chairs. Adjust quantities based on your layout size and which DIY builds you're tackling.
| Item | Quantity / Size | Purpose | Estimated Cost |
|---|---|---|---|
| 2×4 exterior lumber (12 ft) | 10–16 pieces | Bench/sectional framing | $5–9 each |
| 2×6 exterior lumber (8 ft) | 10–14 pieces | Seat and deck surfaces | $8–14 each |
| 4×4 exterior lumber (8 ft) | 2–4 pieces | Legs and canopy uprights | $10–16 each |
| 3-inch exterior deck screws (box) | 2 boxes (1 lb each) | All framing connections | $8–12 each |
| 2.5-inch exterior screws (box) | 1 box (1 lb) | Decking surface attachment | $7–10 |
| Hot-dip galvanized joist hangers/connectors | 6–10 pieces | Frame reinforcement | $2–5 each |
| Exterior deck stain (semi-transparent) | 1 gallon | Wood finish, 2 coats | $30–50 |
| Sandpaper (120 grit, pack) | 1 pack | Prep before stain | $8–12 |
| Outdoor cushions (24×24 in.) | 4–6 pieces | Seating comfort | $25–60 each |
| Outdoor fabric/Sunbrella yardage | Optional | Upholstery for DIY cushions | $15–30/yd |
| Fire-pit heat shield mat | 1 (rated for your pit) | Deck/surface protection | $30–80 |
| Non-combustible paver pad or gravel base | 8–12 sq. ft. | Pit surface zone | $40–100 |
| Rope or garden hose (100 ft) | 1 | Mockup layout circles | On hand or $10–20 |
| 1/4-inch graph paper or scale-drawing pad | 1 pad | Scale drawings | $5–10 |
| Fire extinguisher (2.5 lb ABC) | 1 | Safety requirement | $20–40 |
Putting it all together
The projects here connect directly to a broader outdoor room, and the same measuring and planning discipline applies whether you're working around a fire pit, a pool, or figuring out how to make a small patio work harder. For step-by-step advice on how to arrange furniture on a small patio, see our guide on how to arrange furniture on a small patio (internal resource ID 40a3d4af-4e72-4ce3-bb2f-69e91df539be). Once you've measured, mocked up, confirmed your clearances, and chosen your seating, the layout almost places itself. The fire pit becomes the anchor of the room, the seating wraps around it at the right distance, the circulation paths stay open, and you've got a space that's genuinely comfortable to use instead of just nice to look at in a photo. For additional tips on choosing furniture, arranging groupings, and final styling, see our guide on how to furnish a patio.
FAQ
What are the core layout and safety clearance rules for arranging patio furniture around a fire pit?
Follow three clearance rings: (1) Manufacturer/listing and code first — always follow the appliance manual and local AHJ; listed gas units or built‑in pits may require larger clearances than code. (2) Hard safety minimums — for small recreational wood fires (≤3 ft diameter and ≤2 ft high) many jurisdictions require a 25 ft setback from structures/combustibles; check local amendments. (3) Practical comfort distances — place seating 24–36 in from the pit edge for comfortable heat; use 36 in as a standard comfort/safety ring for most units and larger distances (40–60 in) for large wood fires or windy sites. Also keep 36 in minimum clear circulation paths behind seating and maintain unobstructed escape paths to exits. For deck installations use a non‑combustible pad, tested heat shield or the brand's recommended stand/elevation and meet any additional clearances the manufacturer specifies.
How do I determine safe placement for a fire pit on patios versus decks, screened porches, or poolside areas?
Patio (concrete/pavers/gravel): place pit on a stable, non‑combustible surface; provide the clearance rings above; keep combustibles (plants, wooden railings, fabrics) out of the 25 ft code setback for open recreational fires or follow manufacturer clearances for gas bowls. Decks (wood/composite): avoid direct contact—use manufacturer‑rated heat shield pads or a raised steel/fire‑pit stand with an air gap and place on a tested non‑combustible mat; maintain required clearances and consider replacing decking near the pit with pavers or stone. Screened porches: most codes and manufacturers prohibit open wood fires inside enclosed structures—use listed gas/propane appliances specifically approved for covered/enclosed use and follow required vertical clearance to the roof and any spark/ember controls. Poolside: ensure non‑slip, non‑combustible pad, keep pathway circulation (36 in), and position to prevent wind‑driven embers reaching pool furniture or umbrellas.
What step‑by‑step measuring and mockup techniques should I use before placing furniture?
1) Measure the usable patio area (length, width), note fixed obstacles (steps, doors, railings). 2) Select fire‑pit diameter and mark the center point. 3) Draw or tape concentric circles: pit radius, 36 in comfort ring, and a 36 in circulation ring behind seating. 4) Use cardboard cutouts or pool noodles to mock up bench/sofa footprints to test sightlines and circulation. 5) Walk through usual movements (carrying food/drinks) to confirm 36 in+ paths. 6) For decks, place the actual heat‑pad/test platform and stand on it to ensure stability and check vertical clearance to overhead structures (minimum per manufacturer). 7) Photograph mockups to evaluate visual balance and adjust spacing before final purchase or construction.
What are quick example layouts for small, medium, and large patios?
Small (12–14 ft overall diameter): center a 30–36 in pit with 2–4 chairs in a semi‑circle; keep 24–36 in from pit edge to seat front; leave 36 in rear path where possible. Medium (15–20 ft diameter): 36–48 in pit, full 360° seating for 4–6 (mix of chairs + one angled bench), maintain 36 in seat clearance and 36–48 in circulation behind seating. Large (20+ ft diameter): 48+ in pit or multiple flame features, L‑shaped sectional or back‑to‑back benches plus loose chairs to create conversational pods; provide 48–60 in between opposing seats for open movement and service trays. For poolside orient seats to block prevailing winds and avoid splashing into the flame; for decks arrange furniture so access to rail/gates remains clear.
What seating options work best and what DIY build plans should I consider?
Options: freestanding Adirondack chairs (good for small spaces), low club chairs (comfortable sightlines), built benches (space‑efficient), curved benches (wrap around pit), sectional outdoor sofas (best for large patios), and daybeds for lounging. DIY build plans to consider: (A) Simple straight bench — 2×6 seat, 2×4 frame, waterproof glue, exterior screws; (B) Curved wrap bench — radial cut top slats, plywood form for template, lag bolts into compacted base or masonry anchors; (C) Back‑to‑back bench with built‑in storage — hinged seat for cushions; (D) Modular timber sectional — pallet or 2×8 platform modules joined with brackets. Use exterior‑rated lumber (pressure‑treated, cedar, redwood, or rot‑resistant hardwoods), stainless or hot‑dip galvanized fasteners, and waterproof exterior adhesives. Refer to detailed woodworking plans (cut lists and joinery) when building—follow material grade and span recommendations and pre‑seal cut ends with preservative.
What exact measurements and angles should I use when placing a circular seating arrangement?
For a circular pit: start with pit diameter (D). Add seat setback S (recommended 36 in) to get inner seating circumference radius R = (D/2) + S. For 4 chairs allow 18–22 in per seat along that circumference; for benches plan 20–24 in per person. Angle between two seats = 360° divided by seat count; use that to set chair orientation (chairs angled inward toward center by 10°–20° for conversational focus). Ensure at least 36 in behind seated line for circulation. Example: 36 in (pit) → D=36 in; R = 18 + 36 = 54 in (4.5 ft); outer diameter of seating circle = 9 ft; add 3 ft circulation = 15 ft overall footprint.
Next Articles
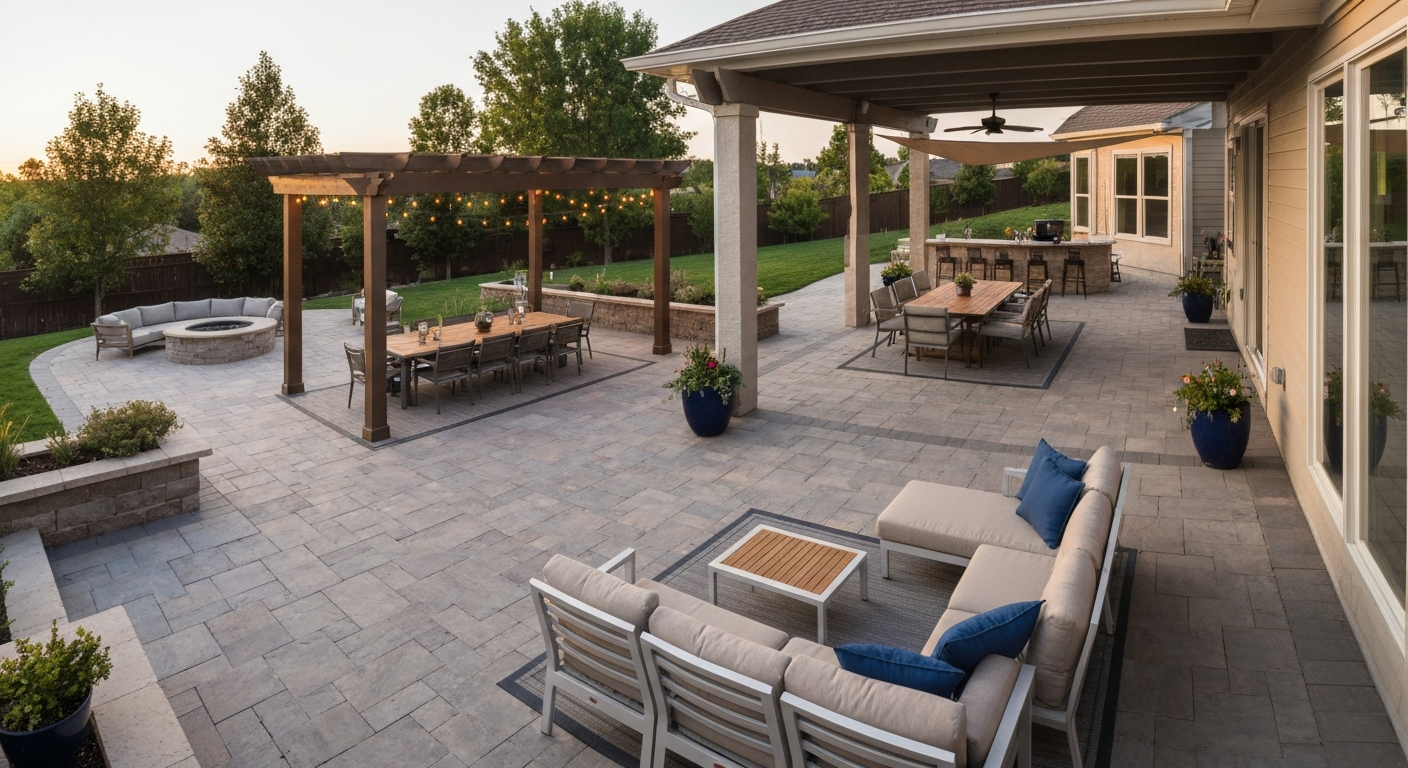
How to Furnish a Large Patio: Step-by-Step DIY for Year-Round Living
Step-by-step plans to furnish a large patio: layouts, scaled furniture, DIY sectional/daybed builds, weatherproofing, he
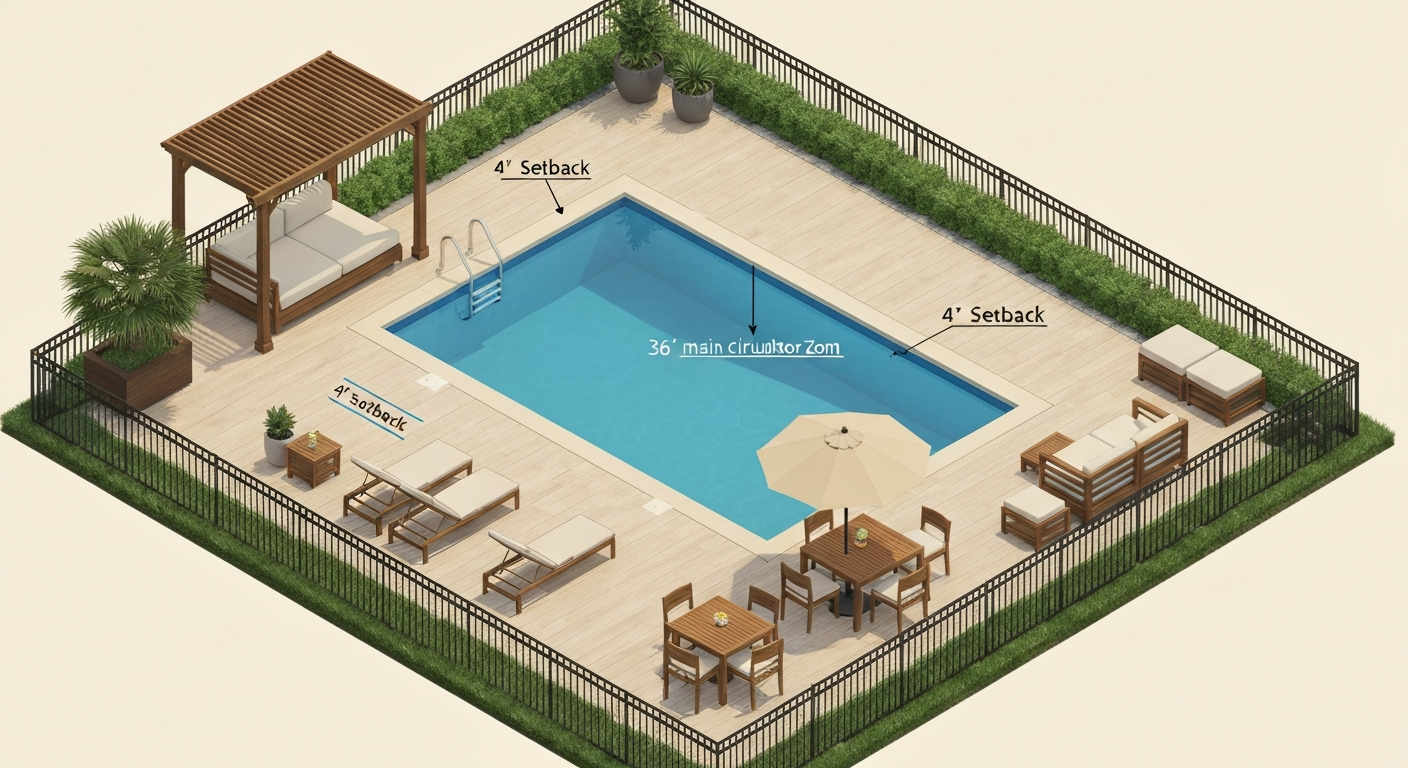
How to Arrange Patio Furniture Around a Pool: Step-by-Step Guide
Arrange patio furniture around a pool with step-by-step layouts, safety rules, DIY builds, and materials guide.
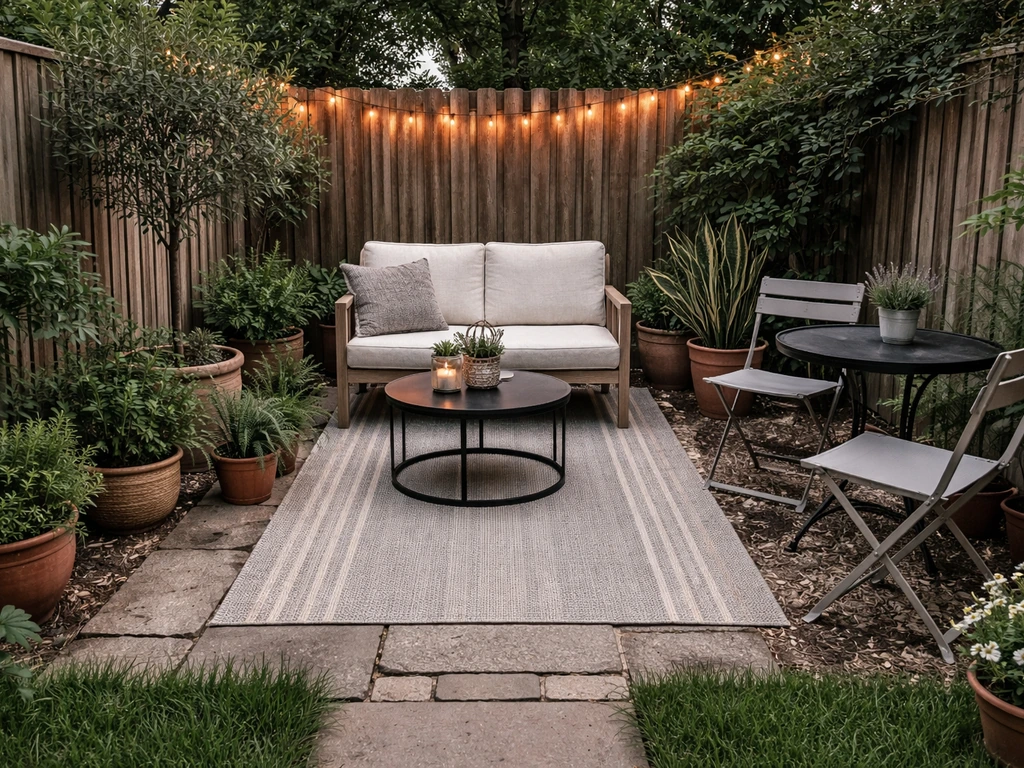
How to Arrange Furniture on a Small Patio Step by Step
Step-by-step tips to arrange small patio furniture for more space, clear walkways, cozy seating, and better flow.