
You can cover a patio railing using bamboo or reed roll screens, privacy slats threaded through balusters, outdoor curtains on tension rods or mounted curtain tracks, lattice or trellis panels, clear vinyl or polycarbonate windbreaks, or retractable roller screens, each one mounts directly to an existing railing without touching the structural posts or requiring a permit in most jurisdictions. The right choice depends on whether you want privacy, shade, rain or wind protection, a winter seal, or just a budget fix, and this guide walks you through every option with costs, step-by-step instructions, and honest pros and cons so you can pick the one that actually fits your patio.
How to Cover Patio Railing: Privacy, Shade, Wind & Winter

Felix Brennan
21 Jul 2026
What this guide covers and who it's for
This article is for homeowners and renters who already have a patio railing and want to do something practical with it, add privacy from neighbors, block wind, reduce glare, keep out rain splash, or prep the space for winter. You don't need advanced carpentry skills. Most of these projects take a weekend afternoon and a basic toolkit. We'll cover bamboo and reed screens, privacy slats, outdoor curtains, lattice panels, clear vinyl and polycarbonate windbreaks, and retractable screens. For each method you'll get a decision checklist, a tools and materials list, step-by-step instructions, an estimated cost and time range, pros and cons, and weatherproofing or seasonal tips. If your project starts moving toward a full roof structure or permanent enclosure, we'll point you toward the right direction, but the focus here is railing-mounted solutions you can tackle yourself.
Quick decision checklist before you buy anything
Running through these four questions before you shop will save you a return trip to the hardware store and potentially a headache with your HOA or building department.
Privacy vs. view
Dense materials like bamboo roll screens, solid privacy slats, and heavy outdoor fabric give you near-total privacy but block your view completely. If you want to keep the sightline while cutting glare and wind, look at solar mesh fabrics with a higher openness factor, Phifer's SunTex 80, for example, has roughly 25% openness so it lets in light and air while blocking about 80% of solar heat gain. For a clear but wind-protected railing, polycarbonate or marine-grade vinyl panels let you see through while acting as a genuine windbreak.
Temporary vs. permanent
Curtains on tension rods, clip-on bamboo rolls, and zip-tied reed screens are all temporary, they come down in a season without leaving a mark. Privacy slats, lattice panels, and polycarbonate sheets attached with hardware are semi-permanent and require tools to remove. Think about whether you rent, whether you want to swap looks seasonally, or whether you're adding something that will need to stay in place year-round.
Budget reality check
Bamboo roll screens are the cheapest route, often $15 to $30 for a 6-foot panel, while motorized retractable screens can run $800 to $2,500 installed per opening. Outdoor curtains land in the middle at $30 to $80 per panel depending on fabric grade. Privacy slats for a standard 36-inch railing section typically cost $20 to $50 in materials. Clear vinyl or polycarbonate windbreak kits fall in the $60 to $200 range for a standard section. If you're looking for the lowest-cost options across the whole patio, not just the railing, there are dedicated guides on the cheapest ways to cover a patio and how to extend a patio cheaply that are worth a read alongside this one.
Local codes and HOA rules
The International Residential Code (IRC Section R312) requires guards on any walking surface more than 30 inches above grade, with a minimum height of 36 inches and openings that cannot pass a 4-inch sphere. Whatever you attach to your railing must not reduce the guard height below that threshold or create gaps large enough for a small child to pass through. Check this before installing anything that sits inside or below the top rail. Separately, if you live in an HOA community, pull your CC&Rs and Architectural Review Committee (ARC) guidelines before you buy materials. Many HOAs lawfully restrict visible exterior changes including screen materials, heights, and colors, some require written ARC approval even for temporary screens. Can an HOA Restrict Exterior Changes? (GoodFences explanation) explains that HOAs can lawfully restrict exterior changes when those rules are in recorded CC&Rs and ARC guidelines, so check them before installing visible railing covers. Submit your request before you install, not after.
Safety, measuring, and the tools you'll use across most methods
Before measuring, walk the railing and check for any loose posts, wobbly balusters, or rotting wood. Adding weight or wind resistance to a compromised railing is a safety issue, repair or replace failing sections first. Once the railing is sound, measure each section independently: width between posts, height from deck surface to top of rail, and depth of the top and bottom rails (you'll need this for mounting hardware). Don't assume all sections are the same width; post spacing varies. Note any gates, electrical outlets, or hose bibs in the railing run so you can plan cutouts or gaps.
- Tape measure and pencil
- Level (2-foot or laser)
- Drill and drill bits (1/8-inch pilot bit and a #2 Phillips or square-drive bit)
- Utility knife or tin snips (for trimming mesh, vinyl, or bamboo)
- Zip ties (UV-resistant, 8-inch or longer)
- Stainless or galvanized wire and wire cutters
- Outdoor-rated (coated or stainless) screws and anchors
- Rubber mallet
- Safety glasses and work gloves
- Ladder or step stool if your railing is on an elevated deck
For coastal or high-humidity locations, always choose 316 stainless steel fasteners over 304 stainless or uncoated zinc screws. 316 stainless contains molybdenum, which gives it significantly better resistance to pitting corrosion in salt air and chloride environments. It costs a bit more but you won't be pulling out rusted hardware in two seasons.
All your railing cover options at a glance
| Method | Privacy | Shade | Wind/Rain Block | Durability | Approx. Cost (per 6 ft section) | Permanence |
|---|---|---|---|---|---|---|
| Bamboo / reed roll screen | High | Moderate | Low-Moderate | 3–10 years | $15–$40 | Temporary/semi-perm |
| Privacy slats (baluster weave) | High | Low | Low | 5–15 years | $20–$50 | Semi-permanent |
| Outdoor curtains / weatherproof fabric | High (closed) | High (closed) | Moderate | 3–7 years (fabric) | $30–$100 | Temporary |
| Lattice / trellis panel | Moderate | Low | Low-Moderate | 10–20 years | $25–$75 | Semi-permanent |
| Clear vinyl windbreak | None | None | High | 3–7 years | $40–$120 | Seasonal/removable |
| Polycarbonate panel | None | Moderate (tinted) | High | 10–20 years | $60–$200 | Semi-permanent |
| Retractable / roller screen | High (deployed) | High (deployed) | Moderate-High | 7–15 years | $200–$800+ | Permanent fixture |
| Planter / green screen | Moderate-High (mature) | Low | Low | Ongoing | $50–$200 setup | Permanent |
Best options by what you're actually trying to solve
Different goals call for different solutions, and the cheapest option isn't always the best fit for your specific problem. Here's a quick breakdown of what works best for the most common homeowner goals.
| Goal | Best Option | Budget Alternative |
|---|---|---|
| Maximum privacy from neighbors | Privacy slats or bamboo roll screen | Outdoor curtains tied back during the day |
| Rain and splash protection | Clear vinyl or polycarbonate panels | Outdoor curtains (heavy canvas or PVC-backed) |
| Wind block with view preserved | Polycarbonate or clear vinyl panels | Solar mesh fabric with low openness factor |
| Winterizing the railing area | Clear marine vinyl panels (16–30 gauge) | Heavy outdoor curtains with liner |
| Lowest budget possible | Bamboo roll screen + zip ties | Reed screen + wire fastening |
| Best long-term investment | Aluminum-framed polycarbonate or retractable screen system | Powder-coated lattice panel |
If your main goal is keeping rain off the patio itself (not just the railing), covering a patio from rain typically involves an overhead structure beyond the railing alone, that's a separate project covered in detail elsewhere on this site. For detailed options and step‑by‑step plans for full overhead or seasonal enclosures, see our guide on the best way to cover a patio. Similarly, if you want to enclose the entire patio for year-round use, covering an open patio as a full enclosure project goes beyond railing-mounted solutions and warrants its own planning process. For step-by-step planning and seasonal enclosure details, see the guide on how to cover a patio for winter. For full enclosure planning and step‑by‑step options, see our guide on how to cover an open patio. If instead you're thinking about expanding or extending your patio on a budget, see how can i extend my patio cheaply for low-cost extension ideas.
Bamboo and reed screens
What they are and when they make sense
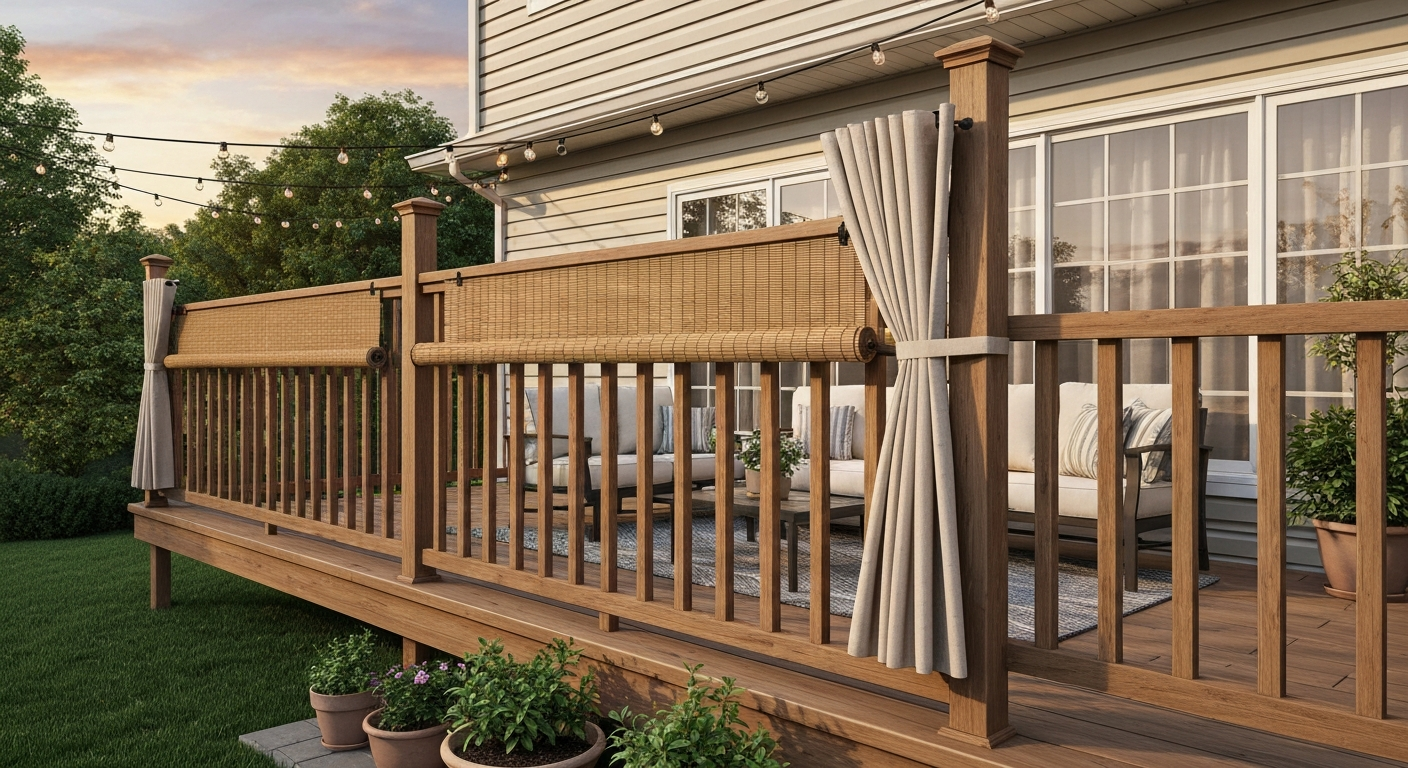
Bamboo roll screens and reed (twig or willow) fencing rolls are among the easiest and most affordable railing covers available. They're sold in standard heights (typically 3, 4, or 6 feet) and lengths (8, 16, or 25 feet), so a single roll usually covers multiple railing sections. Bamboo gives a cleaner, more structured look; reed screens have a natural, woven texture. Both provide high privacy and look attractive in casual or tropical-inspired outdoor spaces. They're not a serious windbreak or rain shield, but they do reduce light breeze and cut direct sunlight reasonably well. Expect a realistic lifespan of 5 to 10 years in a dry climate, closer to 3 to 5 years in wet or coastal areas without treatment.
Tools and materials
- Bamboo or reed roll screen (sized to your railing height and total linear footage)
- UV-resistant zip ties (8-inch, pack of 50+) or stainless wire
- Wire cutters or scissors
- Tape measure and pencil
- Tin snips or a utility knife (for trimming)
- Outdoor wood sealant or bamboo preservative (optional but recommended)
- Work gloves (bamboo edges can be sharp)
Step-by-step installation
- Measure each railing section from post face to post face and from the top of the bottom rail to the underside of the top rail. Order or cut your roll to match the height — you want the screen to sit within the rail framework, not drape over the top rail where it can trap moisture.
- Unroll 2 to 3 feet of the screen along the first railing section to get a feel for the weight. Bamboo rolls are heavier than they look, so have a helper hold the roll while you fasten.
- Starting at one post, thread a zip tie through the wires of the roll and around the post or baluster. Snug it up but don't overtighten on thin bamboo canes — you'll split them. Pull the roll tight and attach every 12 to 18 inches along the top wire and every 12 to 18 inches along the bottom wire.
- For a cleaner look, run a length of stainless wire along the top and bottom edges of the roll, threading it through the roll's horizontal binding wires and wrapping once around each post. This distributes tension better than zip ties alone and looks more intentional.
- Trim any excess width at the gate opening or post with tin snips. Leave a 1/4-inch gap above the deck surface if the screen extends close to the floor — standing water at the base accelerates rot.
- If attaching to a wood railing, you can also screw a 1x2 wood furring strip along the top and bottom rail and staple or screw the screen's binding wire to the furring strip with heavy-duty staples or wire clips. This is the most secure method and makes future removal easy.
- Step back and check for sagging sections. Tighten or add additional zip ties as needed. The screen should sit flat against the balusters, not bowing outward.
Estimated cost and time
A 6-foot wide by 36-inch tall bamboo roll panel costs $15 to $35 at most home improvement or garden centers. A 25-foot roll at 4-foot height runs $40 to $70 and covers four standard sections. Add $5 to $10 for zip ties or wire. Total materials for a 20-foot railing run: roughly $50 to $90. Installation time is 1 to 2 hours for a beginner working alone, 45 minutes with a helper.
Pros and cons
- PRO: Lowest cost of any railing cover option
- PRO: No drilling required — fully reversible installation
- PRO: Natural look blends with most patio styles
- PRO: Available at most home improvement stores and online
- CON: Not a windbreak or rain shield
- CON: Shorter lifespan than most other options without treatment
- CON: Can look weathered or faded within 2 to 3 seasons in harsh climates
- CON: May not meet HOA standards for 'finished' materials in some communities
Weatherproofing, winterizing, and maintenance
Before installation (or on a newly purchased roll), brush or spray the bamboo with an outdoor wood sealant or a dedicated bamboo preservative. This dramatically slows moisture absorption and UV bleaching. Reapply once a year in spring. In climates with heavy snow or sustained freezing temps, take bamboo rolls down for winter storage, wet bamboo that freezes and thaws repeatedly splits quickly. Loosely roll them, wrap in burlap or an old tarp, and store in a dry garage or shed. Reed screens are slightly more cold-tolerant but benefit from the same treatment. If you leave them up year-round, plan to replace them every 3 to 5 years rather than 8 to 10.
Styling ideas
Bamboo and reed screens look great paired with string lights woven through the canes, potted tropical plants at post bases, and outdoor cushions in earthy or jewel tones. For a more polished finish, add a slim wood cap rail over the top of the screen to hide the binding wire. You can also stain bamboo with an outdoor teak oil or wood stain to shift the color from natural tan toward a warmer brown or gray.
Privacy slats for balusters
What they are and when they make sense
Privacy slats are thin strips of plastic (HDPE or PVC) or metal that weave horizontally or vertically through existing baluster gaps. They're specifically designed for this purpose and sold in kits sized for standard railing sections. The result is a solid-looking panel that closes off the gaps between balusters without requiring you to modify or replace the railing structure. They're especially good for metal or composite railings where bamboo roll screens look out of place. They do not block wind or rain, but they provide excellent visual privacy at close range.
Tools and materials
- Privacy slat kit (sized to your baluster spacing and railing height — measure baluster gap width and railing section width before ordering)
- Tape measure
- Tin snips or a fine-tooth hacksaw (for trimming slats to length)
- Work gloves
- Rubber mallet (optional, for tight-fit slats)
Installation steps
- Measure your baluster gap (the clear space between balusters, not baluster-to-baluster center). Standard privacy slat kits are designed for 3.5-inch or 4-inch spacing — confirm your gap before ordering. Remember the IRC 4-inch sphere rule: your finished installation must still prevent a 4-inch ball from passing through, so slats that reduce the opening further are code-compliant, but check that slat thickness doesn't compromise top-rail grip if someone leans on it.
- Count your balusters per section to estimate how many slat rows you need. Most kits list coverage per linear foot.
- Starting from the bottom rail, weave the first slat horizontally behind the first baluster, in front of the second, behind the third, and so on across the section. Push it down to seat against the bottom rail.
- Alternate the weave pattern on each successive row (if row one goes behind-front-behind, row two goes front-behind-front). This creates a basket-weave that locks slats in place without fasteners.
- Continue up the railing. Keep slat rows tight against each other — gaps between rows defeat the privacy purpose.
- Trim the final row at the top with tin snips if the slats extend above the top rail. The top rail should remain clear and unobstructed.
- Check the installation from the outside at eye level — adjust any slats that aren't seated flat.
Estimated cost and time
HDPE privacy slat kits for a 6-foot railing section typically cost $25 to $50 depending on material and brand. For a 20-foot railing run, expect $80 to $160 in materials. No additional hardware is needed for the weave-in method. Installation time is about 30 to 60 minutes per section once you get the rhythm, plan for 2 to 3 hours for a full 20-foot run the first time.
Pros and cons
- PRO: Clean, intentional look — doesn't read as a DIY improvisation
- PRO: No drilling, no fasteners required for weave-in style
- PRO: HDPE slats are UV-stable and won't rot, crack, or need sealing
- PRO: Easy to remove or replace individual damaged slats
- PRO: Available in multiple colors to match or contrast your railing
- CON: No wind, rain, or shade benefit
- CON: Only works on railings with evenly spaced balusters — won't work with glass, cable, or widely spaced pickets
- CON: Time-consuming for long railing runs
- CON: Some HOAs may flag color or material choices
Winterizing and upkeep
HDPE and PVC slats handle cold temperatures well and don't need seasonal removal. Wash them down with a garden hose and mild soap once or twice a year to prevent algae or dirt buildup in the weave. If a slat cracks or discolors, you can pop it out and replace just that strip without disturbing the rest of the installation. In areas with heavy ice loading, inspect the balusters after winter, ice can stress the woven joints, but slats themselves rarely fail.
Outdoor curtains and weatherproof fabric
What they are and when they make sense
Outdoor curtains are the most flexible railing cover option because you can open them for views and airflow or close them for privacy and shade on demand. They work especially well on covered patios where you can mount a curtain rod or track to an overhead beam or ceiling. On open railings without overhead structure, you'll use tension rod mounts, post-mounted hardware, or a cable tension system strung between posts. The fabric grade matters enormously for outdoor use: solution-dyed acrylic fabrics like Sunbrella are the gold standard, with a 5-year limited warranty on most outdoor fabrics and up to a 10-year warranty on shade and marine applications. PVC-backed polyester is cheaper and more water-resistant but feels stiffer and fades faster. Avoid standard indoor curtains outside, they'll mildew within one rainy season.
Mounting methods
Your mounting method depends on your railing and overhead structure. Post-to-post cable systems use eye bolts screwed into posts with a stainless wire cable tensioned between them, the curtain grommets slide along the cable. Curtain rods mounted between posts with heavy-duty outdoor rod brackets are simpler but limited to narrower spans. For covered patios, screw a curtain track or rod directly into the ceiling joists above the railing line. If you have no overhead structure at all, a freestanding curtain panel frame (sold as a privacy screen frame) can stand behind the railing independently.
Tools and materials
- Outdoor-rated curtain panels (solution-dyed acrylic or marine-grade PVC-backed fabric — measure drop from rod/cable to 1 inch above deck surface)
- Stainless steel curtain rod or cable tension kit with eye bolts and cable clamps
- Heavy-duty outdoor curtain rod brackets or eye bolts (316 stainless for coastal locations)
- Drill and 1/8-inch pilot bit
- Outdoor-rated anchor bolts if mounting into hollow posts
- Level
- Tape measure
- Pliers or cable tensioning tool
Step-by-step DIY installation (post-to-post cable method)
- Decide on rod or cable height. For a 36-inch railing, mount the cable or rod at the top of the posts (at or just above the top rail height) so curtains hang to deck level. Mark both post faces at the same height using a level.
- Drill a pilot hole at each mark. Screw eye bolts firmly into the post — for hollow metal or composite posts, use an appropriately sized toggle anchor or through-bolt rather than screwing into hollow wall.
- Thread your stainless cable through one eye bolt and secure with a cable clamp. Run the cable to the opposite post eye bolt and tension with a cable tensioner or by threading through and clamping tightly. The cable should have minimal sag — a little drape is fine for curtains, but too much sag means curtains puddle on the deck.
- Slide curtain grommets onto the cable before securing the second end. Space panels so they overlap 4 to 6 inches in the center when closed.
- Check that curtains hang plumb and that the bottom hem clears the deck by about 1 inch. Trim or hem fabric if needed.
- Add curtain tiebacks (simple rope or hook-and-eye sets) at mid-panel height on the posts so you can hold curtains open without them blowing around.
- In windy locations, add a small clip weight or drapery weight to the bottom hem of each panel to reduce billowing.
Estimated cost and time
A pair of quality outdoor curtain panels in solution-dyed acrylic runs $50 to $100 per pair. A cable tension kit costs $15 to $30. Total materials for one 6-foot opening: $65 to $130. For a 20-foot railing run with three or four openings between posts, plan $200 to $500 depending on fabric grade. Installation time is 1 to 2 hours per section including hardware mounting.
Pros and cons
- PRO: Opens and closes for on-demand privacy and airflow control
- PRO: Huge range of colors and patterns for design flexibility
- PRO: Moderate rain and wind protection when closed
- PRO: Removable for winter storage — no hardware modification needed
- PRO: Sunbrella and similar fabrics resist mildew, fading, and UV degradation
- CON: Fabric wears faster than hard materials — budget for replacement every 4 to 7 years
- CON: Billows aggressively in strong wind — not suitable as a windbreak in exposed locations
- CON: When closed, blocks all view and most airflow (though that's sometimes the point)
- CON: Cable hardware and eye bolts need periodic inspection for corrosion and tension loss
Light, heat, and airflow tradeoffs
Closing heavy outdoor curtains on a sunny afternoon dramatically reduces solar heat gain on the patio, dense fabric absorbs and deflects direct sun effectively. But it also kills airflow, which can make a hot patio feel stuffy. The better approach on hot days is to use a solar mesh curtain (often labeled as solar shade curtains) rather than solid fabric, Phifer's SunTex 80 mesh, for example, blocks about 80% of solar heat while maintaining roughly 25% openness for air circulation. SunTex 95 pushes solar blockage to 95% but drops openness to around 5%, which is almost solid. Match your fabric openness factor to your climate: high-humidity climates benefit from more airflow (higher openness factor), while desert climates prioritize solar heat blockage (lower openness factor).
Cleaning and seasonal storage
Brush loose dirt off panels monthly during the season. For Sunbrella and similar acrylic fabrics, spot-clean with a mild soap solution and a soft brush, the manufacturer's guidance allows a diluted bleach solution for mold or mildew spots (1/4 cup bleach per gallon of water, rinse thoroughly). Never put outdoor curtain fabric in a clothes dryer; lay flat or hang-dry in shade. Before the first hard freeze, take panels off the cable, fold them loosely, and store in a breathable bag or box in a dry space. Leave the hardware in place, just drop-in new panels in spring.
Styling suggestions
White or off-white sheer outdoor curtains give a resort or Mediterranean feel and keep the space light even when closed. Charcoal gray or navy solid panels read as modern and architectural. For a budget-friendly upgrade, pair inexpensive curtains with a painted concrete floor and string lights for a patio that looks far more finished than it cost to achieve. Curtains also work beautifully as a visual divider on an L-shaped railing, separating a dining area from a lounging zone without building any permanent wall.
Other railing cover methods worth knowing about
Lattice and trellis panels
Wood or vinyl lattice panels cut to fit between posts create a semi-private screen with a classic garden aesthetic. They're best for ground-level patios where full privacy isn't the priority but wind and a visual boundary are. Lattice attached to the railing frame with L-brackets and exterior screws is stable and long-lasting, vinyl lattice in particular requires almost zero maintenance and handles moisture well. Add climbing plants like clematis or jasmine for a living green screen effect over time. Keep in mind that lattice doesn't block wind effectively and provides only moderate privacy through its diamond or square pattern.
Clear vinyl and polycarbonate windbreak panels
For rain and wind protection with a clear view, marine-grade vinyl film and rigid polycarbonate panels are the two main options. Marine vinyl (16 to 30 gauge or heavier) is sold by the yard and can be cut to fit any railing opening, then attached with spline tracks, grommets, or zip ties along the edges. Vendors commonly recommend 16–30 gauge marine‑grade clear vinyl for seasonal porch enclosures and note thicker gauges increase puncture resistance but require heavier‑duty spline or fastening methods; see MarineVinylFabric, DIY guide to enclose a porch with clear vinyl (thickness / spline notes) blank" rel="noopener noreferrer">MarineVinylFabric — DIY guide to enclose a porch with clear vinyl (thickness / spline notes). It's a popular choice for winterizing a porch, stretching clear vinyl panels across the railing openings effectively creates a seasonal enclosure at minimal cost. Thicker gauges (30 gauge and above) are more puncture-resistant and hold their shape better in wind, but require heavier-duty spline fastening methods. Rigid polycarbonate from manufacturers like Palram is impact-resistant, UV-protected on its surface coating, and thermally superior to single-ply vinyl. It installs in a frame or channel rail system mounted to the posts and must be installed with allowance for thermal expansion, follow the manufacturer's expansion gap guidance precisely or the panels will buckle in summer heat. If you're moving toward fully enclosing the railing area for winter, this is the material to use. For a full seasonal-enclosure approach, the guide on how to cover a patio for winter covers the broader project in detail. For full seasonal-enclosure planning and step-by-step winterizing instructions, see our guide on how to cover an outdoor patio. For step-by-step instructions on converting a patio into a seasonal enclosure, see our guide on how to cover your patio.
Retractable and roller screens
Retractable screens mount permanently to the posts or overhead structure and roll down when needed for privacy or sun protection. They're the highest-cost option per opening but also the most functional, one pull deploys full-height coverage that rolls neatly out of sight when not in use. Motorized versions from manufacturers like Phantom Screens include wind sensors that retract the screen automatically in strong gusts, which is important because deployed screens in high winds can tear or damage the housing. Many premium retractable systems have regional product approvals (including Florida wind-load approvals for hurricane-prone areas) that document tested performance ranges, ask your installer for these documents if you're in a high-wind zone. For most DIYers, manually operated retractable screen kits are the practical entry point at $200 to $500 per opening, while motorized professional installations typically start around $800 to $1,000 per opening and are usually best left to a pro for the electrical and tensioning work.
When to call a pro instead of DIYing it
Most railing cover projects in this guide are well within DIY reach. But there are a few situations where bringing in a professional is the smarter call. If your railing itself is structurally compromised, loose posts, rotting ledger connections, or failing anchor hardware, fix that first, and if you're unsure how to assess it, a carpenter or structural engineer can evaluate it quickly. If you're in a high-wind zone and want to install any rigid panel system (polycarbonate, aluminum frame, or full enclosure), wind loads on cladding and mounted components are governed by ASCE 7 structural standards and the IRC/IBC. A qualified engineer should confirm your fastening and span design handles local wind pressure. Motorized retractable screen systems involve electrical work and precise tensioning that manufacturers like Phantom Screens typically recommend for certified installers. And if your project is growing into a full roof structure or permanent patio enclosure rather than a railing-mounted solution, that crosses into permit territory in most jurisdictions, at that point, covering an outdoor patio as an enclosure project deserves a separate plan, and a licensed contractor can navigate the permit and inspection process efficiently.
A few final tips before you start
Start with one section before committing to a full railing run. Install your chosen method on a single 6-foot section, live with it for a week, and confirm it gives you the privacy, light, and airflow you expected before buying materials for the whole railing. It's a lot easier to adjust your plan on one section than to uninstall 30 feet of bamboo screen because the view was worse than you expected. Also think about your railing from the outside, whatever you install should look intentional from the street or neighbor's sightline, not like a tarp stapled to a fence. Most of the options in this guide achieve that easily when installed neatly. The time you spend measuring and planning is never wasted on patio projects.
FAQ
What factors should I consider before choosing a method to cover a patio railing?
Decide goals first: privacy vs maintaining view, shade vs light, wind/rain protection, or seasonal winterizing. Then consider permanence (temporary vs permanent), budget, appearance/styling, local building codes and HOA rules, load and wind exposure, and installation skill level. Check codes: IRC requires guards (railings) where any point within 36 in horizontally is >30 in above grade and minimum guard height is 36 in; openings must not allow a 4‑in sphere. HOAs often restrict visible exterior changes—review CC&Rs and any ARC rules before you install. For high‑wind or coastal locations, account for ASCE/engineer wind loads and specify corrosion‑resistant fasteners (316 stainless or hot‑dip galvanized).
What practical railing-mounted solutions are commonly used and how do they compare at a glance?
Common solutions: bamboo/reed roll screens, privacy slats (vinyl/composite), outdoor curtains, lattice/trellis panels, plexiglass or multiwall polycarbonate panels, clear marine vinyl windbreaks, planter/green‑screen (vertical planters or climbing trellis), retractable/roller screens, and tension‑mounted mesh. Quick comparison: bamboo and curtains = low cost, easy install, less durable; privacy slats and lattice = medium cost, semi‑permanent, better durability; polycarbonate and plexiglass = higher cost, durable, good wind/rain protection; retractable screens = mid‑to‑high cost, flexible but wind‑sensitive; planter/green‑screen = aesthetic and passive cooling but needs maintenance. Choose based on privacy vs. view, budget, permanence, and wind exposure.
How do I choose between temporary and permanent solutions?
Temporary (zip‑tied bamboo, curtains, tension mesh, clear vinyl) are low cost, fast to install and removable for HOA/seasonal needs. Permanent (privacy slats, installed lattice, mounted polycarbonate, fixed trellis) require more planning, possibly permits if altering guard height or loading, and better fasteners. Use temporary if you rent, expect HOA objections, or need seasonal changes; choose permanent if you want long lifespan, integrated style, and are prepared to meet code/manufacturer span/fastener requirements.
Can covering a railing violate building codes or safety requirements?
Yes. Modifications can’t reduce guard height, change structural capacity, or create openings exceed the 4‑inch sphere rule per IRC R312. Attaching heavy panels can add wind loads and attachment requirements under ASCE 7; manufacturers’ span limits and fastener tables (e.g., Simpson Strong‑Tie) must be followed. If your cover increases effective wind surface area or is attached to structural members, consult local building department or an engineer and pull permits if required. Also check HOA CC&Rs for appearance and height restrictions.
What tools and materials will I need for bamboo/reed roll screens (DIY)?
Materials: bamboo/reed rolls cut to length, UV sealer (optional), stainless or galvanized wire/zip ties, U‑brackets or saddle clamps (if mounting to posts), exterior screws, and optional trim. Tools: tape measure, tin snips or heavy scissors, drill/driver with bits, ladder, level, and caulk/gap filler if needed. Time/cost: 1–4 hours for an average 12–20 ft railing; cost $25–$150 depending on roll length/quality. Pros: cheap, fast; Cons: limited longevity (5–15 yrs), variable wind performance and privacy gaps.
How do I install privacy slats or infill panels? (steps and checklist)
Checklist: measured railing span, slat/infill kit sized to your railing, stainless/galvanized fasteners, end caps/trim, sealant for wood rails. Steps: 1) Measure and order kit to match clear span and rail height per manufacturer. 2) Remove any temporary covers and clean rails. 3) Dry‑fit panels/slats to ensure fit and spacing. 4) Fasten per manufacturer spacing and fastener specifications (use supplied templates). 5) Install trim/caps and seal any exposed wood. Time/cost: 2–6 hours, $100–$600 depending on material (vinyl/composite more than PVC). Pros: neat, durable, privacy; Cons: semi‑permanent, can affect airflow, may need permit if altering guard function.
Next Articles
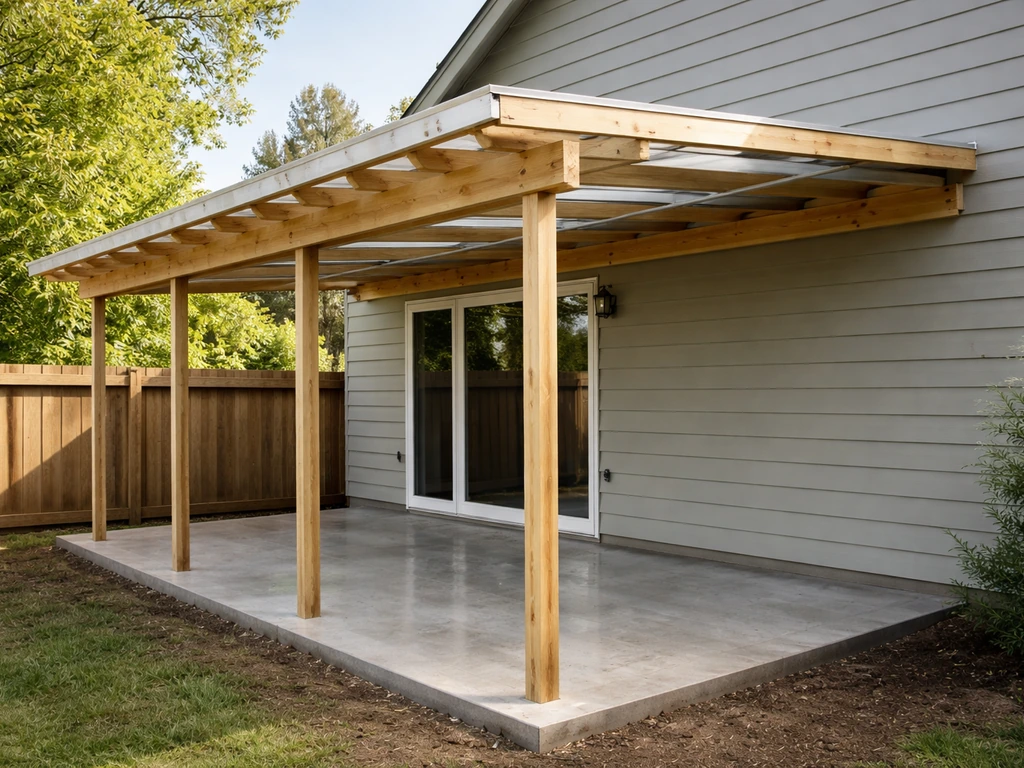
How to Cover an Outdoor Patio: Step-by-Step DIY Guide
Step-by-step DIY on how to cover an outdoor patio, choose the right cover, plan, build, waterproof, and anchor safely.
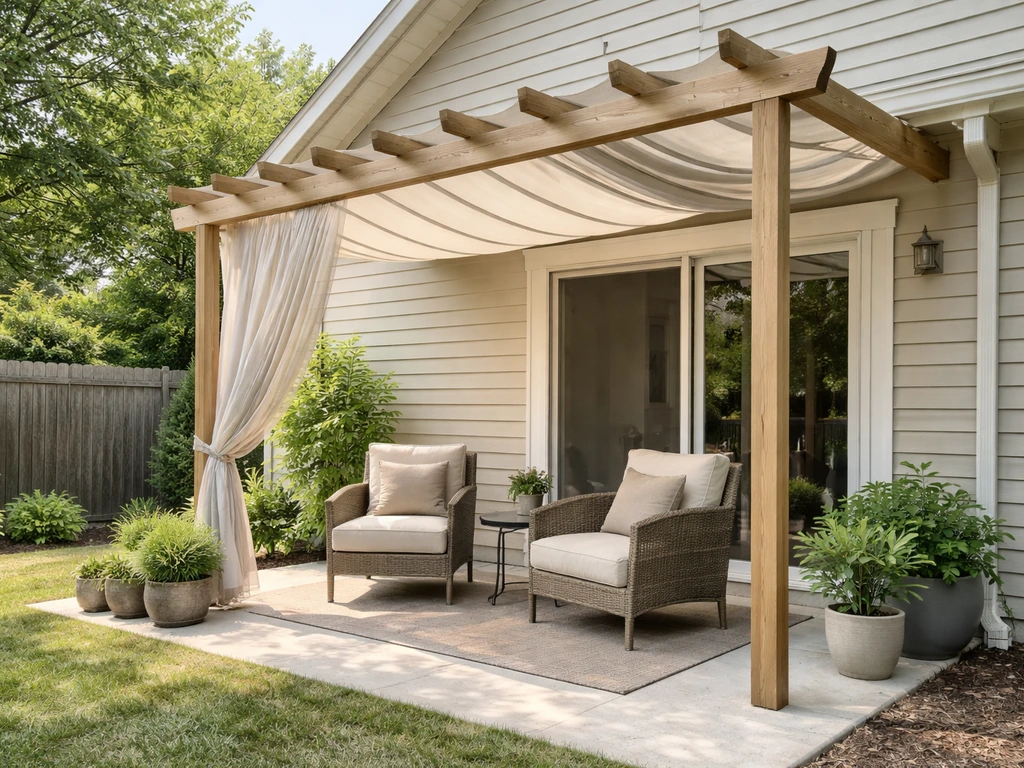
How to Cover an Open Patio: DIY Options and Steps
DIY steps to cover an open patio with awnings, pergolas, shade sails or roofs, plus mounting, drainage, and wind options
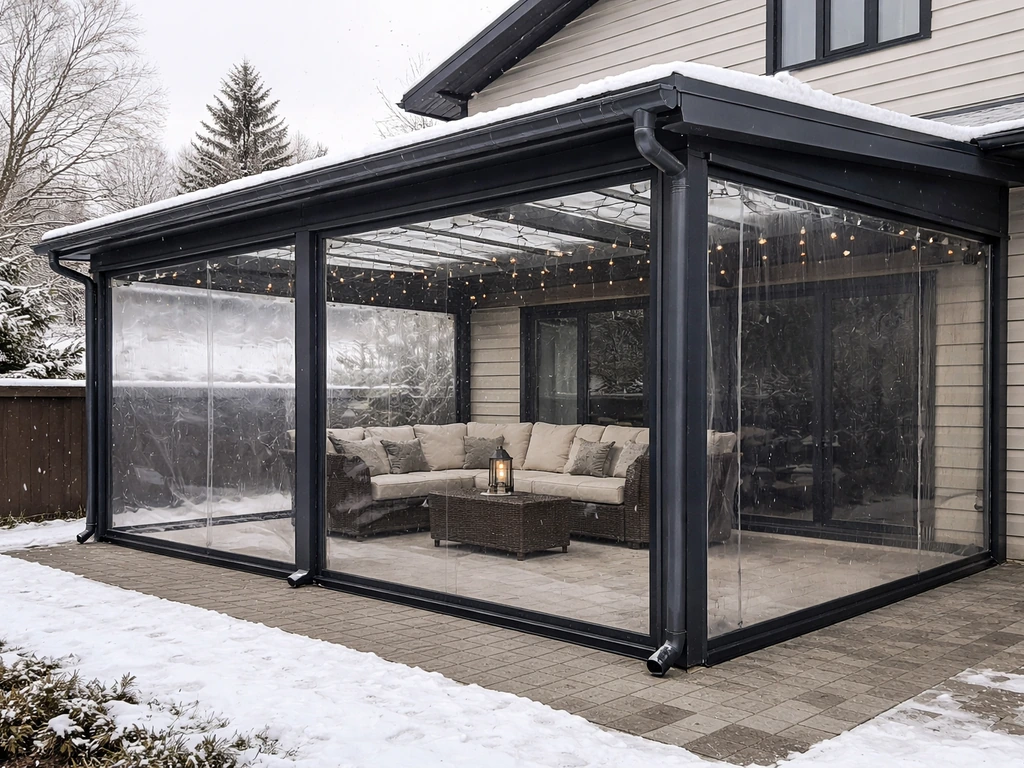
How to Cover Patio for Winter: DIY Guide and Checklist
Step-by-step winter patio cover guide, DIY checklist, enclosure options, safe installation, and upkeep for cold rain and